How to enable Auto HDR in Windows 11
Enjoy brighter colours in Windows 11 games

Your gaming PC might support a 4K display, but if you really want to improve your visuals, you’ll need to enable high dynamic range (HDR) output.
HDR displays show off a richer, more vibrant colour palette to make better use of those extra pixels on higher resolution displays, but only if your game supports it.
Windows 11, which you can now download and install, uses Auto HDR to solve this problem, taking thousands of DirectX 11 and 12 games and boosting the colour range and brightness levels for games that don’t natively support HDR.
Dark colours are darker, light colours are lighter, but you’ll need to enable Auto HDR functionality first to see these changes in action - here's how.
Enable HDR in Windows 11
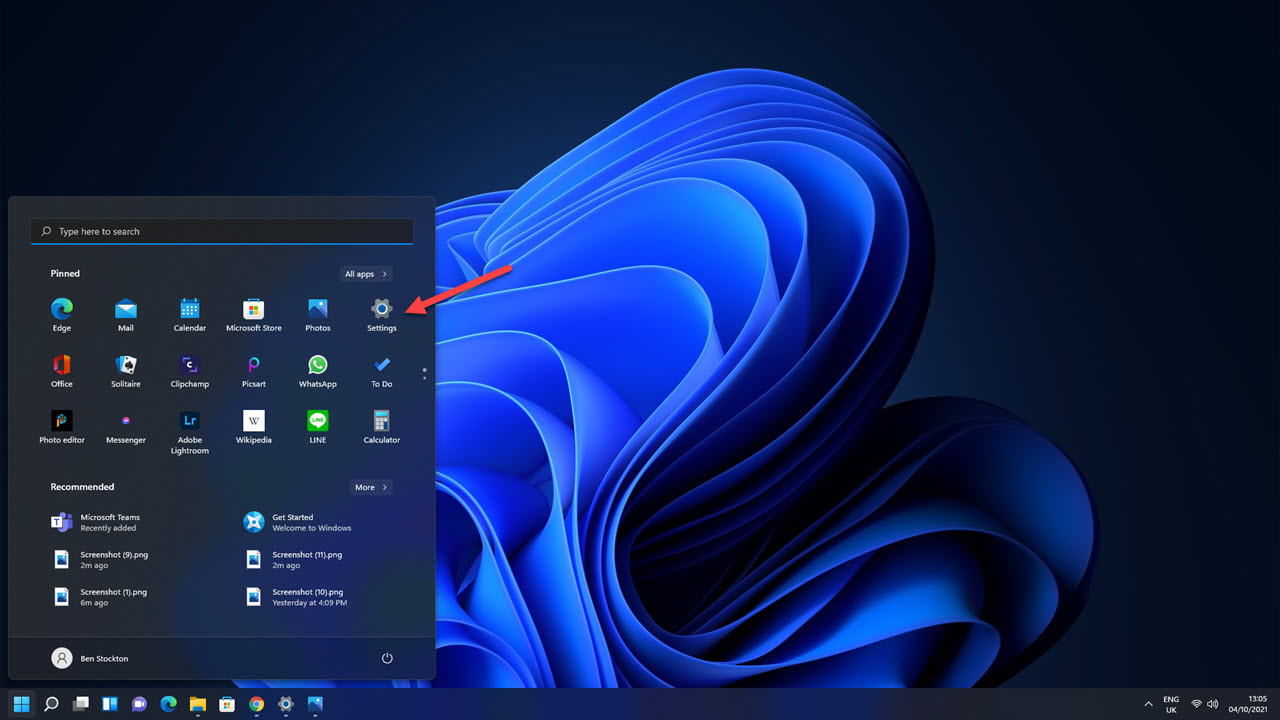
If you want to change your display settings to enable Auto HDR support, you’ll need to open up the Windows 11 Settings menu first.

There's a couple of ways to do this, but the easiest is to open up the Start menu and press the ‘Settings’ app icon in the list.
If you can’t find it, use the search bar at the top of the Start menu to search for ‘Settings’ instead, then press it in the search results afterwards. Alternatively, right-click the Start menu icon on the taskbar and press ‘Settings’ from the pop-up context menu to open it instead.
Sign up for breaking news, reviews, opinion, top tech deals, and more.
Checking for HDR monitor support
All HDR-supported monitors and TVs connected to a Windows 11 PC should, in theory, allow you to use Auto HDR mode. This isn’t always the case, so make sure you’re using a HDMI 2.0 or DisplayPort 1.4 display that supports the HDR10 specification.
Your GPU should also support the necessary resolution to enable HDR (e.g. 3840x2160 at 60Hz).
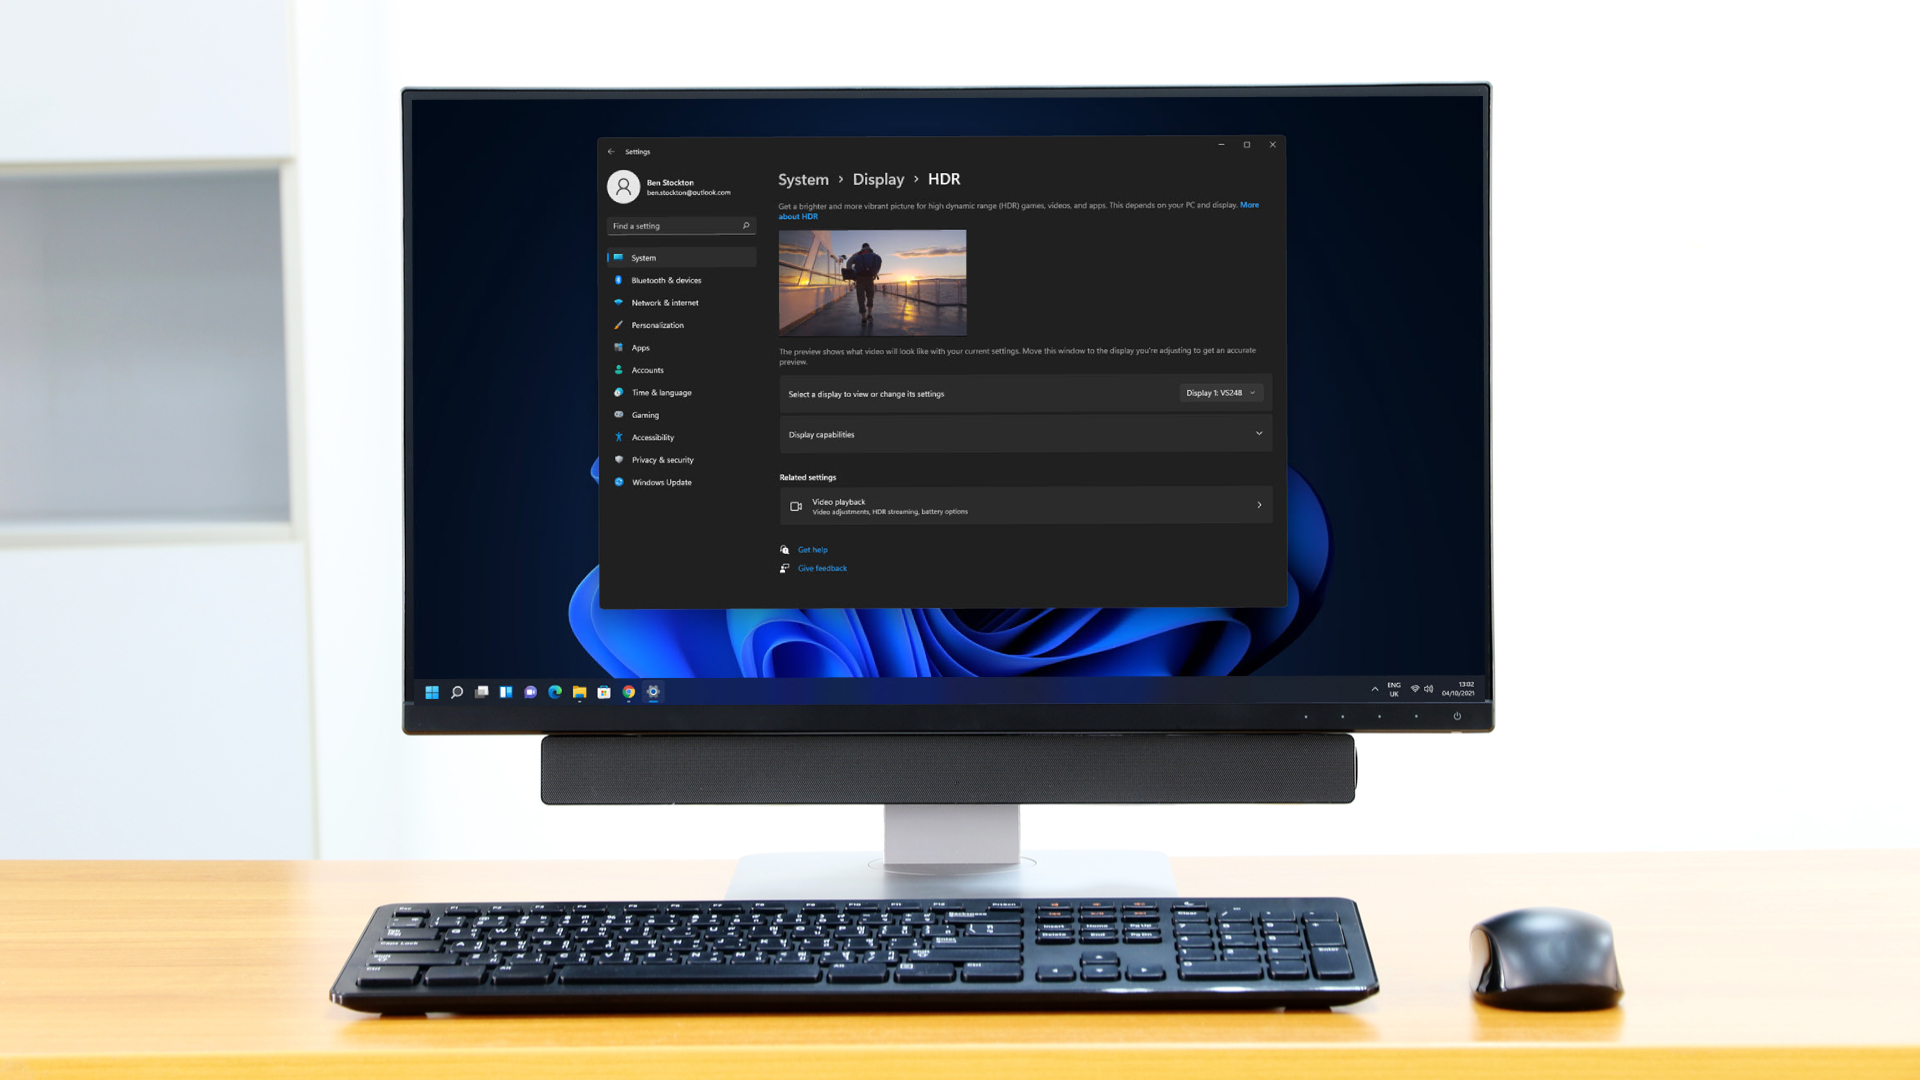
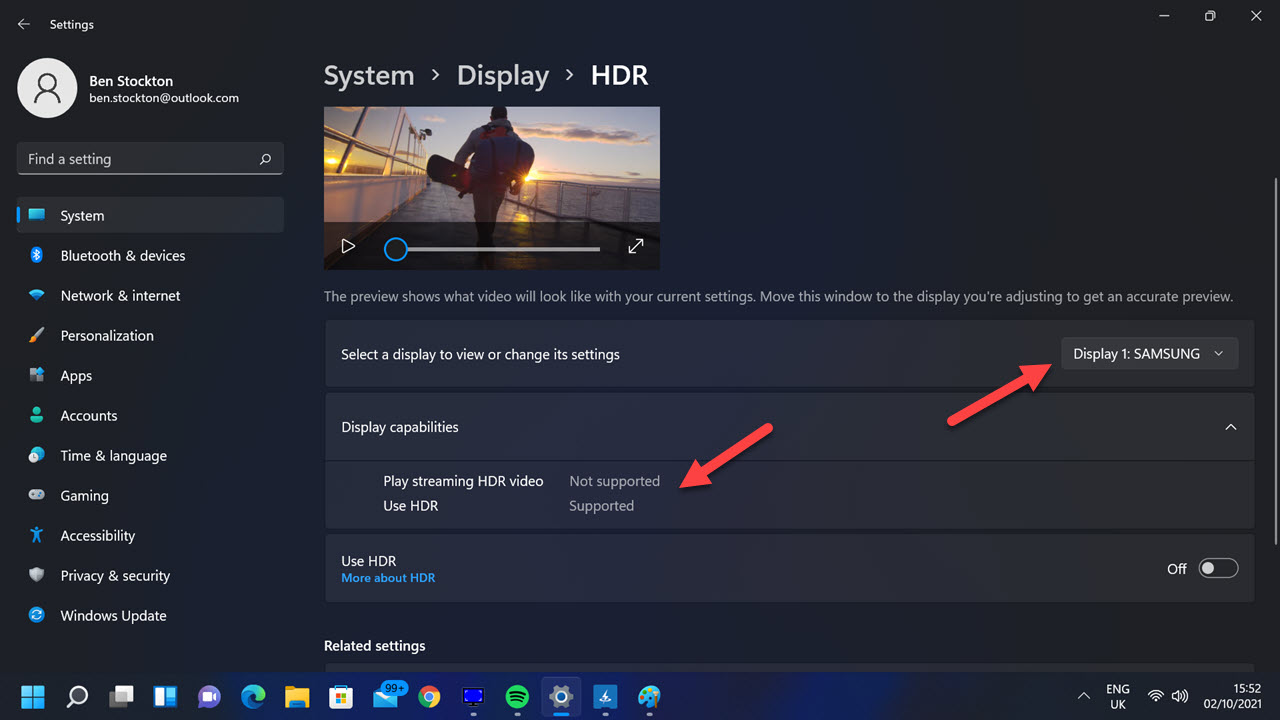
If you’re unsure whether your display supports HDR, you can check this in the Windows 11 Settings menu first. In the Settings menu, select System > Display > HDR, then select your HDR-supported monitor from the drop-down menu.

With the HDR-supported monitor active, press the ‘Display Capabilities’ section. If your TV or monitor lists HDR as ‘Not supported’ here, you’re out of luck. You’ll need to connect an HDR-supported monitor to use this feature.
If HDR is listed as ‘Supported’, however, you’re good to go. Auto HDR may switch on automatically for you, but if it doesn’t, you can switch it on below.
How to enable Auto HDR functionality in Windows 11
You can quickly enable Auto HDR in Windows 11 by opening the Settings app and pressing System > Display > HDR.
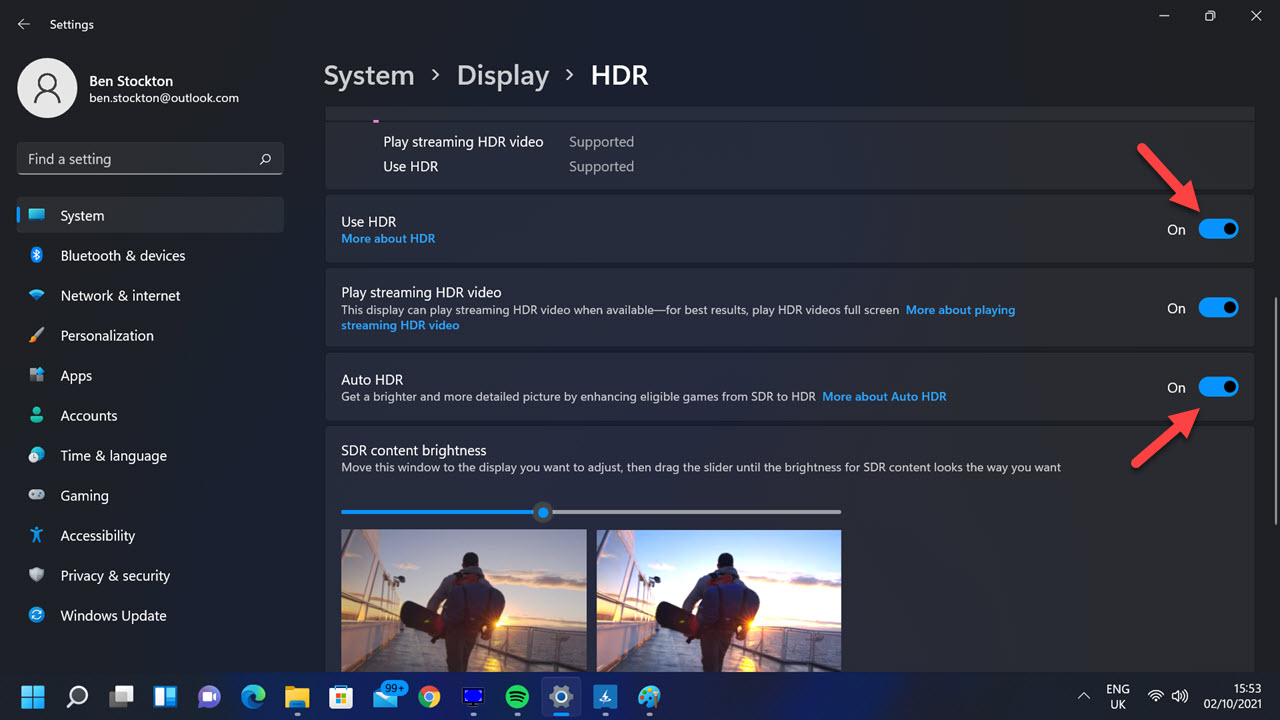
Make sure your HDR-supported TV or monitor is selected from the drop-down menu, then press the ‘Display Capabilities’ section to view your options. Press the slider next to the ‘Use HDR’ section to enable HDR output on your PC.
Next, scroll down and select the slider next to the ‘Auto HDR’ section to enable Auto HDR in games that Microsoft has added support for.

Testing HDR colours in games using Auto HDR split screen

If you’re curious to see how much of a difference HDR makes to your gameplay visuals, you can use a secret split screen feature included in Windows 11 to test Auto HDR. With split screen Auto HDR enabled, one side of your screen will show your game with high dynamic range colours and brightness, while the other side will show the game without it.
To enable this, right-click the Start menu and press ‘Windows Terminal (Admin)’. In the Terminal window that opens, type reg add HKLM\SYSTEM\CurrentControlSet\Control\GraphicsDrivers /v AutoHDR.ScreenSplit /t REG_DWORD /d 1 and press Enter.
Launch your game (with Auto HDR support) at this point to view the difference or to take a screenshot. To disable the feature, return to the Terminal window, type reg delete HKLM\SYSTEM\CurrentControlSet\Control\GraphicsDrivers /v AutoHDR.ScreenSplit /f and press Enter to return your screen to normal.
Playing Auto HDR supported games
Auto HDR is designed to upscale the visible colours you’ll see in certain DirectX 11 and 12 games, but it isn’t available for every game. If Auto HDR is enabled on your PC, you should see a notification in the top-right when you launch a game that supports it on Windows 11.
Unfortunately, there isn’t much you can do to force non-supported games to use Auto HDR at this stage, and there isn’t an official list you can review, either. Microsoft suggests that thousands of DirectX 11 and 12 games should work with Auto HDR, but your own experiences may vary. The only thing you can do is give it a try.
If Auto HDR doesn’t work the first time you run your game, exit the game fully and restart it to activate the feature. This should work for games that do support Auto HDR, but only if Microsoft has added support for your game.
- These are the best laptops you can buy right now