How to install Genesis alternatives on Kodi
Make the ultimate media player

Sign up for breaking news, reviews, opinion, top tech deals, and more.
You are now subscribed
Your newsletter sign-up was successful
Kodi is one of the finest applications for watching digital media in your home. Originally known as XBMC (Xbox Media Centre), this open source software can be installed on a variety of devices, such as PCs and the Raspberry Pi, and offers an attractive and easy-to-use interface for playing digital media on your TV from various devices on your home network.
One of the best things about Kodi is that it's open source - which means not only is it free to download and use, but it has also built up a community who have created a number of add-ons that further expand Kodi's functionality.
One of the most popular Kodi addons was Genesis, which allowed you to easily find and stream movies and TV shows. The legality of this wasn't straightforward, and earlier this year Genesis was discontinued. However, if you'd like to install a Genesis alternative on Kodi, or any of the other brilliant addons - then read on for our step by step guide on how to install Genesis alternatives on Kodi.

1. Select a repository
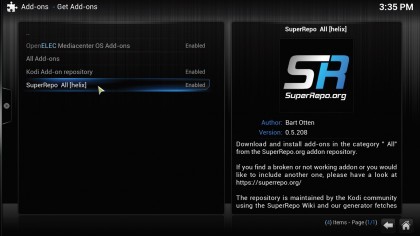
You can extend virtually every aspect of your HTPC by adding a number of plugins and extensions. To do this, head to System > Settings > Add-ons > Get Add-ons. This displays a list of repositories (repos), including the official OpenELEC and Kodi repo.
Select the repo you wish to install from. There's also the All Add-ons option, which displays plugins from both these repos.

2. Select category
Once you've selected a repo, you're shown a list of add-on categories. The Kodi repo includes a lot more categories than the OpenELEC one.
The OpenELEC repo mostly includes drivers for various devices, while the Kodi repo includes well over a dozen categories. The Programs Add-ons category is particularly interesting and houses plugins that turn your HTPC into a seed box.
Sign up for breaking news, reviews, opinion, top tech deals, and more.

3. Select the add-on
When you select a category, you're shown a list of related add-ons. For example, if you select the Music Add-ons category, you're shown plugins for various online radio stations. Similarly, the Video Add-ons category houses plugins for popular video streaming websites, including YouTube, Vimeo and TED Talks.
When you find a plugin you wish to use, select it and click the 'Install' button.

4. Configure the add-on
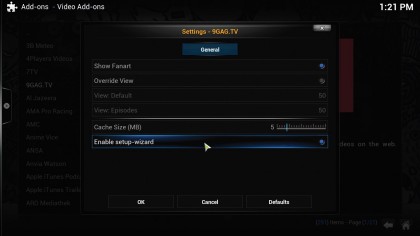
You're returned to the list of plugins while Kodi downloads the one you selected. Kodi also installs and enables the plugin with the default options. Some plugins have optional configurable elements.
To view these, click the 'Configure' button associated with the plugin. The installed plugin is accessible from under its category, eg video plugins install under Video on the main page.

With almost two decades of writing and reporting on Linux, Mayank Sharma would like everyone to think he’s TechRadar Pro’s expert on the topic. Of course, he’s just as interested in other computing topics, particularly cybersecurity, cloud, containers, and coding.