


Whenever an app quits unexpectedly, or your Mac restarts after freezing, you would probably like to run a quick check to reassure yourself that there's nothing more serious wrong with it.
You could restart and run Apple Diagnostics, or start up OS X Recovery to run Disk Utility's First Aid feature, but by then it'll be lunchtime and you'll have got nothing else done.
These are ideal situations to run a quick and lightweight check, so that you can get back on with what you were doing with the minimum of fuss. To this end, it's time for MacCheck – when you first open this app, it'll ask you to register for a free serial number; there's no price attached.
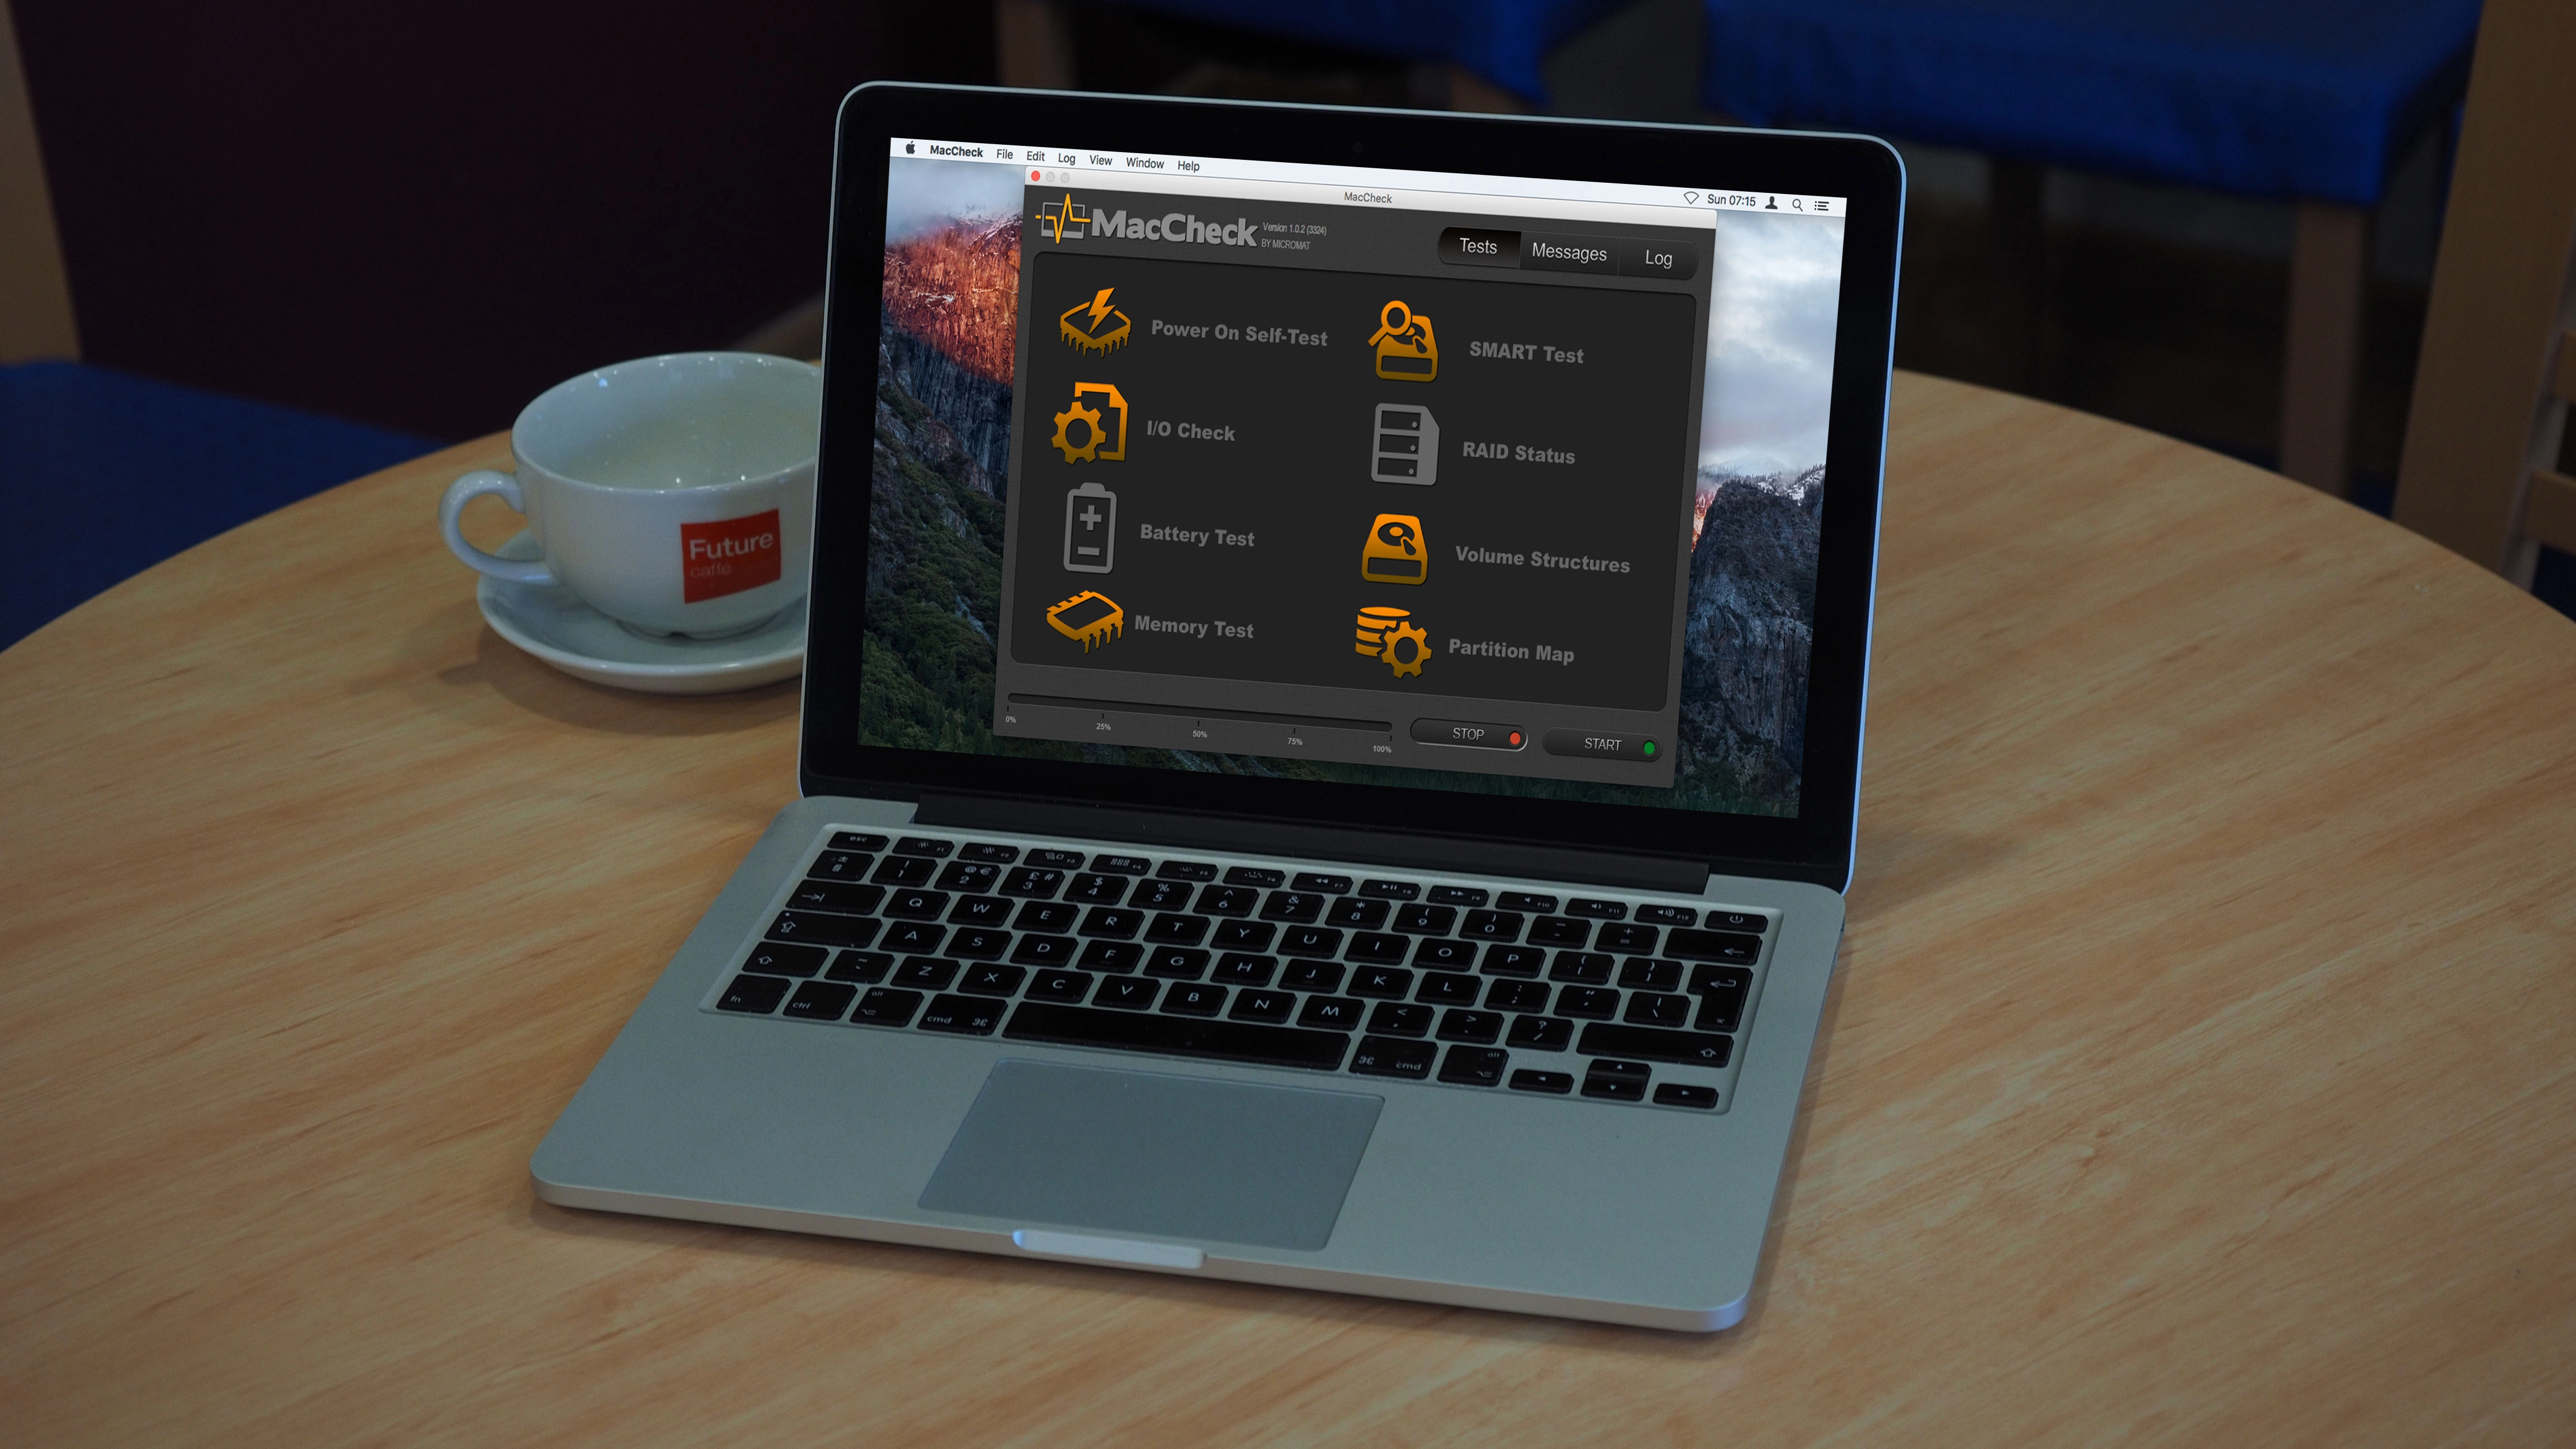
MacCheck is much like a health screening for your computer. It performs a quick run through the most important indicators of significant problems with a Mac's hardware. It checks the results of the last power-on self-test (POST), memory, and several kinds of storage error, as well as the battery on portable Macs.
If you get a set of green lights at the end of the tests, you can be happy that, whatever it was that happened, your Mac remains in fine fettle. If any test returns a red light, you need a strategy and the tools to follow it up. Most errors found during the power-on self-test are likely to be with memory, and should have attracted your attention at that time as you would have experienced problems during your most recent startup.
Battery problems tend to be straightforward, and are typically fixed by replacing the failing battery.
Deal with the prognosis
MacCheck only tests internal drives, so it won't recognise an external RAID drive even if it was set up using OS X's software-based RAID tech. Drives with a hardware-based RAID controller normally have their own maintenance tools to check and report their status.
Use Disk Utility to check software-based RAID drives. If you suspect a hardware fault, Apple Diagnostics is the ultimate check. Power on your Mac and hold d on your keyboard until it appears. (If you have trouble with this, use the Recovery system to remove any firmware password you've set, or try a wired keyboard and mouse.) You may get a choice of regular or extended checks; in the first instance, pick the former.
Note any error code to quote to AppleCare or a Genius Bar.
How to test your computer with MacCheck

1. Start the tests
MacCheck inspects your computer and works out what tests it can perform. There are no options to choose from, and the app always runs all the tests that it can on the hardware you're asking it to check.
Simply click the Start button.

2. See the result
As the app works through its tests, each one's icon changes from amber to green or red, showing whether your Mac passed or failed that item.
The Volume Structures test invariably takes longest, according to the drive's capacity.

3. Browse MacCheck's log
If you get any red lights, click on the Log button at the top right to inspect MacCheck's testing log. This should give you a good idea as to what to do next, so you can further diagnose and fix any problems the app detected.
How to investigate Mac memory faults

1. Check installed memory
Memory errors can cause MacCheck's power-on self-test or memory test to fail.
If either comes up red, open the Apple menu and select 'About This Mac', then click the Memory tab to check what memory is installed and successfully detected by your Mac.

2. Scan your memory
MacCheck runs one test on a sample of memory, typically around 1–2GB out of 8GB. Paid-for apps like TechTool Pr can test more intensively, and help pinpoint the fault so you can replace any faulty modules.

3. Run a specialist checker
Specialised memory testing tools like ATOMIC can be used to test even more memory, and can run tests for half an hour or more as a stress test.
This can help bring troublesome intermittent faults to light.
How to investigate disk errors

1. Run SMART diagnostics
Some SMART diagnostic indicators are better predictors of disk failure than others. Use a specialist tool such as DriveDx to investigate a SMART error, and its tips will advise appropriate action.

2. Disk Utility's First Aid
Input/output and disk errors are best repaired using Disk Utility, preferably from the Recovery system (hold Command + R at the startup sound). Select the drive rather than volume on it, so it can check and repair low-level disk structures too.

3. Try specialist repair
If Disk Utility can't fix your drive, use a specialist tool such as Drive Genius. If damage is substantial, try to make at least one backup, then initialise the disk using Disk Utility. If old, consider replacing the drive.
- Enjoyed this article? Get more tutorials, guides, and tips on how to get the most from your Apple devices inside MacFormat. Take advantage of an exclusive offer in our sampler today.