
How to use the Windows Snipping Tool: cut to the chase
- Press Windows logo key + Shift + S
- Choose which snipping option you want
- The screenshot is automatically copied to your clipboard
How to use the Windows Snipping Tool: in depth
● System: Windows 10 or Windows 11
● Tools: Keyboard and mouse
● Skill Level: Beginner
There are plenty of options for taking screenshots on your PC or laptop, including the use of extensions or the very simple ‘Print Screen’ key on your keyboard. But there’s a simple way to not only take a screenshot on your computer, but to also control what part of the screen you screenshot.
How to use the Windows Snipping Tool with a mouse and keyboard
Have the screen displayed to what you want to screenshot or crop, whether it’s a program or a website on an internet tab.
On the keyboard, locate the following keys: the Windows key (denoted by a small four-pane window logo on the key), the Shift key, and the S key.

Press the Windows key and the Shift key at the same time. While holding those keys down, press the S key.
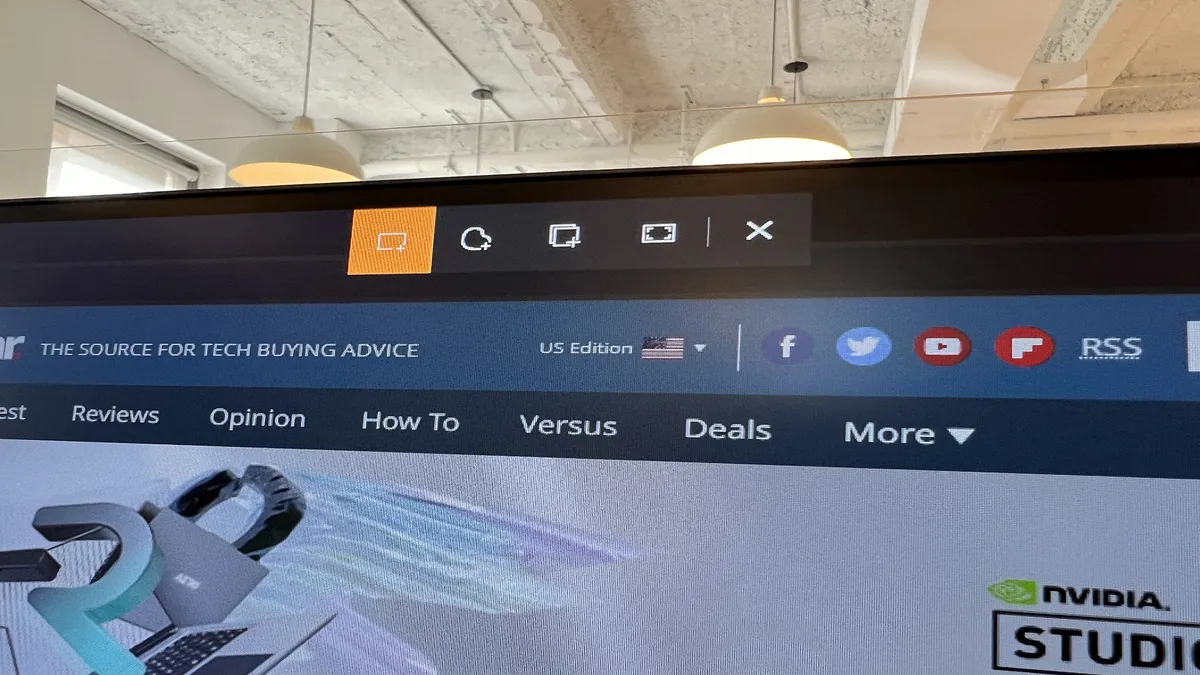
A small box should appear at the top of the screen, with several options to choose from. These options are Rectangular Snip, Free-form Snip, Window Snip, and Fullscreen Snip. Choose which option is best for your needs with the mouse. For the first two, you’ll need to crop which section you want using the tool on the cursor. The last two options simply require you to click them, then a screenshot will automatically be taken.

Any screenshots or crops are automatically copied in your clipboard. You simply need to Paste it into any compatible application.
How to use the Windows Snipping Tool with just a mouse
Have the screen displayed to what you want to screenshot or crop, whether it’s a program or a website on an internet tab.

Go to the Start menu located on the bottom left corner of your screen and click it, or press the Windows key plus the S key to bring up the search bar.

Type Snipping Tool in the Search bar and click the app that appears in the window.

Rectangular Snip is chosen by default, however you can choose which option you want through the toolbar. These options are Rectangular Snip, Free-form Snip, Window Snip, and Fullscreen Snip.
Choose which option is best for your needs with the mouse. For the first two, you’ll need to crop which section you want using the tool on the cursor.
The last two options simply require you to click them, then a screenshot will automatically be taken.
Any screenshots or crops are automatically copied in your clipboard. You simply need to Paste it into any compatible application.
Final thoughts
Though the Windows Snipping Tool is incredibly useful and offers several options that can suit your needs, there are other ways to screenshot or crop your screen. The fastest and easiest way would be the ‘Print Screen’ button located either on the very top or the right side of your keyboard. This instantly creates a screenshot of whatever is on screen, and copies it to the clipboard.
Other options include downloading an extension from your browser in order to screenshot or crop, including several options from our best Chrome extensions list. While definitely the more involved option, it also tends to offer the most customization and many offer a lot of features that the Windows Snipping Tool can't. In most cases, the image isn’t sent to the clipboard but instead a copy is made available to your browser for editing or you can save a file to your computer.
Considering all this, most users prefer a simple option that allows for a few easy to use options. And especially something that’s already built into your PC, versus something you have to download to use. Best of all, you don't have to choose, since the Windows Snipping Tool is always available in any WIndows 10 or Windows 11 installation, so you can always use many different options depending on your needs.
