Supercharge your Raspberry Pi
Get your soldering iron ready
Powering your Pi
The Raspberry Pi gets power from its microUSB port. This supplies 5V, and the Raspberry Pi Foundation recommends an available current of at least 700mA. This can easily be delivered via a mains adapter, or a USB cable from a computer.
If you want your Pi to be portable, then there are other options. Four AA batteries should provide enough power, provided you have the appropriate housing and cables to get the power into the microUSB port.
However, we found the best solution was to get a backup power supply for a mobile phone that plugs directly into the Pi.
Ohm's Law
There are two key ways of measuring electricity – voltage and current. Voltage (measured in volts) is the amount of energy a given quantity of electrons has, while current (measured in amps) is the amount of electrons flowing past a point. The two are intimately connected by Ohm's law which states: Voltage = Current x Resistance, or V=IR.
You can use this connection to make sure you don't accidentally toast your Pi by pushing too much current into it. The exact setup of the Pi is a little complex. If you wish to delve into it, Gert van Loo (one of the designers) has put together an explanation, which can be found here.
As a rough rule of thumb, you can expect to draw voltage out of a GPIO pin at 3.3V, and you shouldn't draw more than 16mA, or push more than this into an input pin. Remember, this is the maximum current, so you should aim to use less.
So, with Ohm's law we know V=IR, so R=V/I. If we put in the data from the Pi, and want to ensure we don't damage it, we know that R must be greater than 3.3/0.016, which is 206.25 Ohms. Remember, this is the smallest amount of resistance it's safe to use with a GPIO output.
Sign up for breaking news, reviews, opinion, top tech deals, and more.
You should aim for a margin of safety several times above this unless absolutely necessary. In our circuits, we've used 1,000 Ohms, which gives us a safety factor of almost five.

Networking
All Raspberry Pi models – with the exception of the Pi Zero – come with a wired Ethernet connection, which is fine for most occasions, but sometimes the cable just won't reach. You could use a USB wireless dongle. However, if you've got an Android phone, and your carrier hasn't disabled the feature, you can use this as your networking device.
This has an extra advantage of not drawing as much power from the Pi, and so makes it easier when running from batteries. You should be able to share your phone's connection to Wi-Fi as well as 3G, so it won't necessarily eat into your data allowance.
Of course, it's best to check the connection type before downloading large files. To do this, connect your phone to your Pi, and enable USB tethering from your phone under Settings > Wireless and Networks > Tethering & Mobile Hotspot. If it remains greyed out, try a different cable.
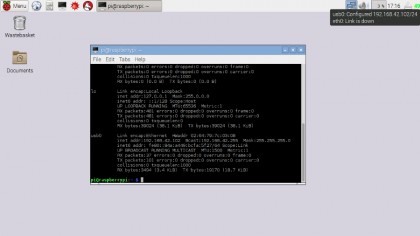
Back on the Pi, if you type sudo ifconfig, you should then see the interface usb0 listed, but it won't necessarily have an IP address. Networking interfaces are controlled by the /etc/network/interfaces file. By default, there may not be an entry in here for USB networking, so you'll need to set one up.
Open the file with your favourite text editor as sudo – for example, sudo nano /etc/network/interfaces– and add the lines:
iface usb0 inet dhcp
nameserver 208.67.220.220
nameserver 208.67.222.222
This uses the OpenDNS nameservers, but you could use others if you wish. You can now either restart the interfaces or restart your Pi to pick up the changes. You should have an internet connection up and running.