How to screenshot on a Chromebook
Share your whole screen or just part of it

If you need to capture screenshots on your Chromebook, you're in luck. The process may not have as much flexibility as on PC, but taking two types of screenshots on Chromebooks is just as easy as taking screenshots on PC.
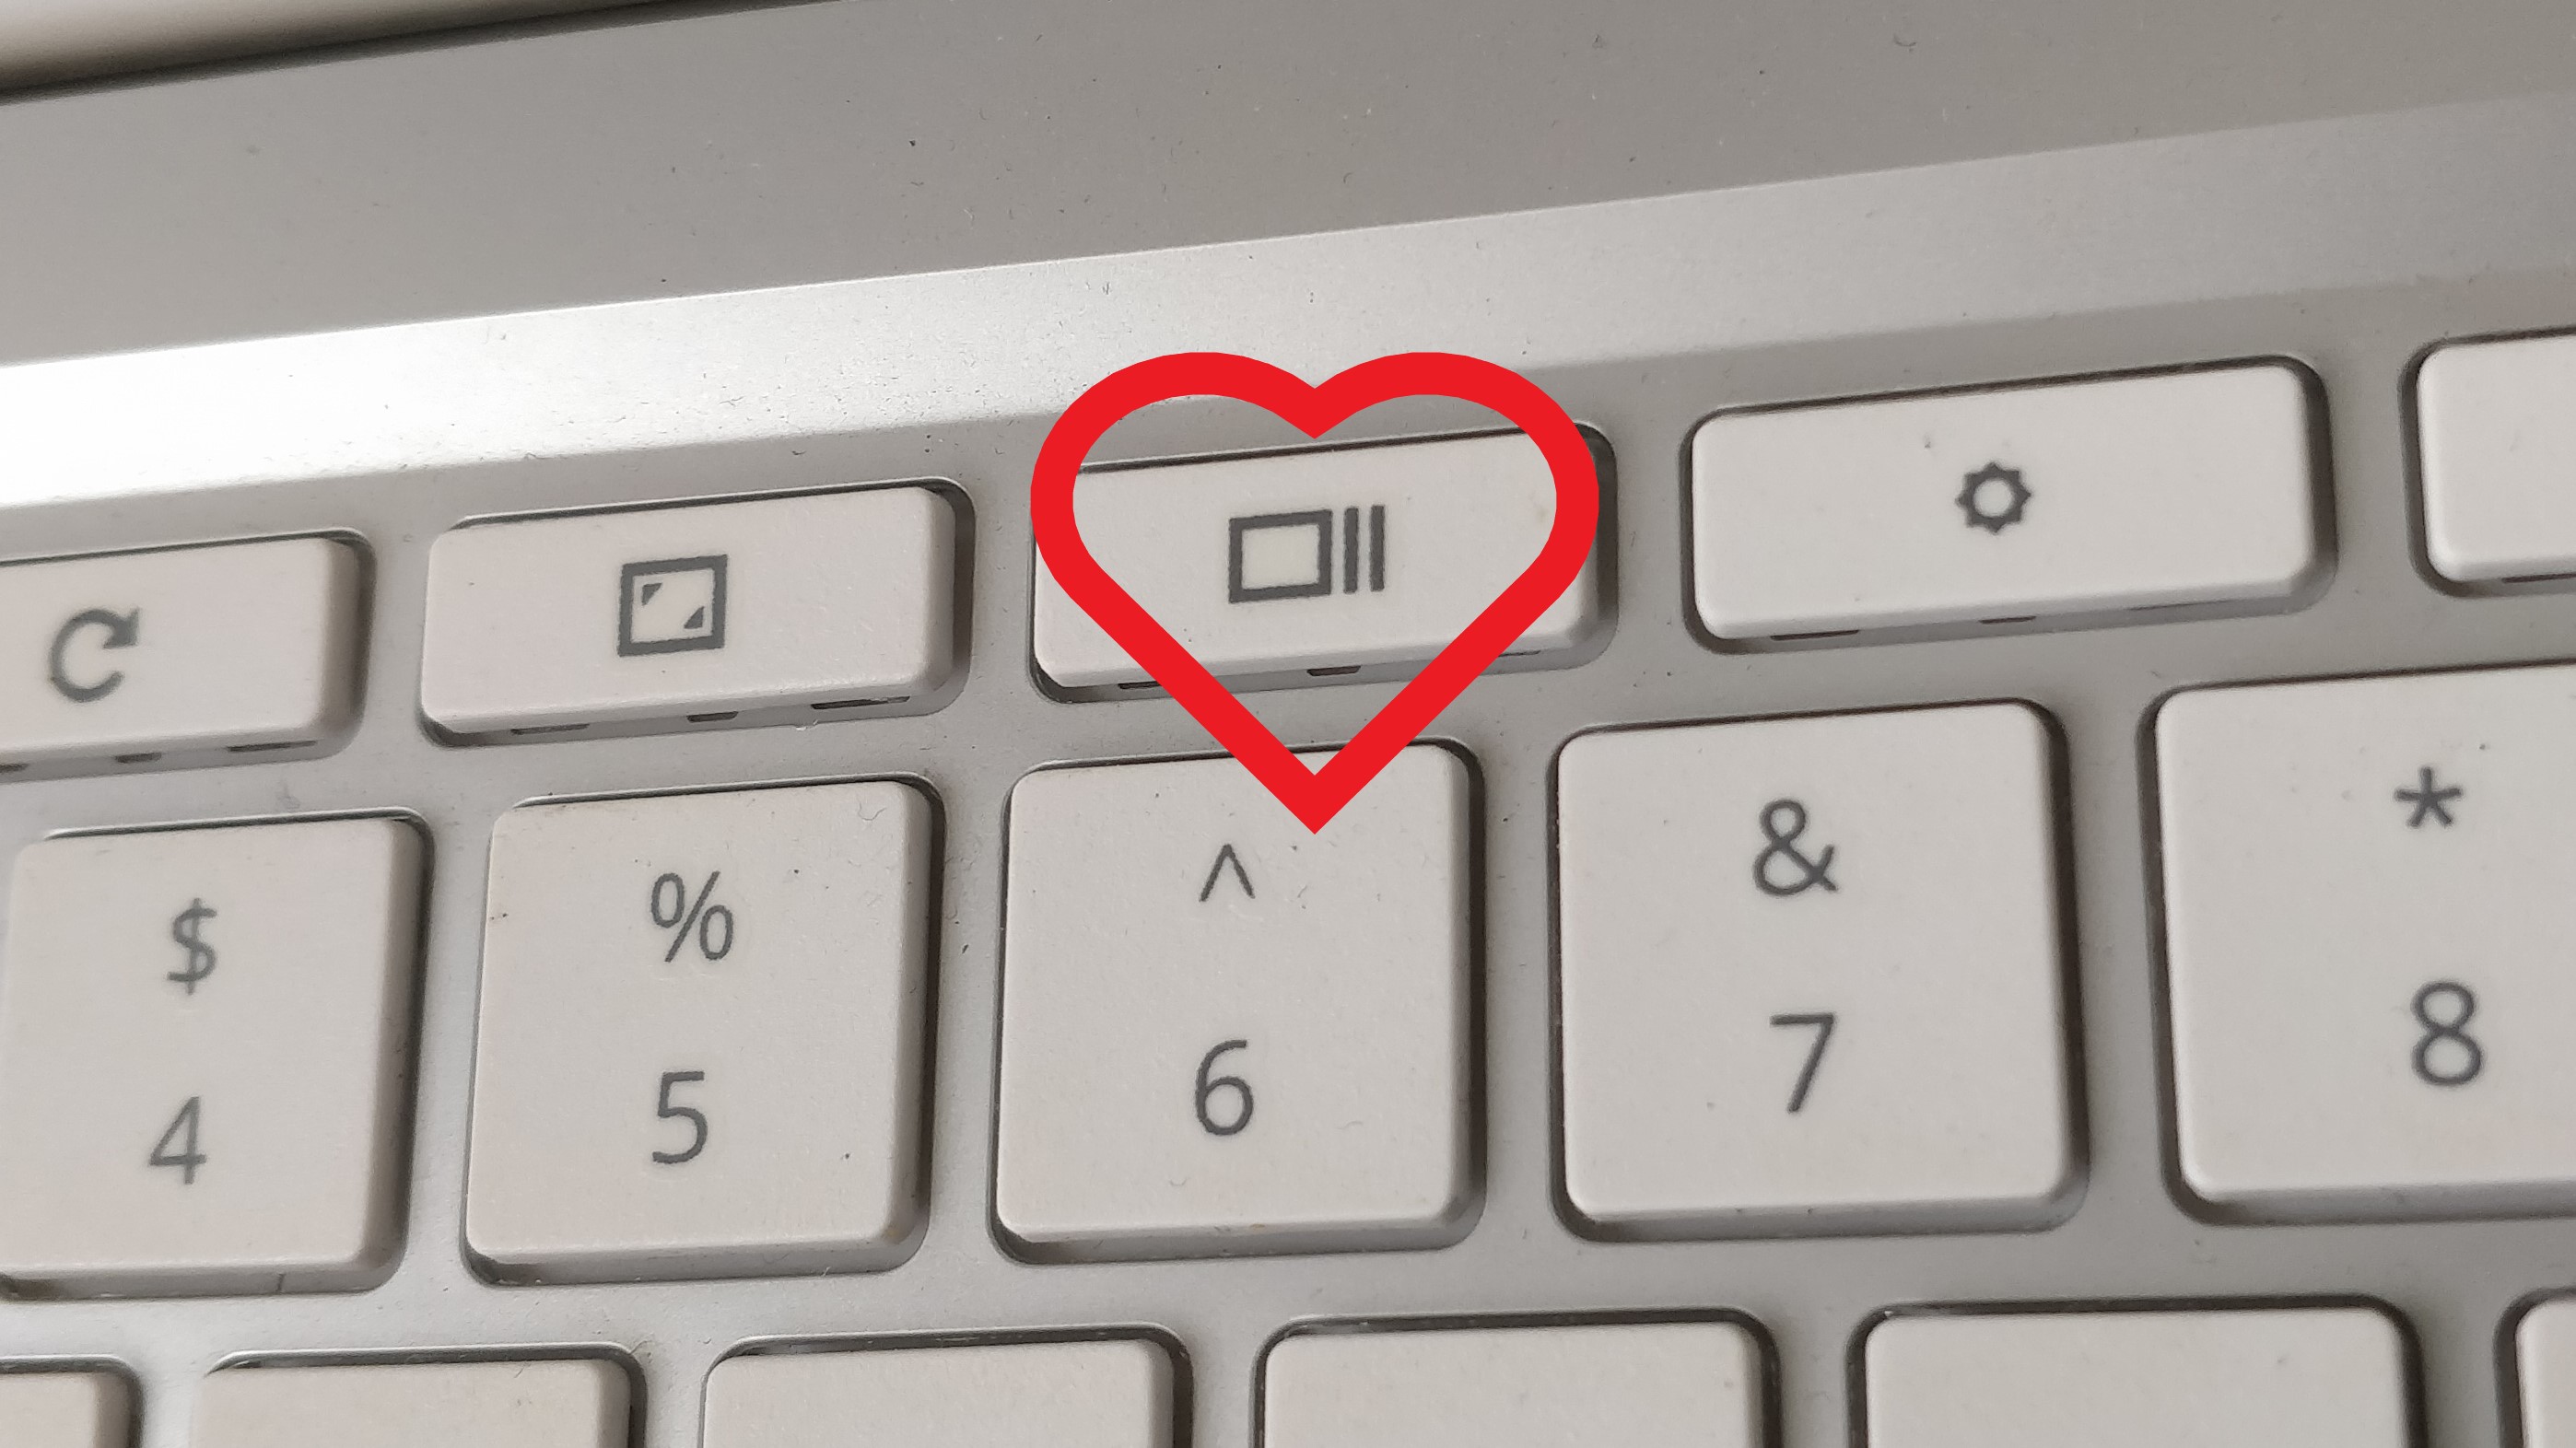
Before you begin, you'll just need to make sure you're familiar with one specific key on your Chromebook's keyboard. This is the Overview key, which is sometimes called the "Show windows" or "Window switch" key.
Google's description of the key is "Show all windows in Overview mode."
This key should be located above your number row, and appears as a rectangle with two vertical lines next to it. You can also identify it via the headline image for this article.
(Note: If you're using an external keyboard with standard Windows keys, then the Overview button will correspond to the F5 key. So, for all keyboard shortcuts explained in this article, you would press F5 in place of the Overview key.)
How to capture a full screenshot on a Chromebook
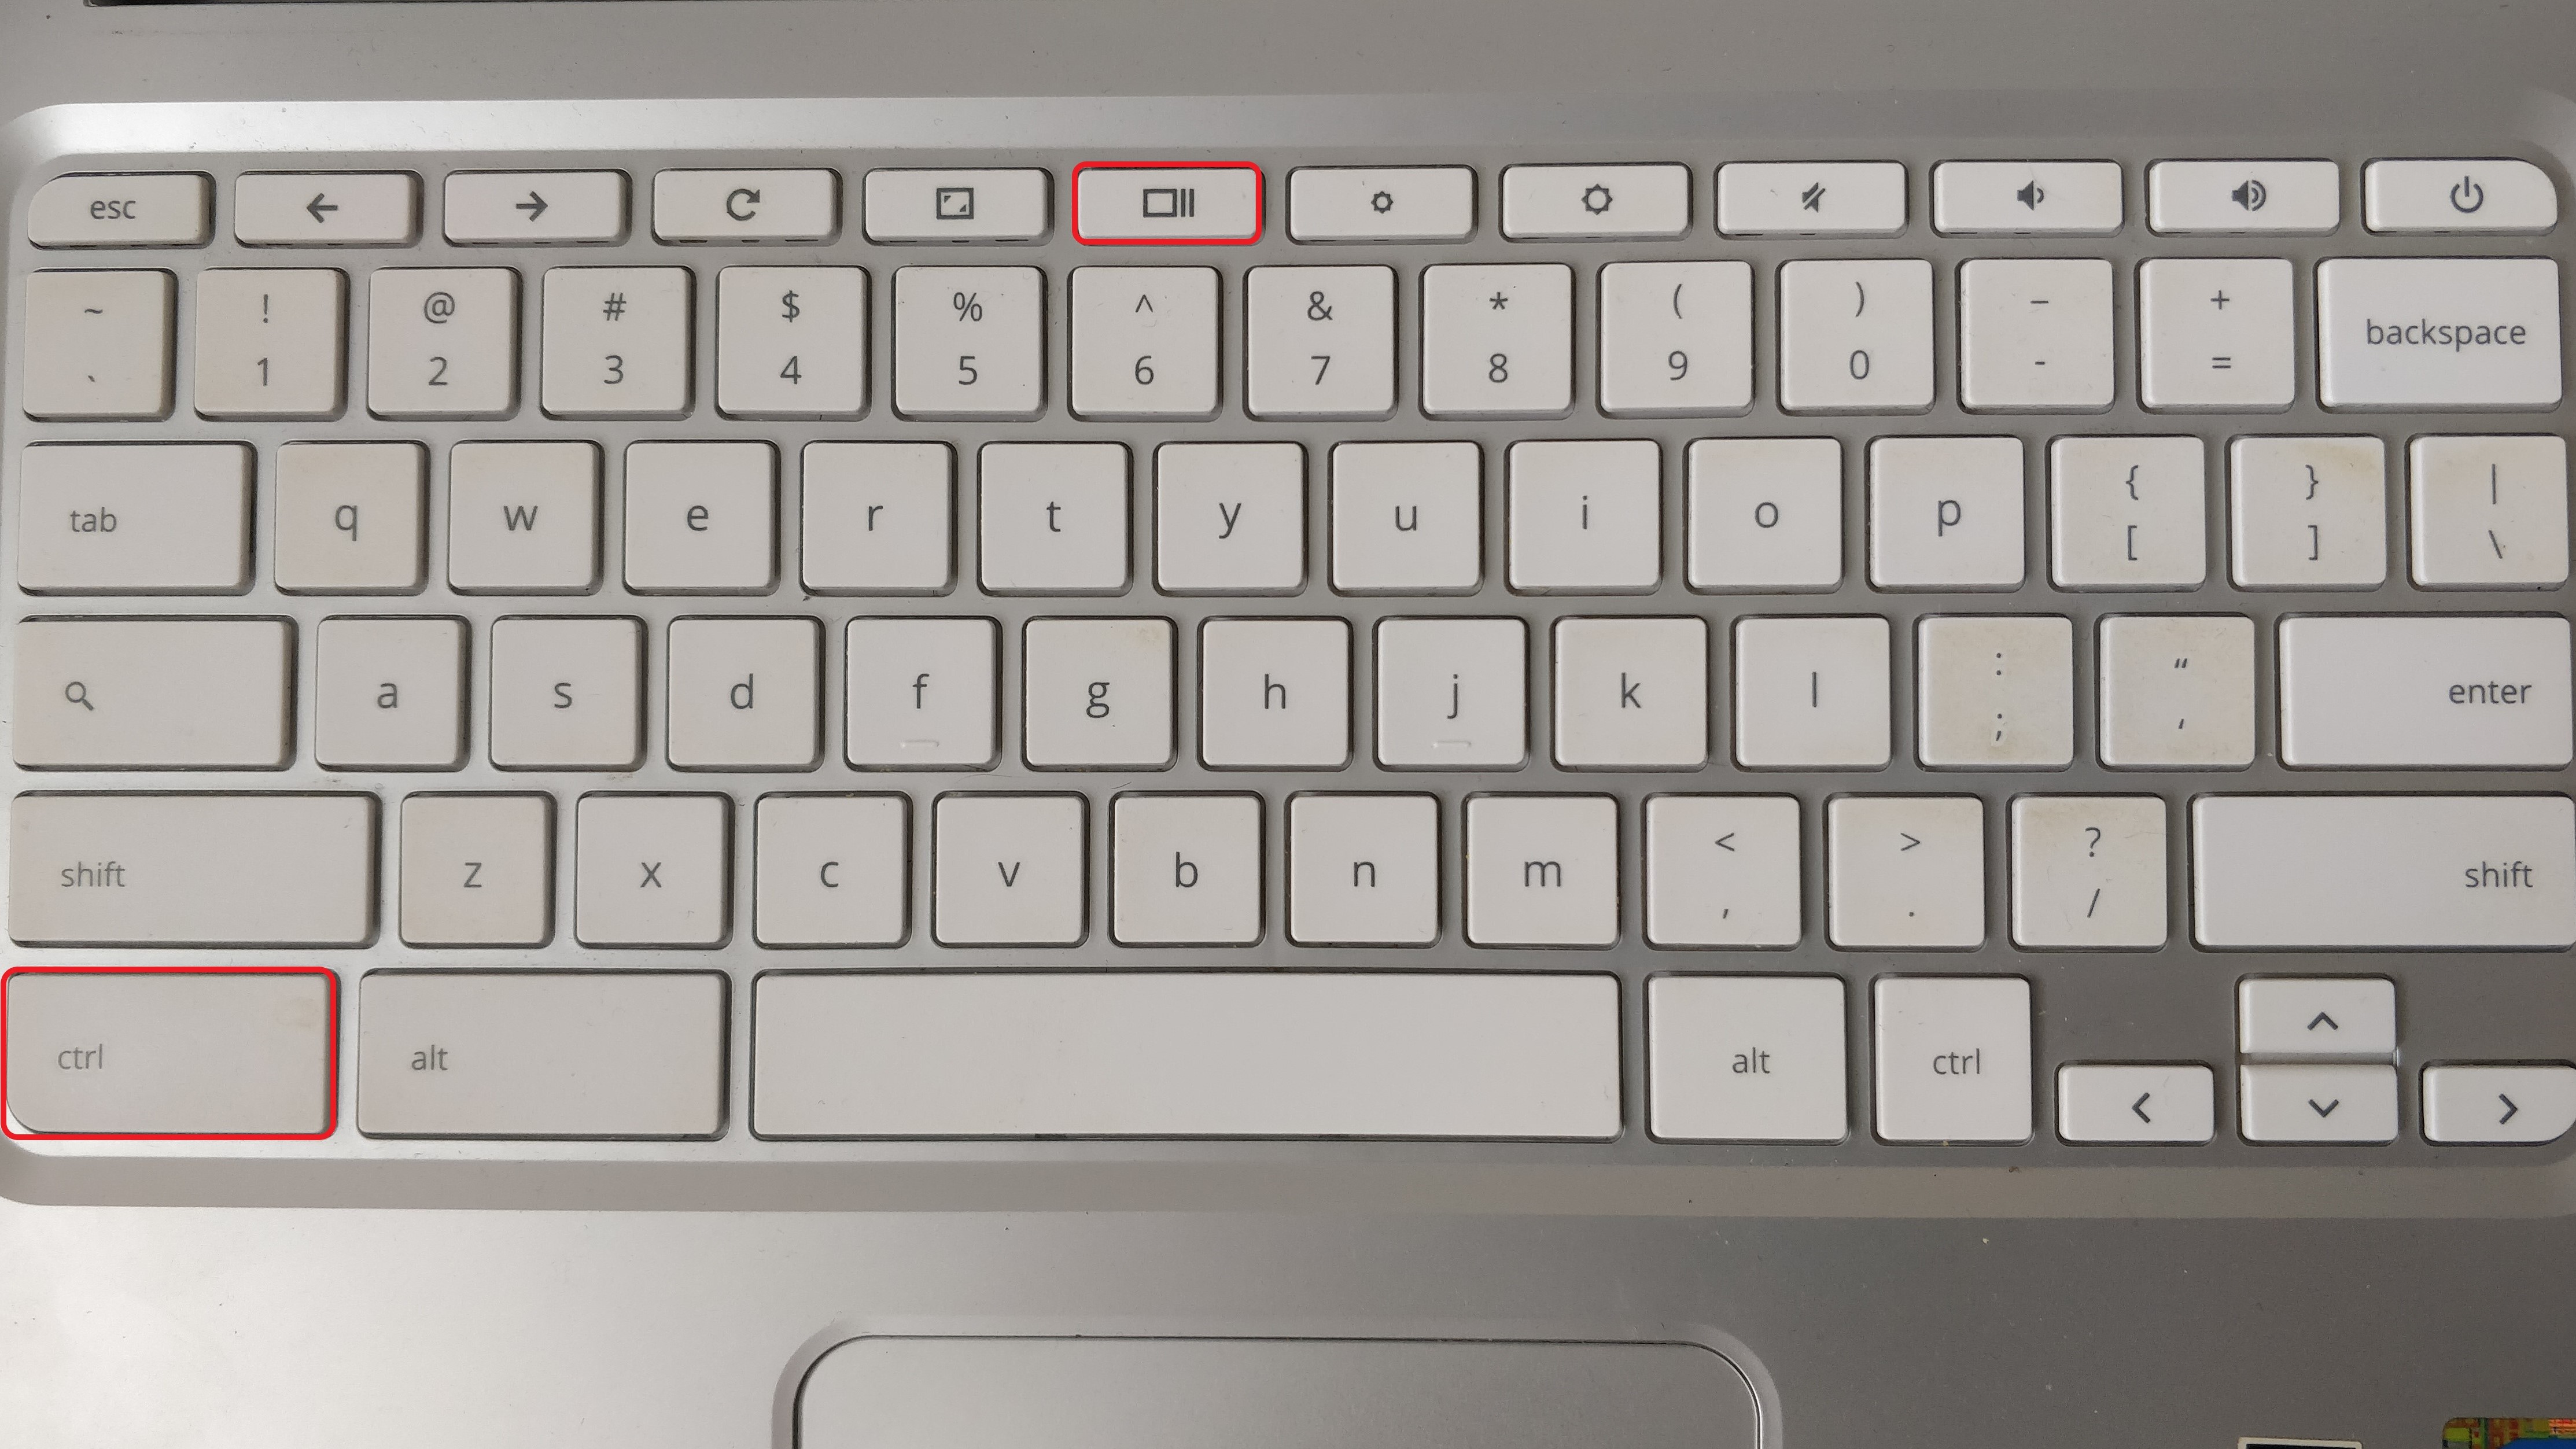
If you want to capture everything you can see on the screen of your Chromebook, there's just one step to do so.

- Step one: Simultaneously press Ctrl + Overview key (or Ctrl + F5).
This will create a screenshot of your entire screen. For more details on managing your screenshots, head down to our section on "What happens after you've taken a screenshot."
Sign up for breaking news, reviews, opinion, top tech deals, and more.
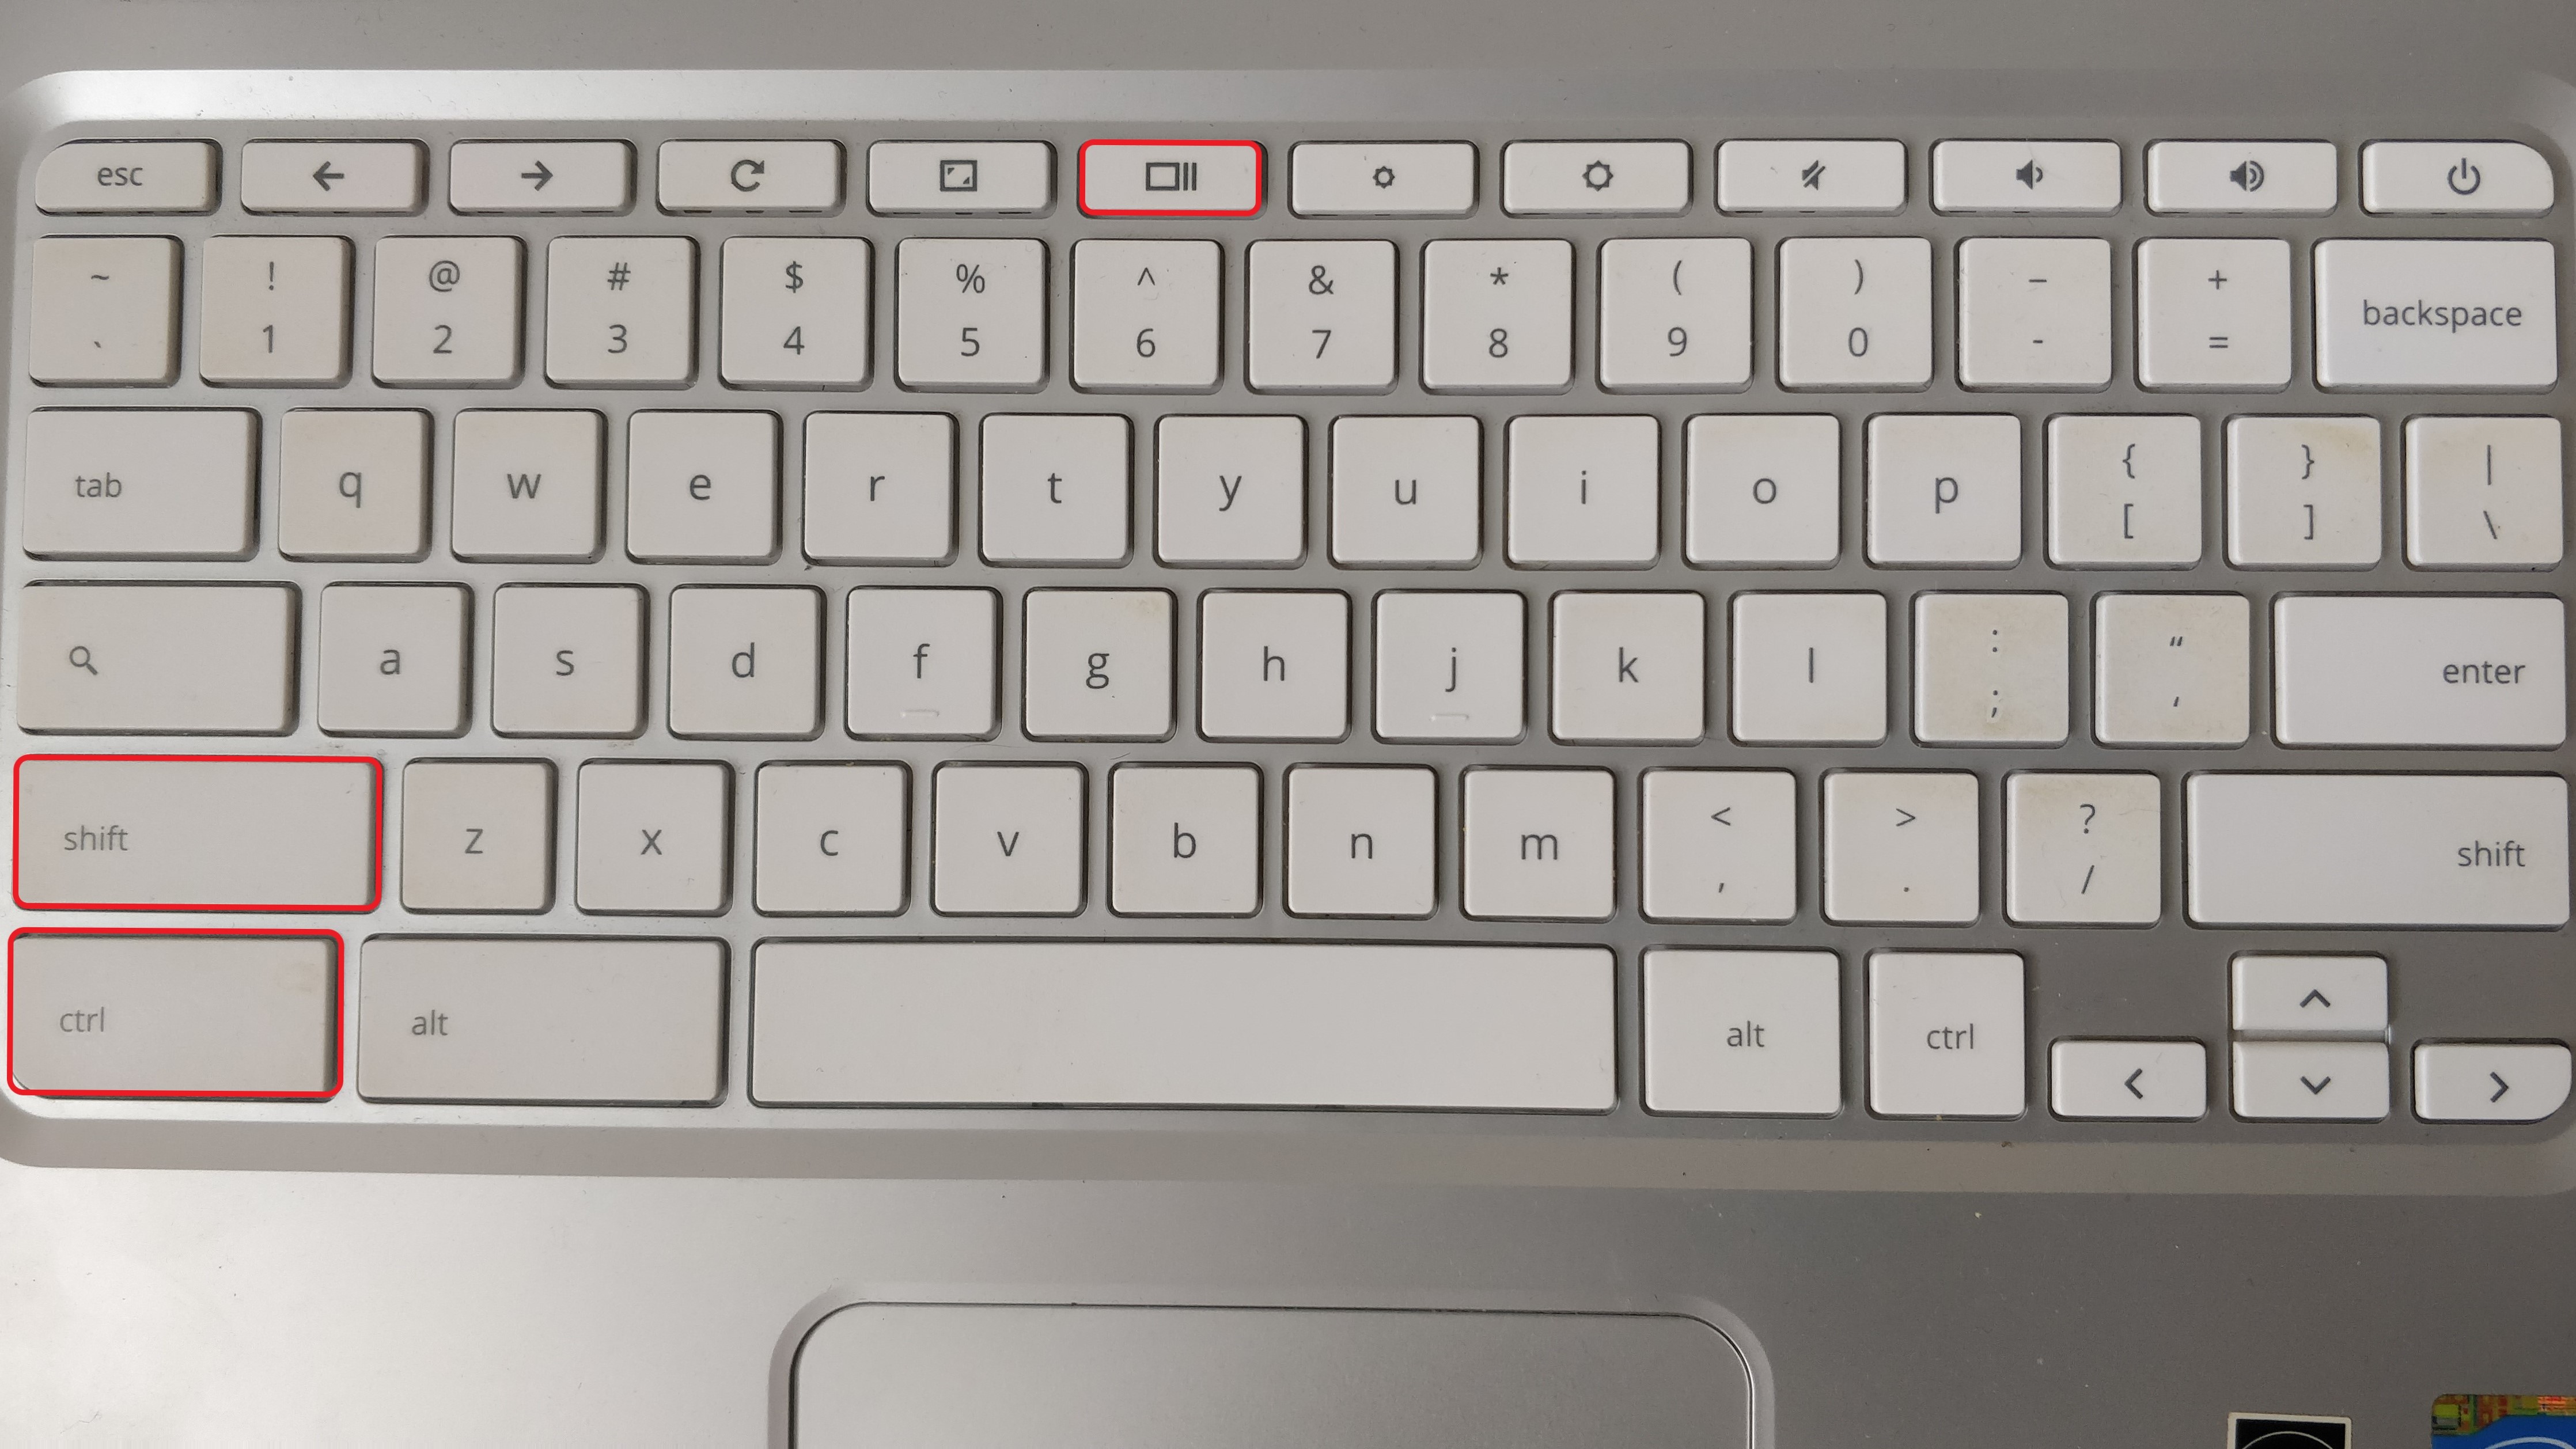
How to capture a screenshot of part of your screen on a Chromebook
In many cases, you won't want to capture a screenshot of your whole screen. It may be that you just want to share a small snippet of something you're seeing in a Chrome app or on a website.
If this is the case, you can capture a custom region of your screen using the following steps.

- Step one: Press Ctrl + Shift + Overview key (or Ctrl + Shift + F5).
- Step two: Click and drag with your mouse to select the rectangular region of your screen you want to screenshot.
How to capture screenshots without a keyboard
If you're using a Chromebook that has a tablet mode, you can capture screen shots on it by using the same button combination for screenshots on Android smartphones.
- Step One: Simultaneously press the Power and Volume Down buttons. If this doesn't take a screenshot immediately, trying briefly holding both buttons.
If your Chromebook comes with an active stylus, as the Pixelbook and some Samsung models do, you'll have another option for taking screenshots.
In the bottom right corner of your screen, you should see a stylus menu. If you do, you can use these steps.
- Step one: Tap the stylus button at the bottom corner of the screen.
- Step two: Select "Capture screen" for a full screenshot, or select "Capture region" and use the stylus to select the region you want a screenshot of.
What happens after you've taken a screenshot

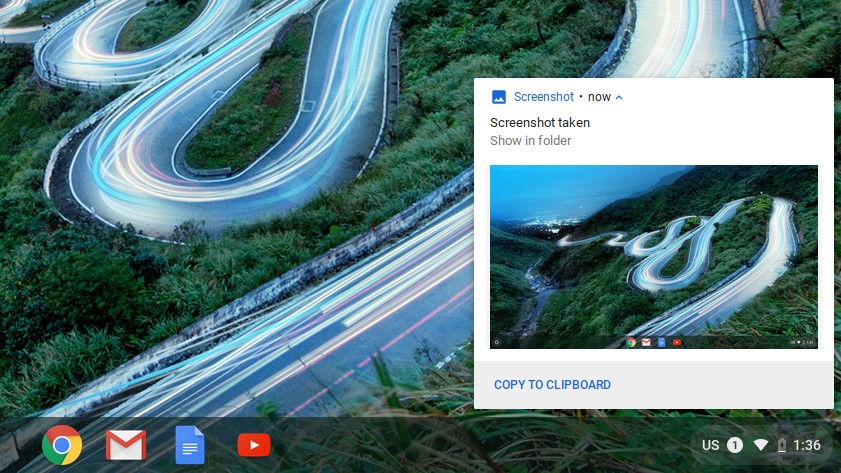
Your Chromebook should, by default, save your screenshots into your Downloads folder. A pop-up notification in the bottom-right corner of your screen should also show the screenshot you've captured.
You can copy the screenshot to your clipboard directly from the pop-up notification, if you want to paste it into an image editing program or share it through email or chat.
If you want to have access to the screenshot on other devices, you will need to move the file to an external drive or add it to a folder that syncs to a cloud storage service, like Google Drive.
- These are the best Chromebooks we've tested to date

Over the last several years, Mark has been tasked as a writer, an editor, and a manager, interacting with published content from all angles. He is intimately familiar with the editorial process from the inception of an article idea, through the iterative process, past publishing, and down the road into performance analysis.