How to fix search problems in Windows 10
Looking to fix search problems in Windows 10? If you've found the search function is no longer working, we have some quick and easy solutions

Sign up for breaking news, reviews, opinion, top tech deals, and more.
You are now subscribed
Your newsletter sign-up was successful
While it may feel like a huge undertaking, figuring out how to fix search problems in Windows 10 is actually relatively straightforward. If you're looking to clear up one of these common glitches, then we have good news - you've come to the right place.
One of the most useful features of Windows 10 is the ability to search the files on your PC or laptop – as well as the internet – directly from the search box on the taskbar. But, because Microsoft have released a number of updates to the OS, frequent changes to how the search function works has meant some users have experienced glitches.
If you have the best computer or the best Windows laptop, chances are that you may have encountered an issue with searching after installing an update. Thankfully, simple software problems or network-related issues are usually to blame and there are a variety of different ways you can fix search problems in Windows 10 to get you back up and running again.
To help you do just that, we've compiled a list of solutions ranging from using the troubleshooter to rebuilding the index. If you're experiencing other issues with the OS, check out our guide to 100 common Windows 10 problems and how to solve them. But for now, here's how to fix search problems in Windows 10...

How to fix Windows 10 search problems using the troubleshooter
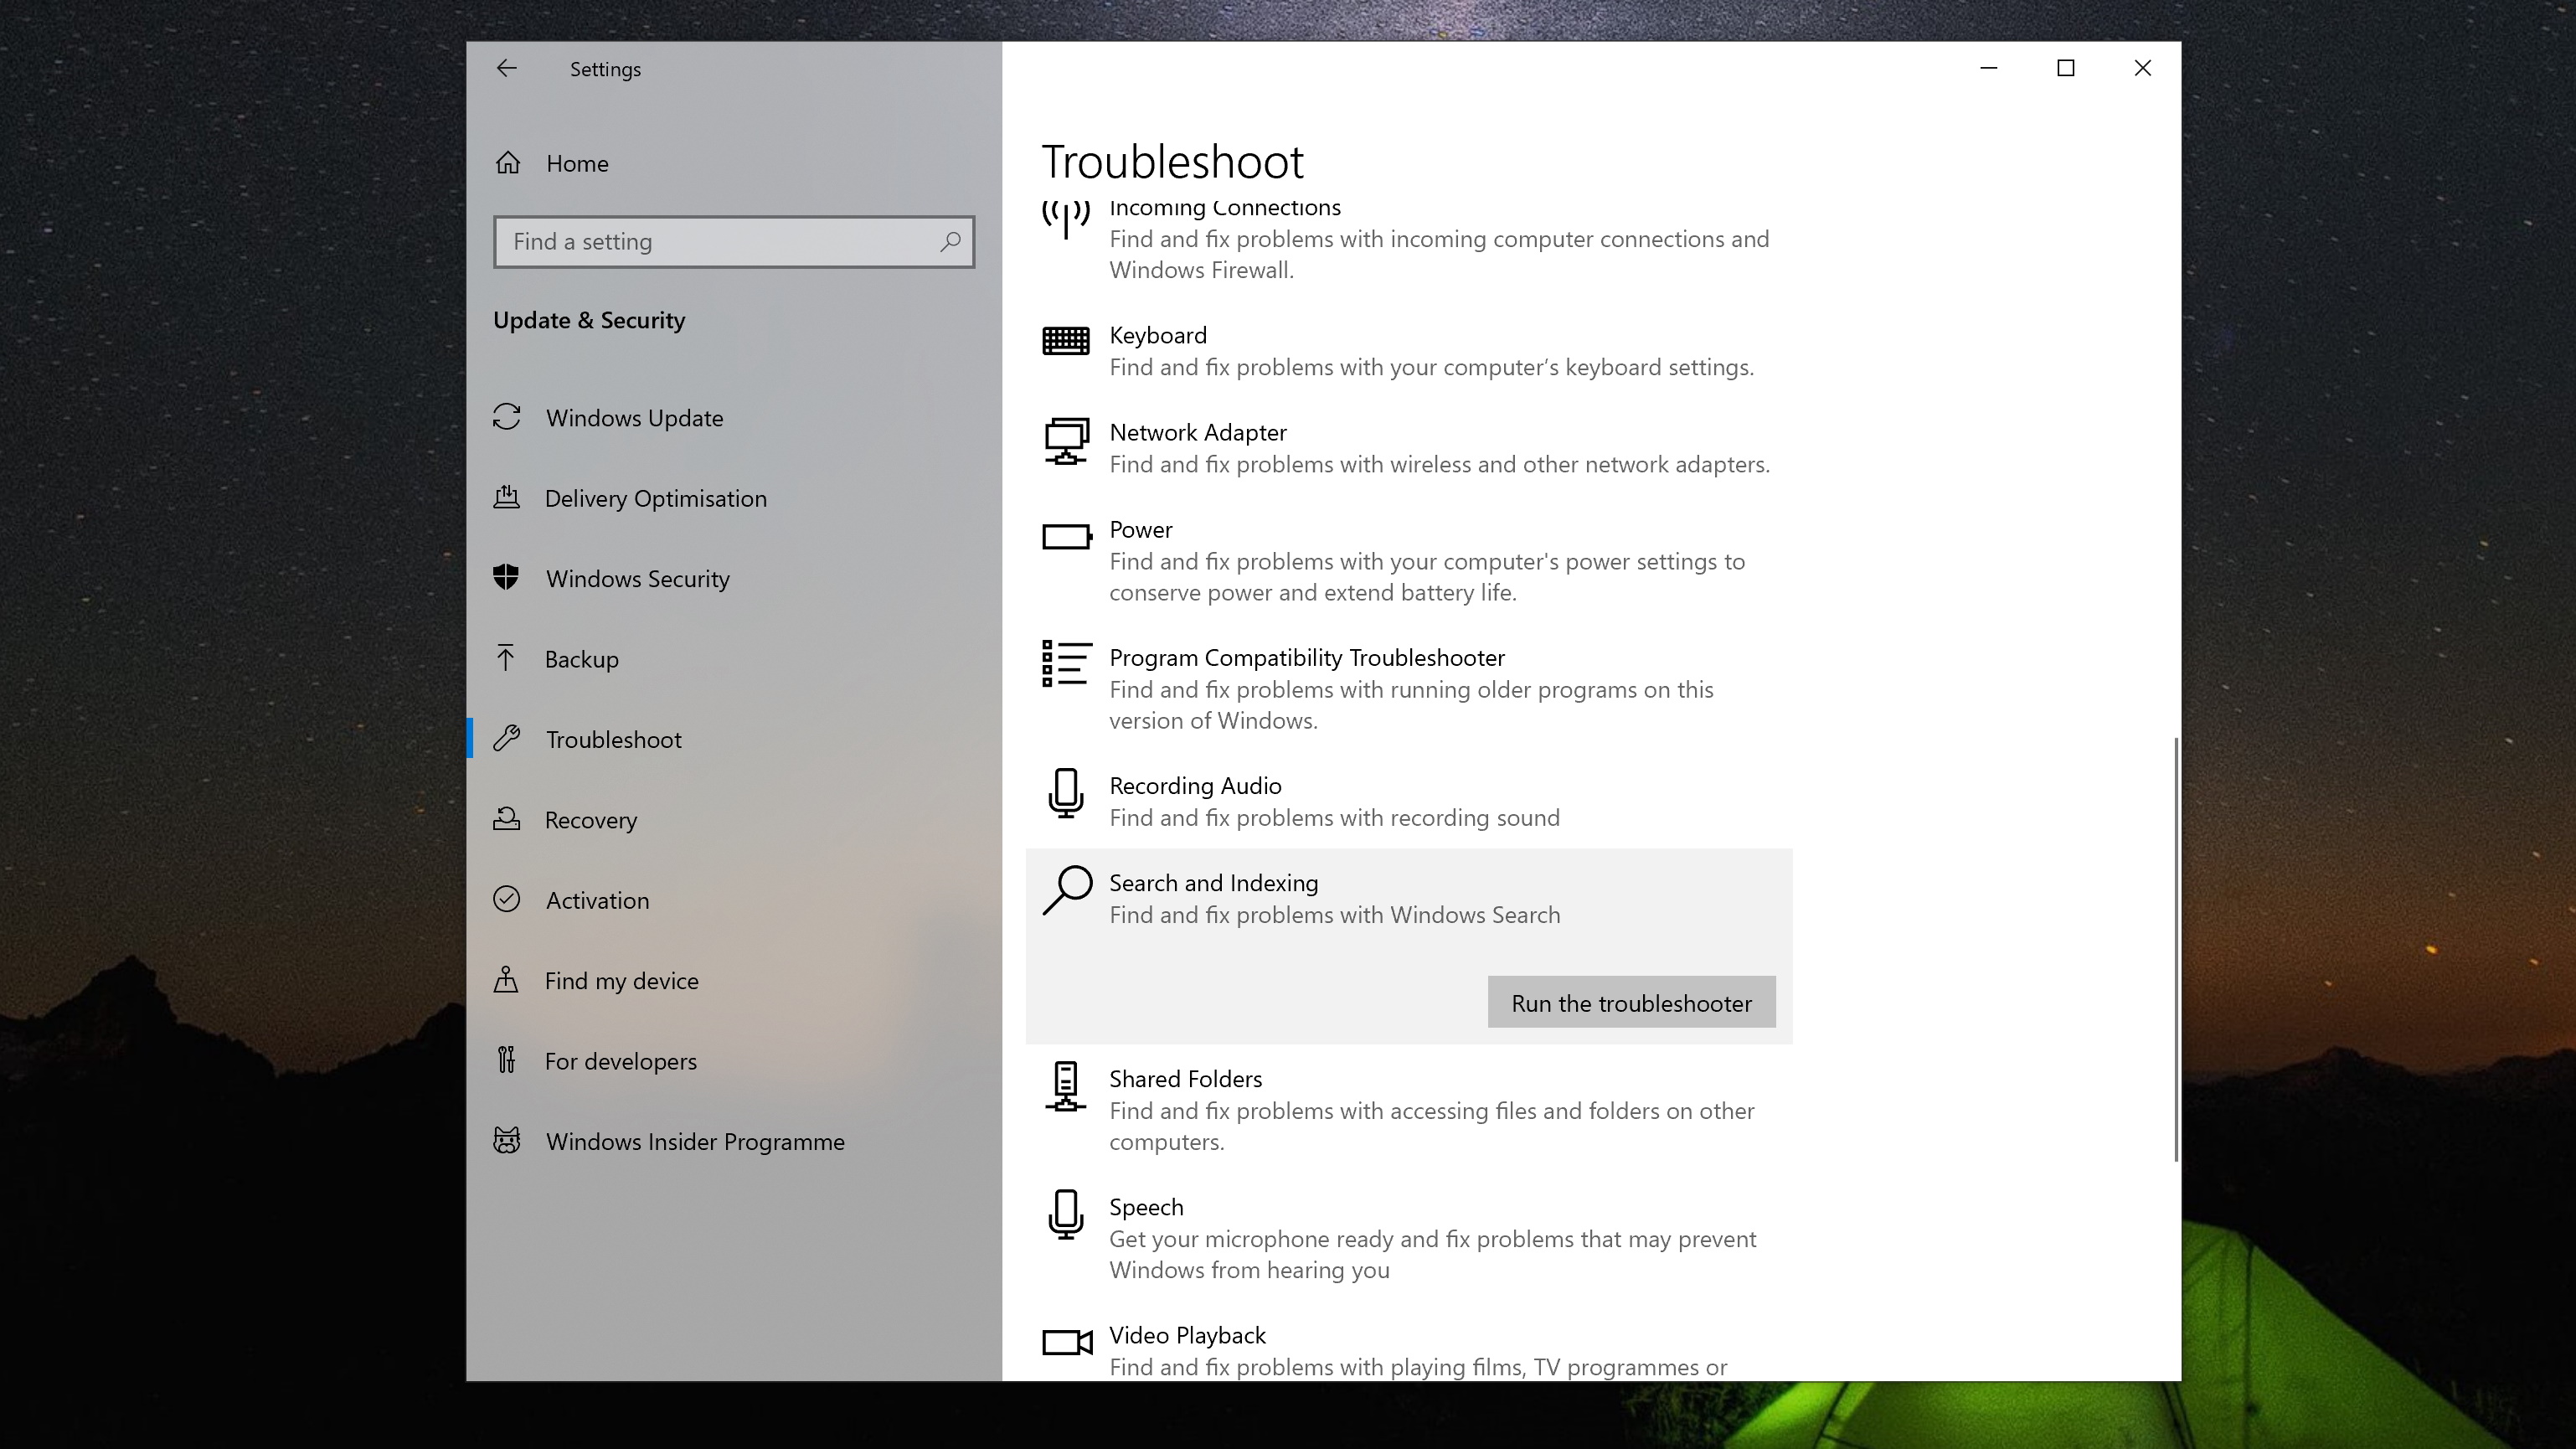
The easiest way to fix search problems in Windows 10 is by using the built-in troubleshooter. To launch the troubleshooter, open up the Settings app (click the Start menu and then the cog icon), then click ‘Update & Security’.
On the left-hand side of the window that appears, you’ll see an entry called ‘Troubleshoot’. Click it, then scroll down until you see ‘Search and Indexing’. Click that, then click ‘Run troubleshooter’.
The troubleshooter is a handy tool as it will ask you questions about the problem you’re having, then will run some tests to see what needs fixing.
Sign up for breaking news, reviews, opinion, top tech deals, and more.
Once you’ve gone through each step of the troubleshooter, Windows 10 search problems should now be fixed.

How to fix Windows 10 search problems using Windows Update
As we mentioned earlier, a few dodgy updates have been released which have introduced problems with Windows 10 search, leading Microsoft to issue yet more updates to fix the Windows 10 search problems that have started cropping up.
So, it’s worth using Windows Update to see if there’s a new update waiting for you that will fix your Windows 10 search problems.
To do this, open up the Settings app (click the Start menu and then the cog icon), then click ‘Update & Security’.
At the top of the screen that appears, you’ll be told if there is an update ready to be installed, or if Windows 10 is up to date.
It’s also worth clicking ‘Check for updates’ to see if there are other updates waiting.
If there are updates that need installing, make sure all your work is saved, then apply the updates and restart your PC.

How to fix Windows 10 search problems by uninstalling Windows 10 updates
One of the reasons why Windows 10 search isn’t working for you is because of a faulty Windows 10 update. If Microsoft hasn’t released a fix just yet, then one way of fixing search in Windows 10 is to uninstall the problematic update.
To do this, return to the Settings app, then click ‘Update & Security’.
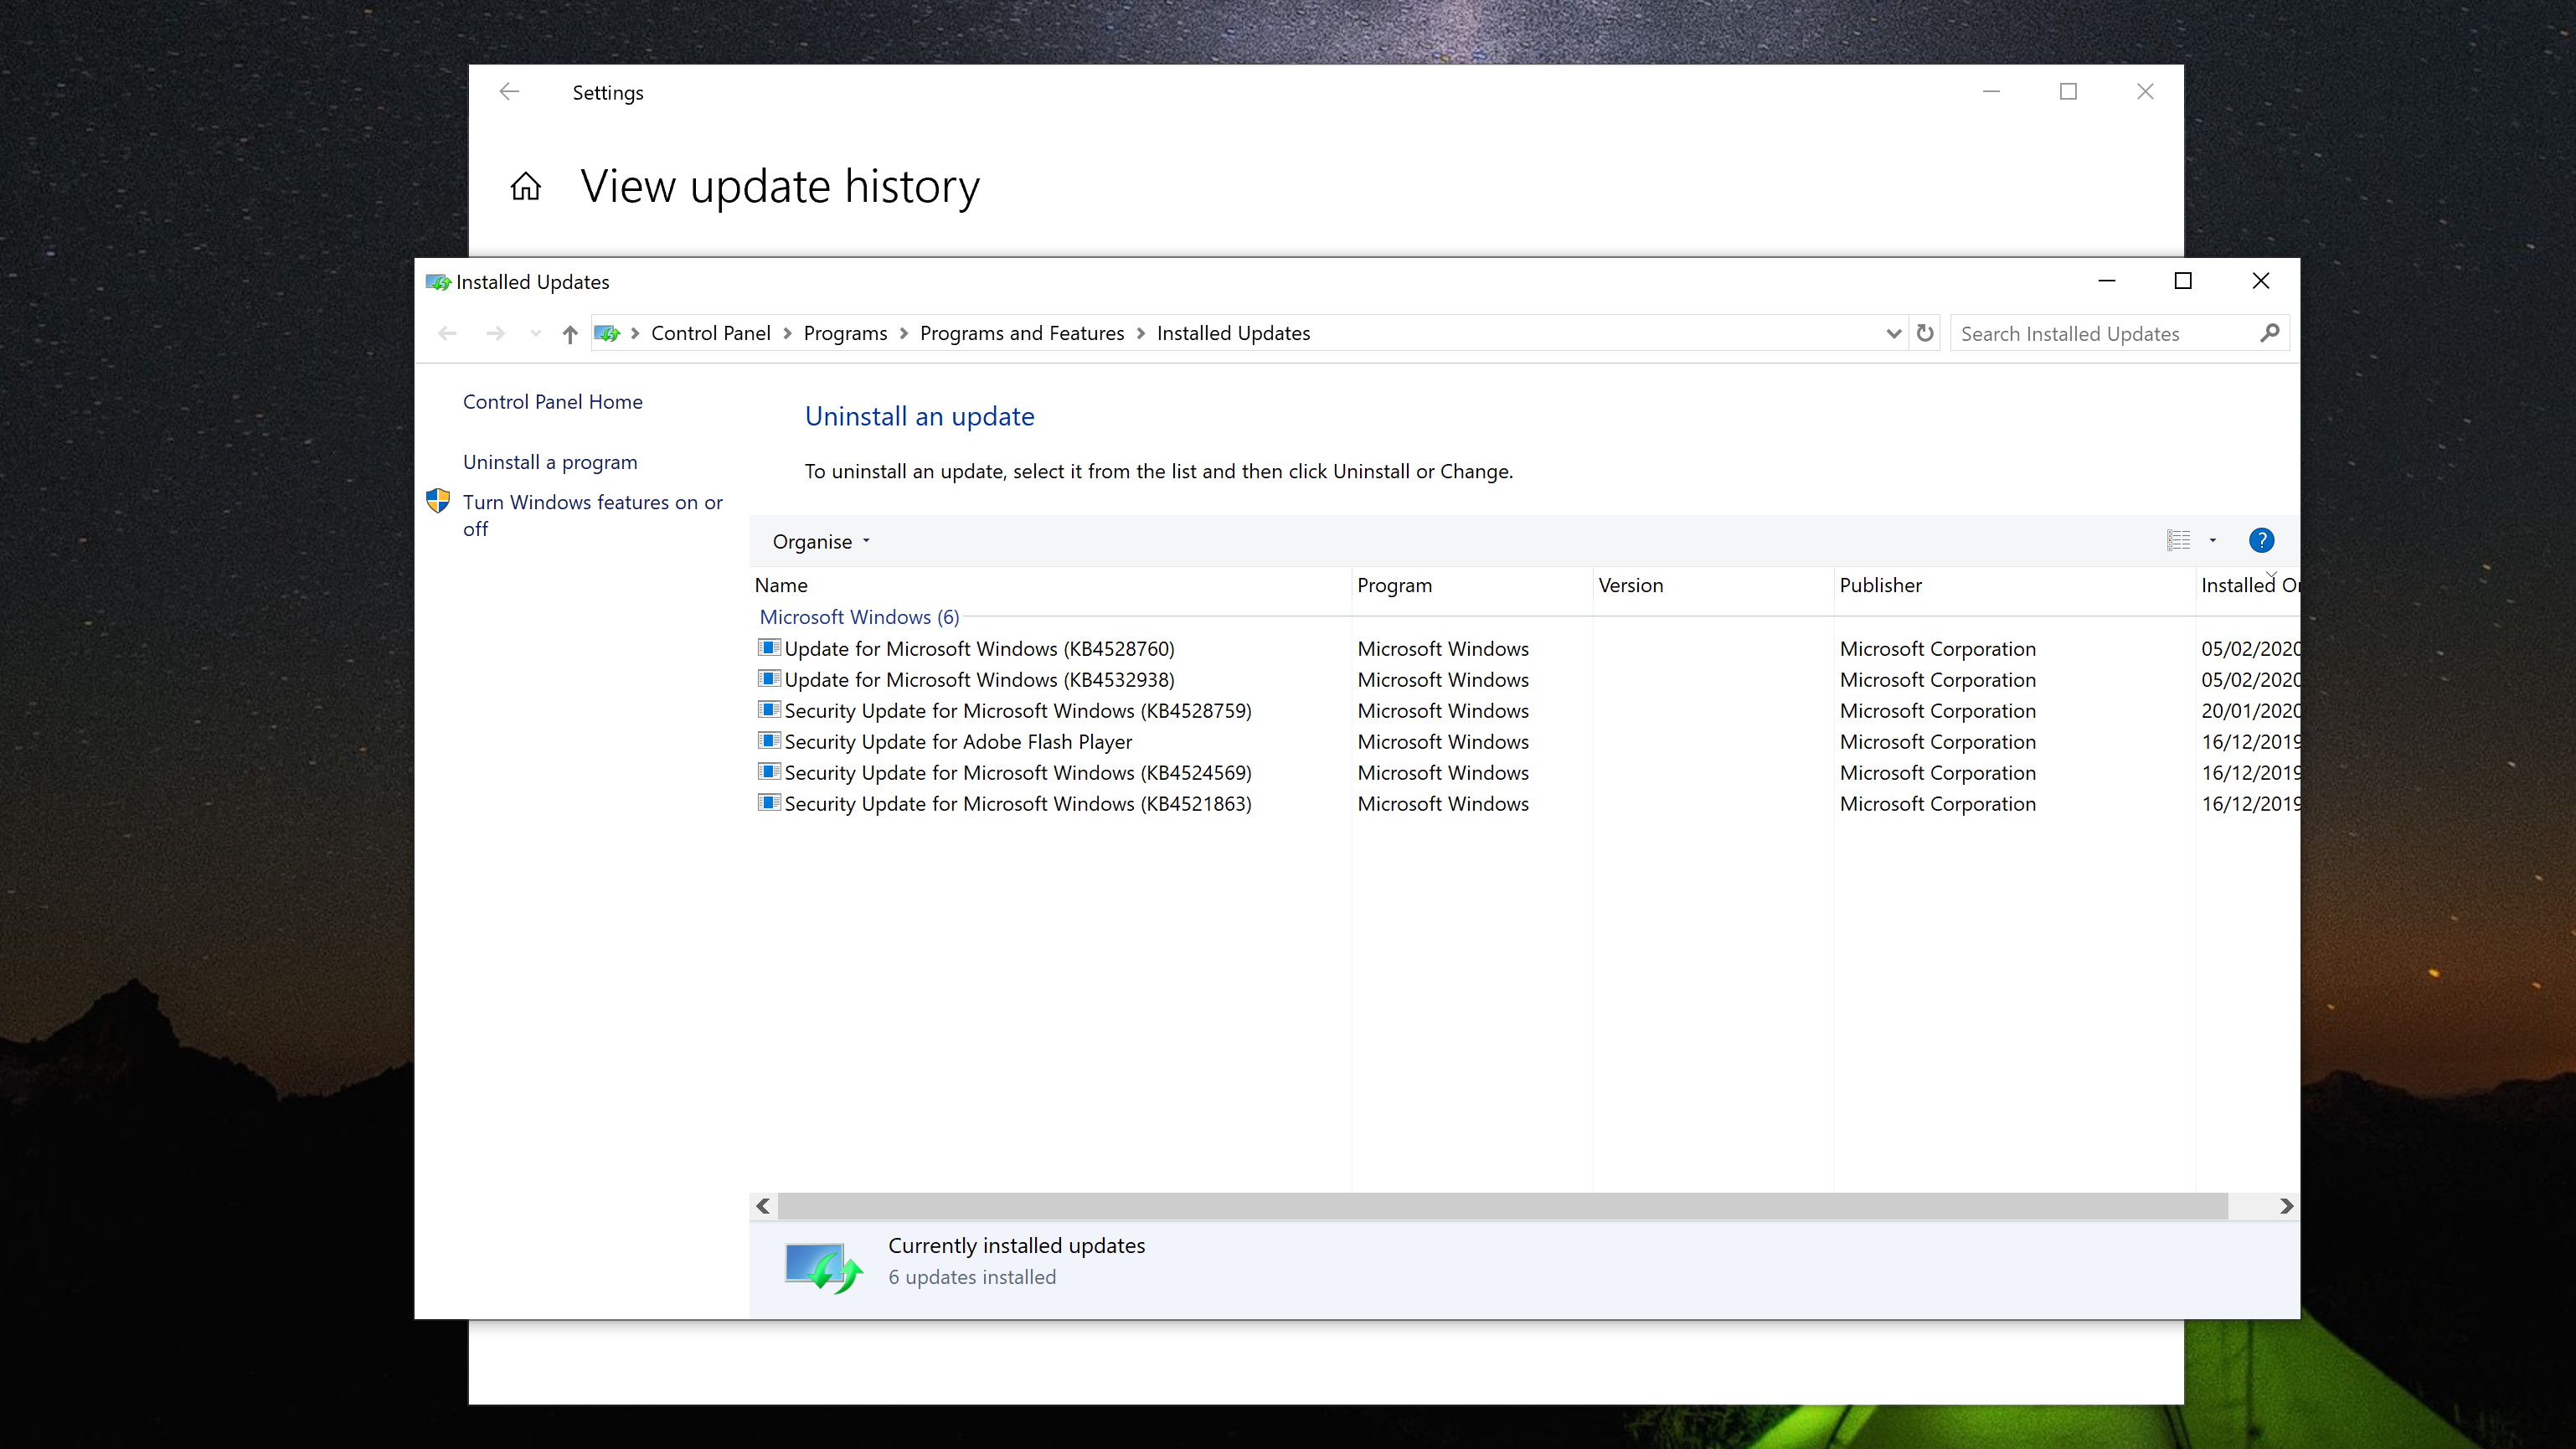
From the window that appears, click ‘View update history’, then ‘Uninstall updates’ and select the last update you installed before your search problems started.

How to fix Windows 10 search problems by rebuilding the index
The way Windows 10 indexes the files and folders on your PC can sometimes cause problems that makes searching in Windows 10 not work the way it should, so if none of the other steps have worked, this is worth trying.
To fix certain Windows 10 search problems, you need to rebuild Windows 10’s index database. To do this, once again open the Settings app, and click ‘Search’.
On the left-hand menu, click ‘Searching Windows’, then under where it says “More Search Indexer Settings”, click ‘Advanced Search Indexer Settings.’
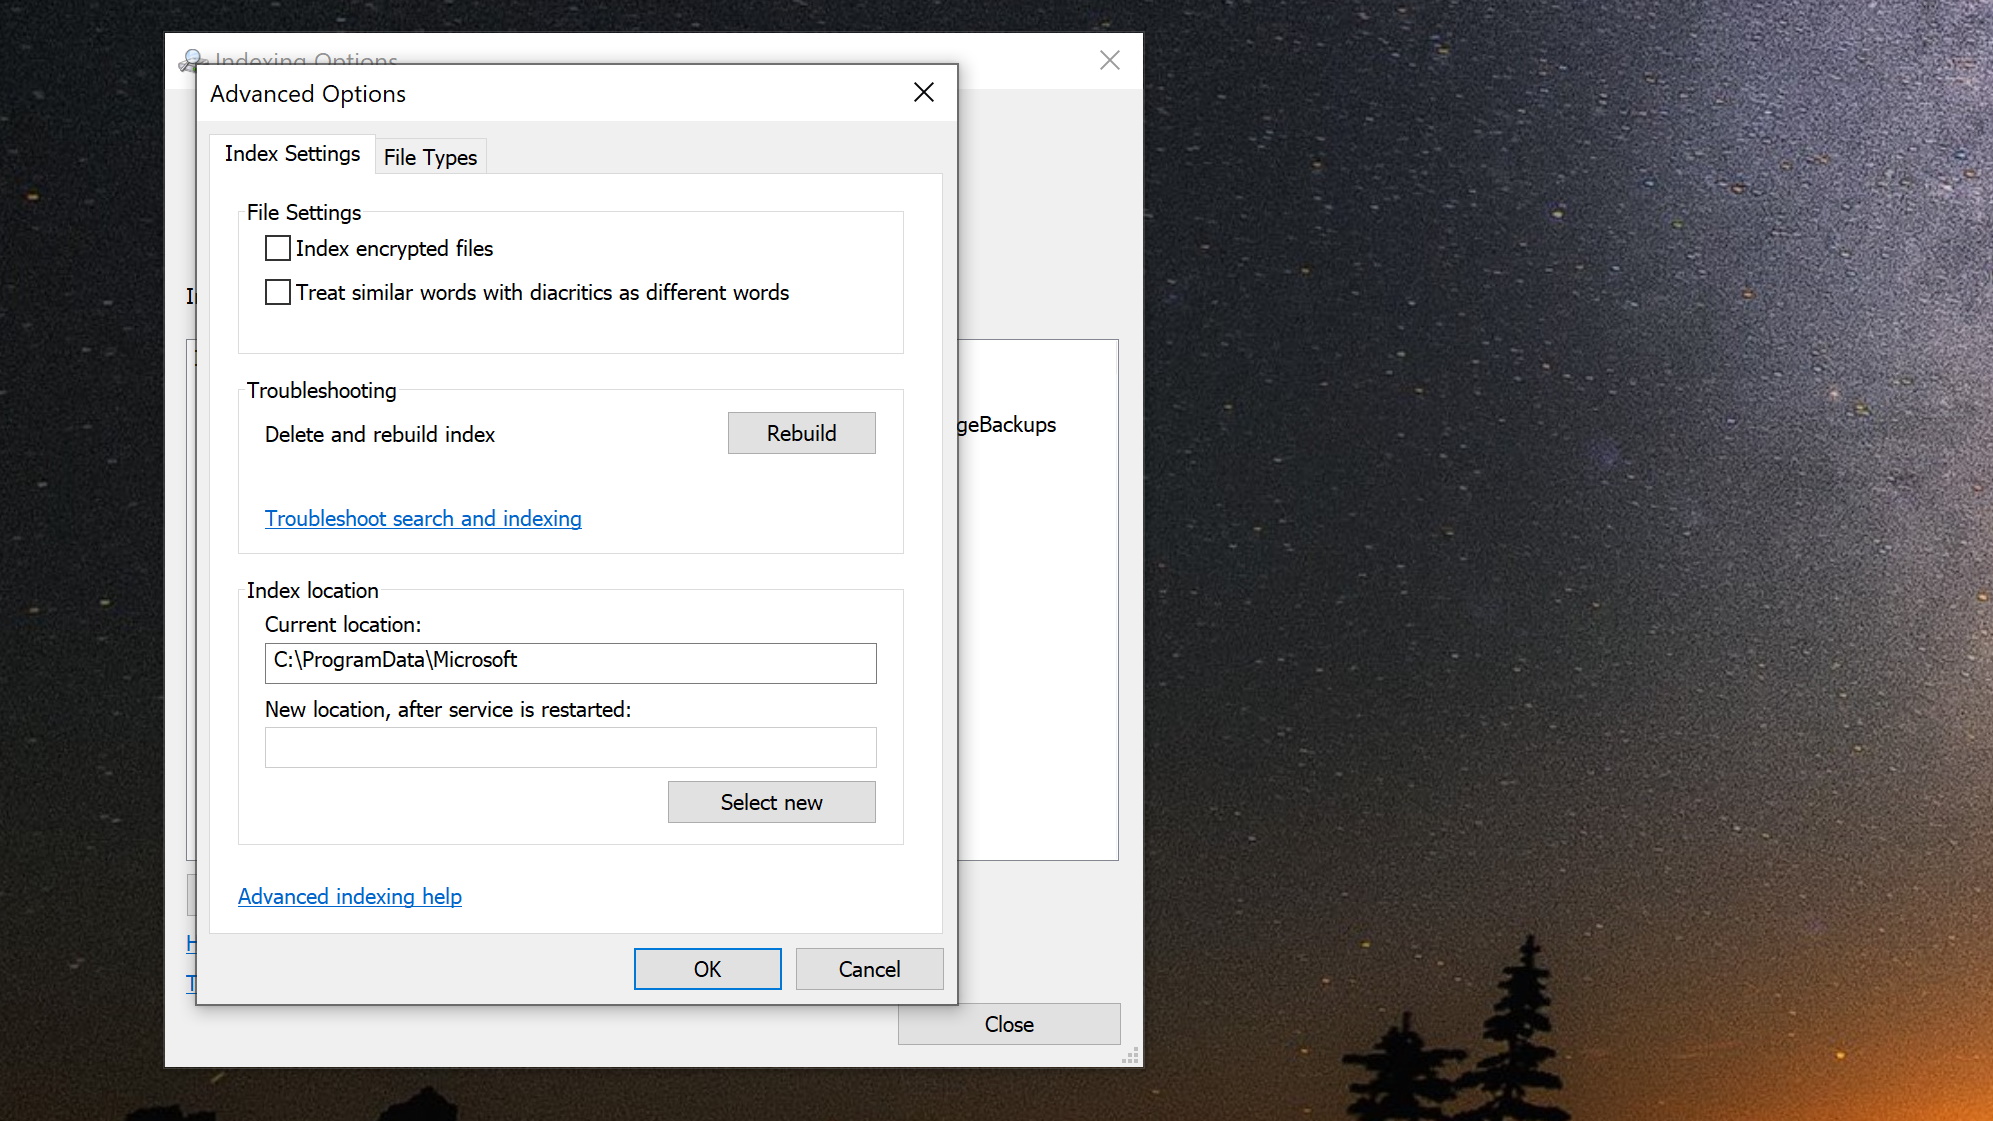
Click the ‘Advanced’ button in the next window that appears, then click the ‘Rebuild’ button. Click ‘OK’ and let Windows 10 do its thing.
Hopefully one of these methods will have shown you how to fix search problems in Windows 10.

Matt is TechRadar's Managing Editor for Core Tech, looking after computing and mobile technology. Having written for a number of publications such as PC Plus, PC Format, T3 and Linux Format, there's no aspect of technology that Matt isn't passionate about, especially computing and PC gaming. He’s personally reviewed and used most of the laptops in our best laptops guide - and since joining TechRadar in 2014, he's reviewed over 250 laptops and computing accessories personally.