How to set up your Raspberry Pi in Windows
Use Windows to install Raspbian

Sign up for breaking news, reviews, opinion, top tech deals, and more.
You are now subscribed
Your newsletter sign-up was successful
While Microsoft Windows doesn't have that much in common with the version of Linux that runs on the Raspberry Pi, it doesn't mean Windows users are at a disadvantage.
This is because the types of applications that run on Windows are just as diverse, and it's an operating system that can lend itself to so many different uses, that the do-everything attitude behind Windows is just as applicableto Linux.
You can even find a Linux-like command line if you look close enough, and many pieces of open source software have been built to run on Windows. So the two worlds aren't that far apart.

Windows users also benefit from having the easiest and least-risk installation routine, thanks to a piece of open source software called Win32 Disk Imager, so your first step should be to download a copy.
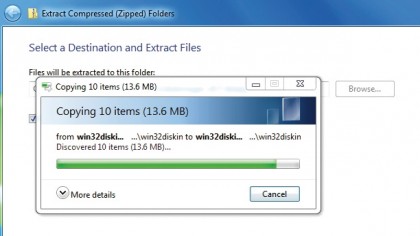
It doesn't need to be installed, because the download is a ZIP file which, when uncompressed with a right-click > Extract All, contains everything needed to run the application directly. It should also go without saying that you'll need a copy of the Raspbian image file for writing to your SD card. But this method will work for any Raspberry Pi operating system you might want to install, as well as writing other images to an external USB device.
Check your USB storage
But before we run the image writing tool, we need to make sure the SD card has an identifiable volume name and contains no data you want to keep.
Many Windows PCs include an SD card reader built in to the case, so you might want to try using this first. However, there have been quite a number of problems reported when users attempt to use these to create a bootable version of Raspbian. This is something to be aware of if you run into problems.
Sign up for breaking news, reviews, opinion, top tech deals, and more.

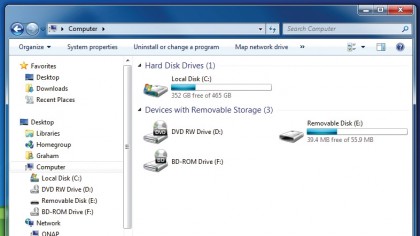
We've always had great results from using an inexpensive external USB SD card reader, which is what we're using here. With this inserted, you should find the device appears in your Computer overview from the Windows file manager. It's usually labelled as Removable Disk, and to the right of this you'll see a drive letter. In our example, it's (E:). You need to remember this.
You should also open up the drive from Explorer and make sure there's nothing on there you want to keep, because we'll be overwriting everything with the Raspberry Pi operating system. Which is exactly what we're going to be doing in the next step.