10 Lightroom editing skills every photographer should know
Discover how to get started with this powerful editing tool
Adobe Lightroom has grown to become one of the most popular image management and raw image processing programs on the planet. And as part of the Creative Cloud Photography Plan, if you have Photoshop CC you’re going to also have a copy of this powerful software.
One of the most alluring aspects of Lightroom is that you can use it at a basic, intermediate or expert level. Even if you only go as far as the Basic adjustments tab, you have a surprising amount of control over your imagesm whether they’re raw files, TIFFs or JPEGs. But delve a little deeper and you’ll find a wealth of control at your fingertips.
Lightroom should be an essential part of your image-editing workflow
If you shoot raw this is where Lightroom really comes into its own. Not only can you quickly and easily select, delete, rate and search images, you can also apply a large number of powerful adjustments non-destructively. This simply means you’re working on raw image data which holds more information than other file types, and you’re not actually doing anything to the original Raw file itself.
When you're done editing your raw files, you can export them and add finishing touches in Photoshop using the tools and features available there. In short, Lightroom should be an essential part of your image-editing workflow, so here are 10 tips to help you to get more from the software…
1. Importing images
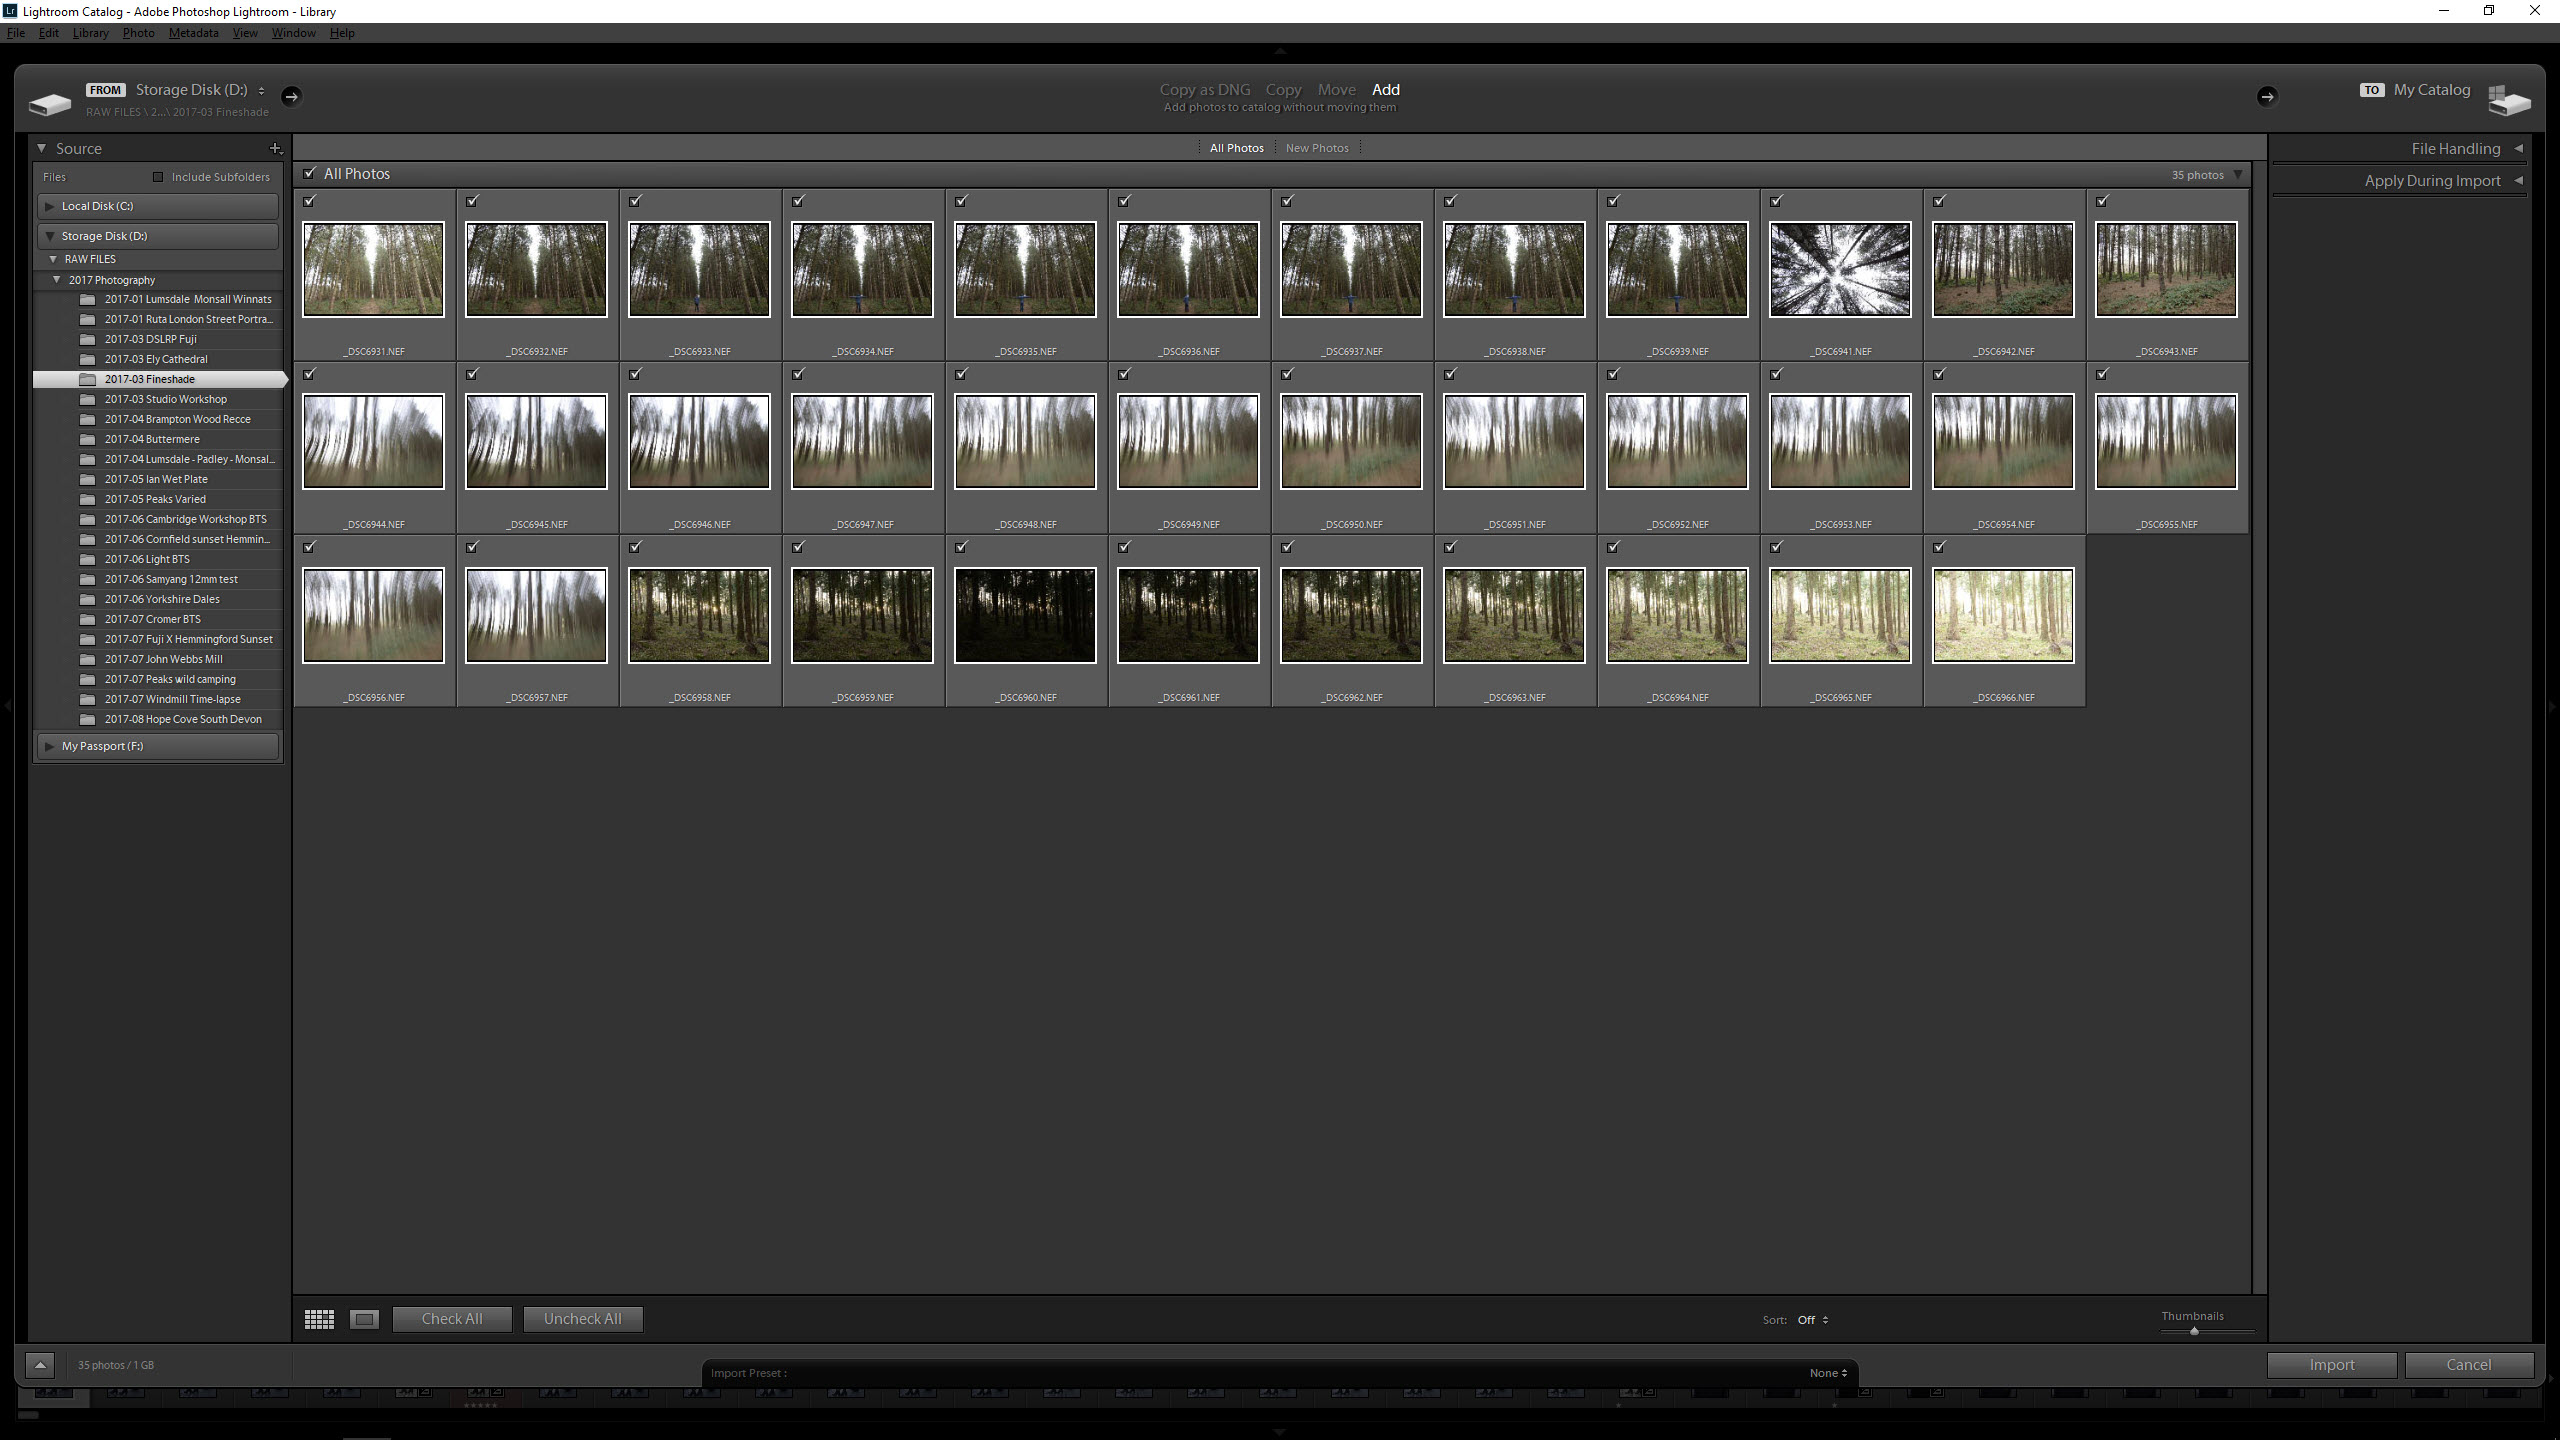
The first thing you need to do is get your images loaded into Lightroom, and this can be done by simply clicking on the Import button at the bottom-left of the interface when you’re in the Library module. When the Import dialog opens use the file tree on the left to locate the relevant folder on your computer, and make sure Add is selected at the top. This enables you to keep the images in your desired location, rather than importing them into the Lightroom Catalogue itself.
2. Synchronizing folders
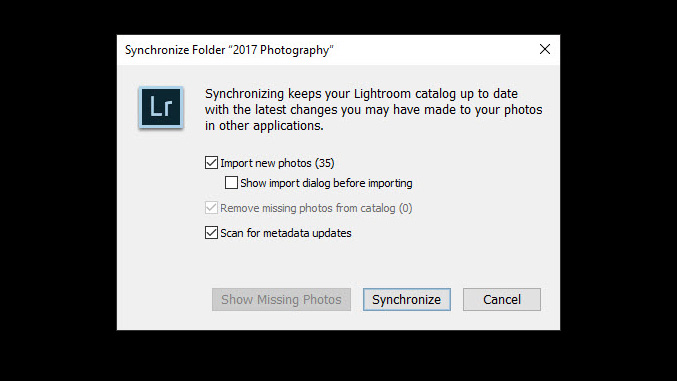
You’ll need to work out a filing system that works for you; using the year, or year and subject matter can work well for parent folders. Within this you can then name folders by year, month and description, for example ‘2017-08 Spain’. Now if you put a new image folder within the parent folder, you can right-click on the parent folder in the file tree in the Library module and select Synchronize Folder. This will then bring up a box showing how many images will be imported, and it's much quicker than importing using tip 1.
3. Basic adjustments
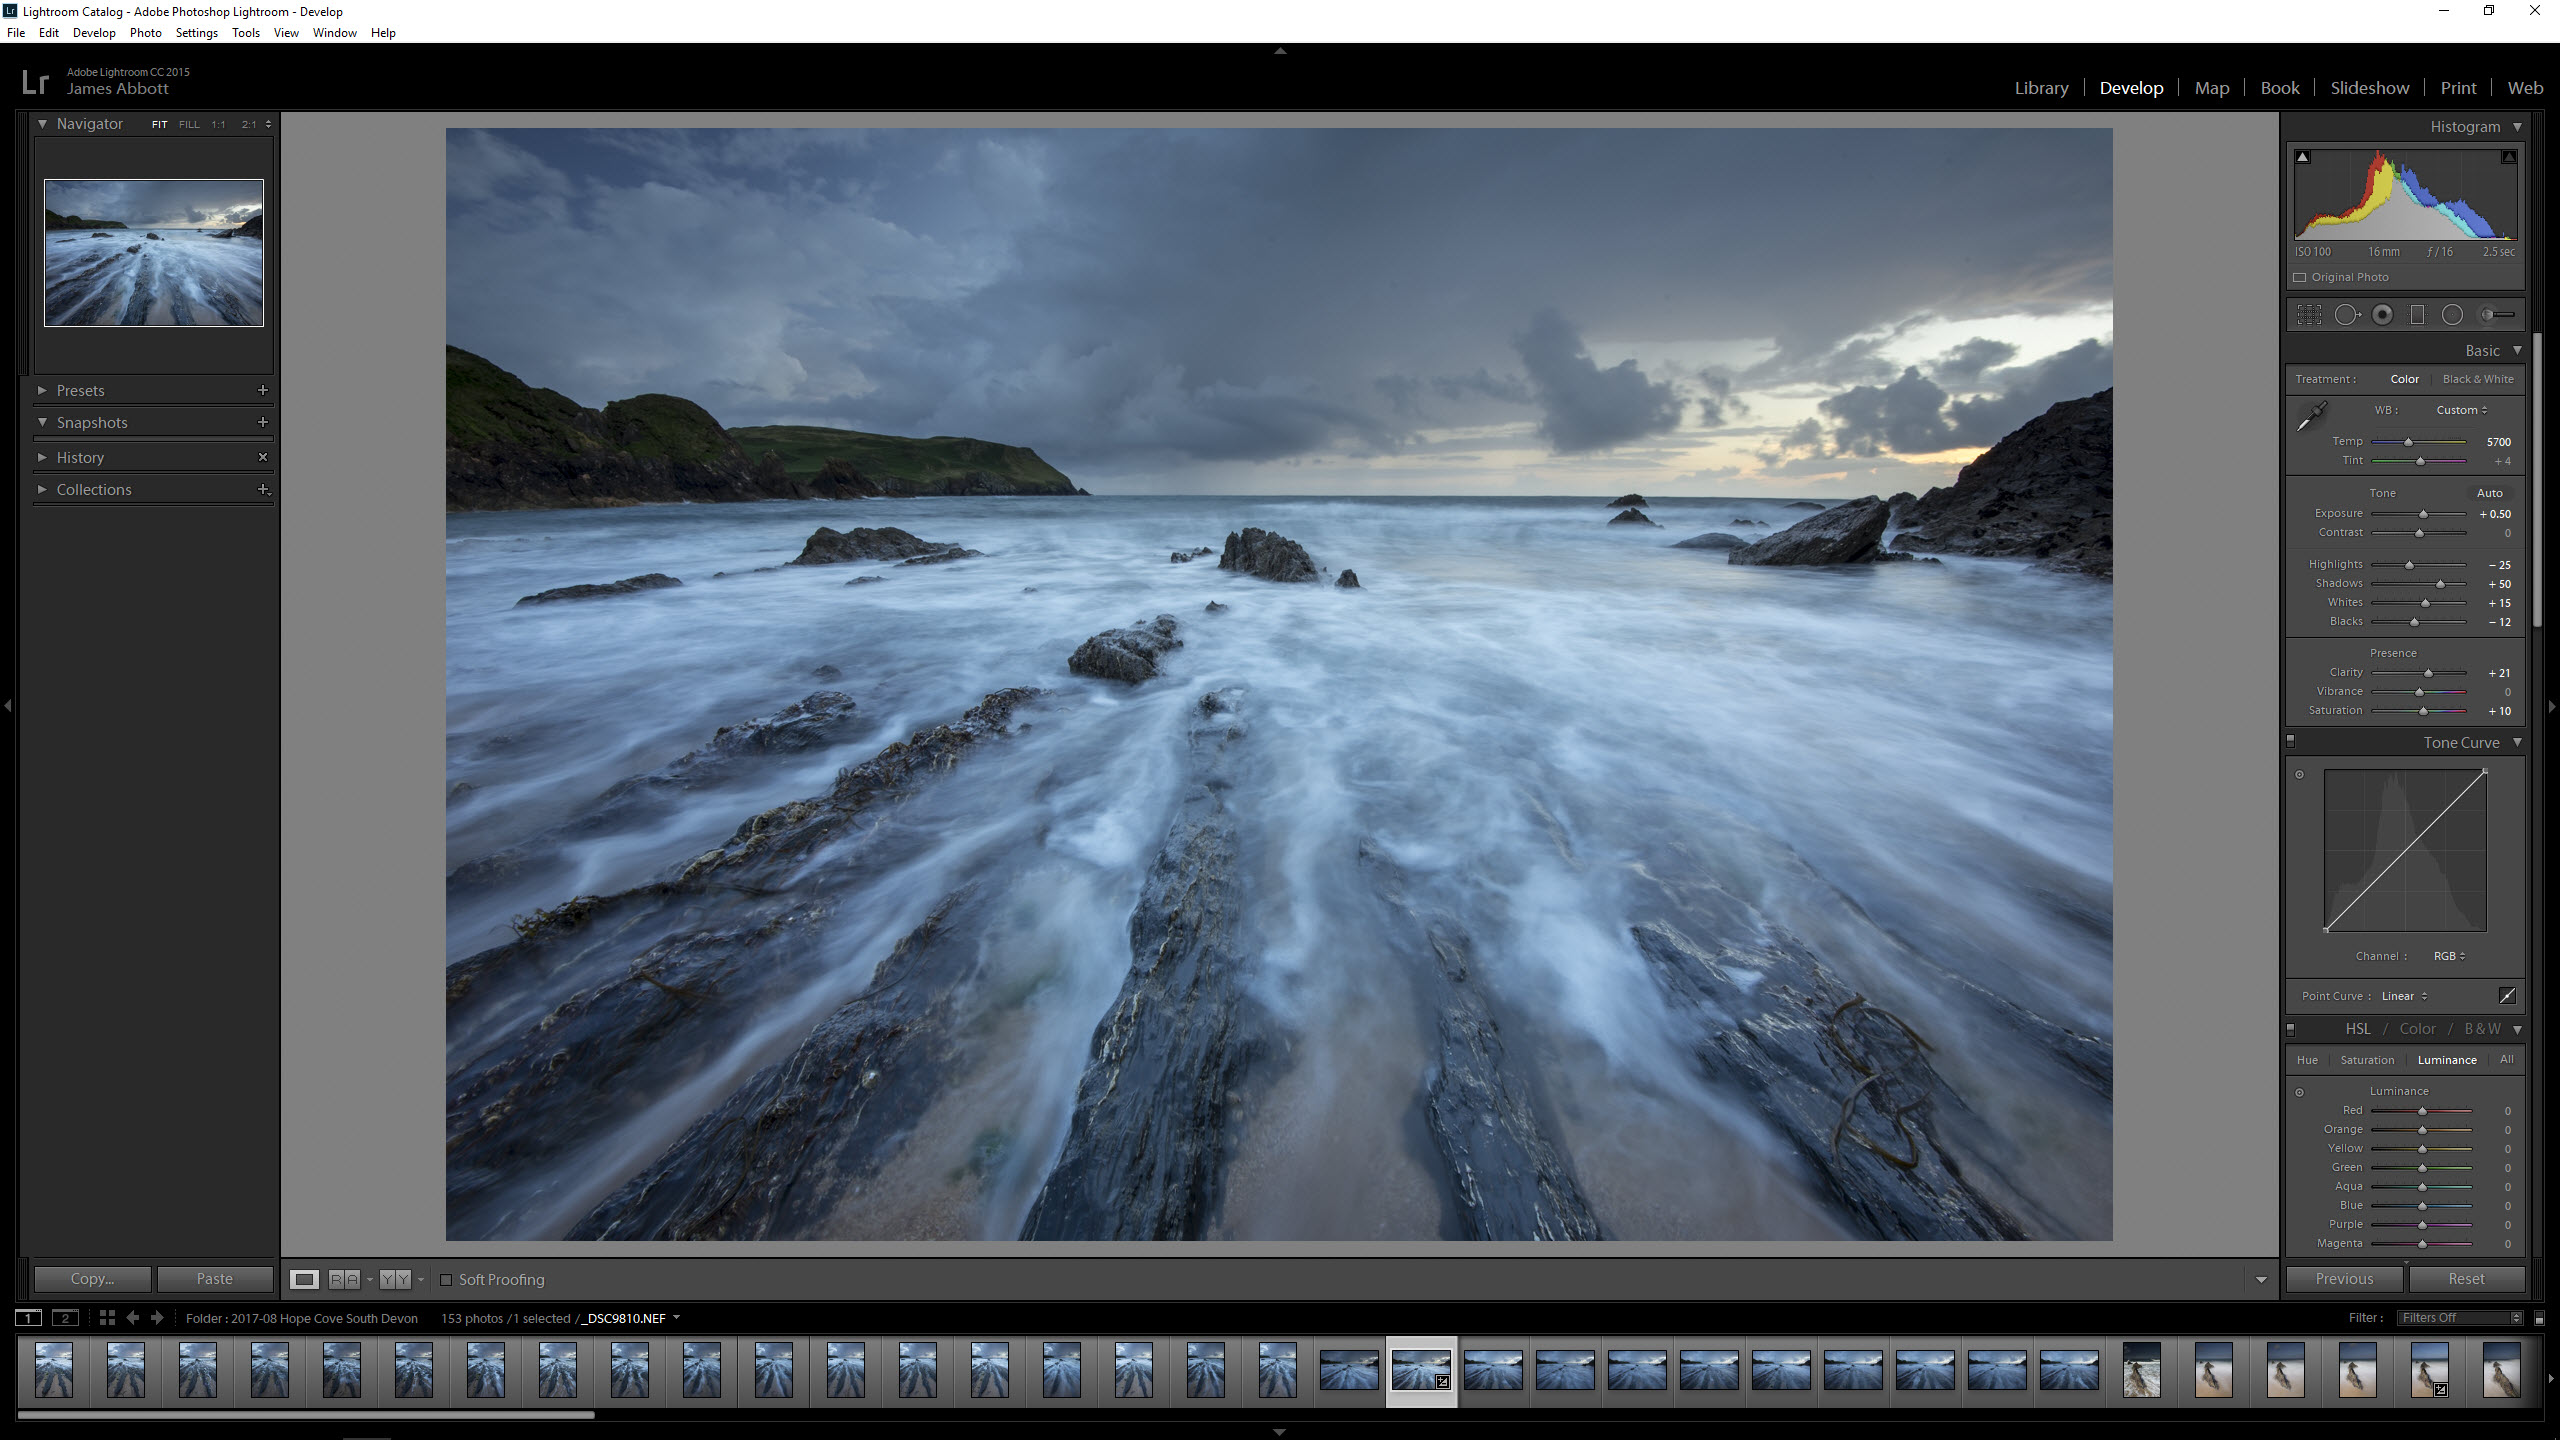
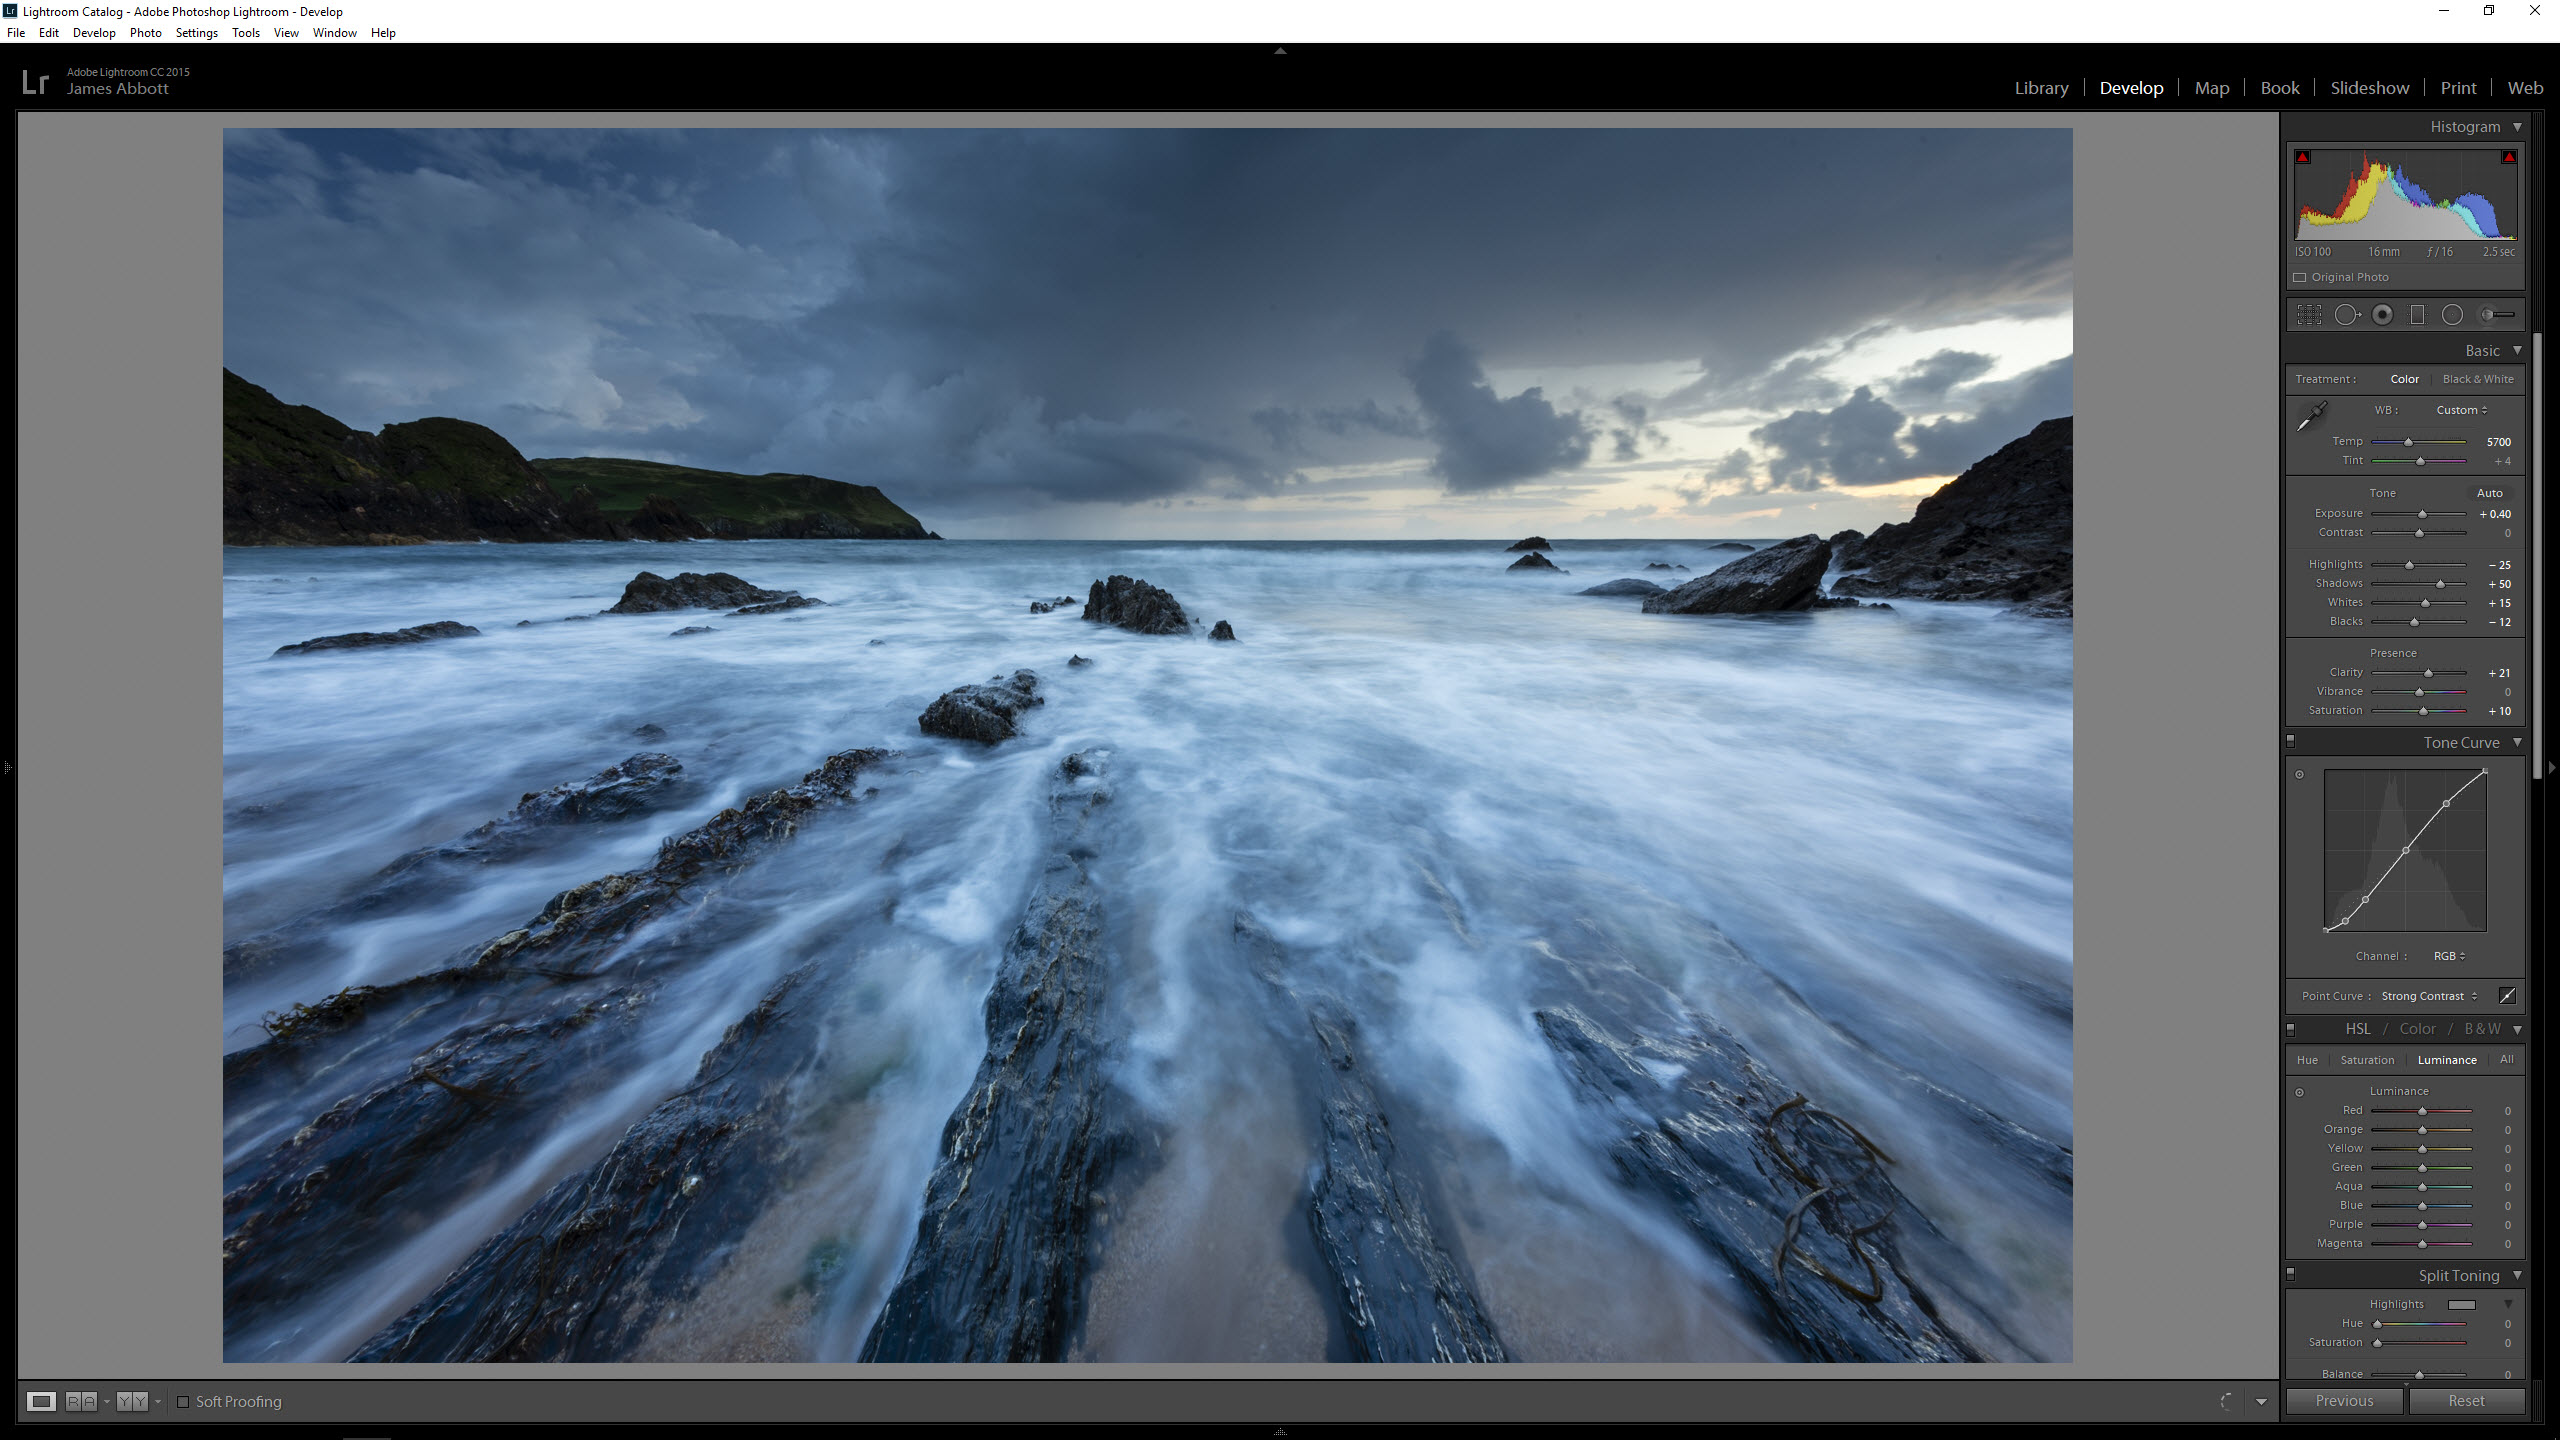
The Develop module is where you can process images and make a multitude of adjustments. The Basic tab at top-right, below the Histogram, will often be your first port of call. Here the sliders are fairly self-explanatory, and as the name suggests it's where you make all of your basic image adjustments such as White Balance, Exposure, Contrast, Shadows, Highlights and Saturation (although for boosting contrast you can achieve better results by using the Tone Curve below the Basic panel rather than the Contrast slider).
Sign up for breaking news, reviews, opinion, top tech deals, and more.
4. Using the Tone Curve
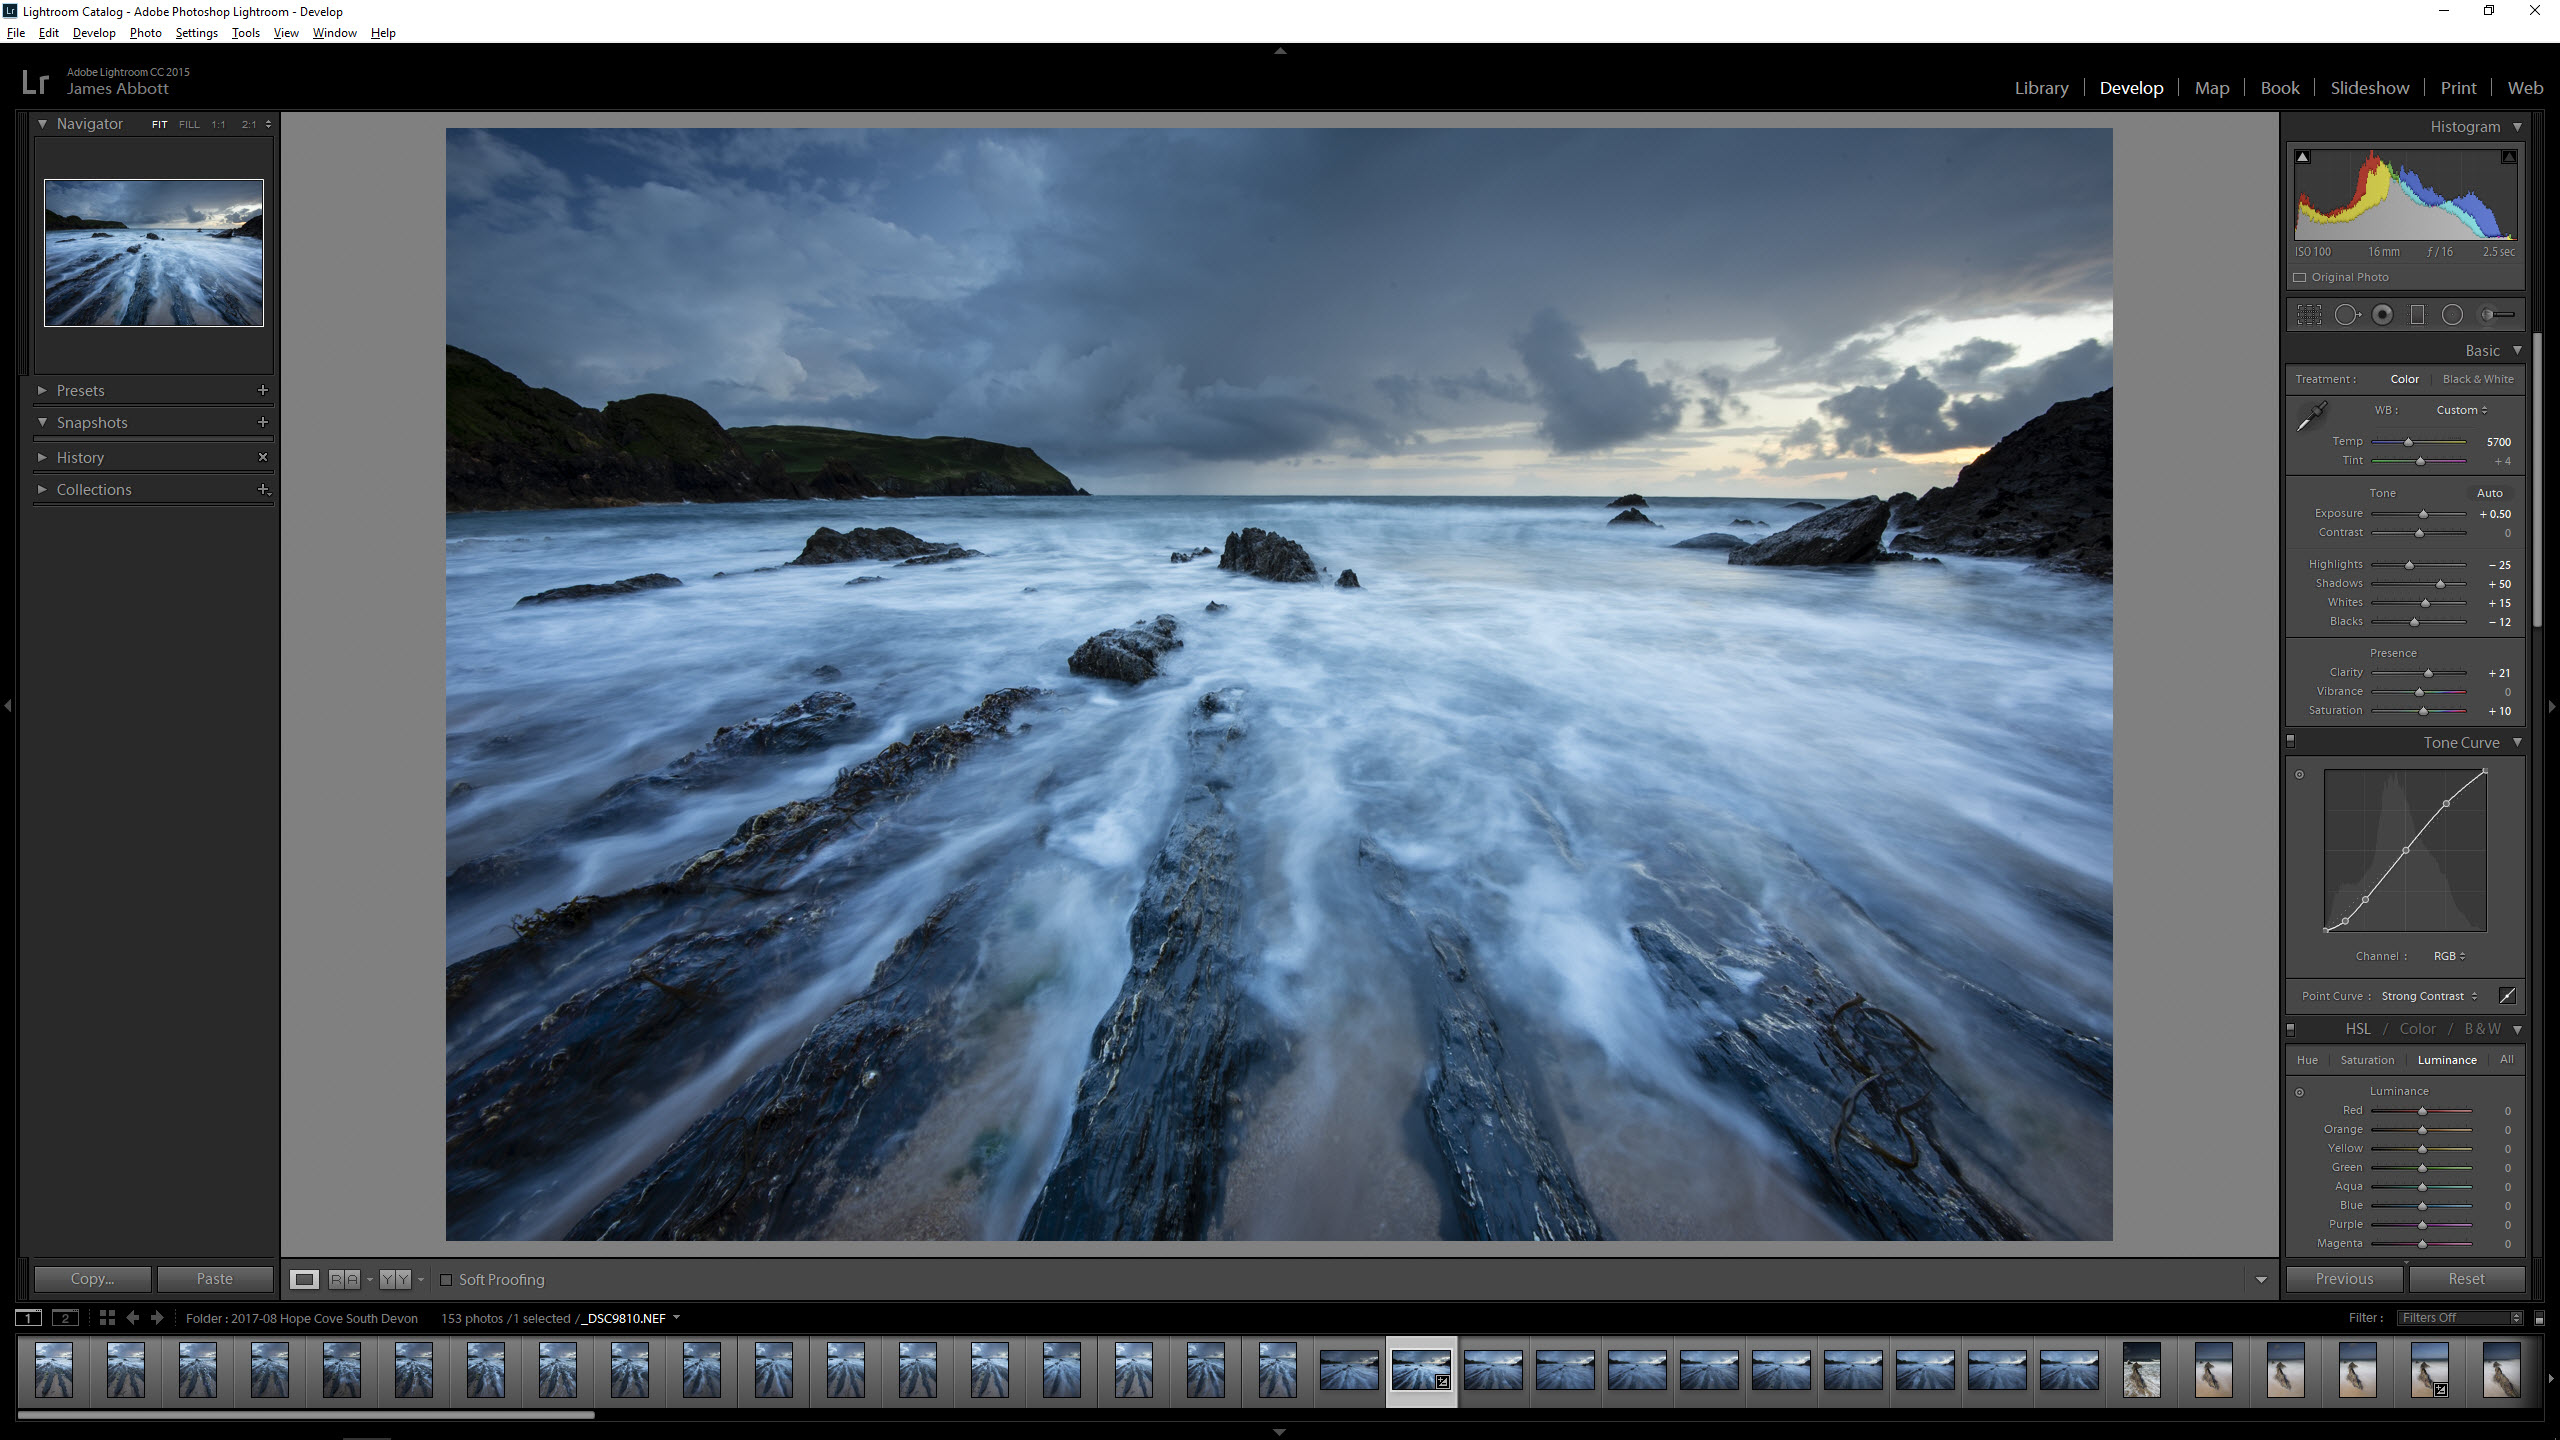
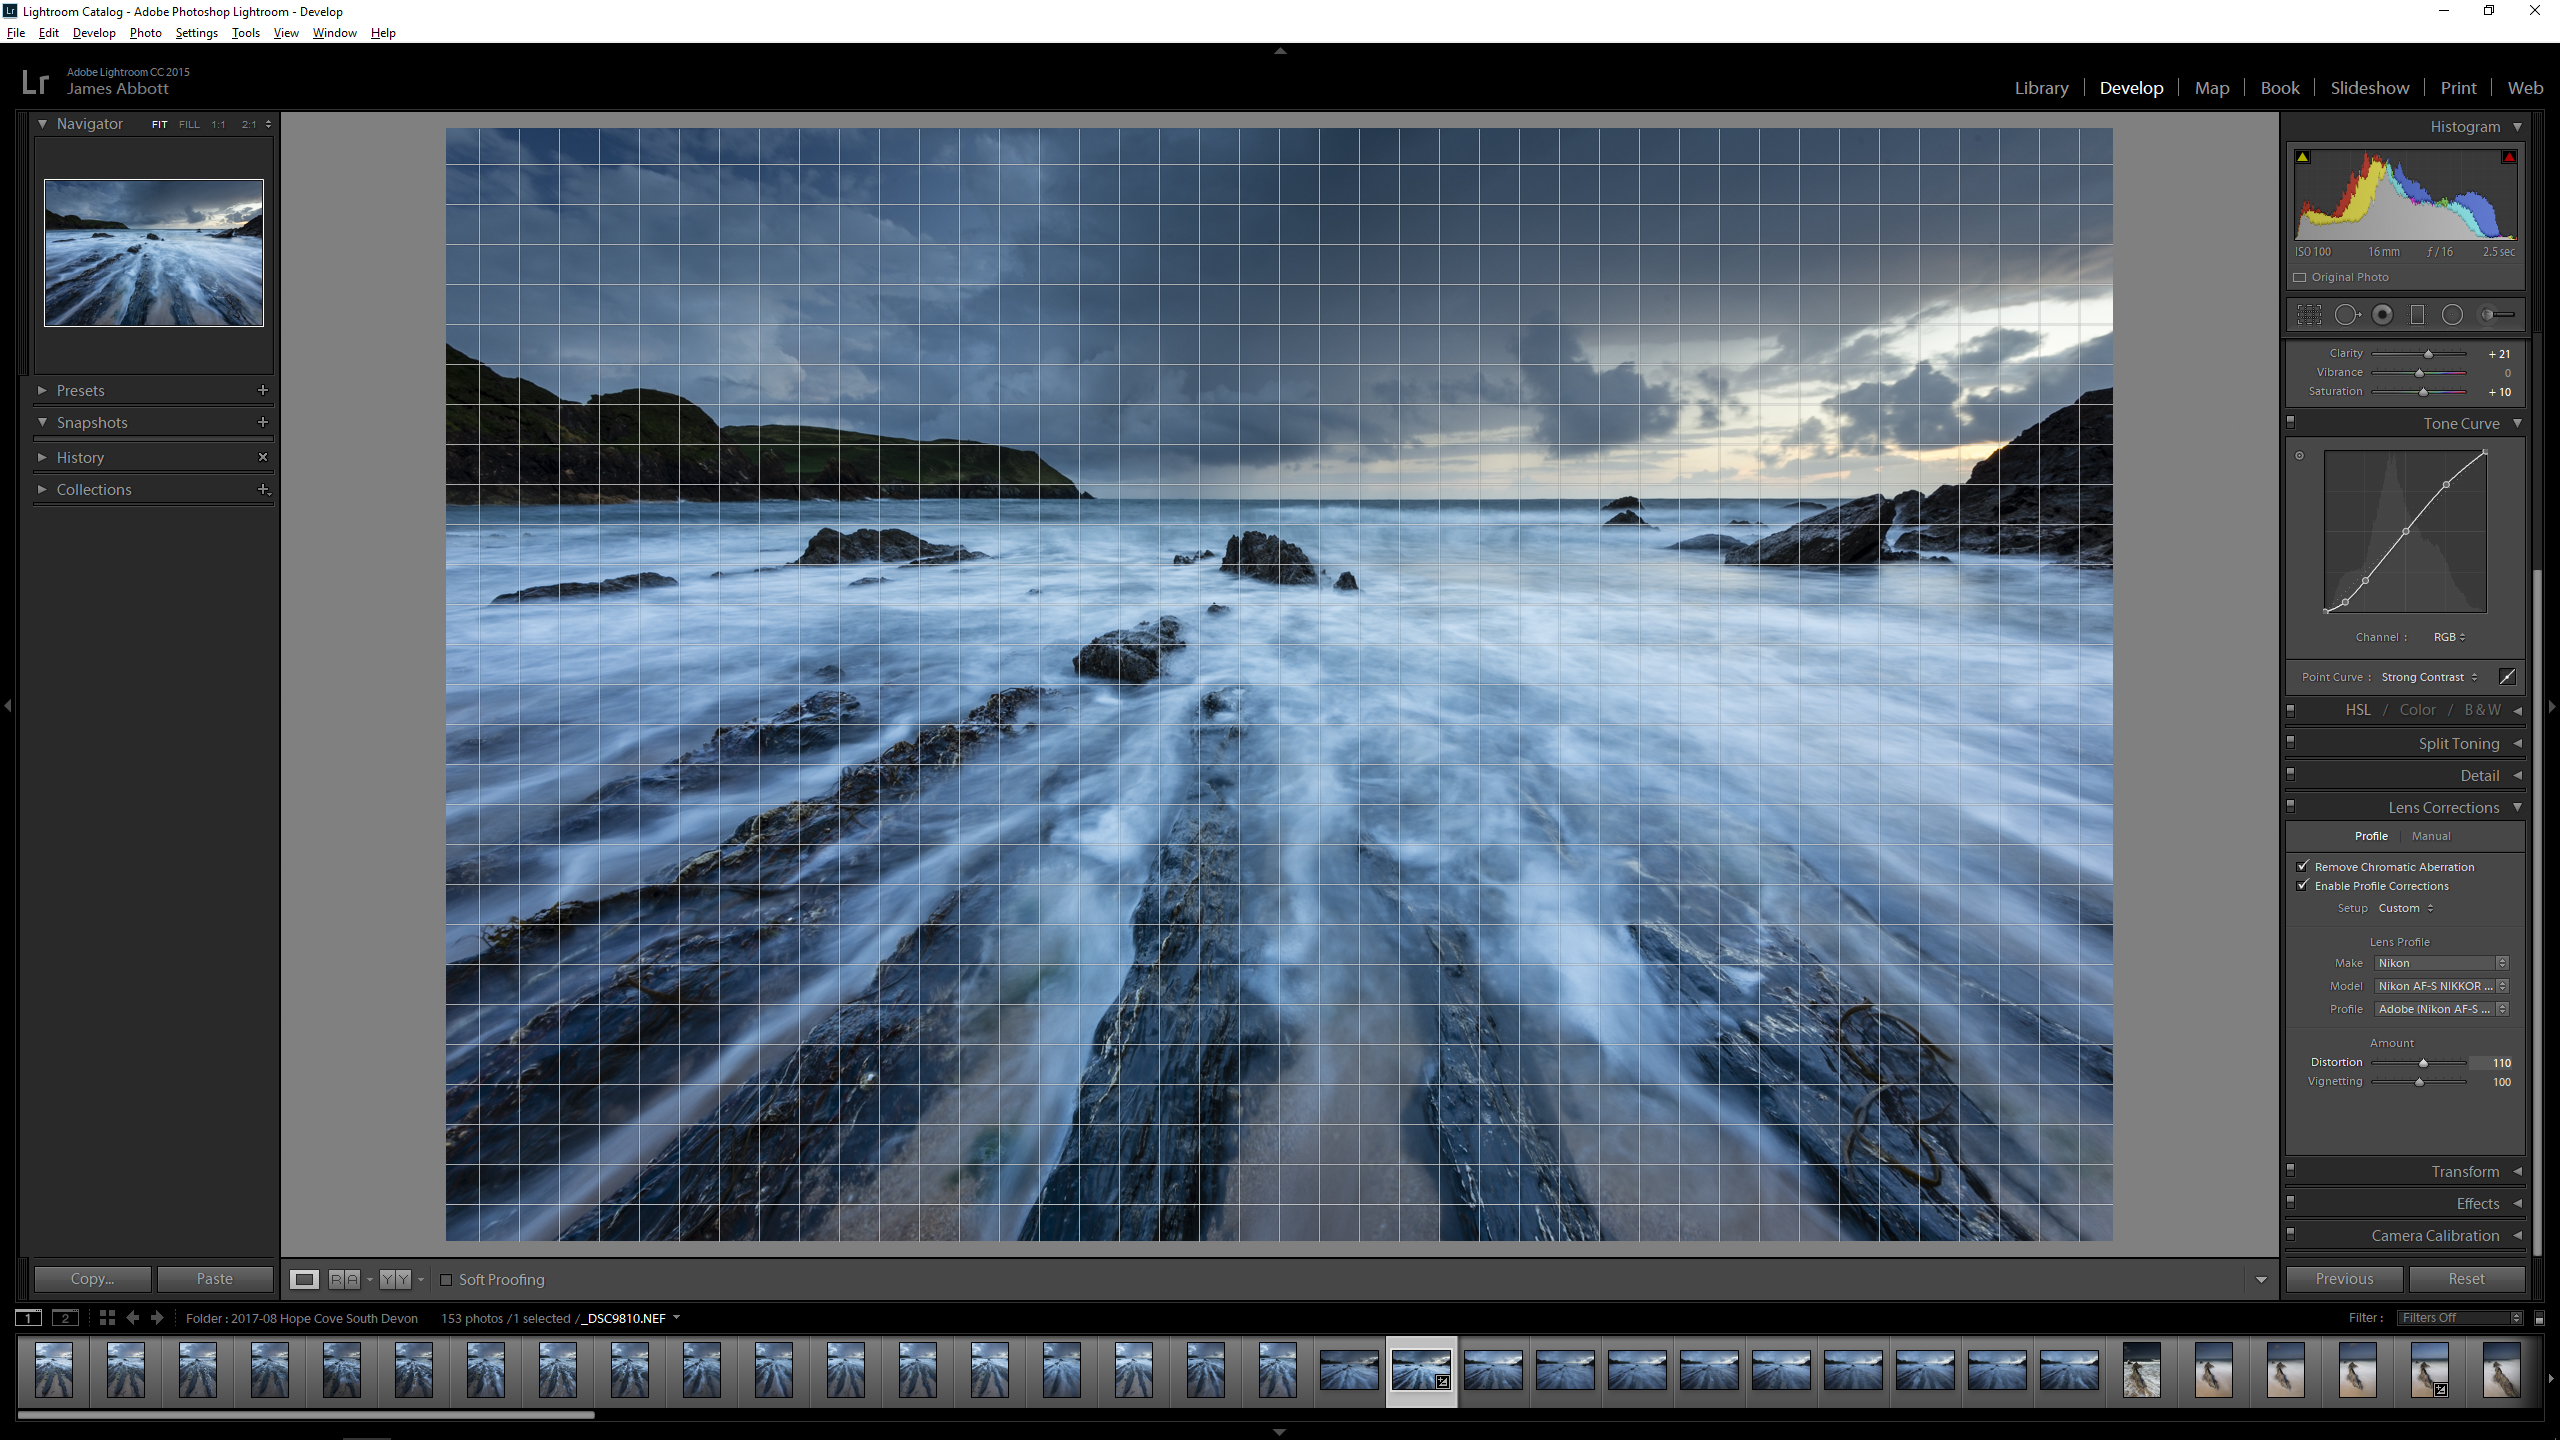
The Tone Curve is a great way to control contrast and make color adjustments within the red, green and blue channels. It’s not as sophisticated as Curves in Photoshop, but it’s still a powerful tool that can’t be ignored. Point Curve will be set to Linear by default, but the menu also allows you to select Medium Contrast and Strong Contrast presets; alternatively you can add points manually to the Linear curve. The individual color channels are accessed using the Channel dropdown menu that’s set to RGB by default.
5. Reading the histogram
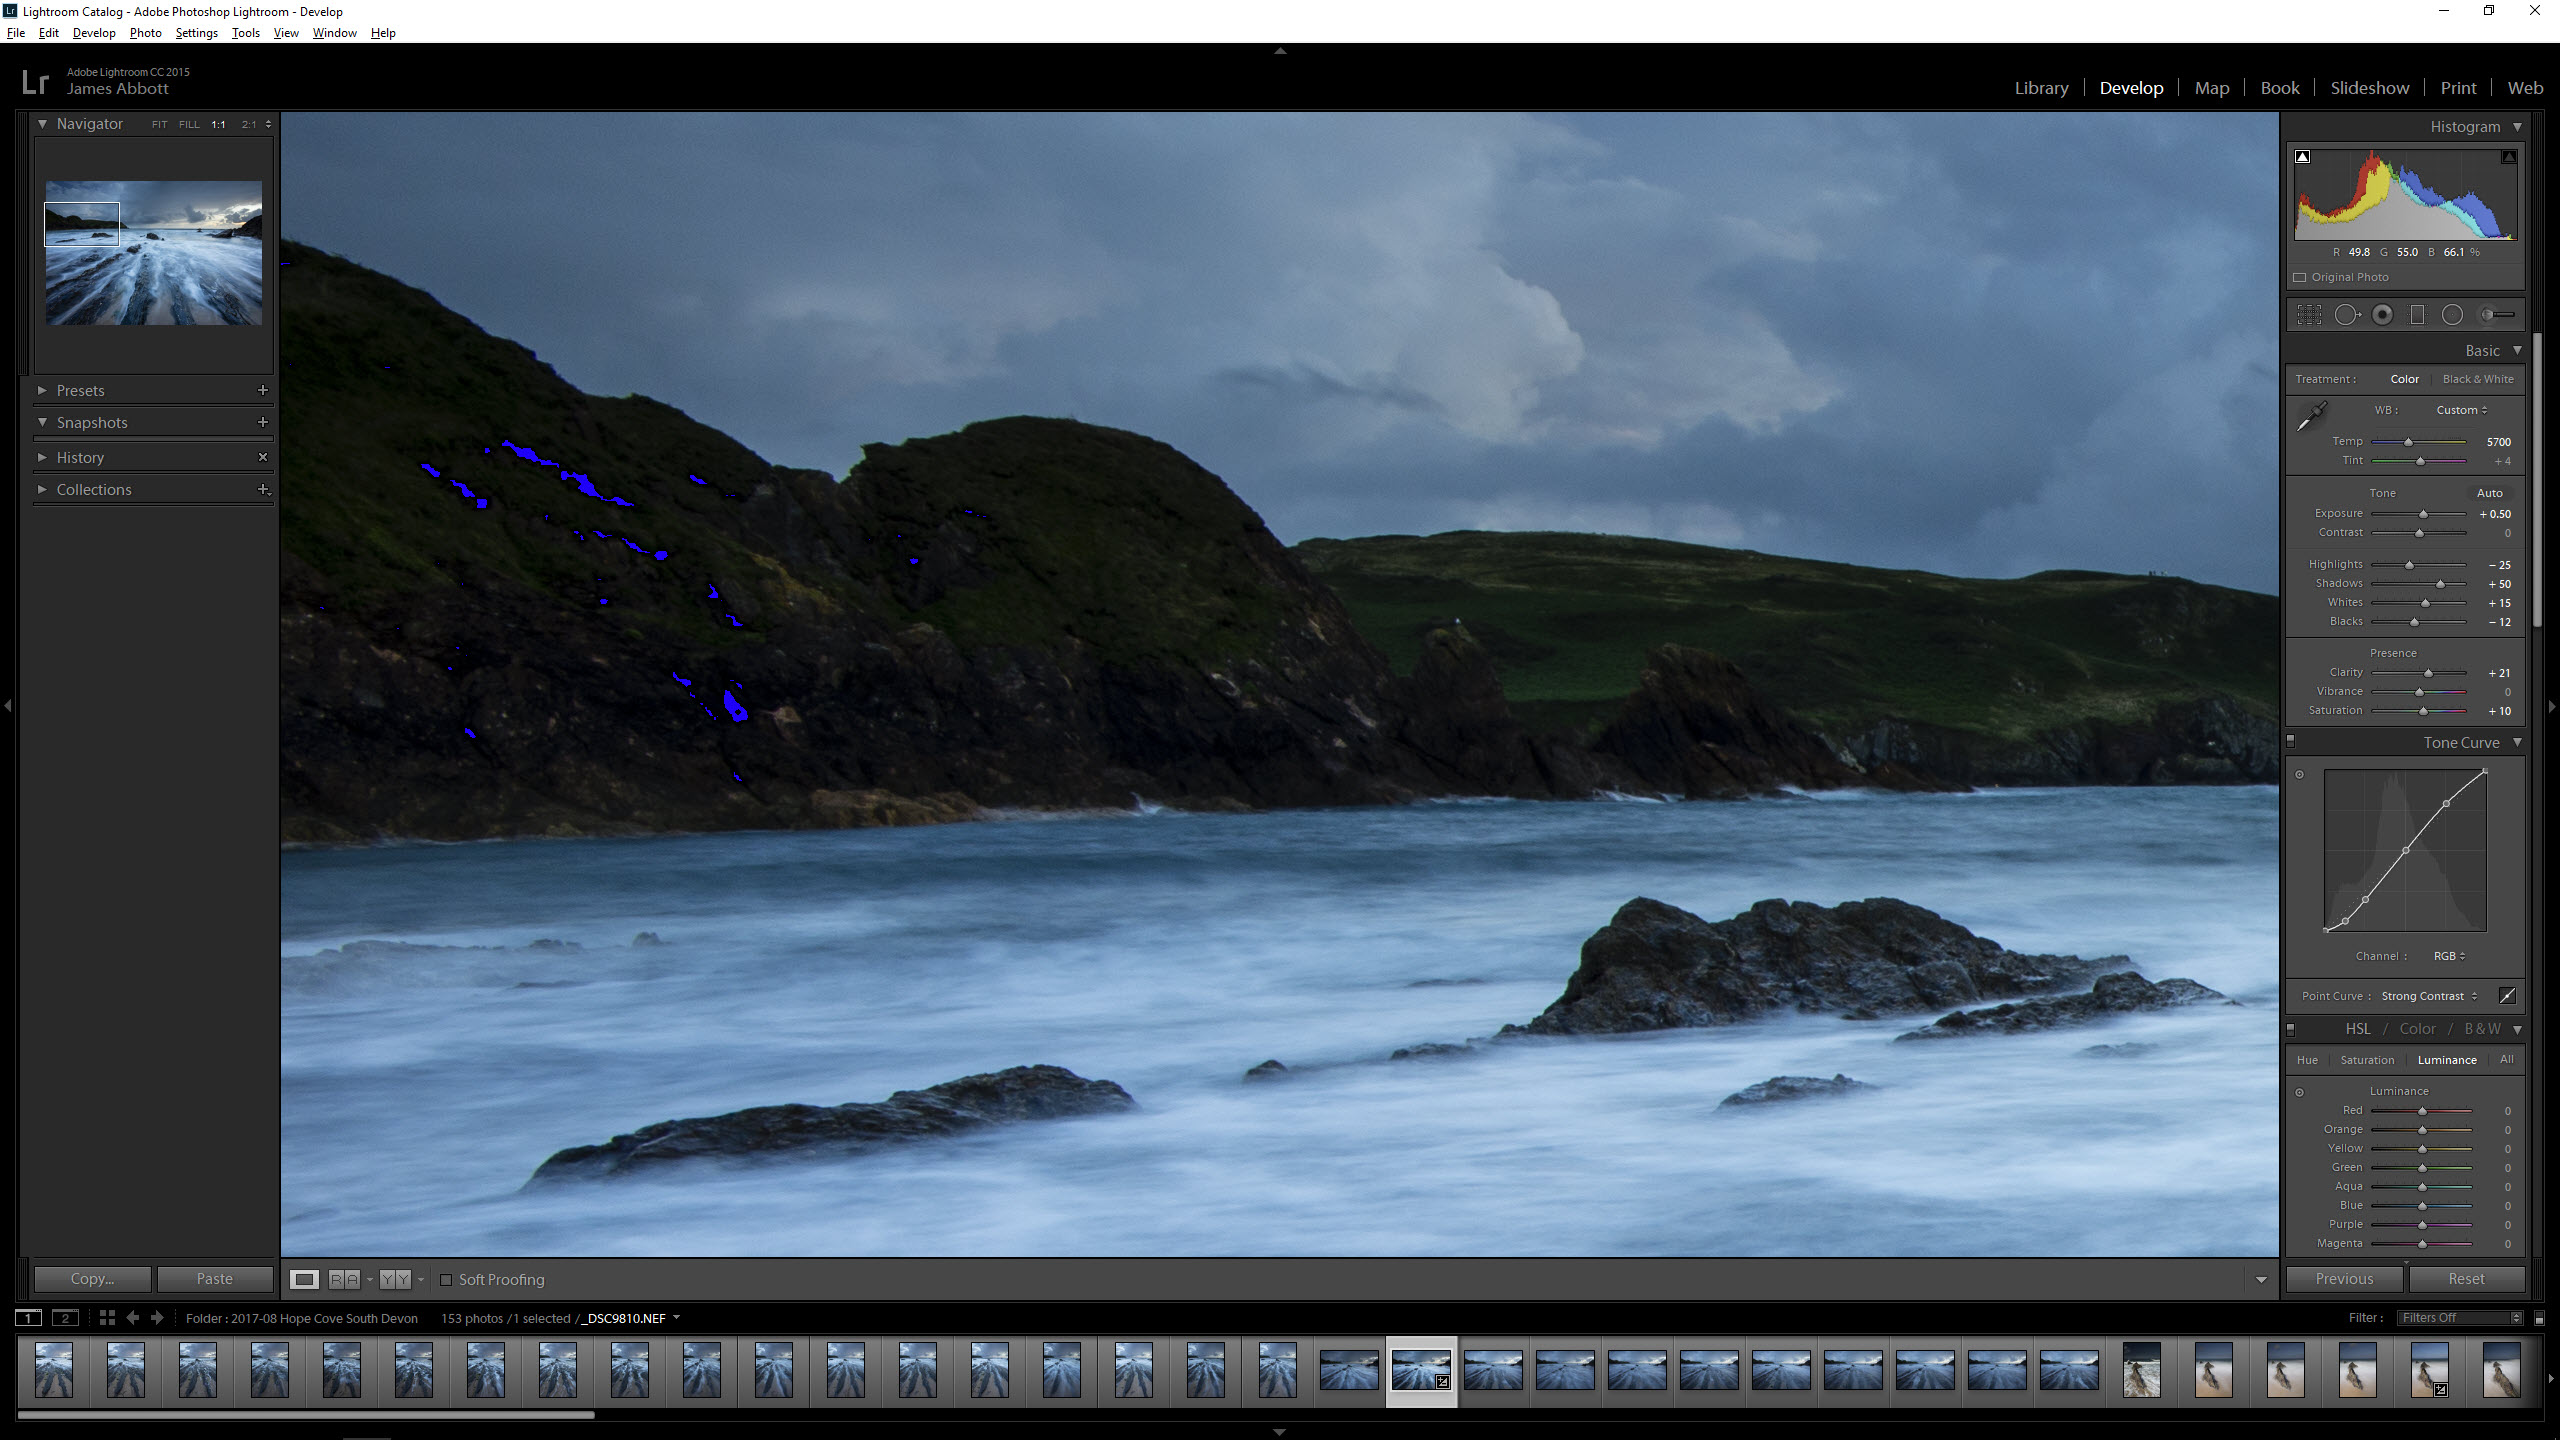
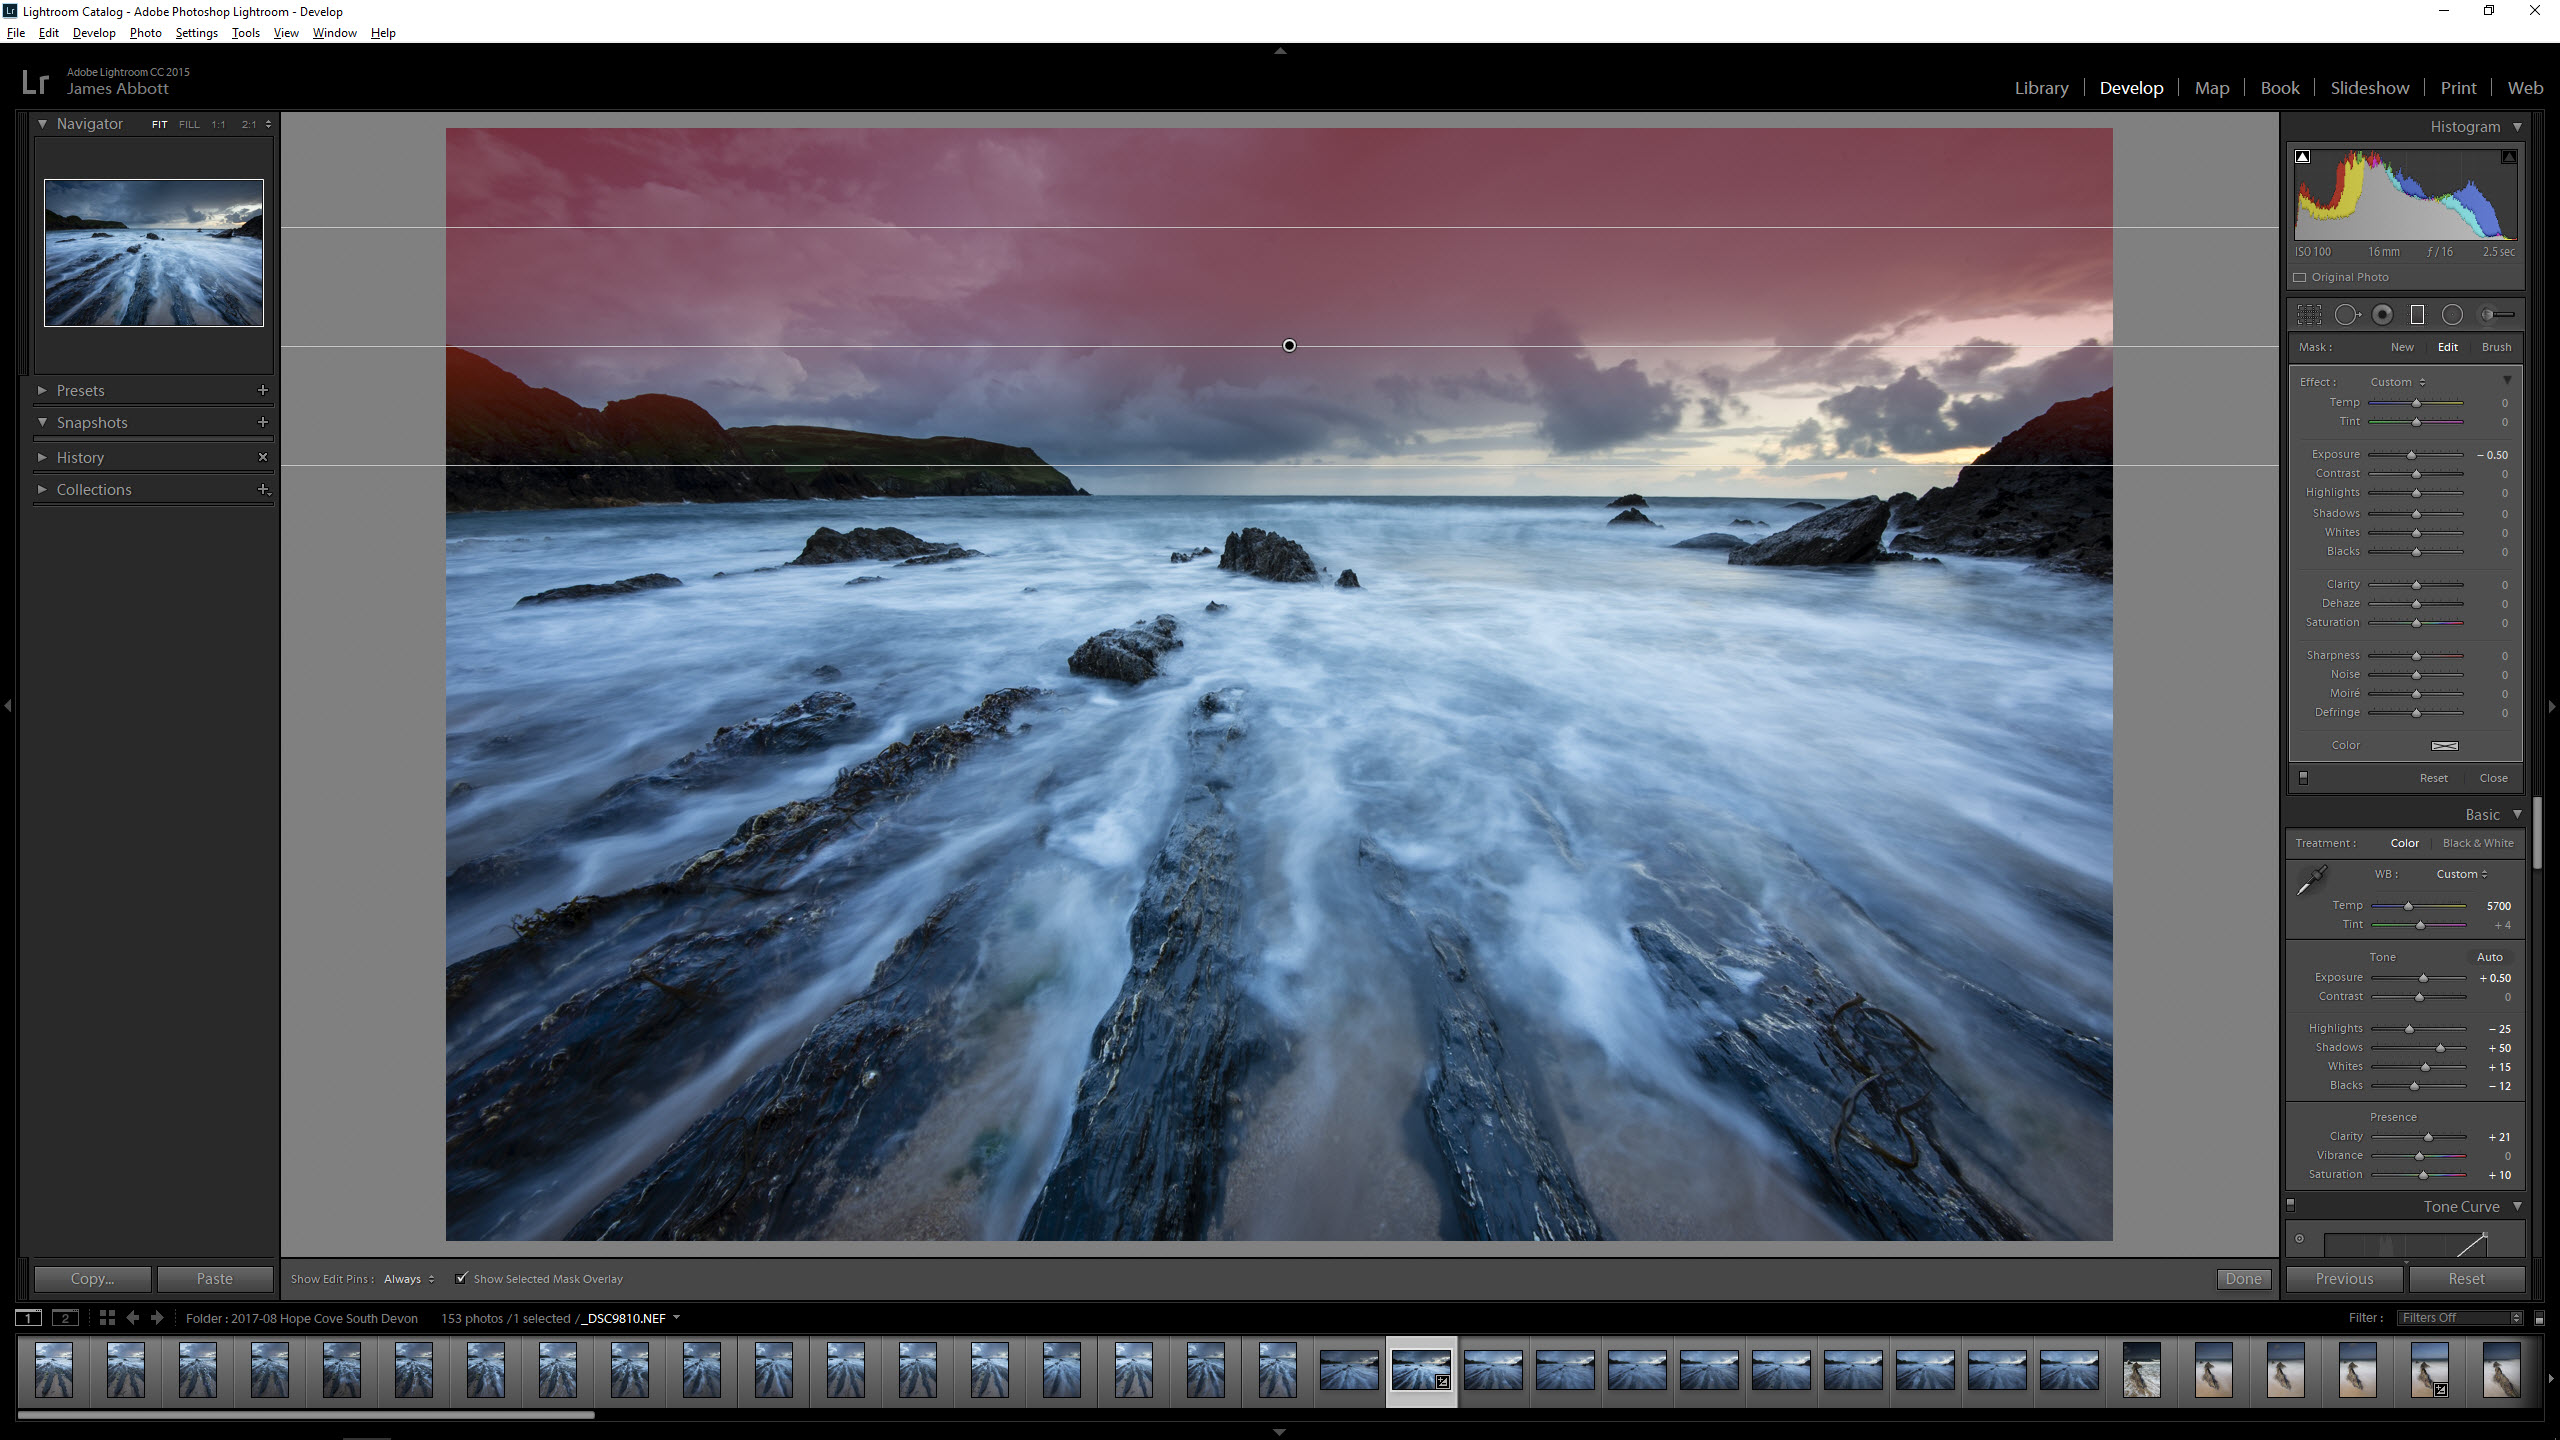
Just like the histogram on your camera, the histogram in Lightroom is a great way to check the range of tones in your images as you process them. Shadows are represented on the left of the graph, midtones in the centre and highlights on the right. In most, but not all, situations you’ll want to make sure that the left and right ends of the graph don’t touch the ends of the histogram, as this means those tones have been 'clipped' and the corresponding detail lost. In the screen shot above the blue patches on the cliffs on the left indicate lost shadow detail, but in this case the area is so small it’s not worth worrying about.
6. Localised adjustment tools
While the sliders in Lightroom's Basic and other panels enable you to make 'global' adjustments across an image, there are also three tools for applying adjustments locally to specific areas. The Graduated Filter enables you apply adjustments using a linear gradient, for example to mimic the effect of an ND grad lens filter. The Radial Filter does a similar but allows you to create circular or elliptical gradients. The Adjustment Brush enables you to paint adjustments into specific parts of an image. Pressing O on your keyboard toggles the visibility of the mask for these adjustments, and both the Graduated and Radial Filters include a brush to enable you to edit the mask.
7. Applying lens corrections
The Lens Corrections panel enables you to fix distortions introduced by your lenses, such as chromatic aberration, vignetting and 'converging verticals'. If your lenses are included in Lightroom's lens database then corrections can be applied by checking the Enable Profile Correction box; Lightroom can usually read EXIF data to find the right lens, but sometimes you have to select the lens manually. If a lens isn’t in the database you can make corrections manually with ease. And even with a profile enabled you can fine-tune distortion and vignetting corrections manually using the sliders.
8. Reduce high-ISO noise
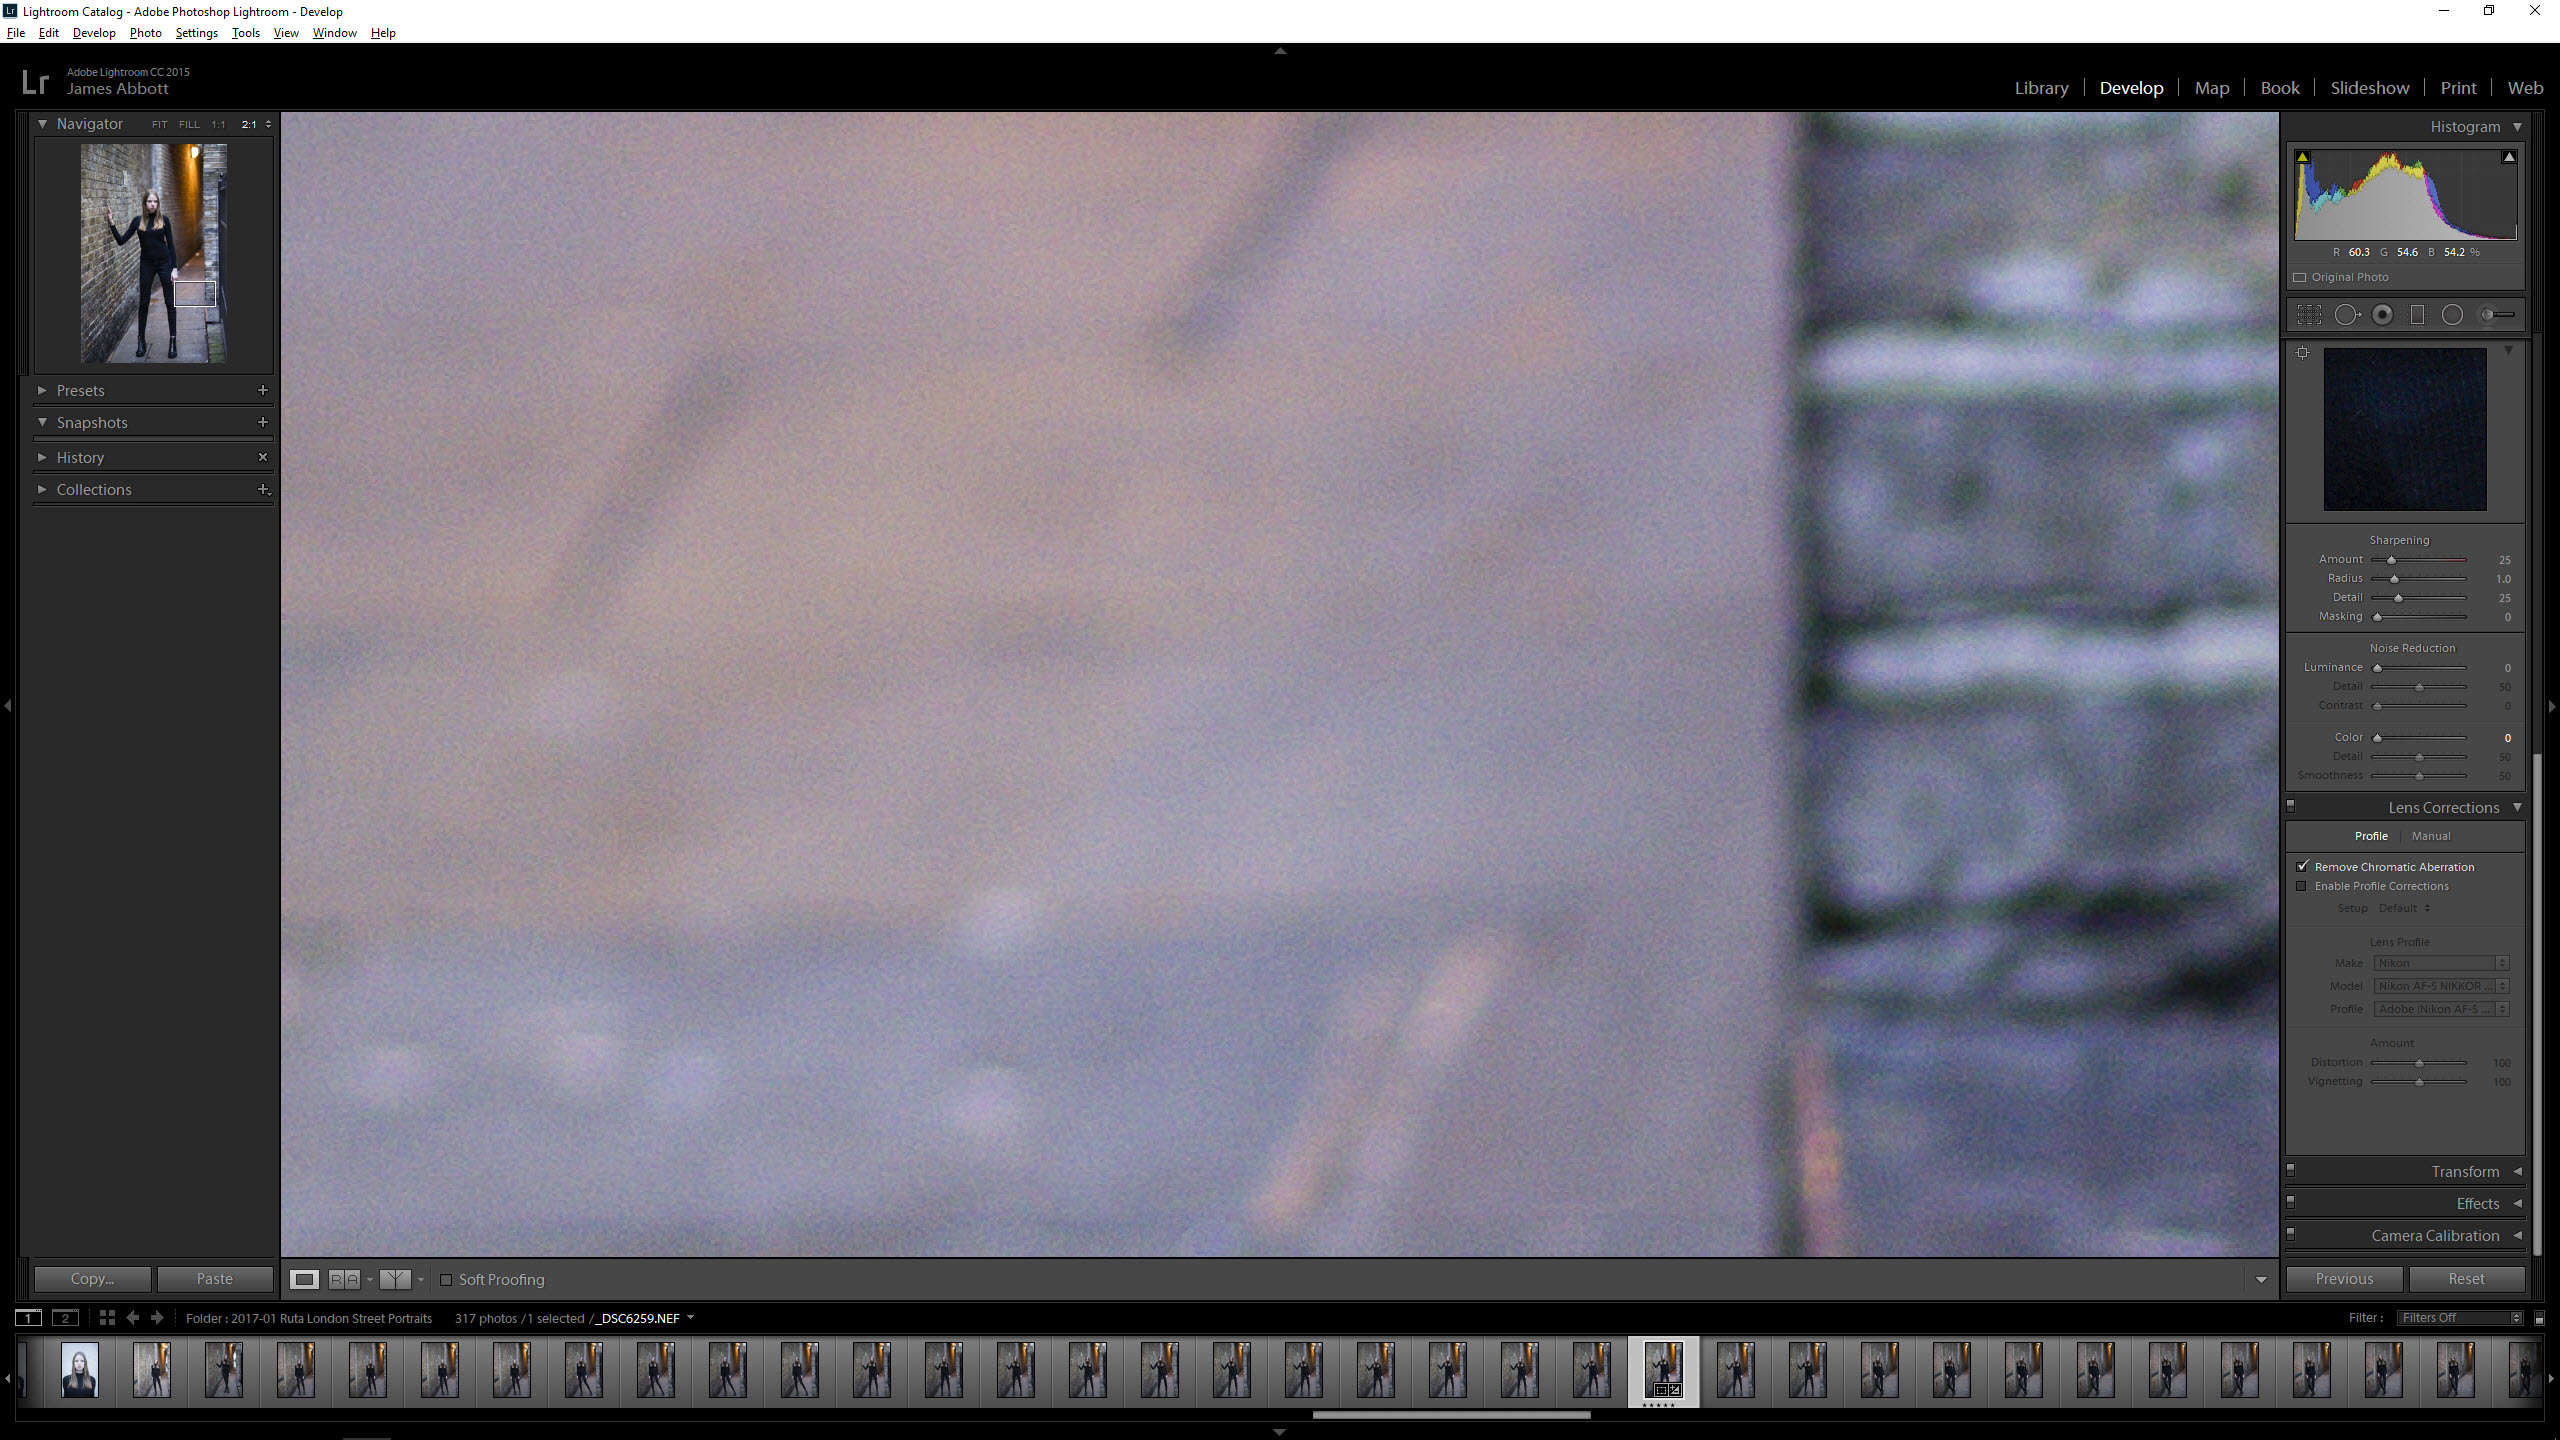
The latest digital cameras are very good keeping noise levels low at high ISO settings, but they’re not yet perfect, and Lightroom includes tools that enable you to reduce, and sometimes completely remove both luminance and color/chroma noise. Luminance noise is the grainy texture you see in high-ISO images, while color noise takes the form of flecks of color. In Lightroom the Color adjustment is set to 25 by default and can often be lowered, while the Luminance adjustment is set to 0, and needs to be applied with care to avoid blurring detail.
9. Correcting perspective problems
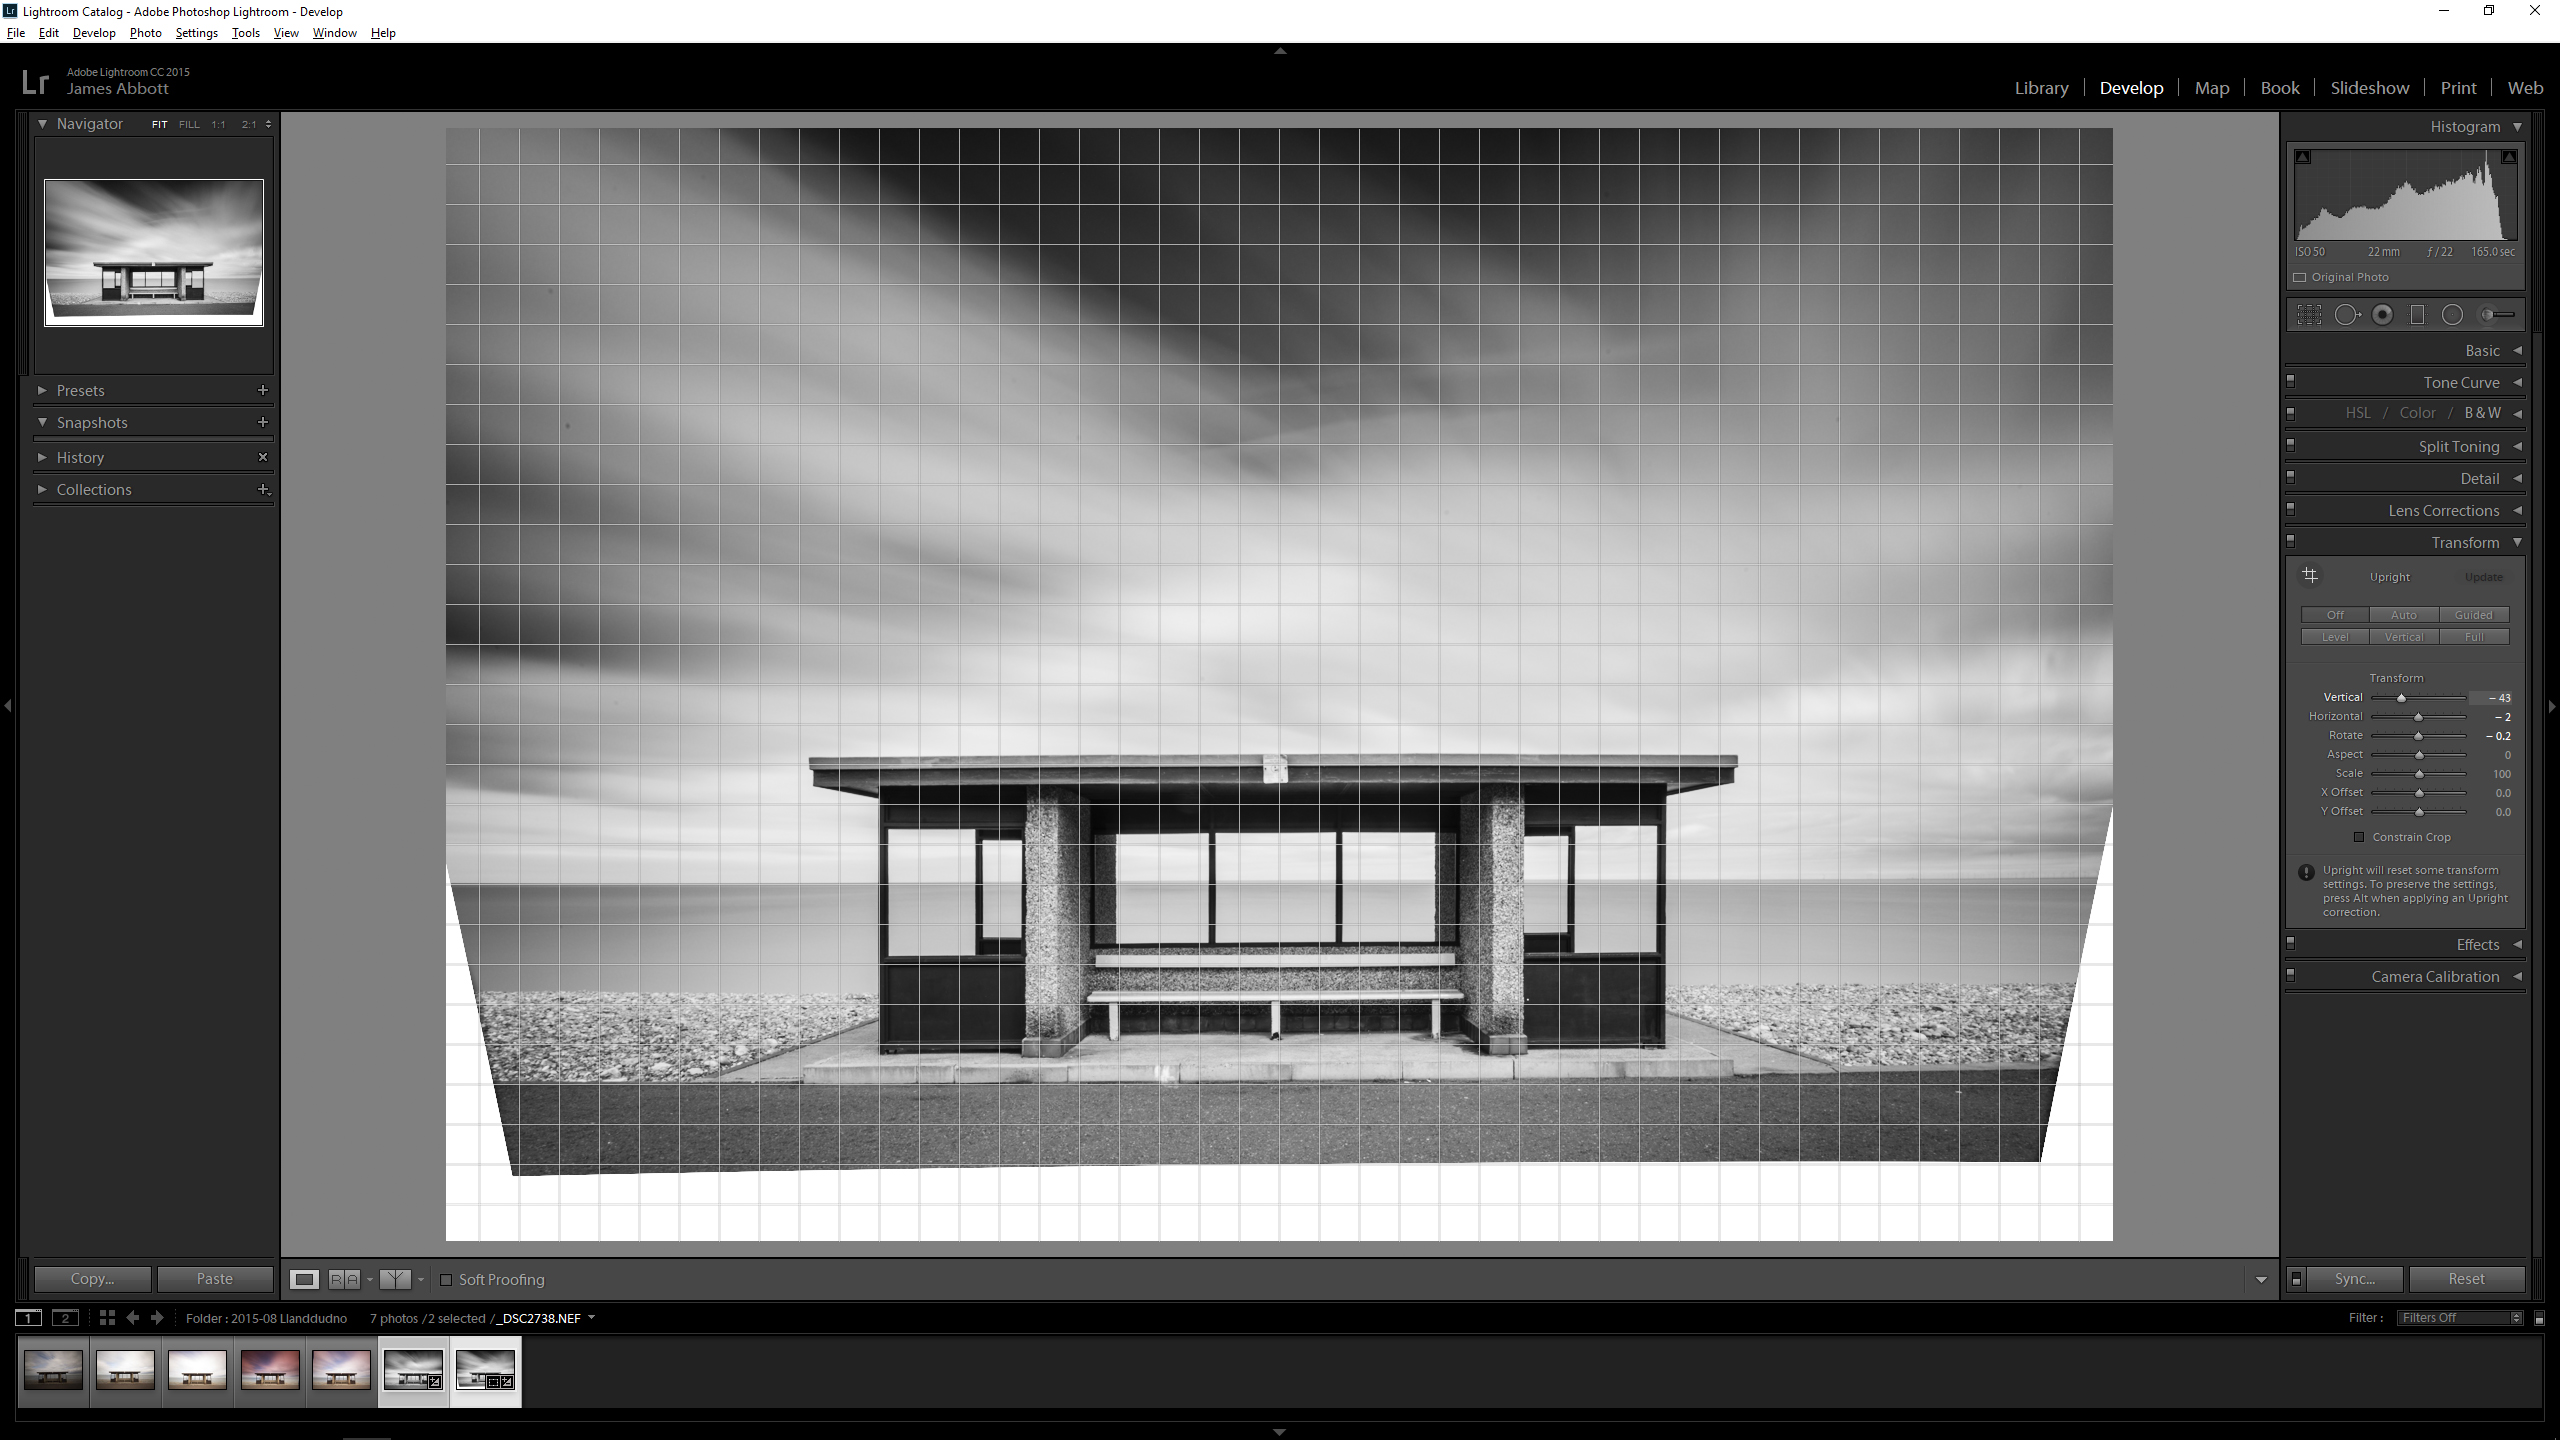
If you take a shot with the camera pointing upwards or downwards at your subject, the resulting images will suffer from converging verticals, while if you’re not square-on to the subject, shooting slightly from the side, the image will exhibit converging horizontals. These distortions can be remedied to a degree using the Transform tab, and within this there are manual, Auto and Guided controls. It’s a feature that can sometimes save an image that's perfect aside from such distortions.
10. Exporting Images
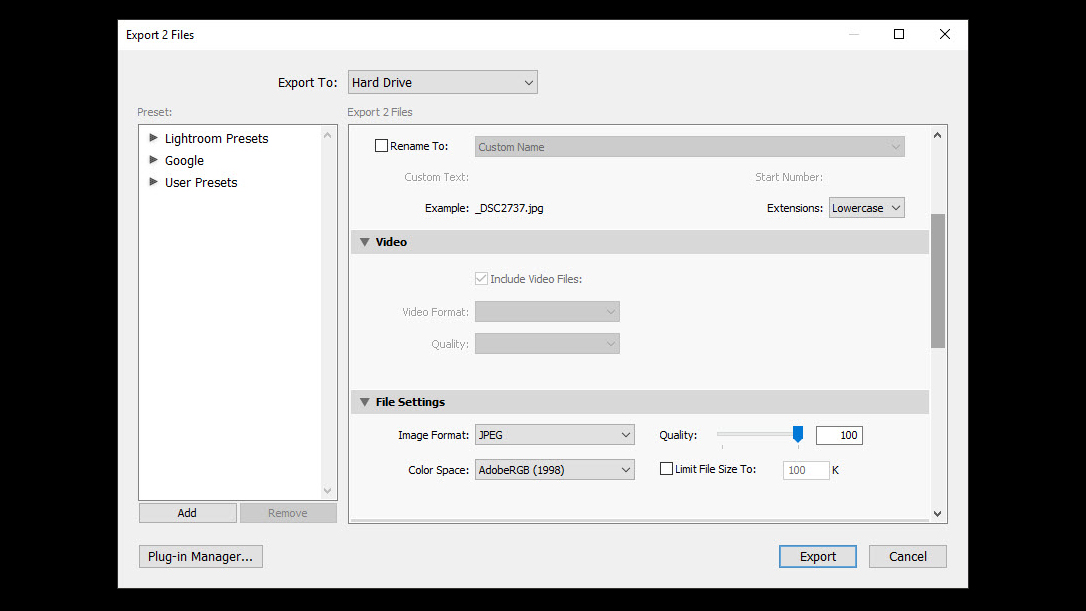
When you've made all your adjustments it’s time to export your image as a JPEG, TIFF, PSD or other file type; if you’re processing a raw file it needs to be converted to a more usable file format. To Export an image press Ctrl/Cmd+Shift+E or go to File > Export. In the Export dialog you can select a number of parameters such as file type, naming convention, quality, color space and where the file should be saved. It’s all fairly self-explanatory, and you can even create presets to save time in the future.
Join Adobe Creative Cloud and save 15% on your first year
TechRadar has teamed up with Adobe to offer a special discount on Creative Cloud All Apps membership. For the first year, you'll pay just $45.04/£42.46 per month – down from the regular price of $52.99/£49.94. You'll get access to Adobe's full suite of creative apps, including Photoshop, Lightroom and Illustrator, plus 100GB cloud storage for your projects. Offer ends August 26 2018.

James Abbott is a professional photographer and freelance photography journalist. He contributes articles about photography, cameras and drones to a wide range of magazines and websites where he applies a wealth of experience to testing the latest photographic tech. James is also the author of ‘The Digital Darkroom: The Definitive Guide to Photo Editing’.

 Become a TechRadar Insider


