How to create your own free computer forensics kit on a USB drive
Sign up for breaking news, reviews, opinion, top tech deals, and more.
You are now subscribed
Your newsletter sign-up was successful
Introducing Backtrack 4
Backtrack 4 is based on a stripped-down version of Ubuntu Linux, which is a popular choice for home users because of its ease of installation and use. The makers of Backtrack 4 have stacked the application with special security and forensics tools. These make it extremely useful to network security specialists and police forces, as well as anyone interested in knowing exactly what's happening on their own networks and any second-hand machines they've bought.
Despite being Linux-based, Backtrack will grant you complete access to data stored on computers running any version of Microsoft Windows. That's because Windows isn't running when Backtrack is booted from a DVD or USB pen drive.
Linux can read Windows disks, but it doesn't obey the file permissions, so the machine's hard disk simply seems to contain a lot of files waiting to be accessed. As well as booting and running directly from a DVD as a Live CD installation that never installs on your computer, you can also install Backtrack on a hard disk as the only operating system, or next to an existing Windows installation.
If you plan to install Backtrack on a USB pen, you'll need one with a minimum 2GB capacity. This booting option brings Backtrack closer to Microsoft's COFEE than any other option.
First, you need to download the Backtrack 4 ISO file, which is just under 1.6GB. You can download it from the Backtrack site directly or click the 'Torrent' link on the same page. There are multiple sources from which you can leech parts of the file in parallel, so in practice it's faster to download the ISO as a torrent.
Once the ISO has downloaded, use it to make a bootable DVD. We've listed a free and easy to use CD/DVD package capable of making bootable disks in the Resources section. When that's done, test your work by ensuring your BIOS is set to boot from CD/DVD before attempting to boot from your hard disk, then insert the DVD and reboot the PC. Select the option to boot with a screen resolution of 1,024 x 768.
Sign up for breaking news, reviews, opinion, top tech deals, and more.

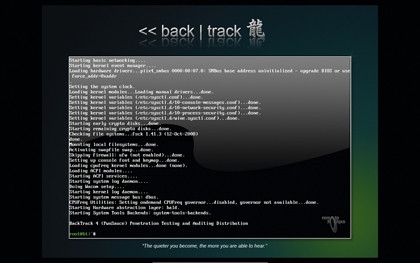
When Backtrack has booted, you'll see a command line. To start a desktop environment, enter the command startx and press [Enter]. After a few seconds, the standard KDE desktop will start.
Find your way around
Backtrack is loaded with all the obscure little utilities used by professional security consultants. Many of them are fiddly command-line programs, but a lot have graphical front ends that make them simple to use.
Hover your mouse over the icons on the menu bar at the bottom of the desktop and KDE will tell you the name of each one. We'll use the names that appear when you do this to make thing easy to identify here.
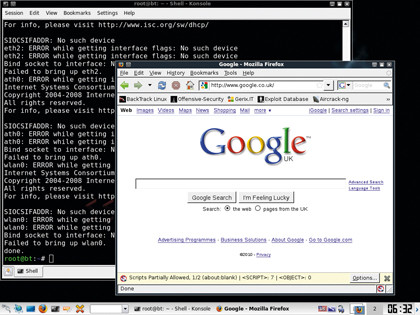
The network interface cards are designed for network security work, and are disabled by default when you boot up Backtrack. This is because if anyone (or anything) is listening to network traffic, the last thing you want to do is announce your presence by requesting an IP address over DHCP.
To enable networking, click the black Konsole icon to open a terminal window, then enter the following command:
/etc/init.d/networking start
After a moment or two, during which lots of verbiage scrolls up the screen, open Firefox (the icon is next to the terminal on the menu bar) and enter www.google.com as a URL. You should see the world's favourite search engine appear.

Much like the Start button in Windows, the left-hand icon on the menu bar brings up the installed programs and system configuration options. This is called the K menu and is organised into subject areas. The one we're most interested in is the first: 'Backtrack'.
Click on this and you'll see a submenu containing categories of hacking programs, with which Backtrack has been preloaded. Clicking one of these reveals nested subcategories right down to individual programs.
Map the neighbourhood
Let's begin by scanning the local network for hosts (another name for networked computers). Starting from the K menu, select 'Backtrack | Network Mapping | Identify Live Hosts | Autoscan'. A wizard will appear. Click 'Forward' and you'll be asked for the name of a network to scan.
Leave this as 'Local network' and click 'Forward' again. The next screen asks where the network is located. We're scanning the local network, so accept the default of it being connected to your computer by clicking 'Forward' once more.
Next, select the default network adaptor. This will usually be called 'eth0'. If you don't see any adaptors in the pull down menu, it's because you didn't start networking earlier. Close Autoscan, start networking and run Autoscan again. Click 'Forward' one last time to confirm what you've asked Autoscan to do, then maximise the user interface that appears so you can see everything.
Autoscan now contacts every possible IP address on the local subnet to see if there's a machine connected to it. If there is, it adds an entry to the left-hand pane. Notice that in some cases, Autoscan can even tell you the username that's logged in.
When you select a host, Autoscan will attempt to gain more information about it for you. A wizard will also appear, asking you to add it to the Autoscan online database. Cancel this. You can go between tabs between the interface's right-hand panes to display a summary of the machine, detailed information or an inventory.
Autoscan works by sending a stream of specially crafted packets to each host in turn. These are designed to return information about the running system and can give away a surprising amount of information. Autoscan is a useful tool for detecting whether your neighbours are leeching your Wi-Fi, for example. If you don't recognise a host, it's probably an intruder – so up your security!
Current page: Introducing Backtrack 4
Prev Page Evidence gathering Next Page Wipe passwords and recover passwords