How to format an external hard drive for PS4
You’ll need to format an external hard drive for PS4 before you use it as extended or backup storage. We show you how to get started...
Wondering how to format an external hard drive for PS4? We've got you covered. If you're needing more space to store games, then an external HDD (hard disk drive) or SSD (solid state drive) is an absolute must.
While it may sound like a tricky job, you'll be pleased to learn that regardless of whether you have the Sony PS4 (Slim), the PS4 Pro or just your regular PS4, it's never been easier or more affordable to add an external drive to your games console.
And the benefits of doing so are huge! Not only does learning how to format an external hard drive for PS4 allow you to keep more games on your console, you'll also be able to create a backup which will allow you to preserve all that important gaming data.
Regardless of what you're wanting to use the external drive for, the best PS4 external hard drives 2022 are super easy to set up and just as easy to use, and don't worry if you've never done it before, that's what were here to help you with.
If you have a smaller budget or you'd like to prioritize space or speed, you'll be happy to learn that there are a wide range of external hard disk and external SSD products available.
As ever, there are some technical considerations to bear in mind. One of the most important things is to make sure that your external hard drive or the best SSD that you've purchased is formatted properly, because you won't be able to use it without this step.
Sony makes it easy to handle this part of the process, and it’s simple to do on Windows and Mac OS X too. Below, we talk you through exactly how to format an external hard drive for PS4. Let's take a look...
Sign up for breaking news, reviews, opinion, top tech deals, and more.
Format your external HDD or SSD on your PS4
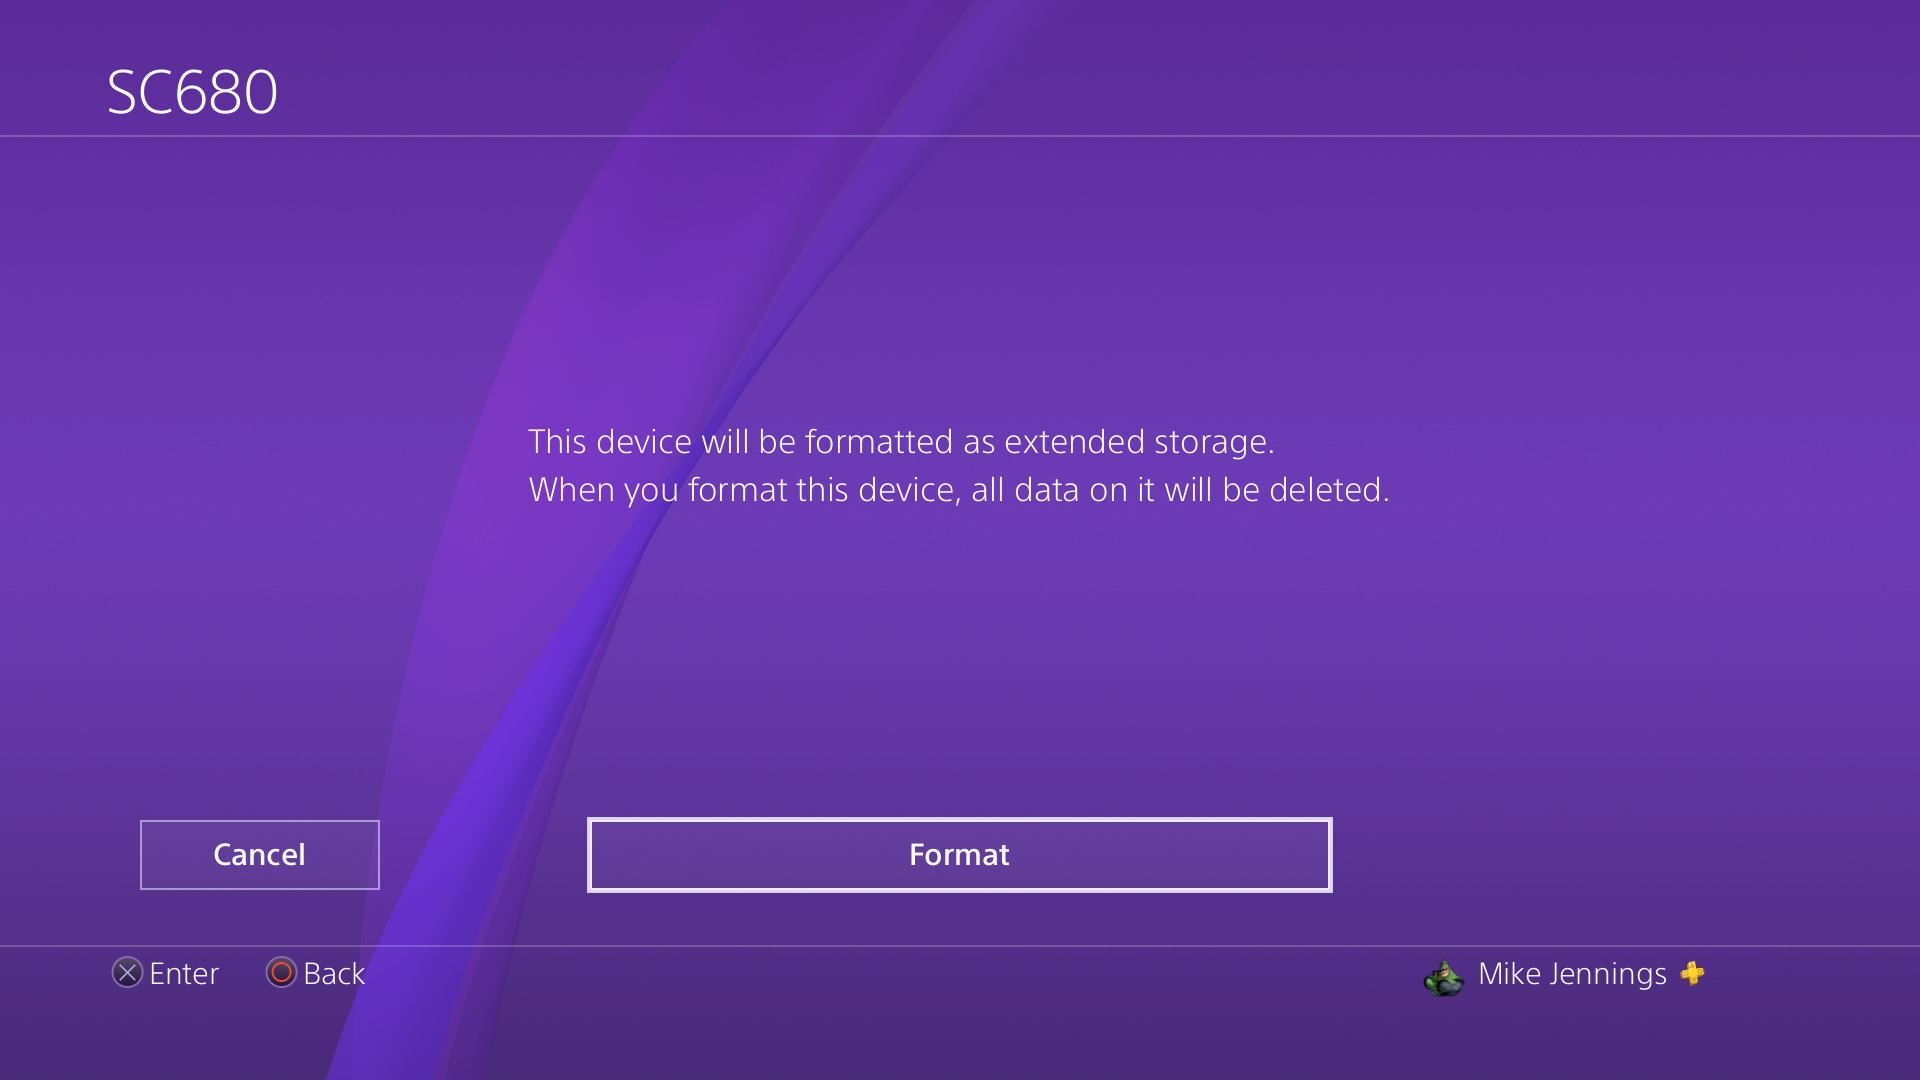
If you want to format an external hard drive for PS4, the process couldn’t be much simpler. This is because the PS4 uses its own encrypted file system when using a hard drive or SSD as extended storage.
All you’ve got to do is plug your drive into the console, head to the Settings menu, open Devices, and then USB Storage Devices. Pick the option to Format the drive as extended storage, and the console will take care of the whole process.
As ever, you do need to remember to use a USB 3.0 product with a capacity between 250GB and 8TB, otherwise the process won’t work. But that’s it.
If you want to use an external drive to store console backups the process is only a little more complex. This is because the PS4 doesn’t encrypt and format the entire drive when making backups – it leaves your hard disk or SSD free to be used for other tasks if you’ve got the space.
You’ll need to make sure your hard disk, SSD or USB drive is formatted using the FAT32 or exFAT file systems – the PS4 doesn’t support the NTFS file system. We recommend exFAT, because it supports files that are over 4GB in size.
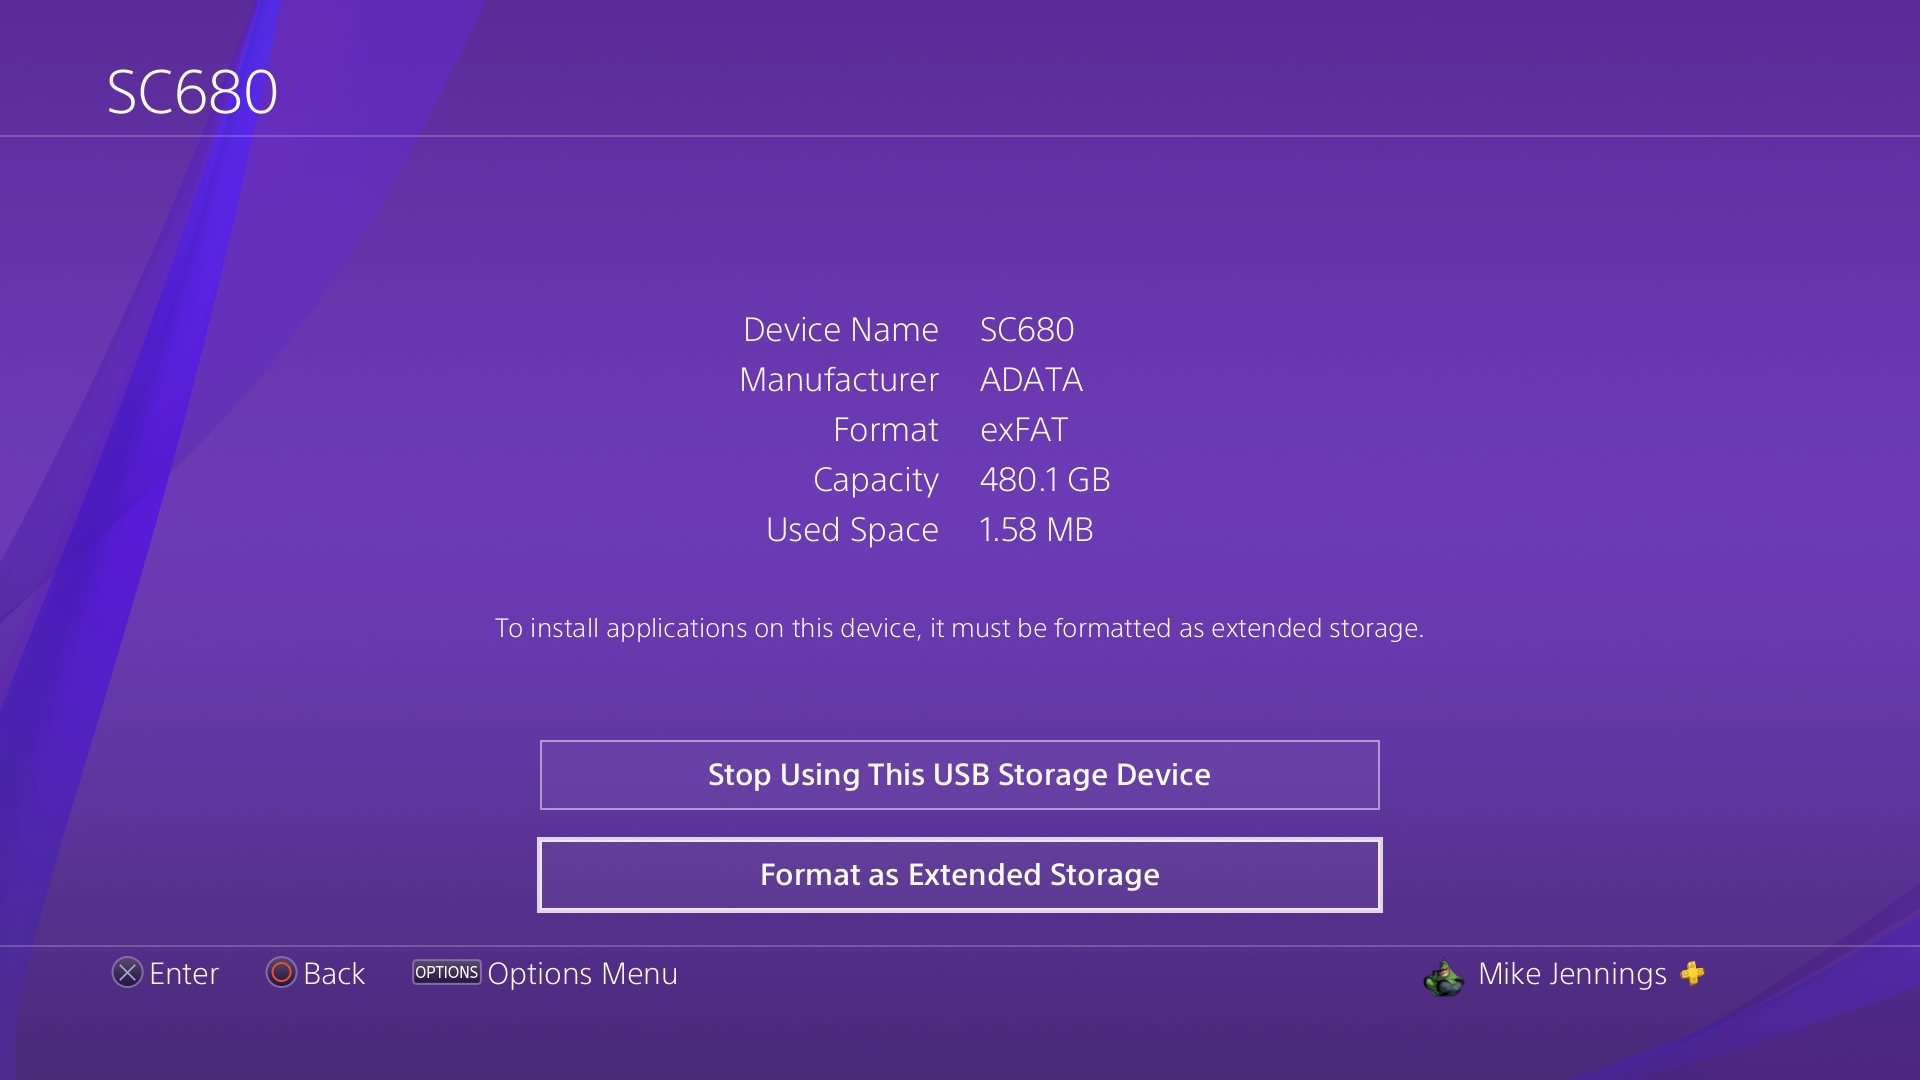
If your external hard disk or SSD is already using an appropriate file system then you can plug it into the PS4, head to the System menu, open the Back Up and Restore section and choose what you’d like to preserve. If you need to format the drive, you can do that on the PS4 too – head to Settings, Devices and USB Storage Devices, choose your drive, and then click the Options button. This will reveal a menu where you can format the drive as exFAT so it can be used for backups.
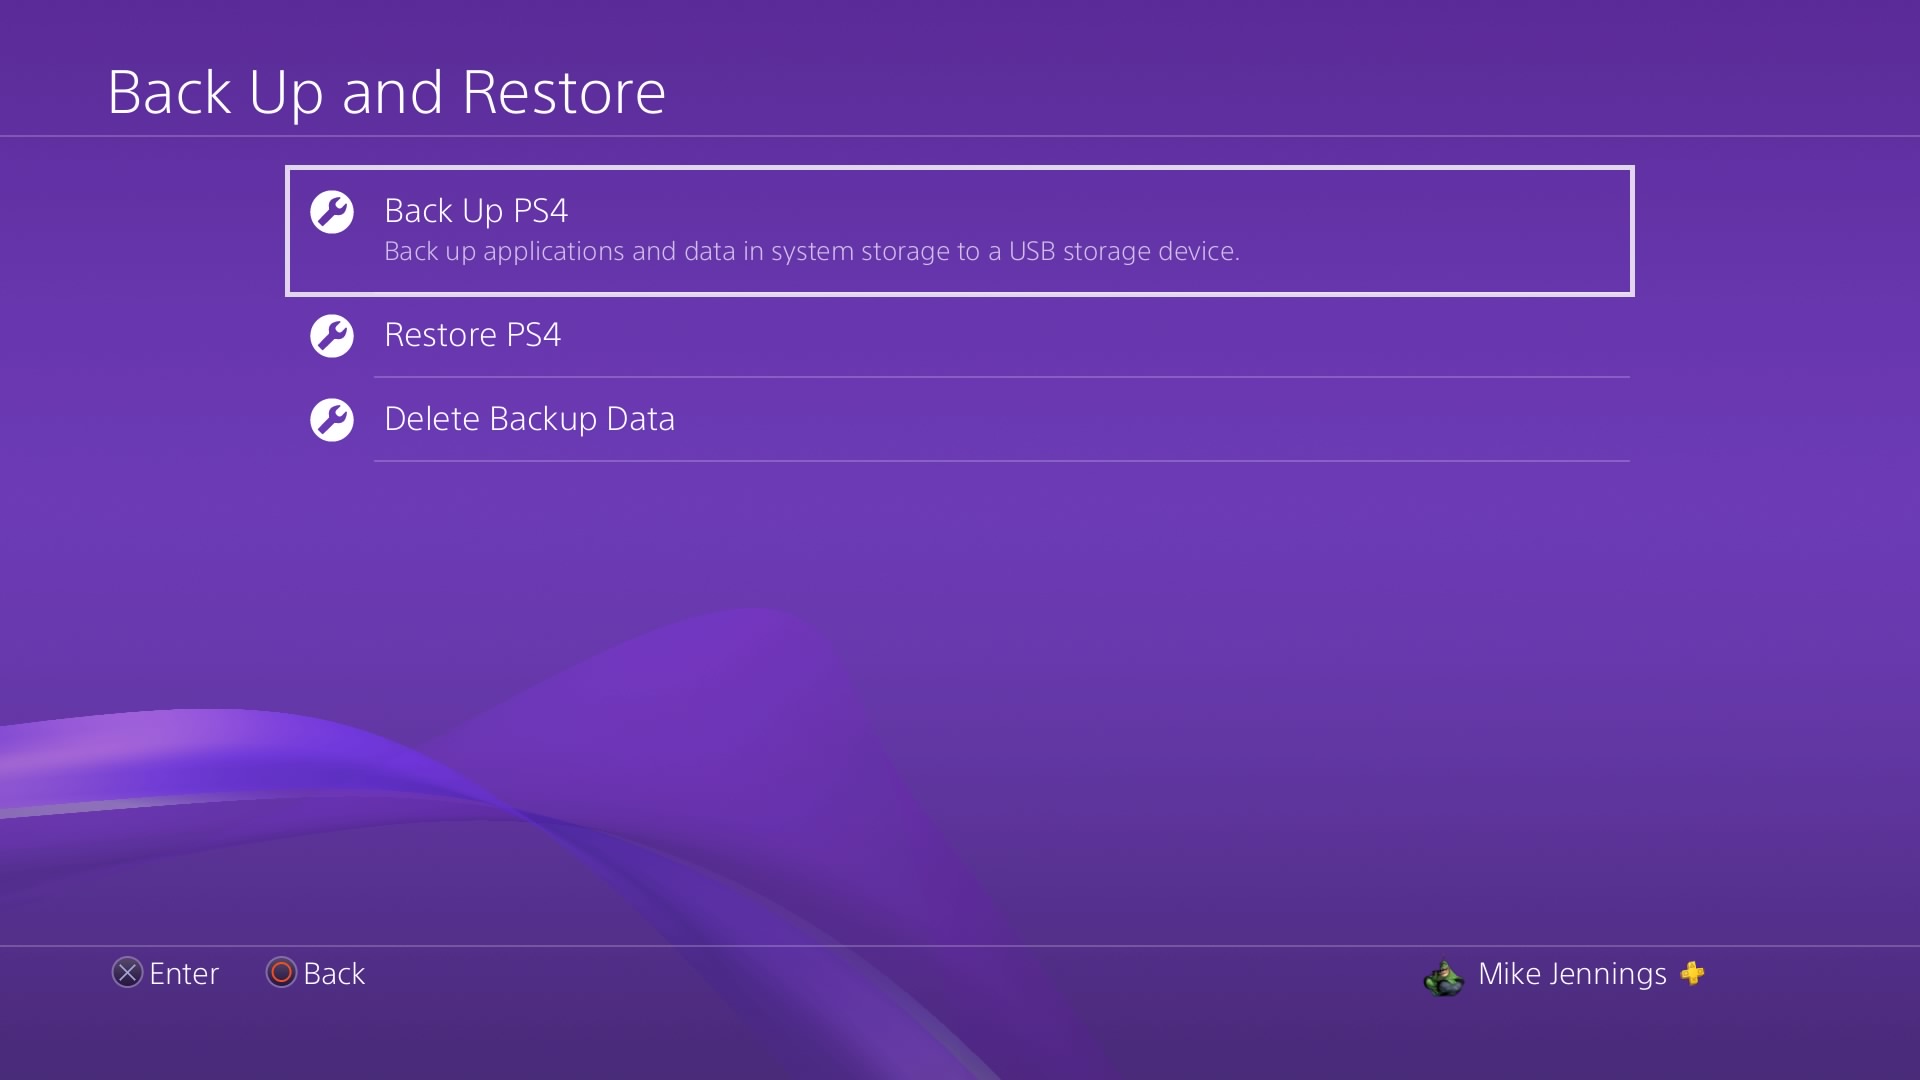
If you don’t want to use your PS4 or if your drive is already plugged into another machine, then it’s also possible to format it using your Windows or Mac OS X machine.
Format your external HDD or SSD on your Windows PC or laptop
There are a couple of easy methods for drive formatting on Windows, and they don’t change much – these instructions are for Windows 10, but they should be applicable for the last few versions of Microsoft’s operating system.
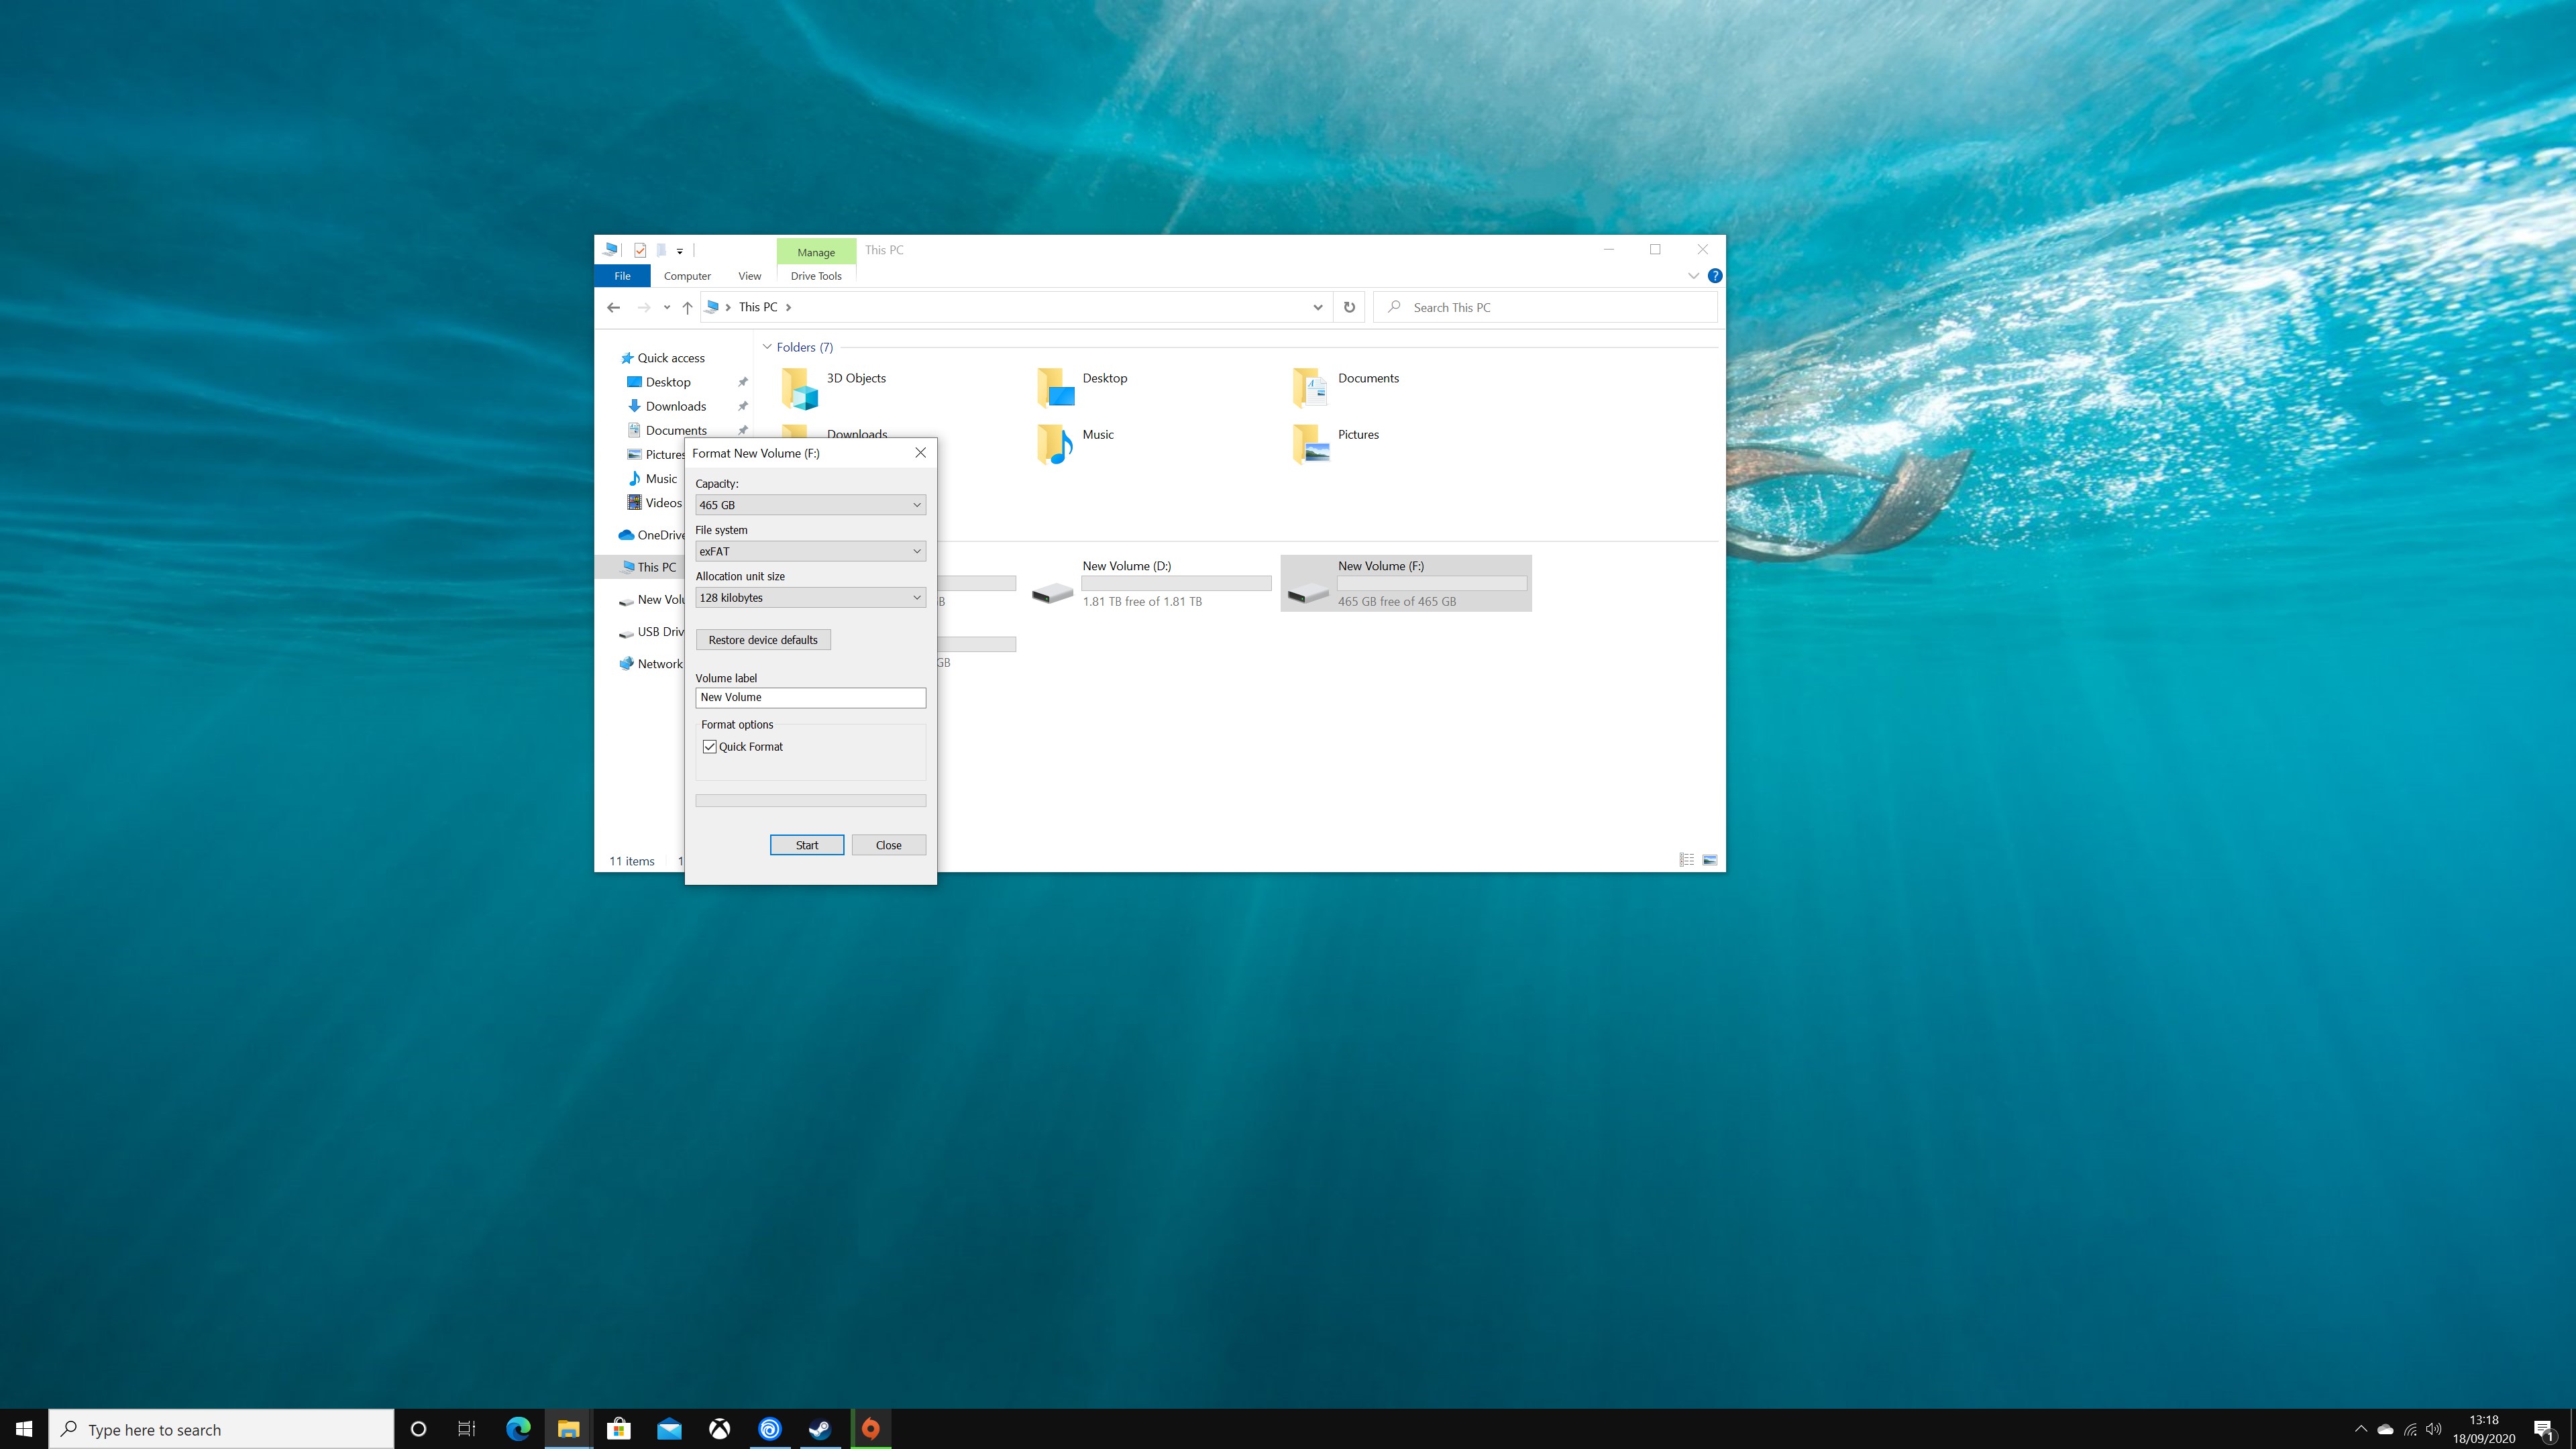
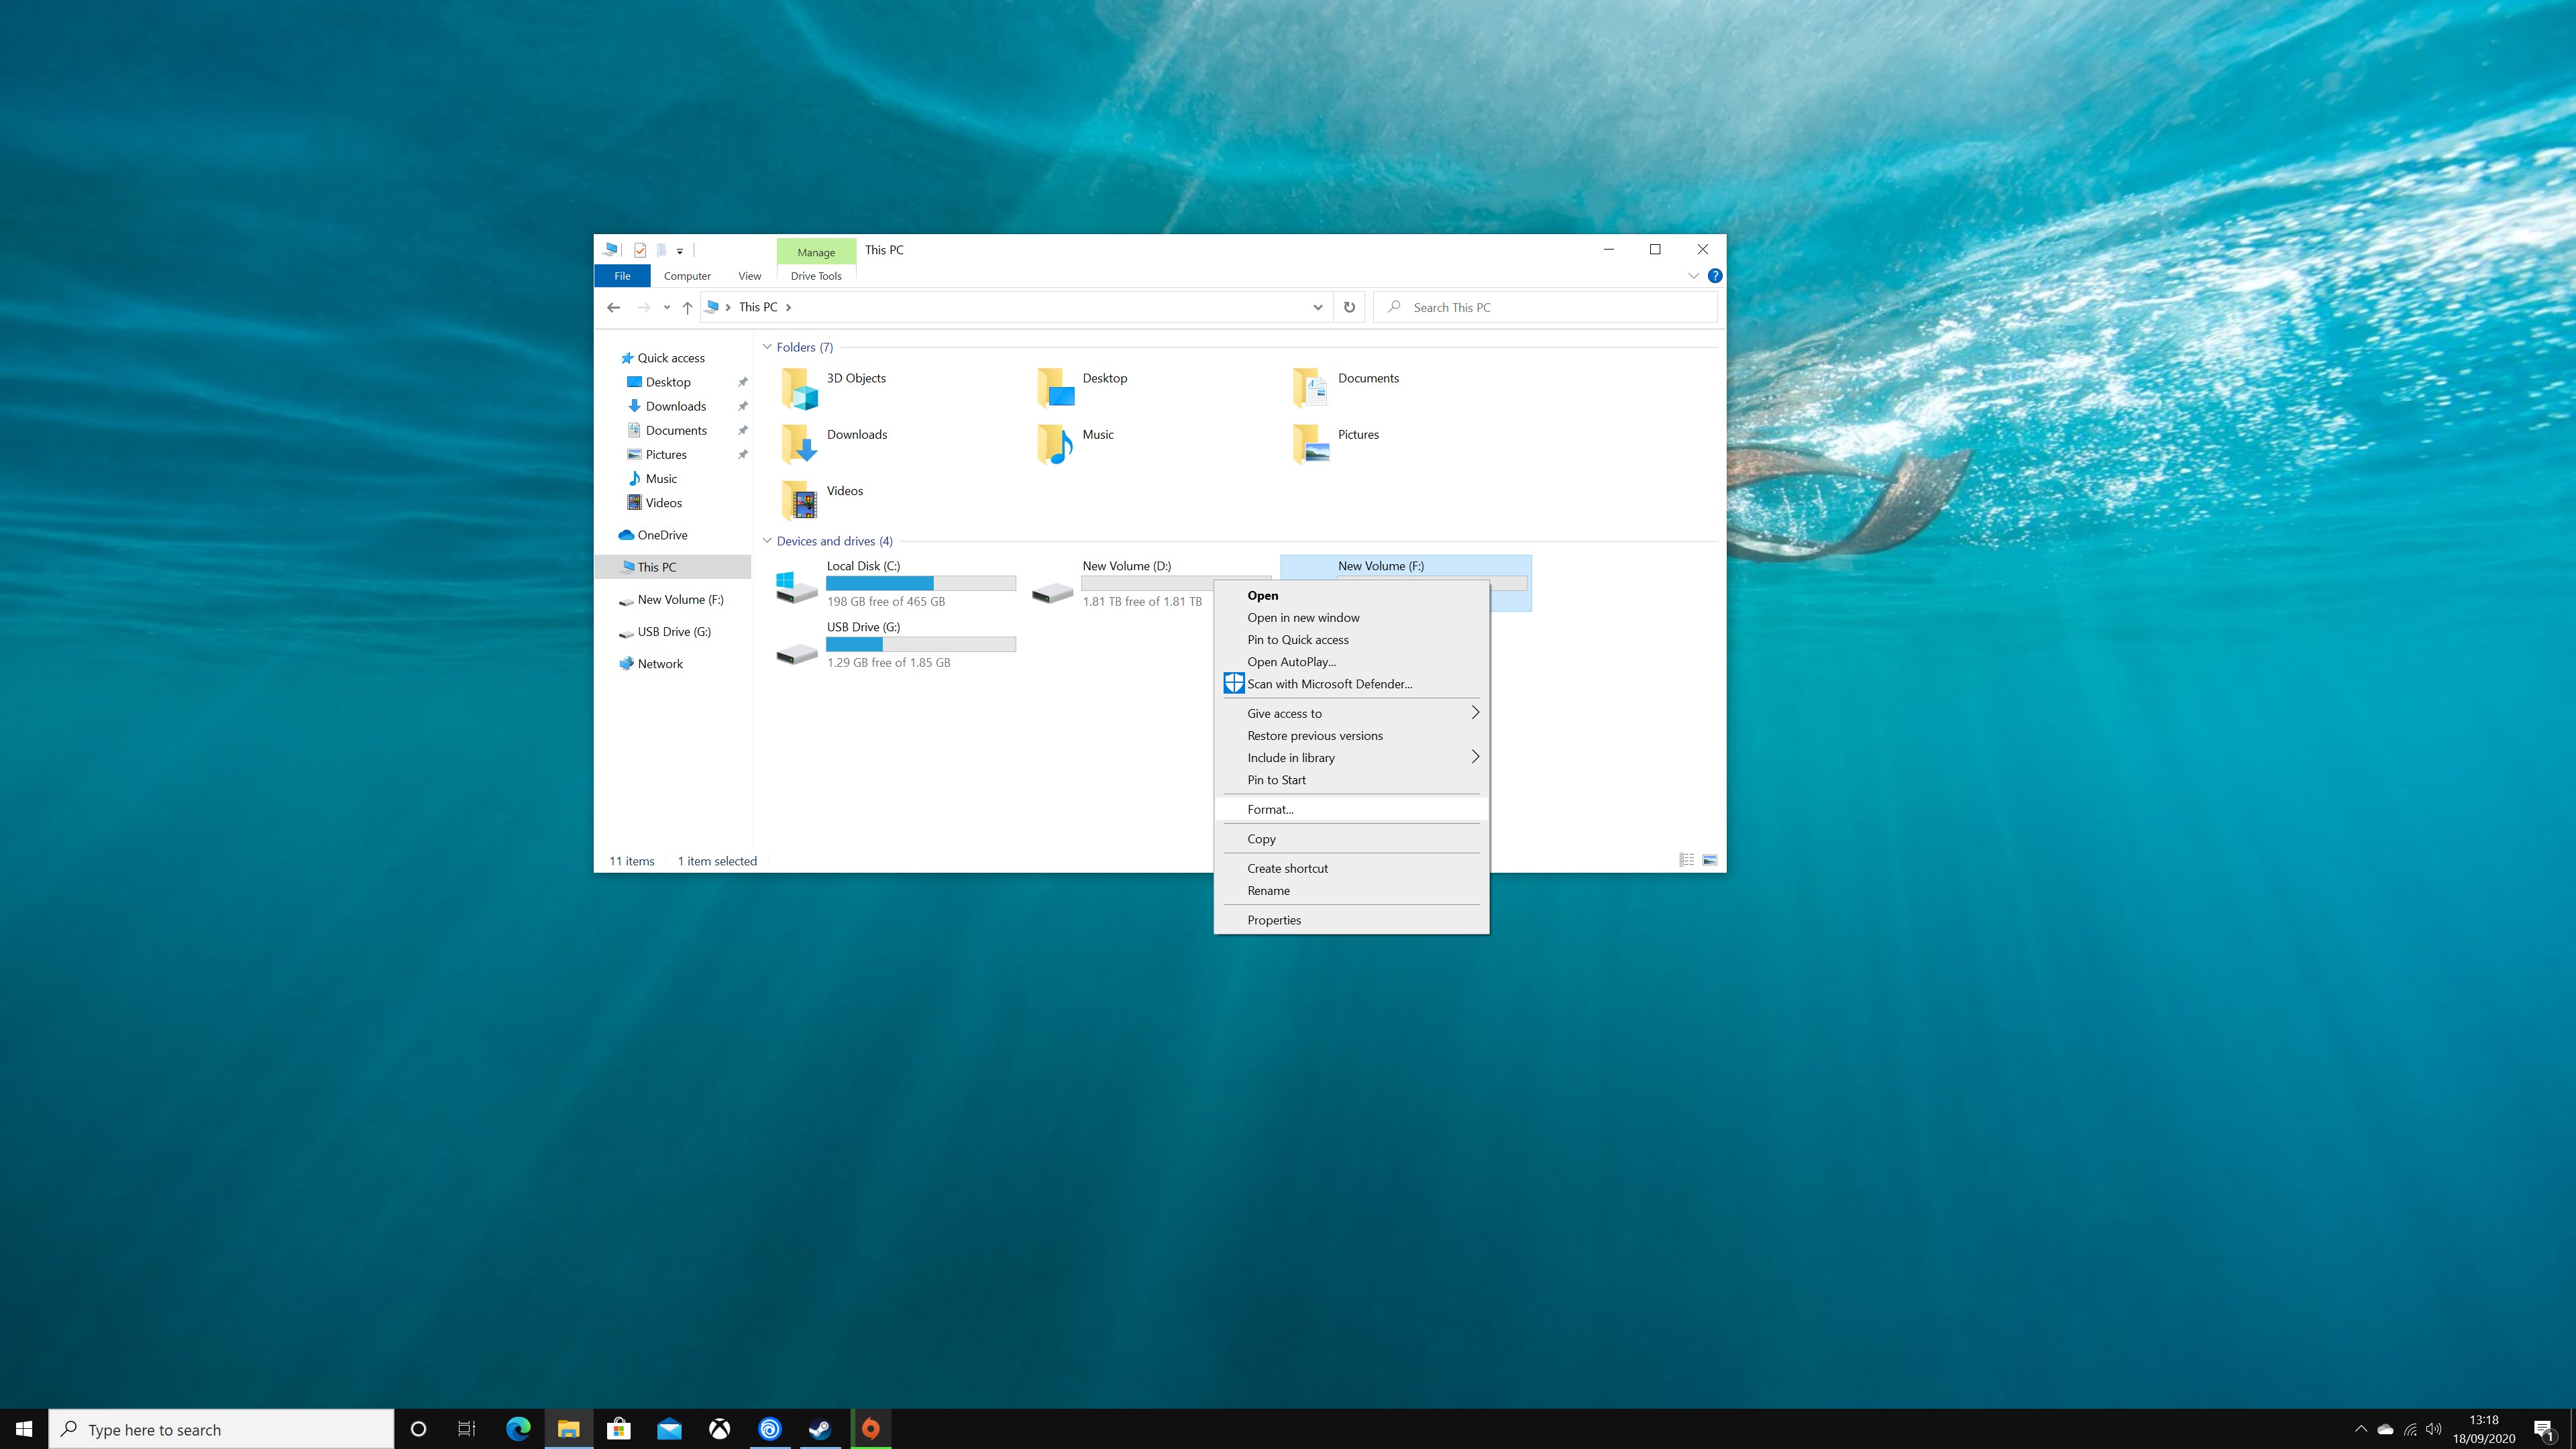
The easiest method involves plugging the drive into your PC or laptop and opening the File Explorer – the screen where you can navigate recent files and key folders. If you click on the This PC shortcut, you’ll hopefully see your external drive connected as a hard disk, right alongside your system’s main hard drive or SSD. If you see it, right-click, select Format, and then choose the exFAT option and start the process. That’s the only thing you’ll need to really change unless you want to rename the drive, and using the Quick Format setting is fine.
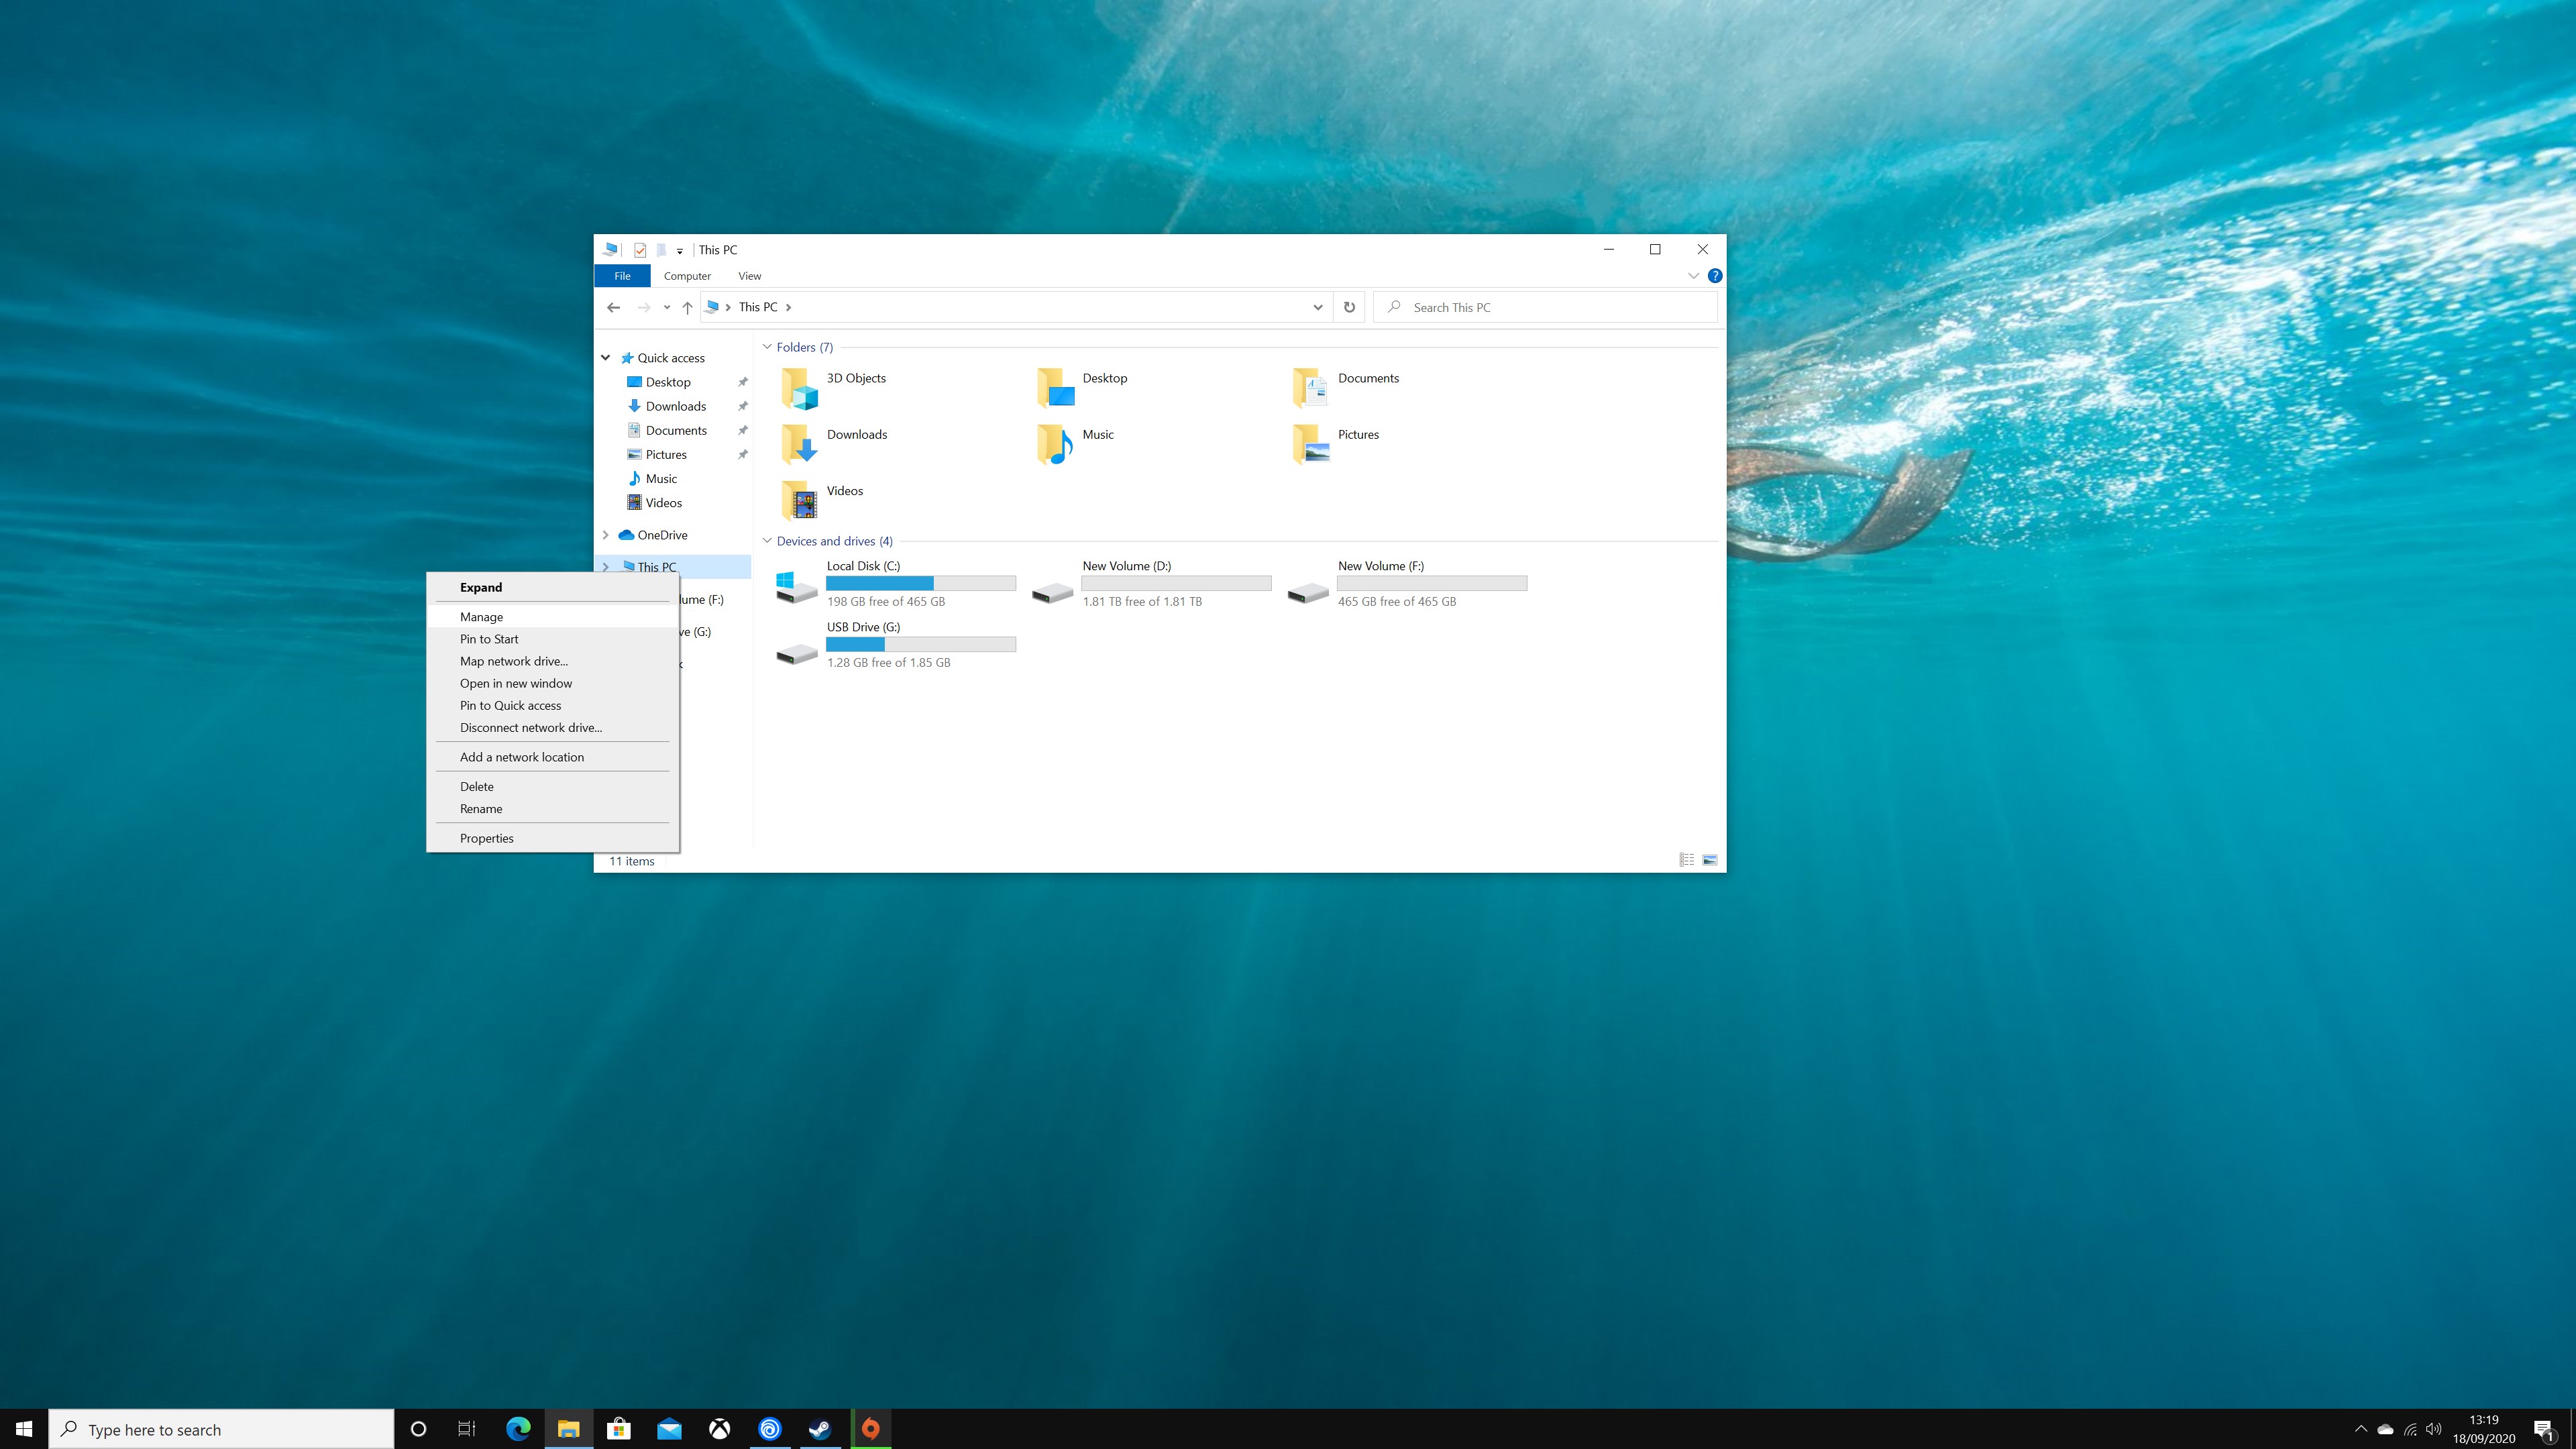
If you don’t see your external drive in the File Explorer, it’s likely using a file system that the PC can’t read – like the PS4’s own, encrypted Extended Storage system. If this is the case, keep the drive plugged in, right click on the This PC shortcut in the File Manager and click Manage. Once this new window has opened, head to the Disk Management section.
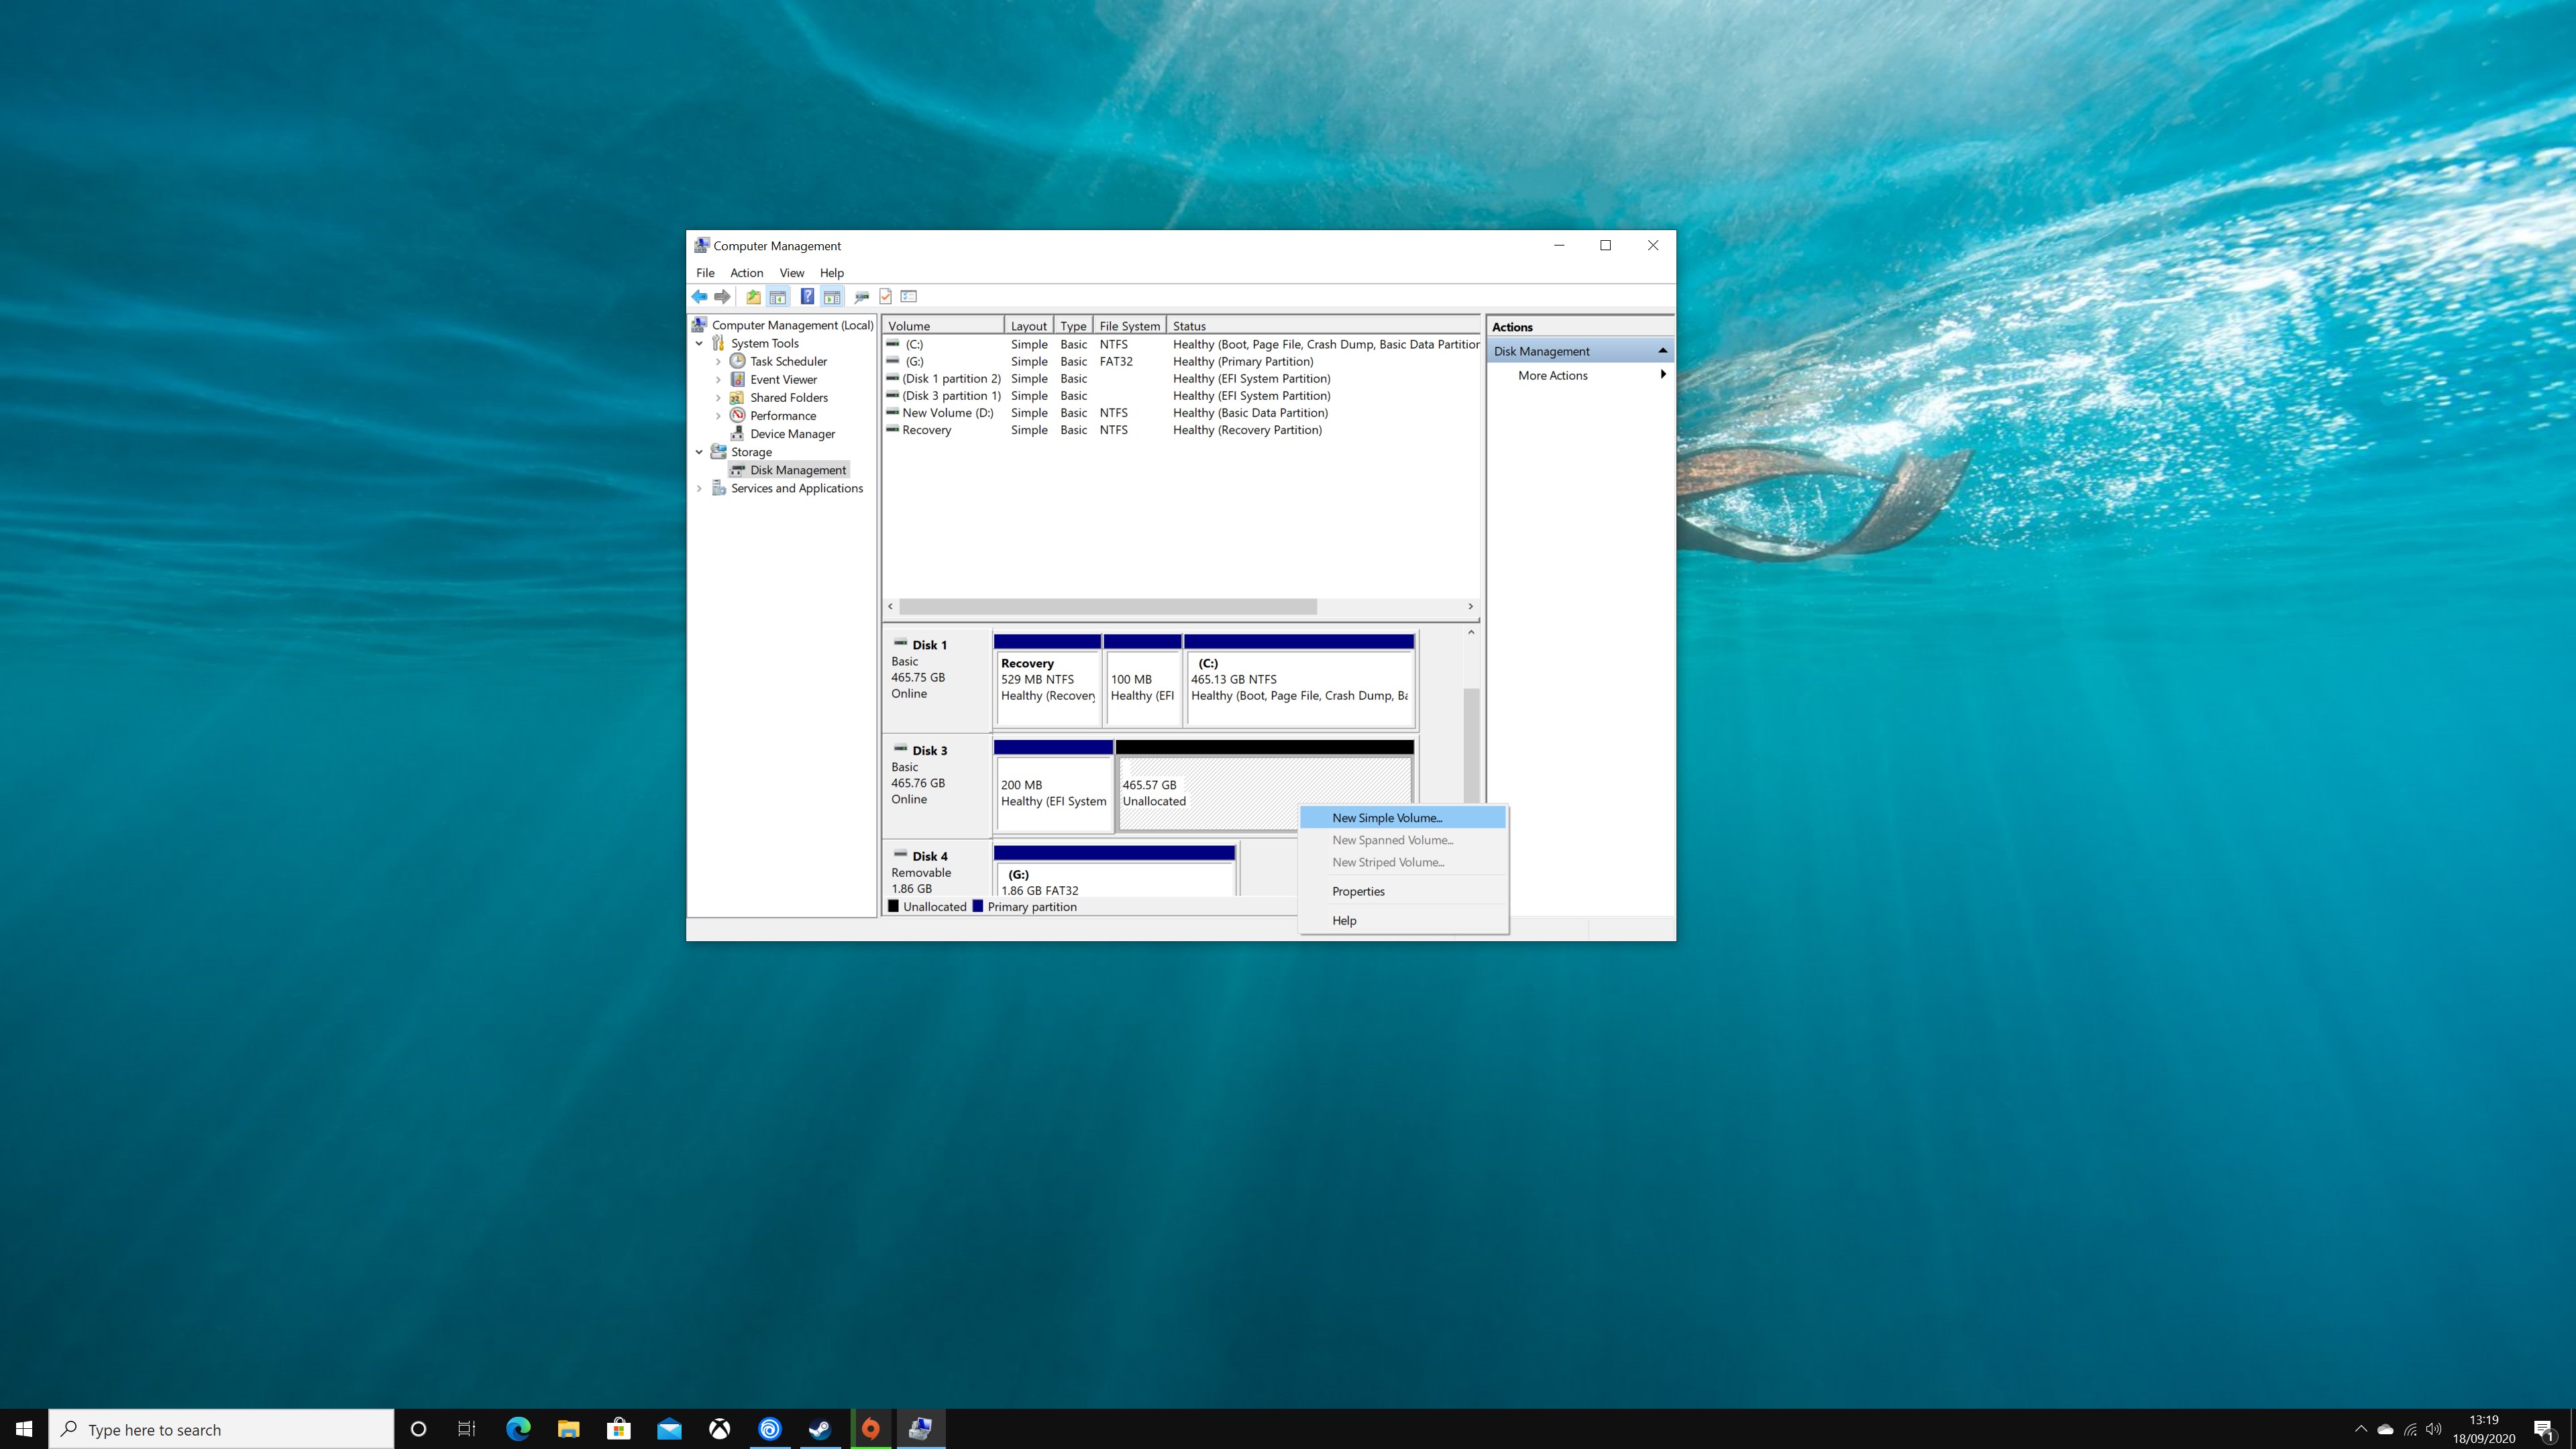
You should see your drive at the bottom of the window – it’ll be the one in black, rather than navy blue, and it’ll be described as Unallocated. Right-click it, choose the option to Initialise the drive, and click through the box that appears. You don’t have to change anything.
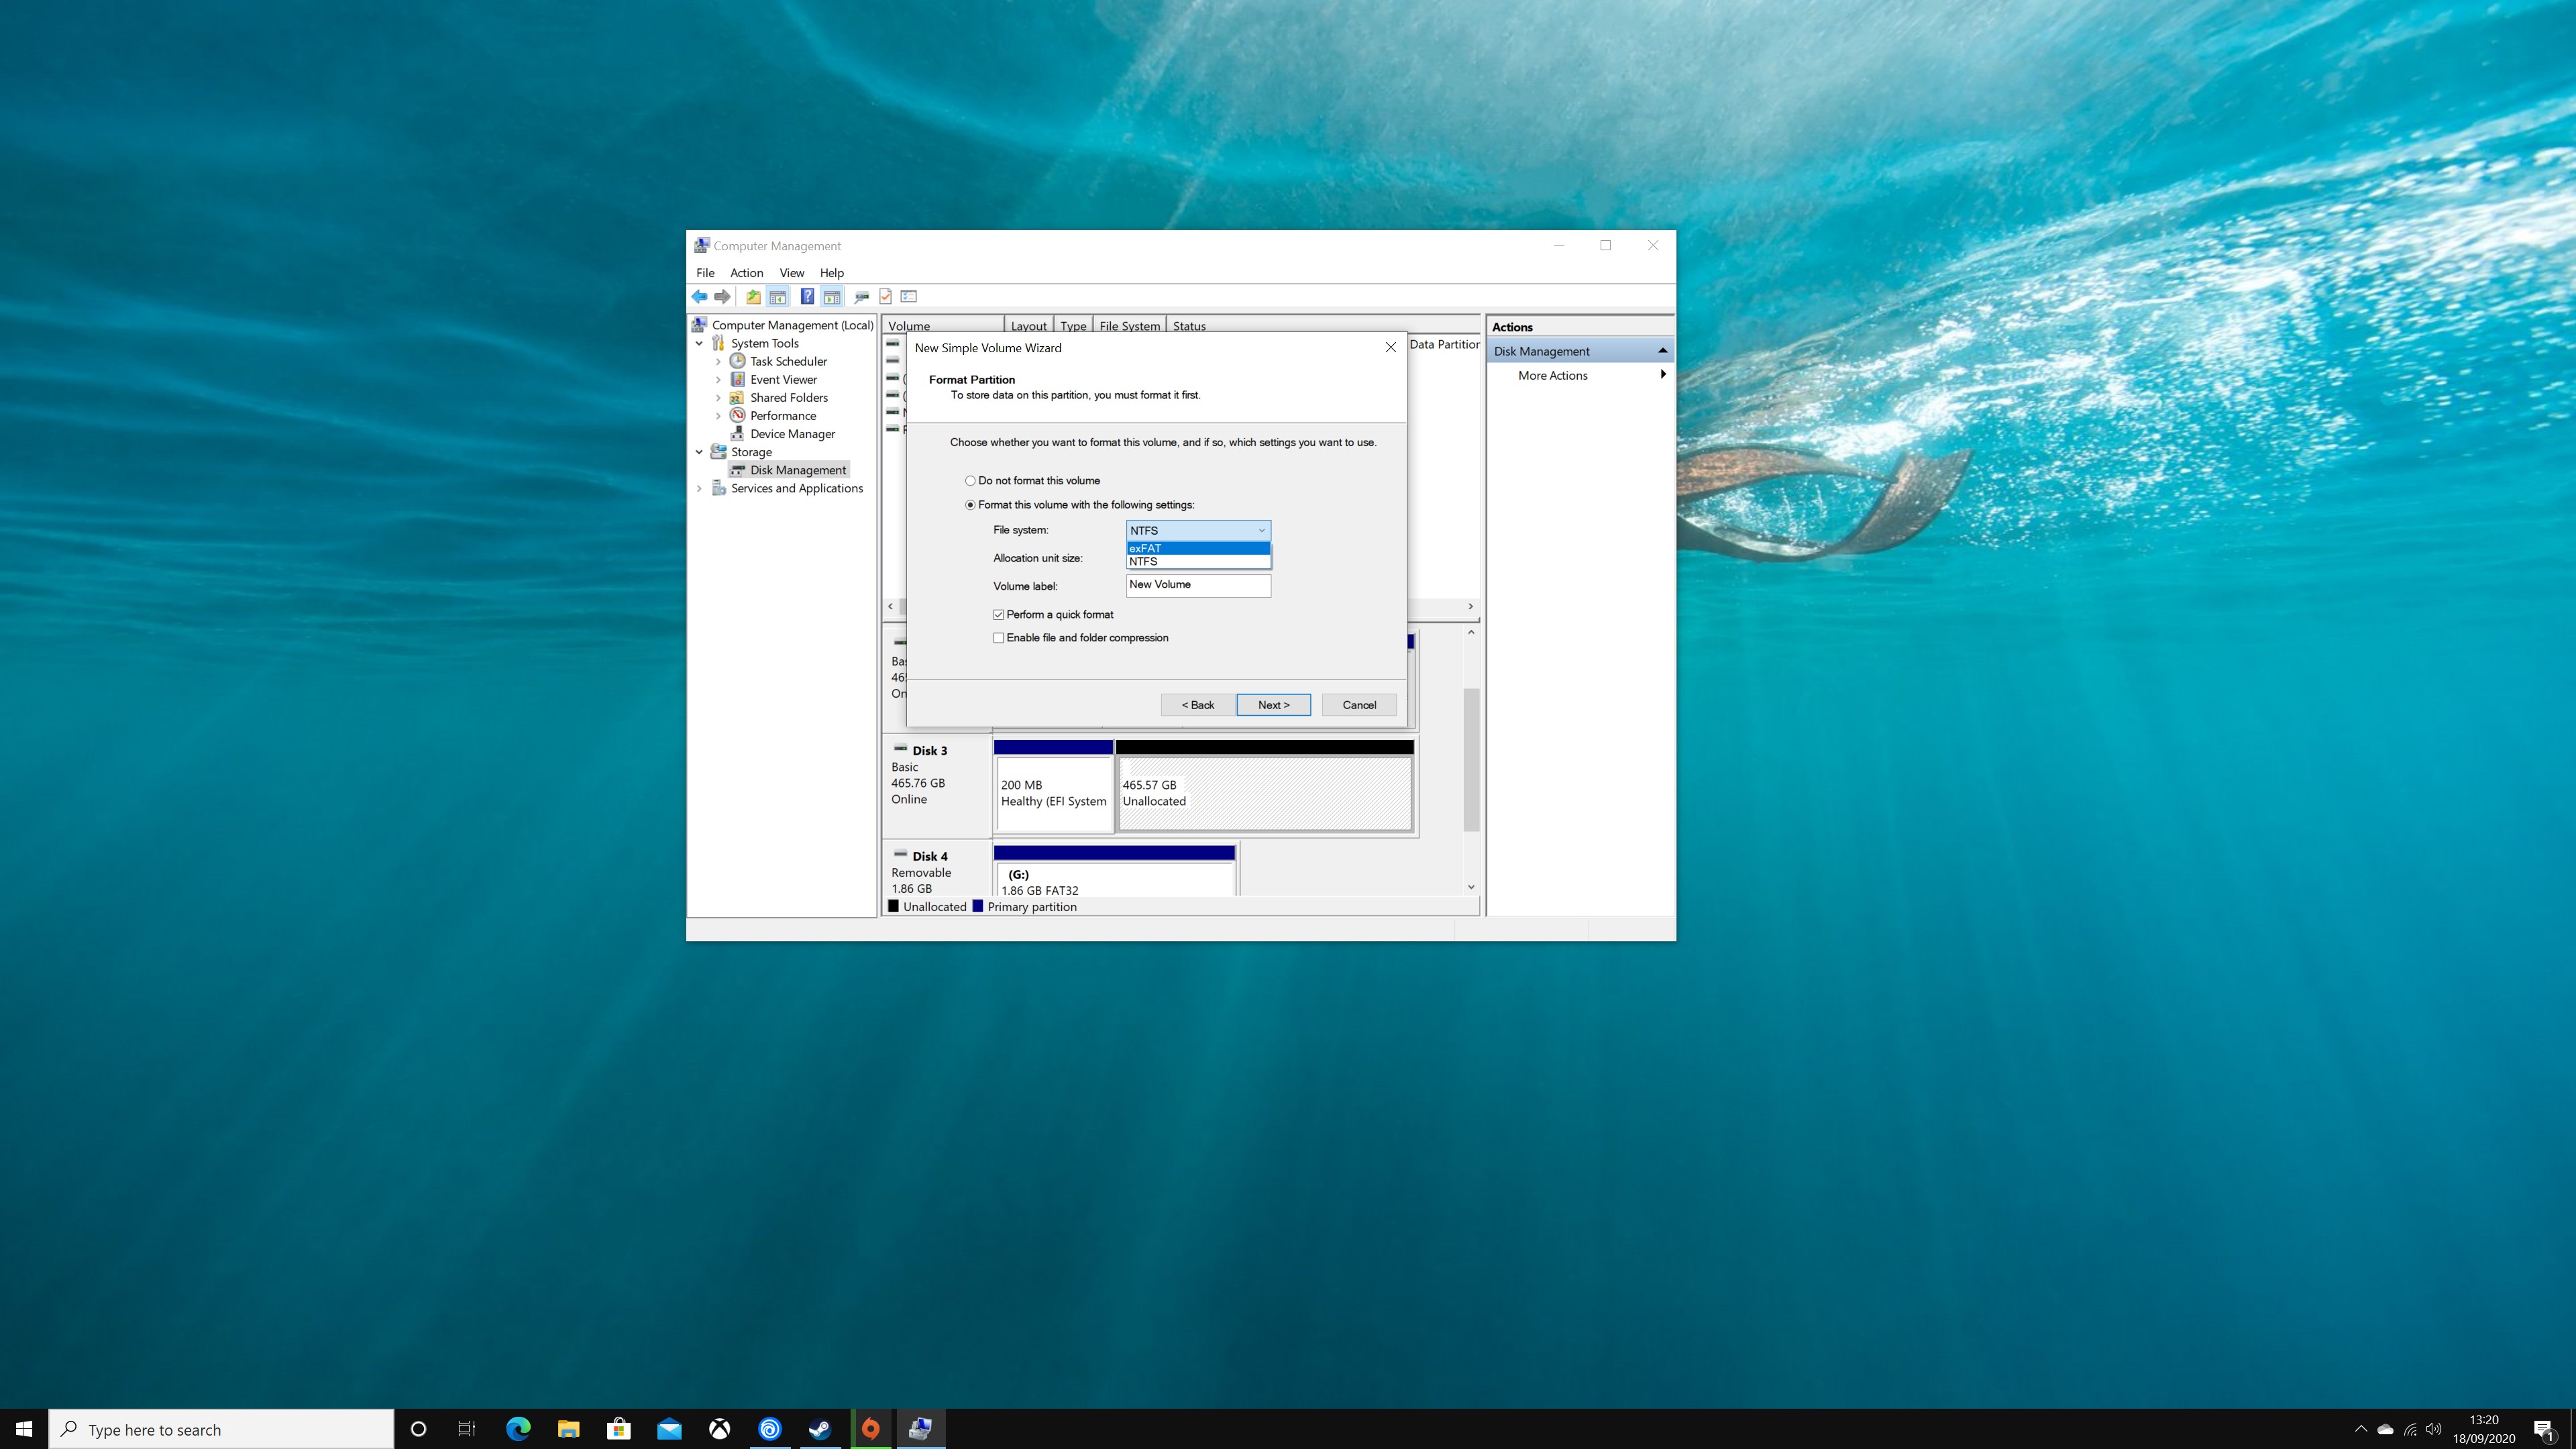
Once that’s done, right-click the striped area and select New Simple Volume. This launches more dialogue boxes – you can click through until you see an option for File System. Pick exFAT, click Next, and then click Finish. Your drive will now be ready for your PS4.
Bear in mind that sometimes you will be able to right-click the drive and select the New Simple Volume option straight away. If the drive lets you, do that – you’ll be safe skipping the Initialise portion of the process.
Format your external HDD or SSD on your OS X machine
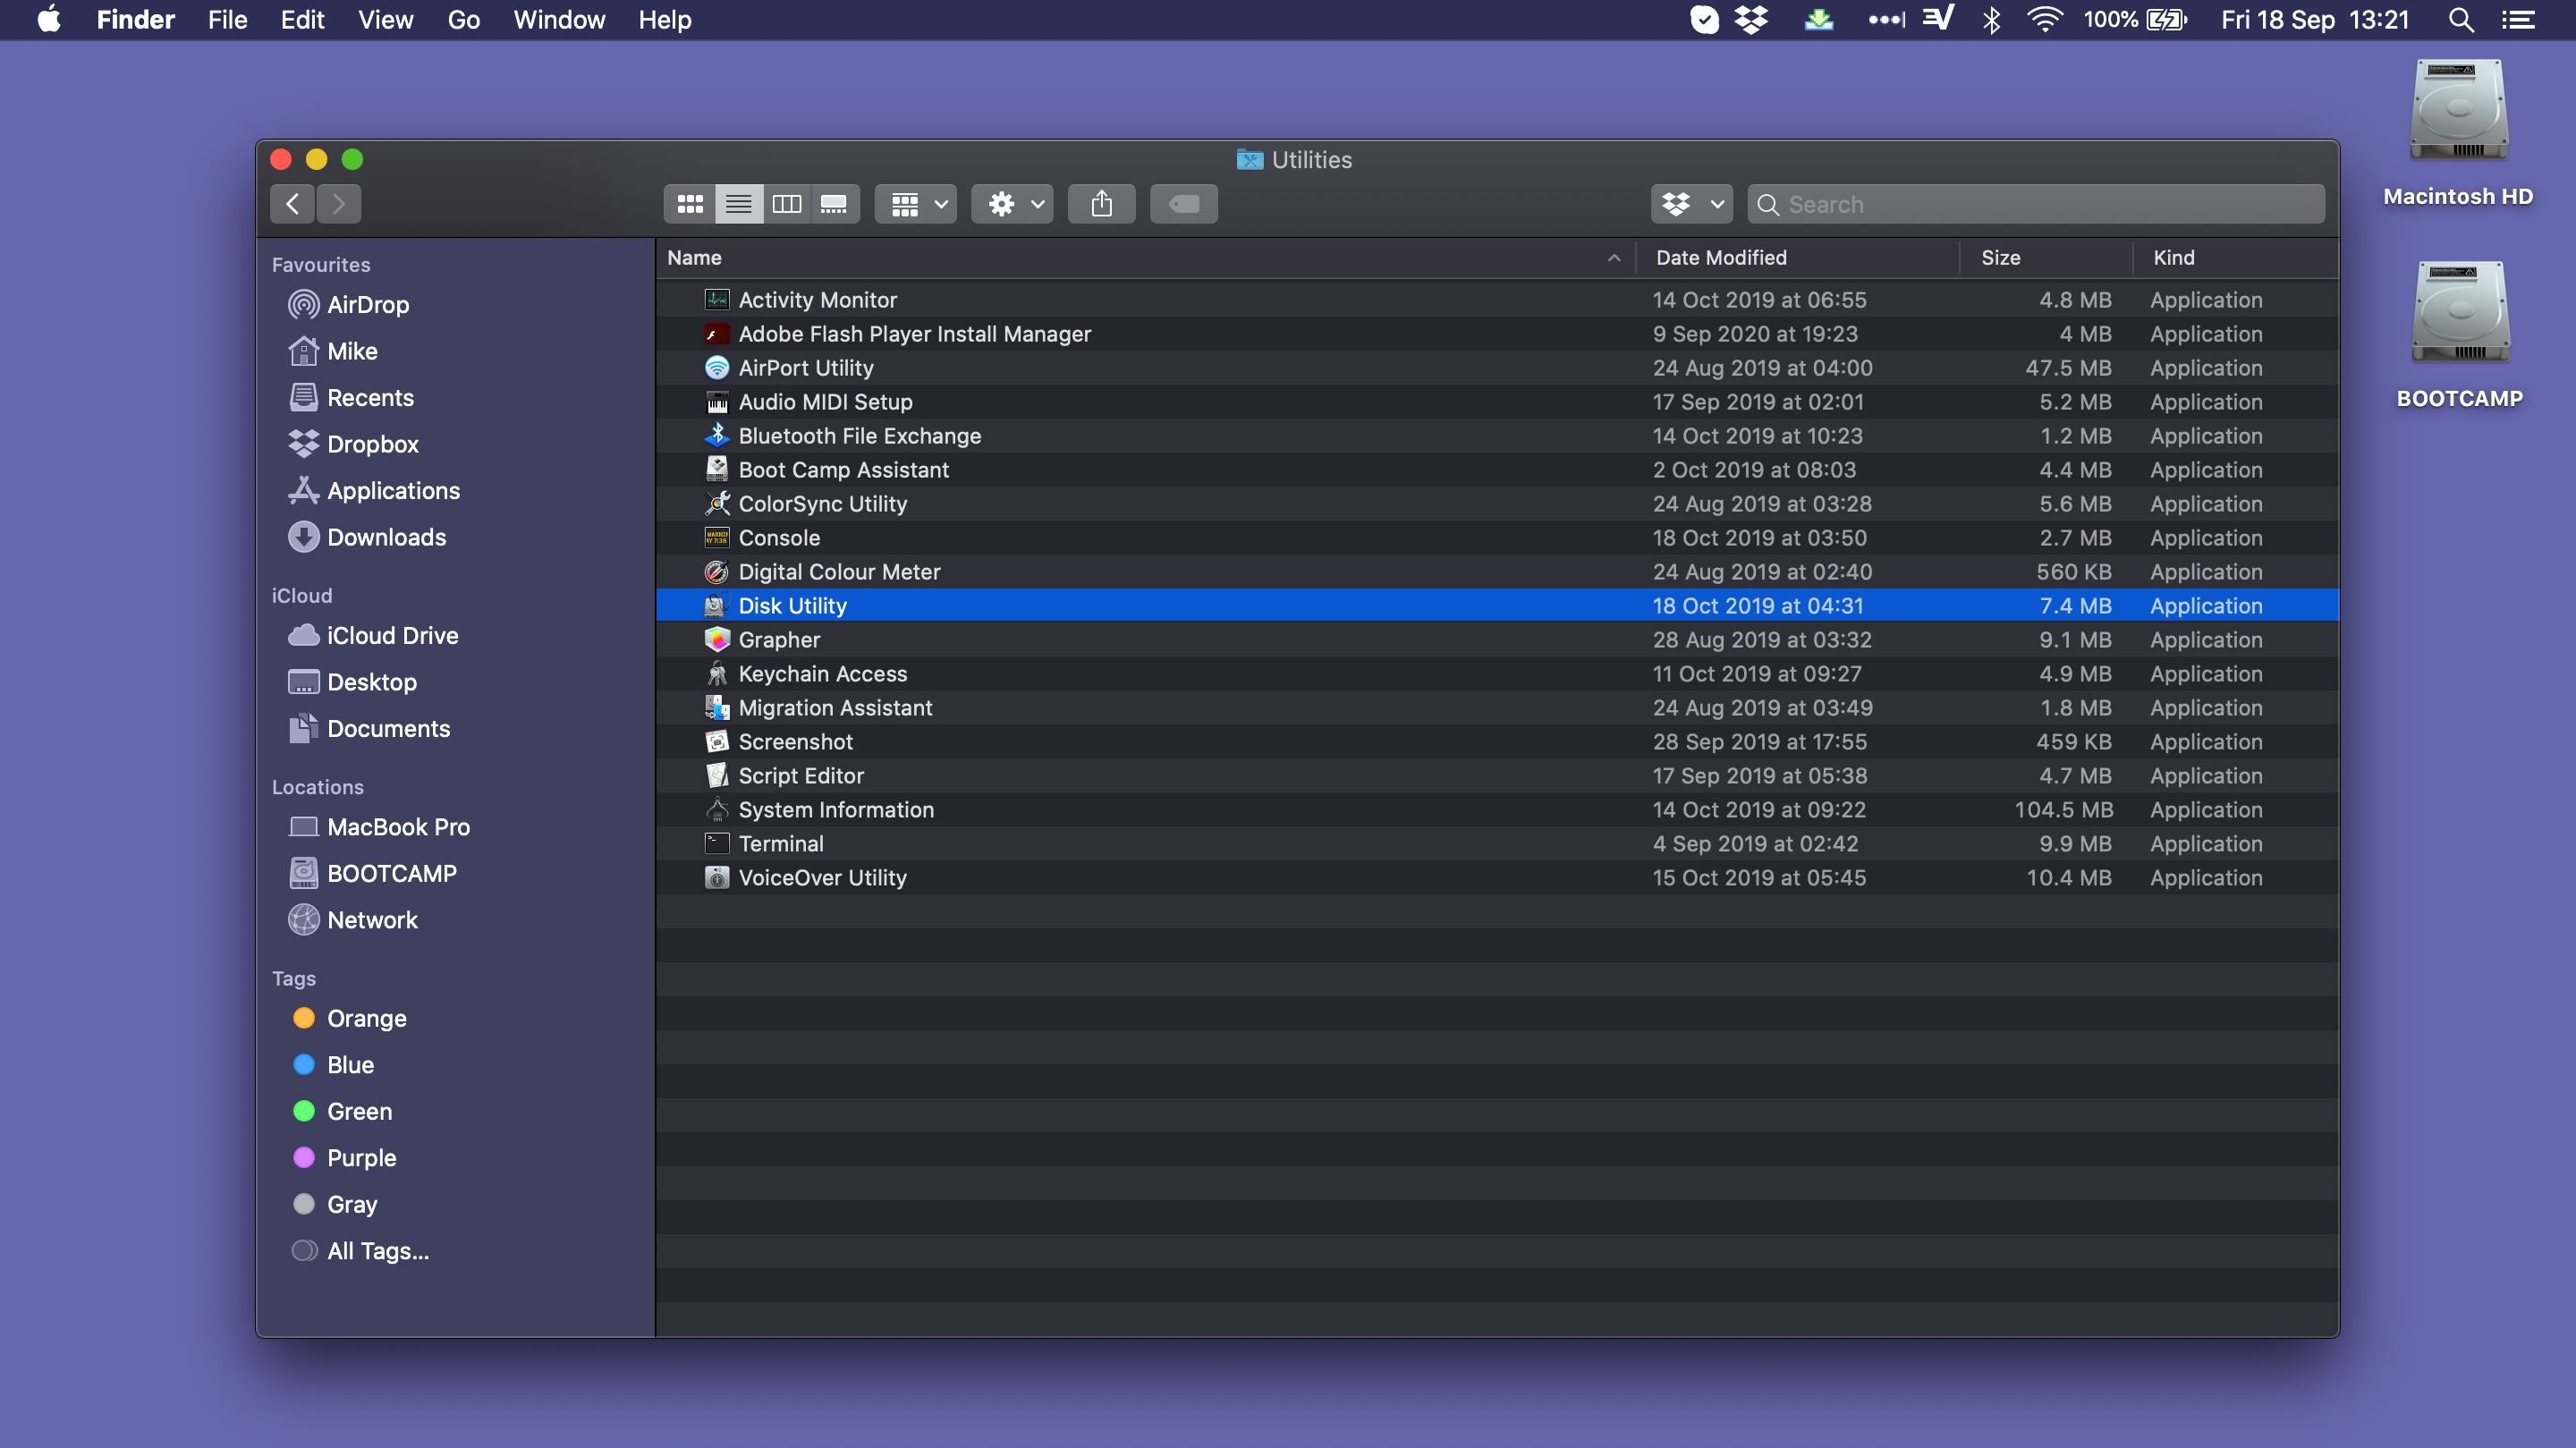
If you need to use an OS X machine to format your external drive, head to Disk Utility. You can find this by opening a Finder window, heading to Applications, and then the Utilities section.
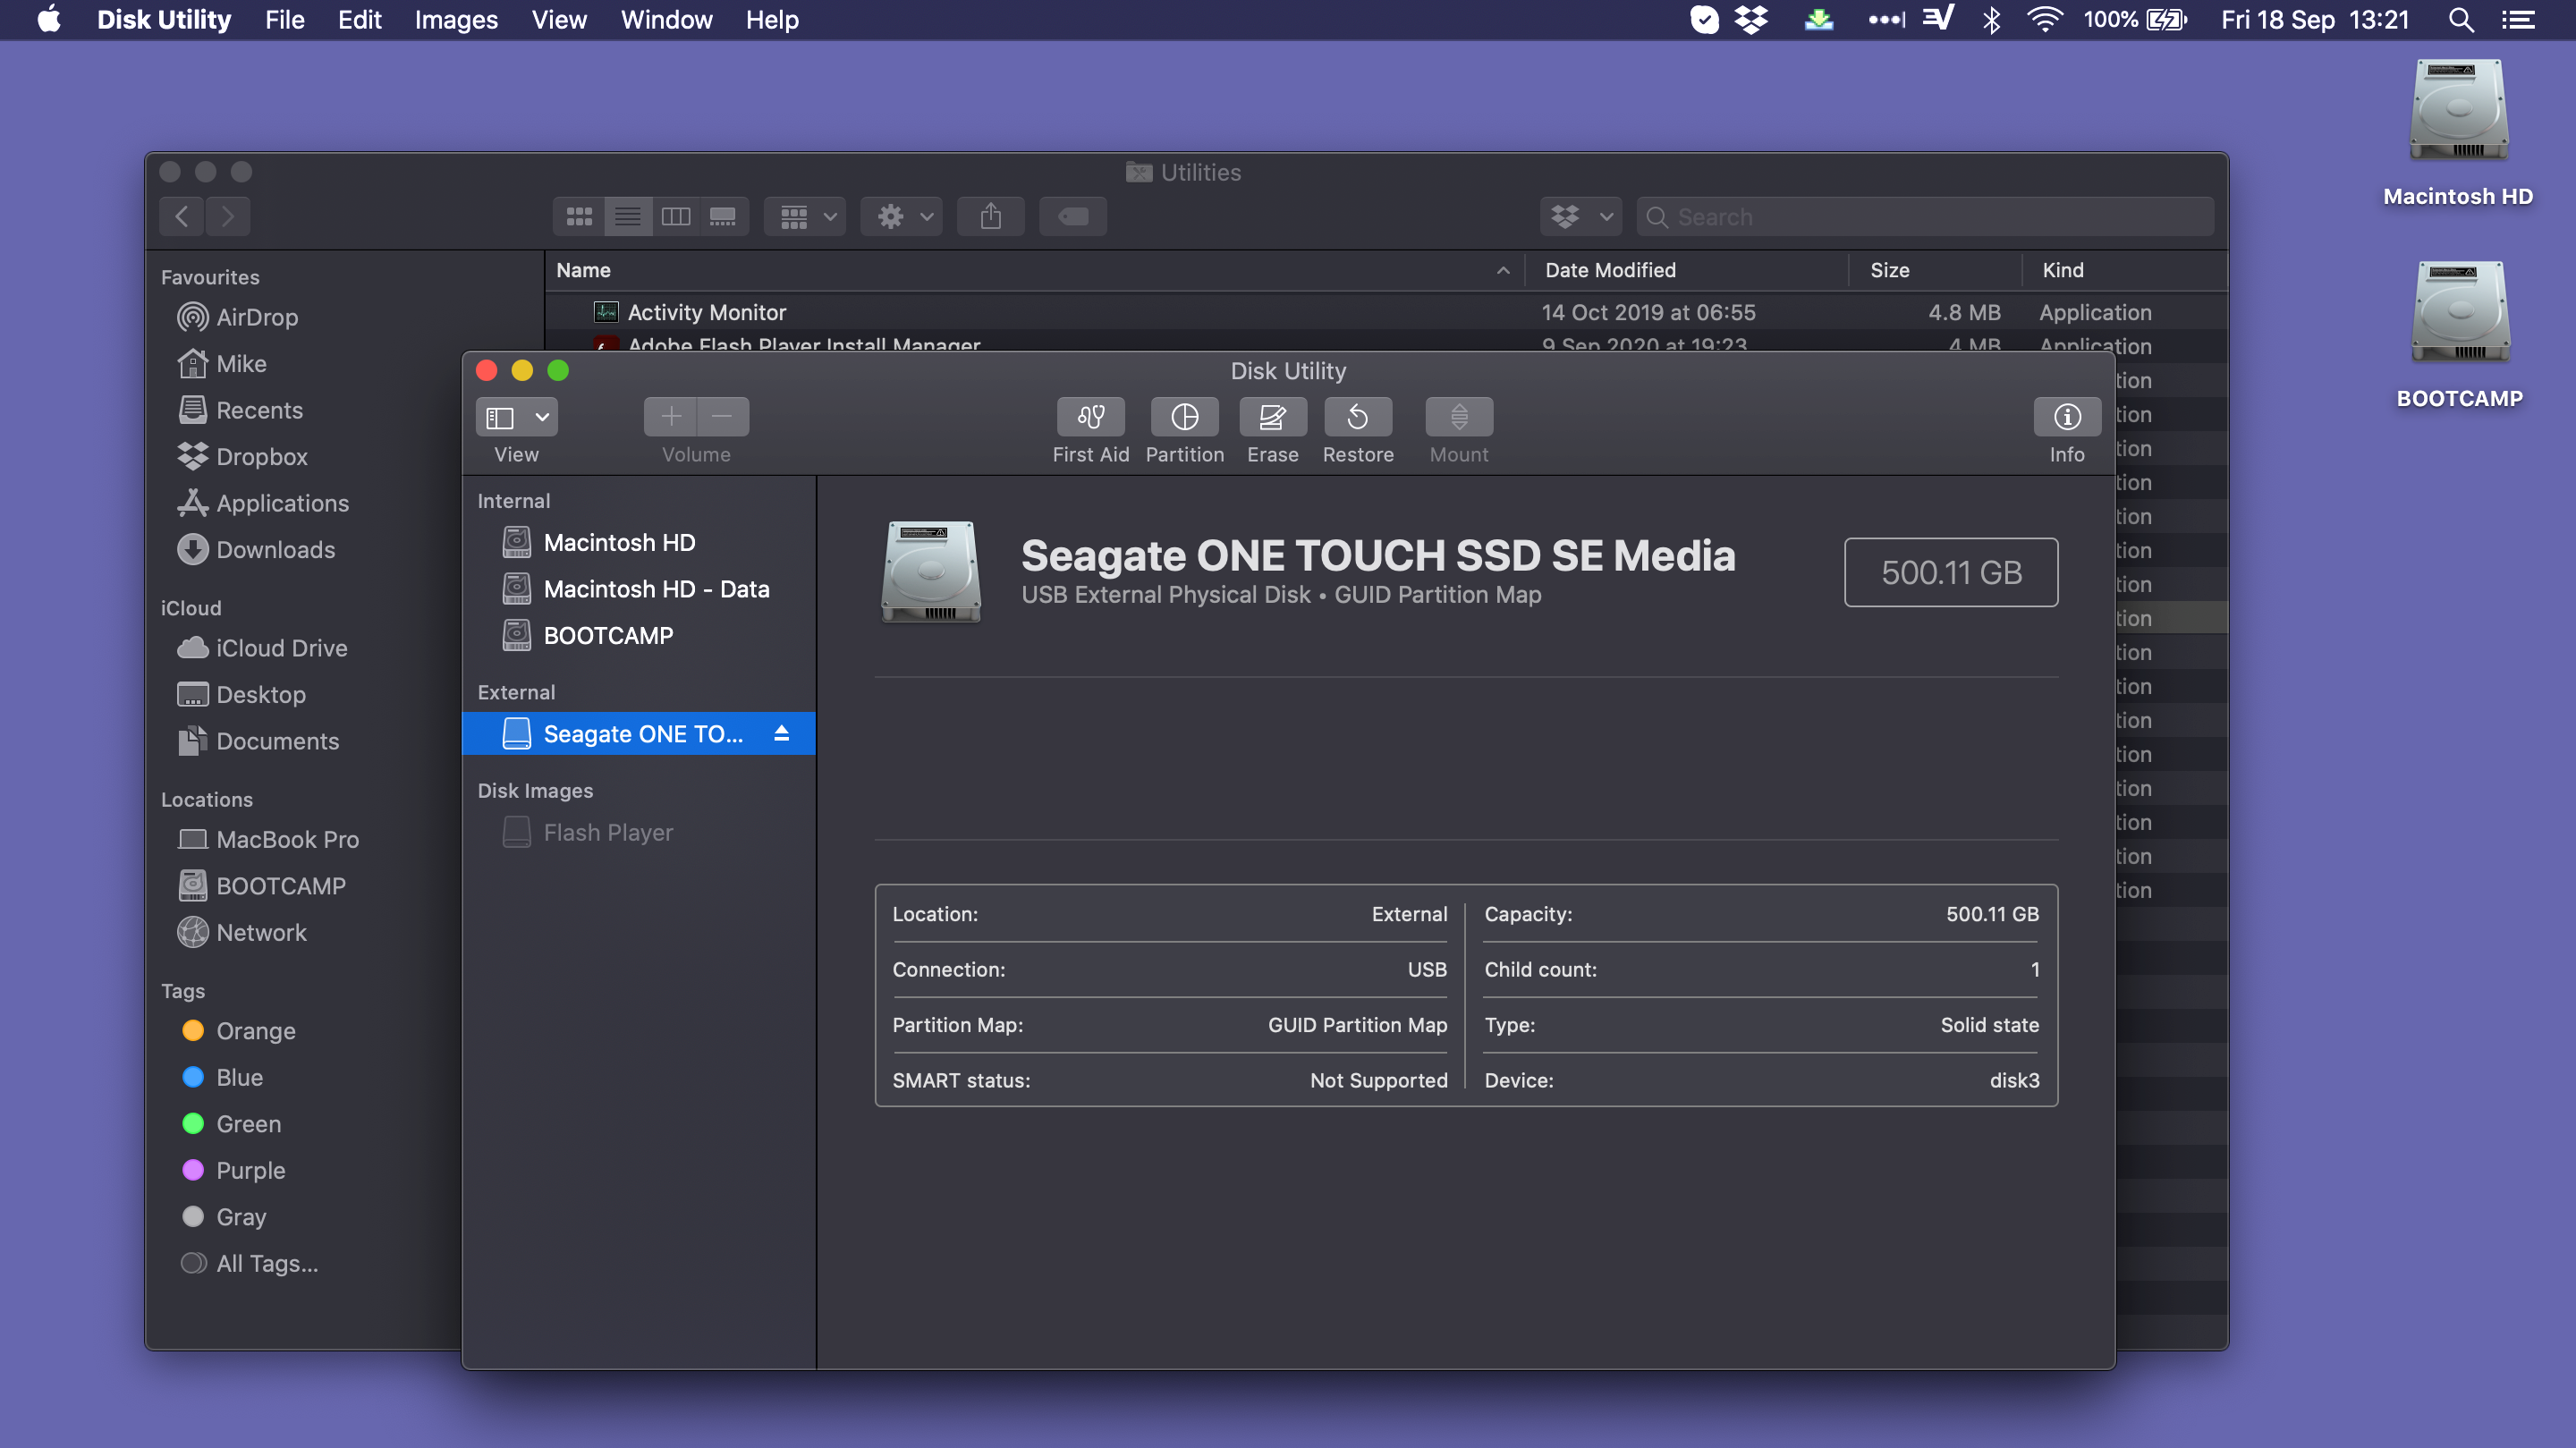
In Disk Utility, select your external drive from the list on the left-hand side and click on the Erase option along the top of the Disk Utility window. In the new window that appears, simply choose exFAT as your file format and click the Erase button.
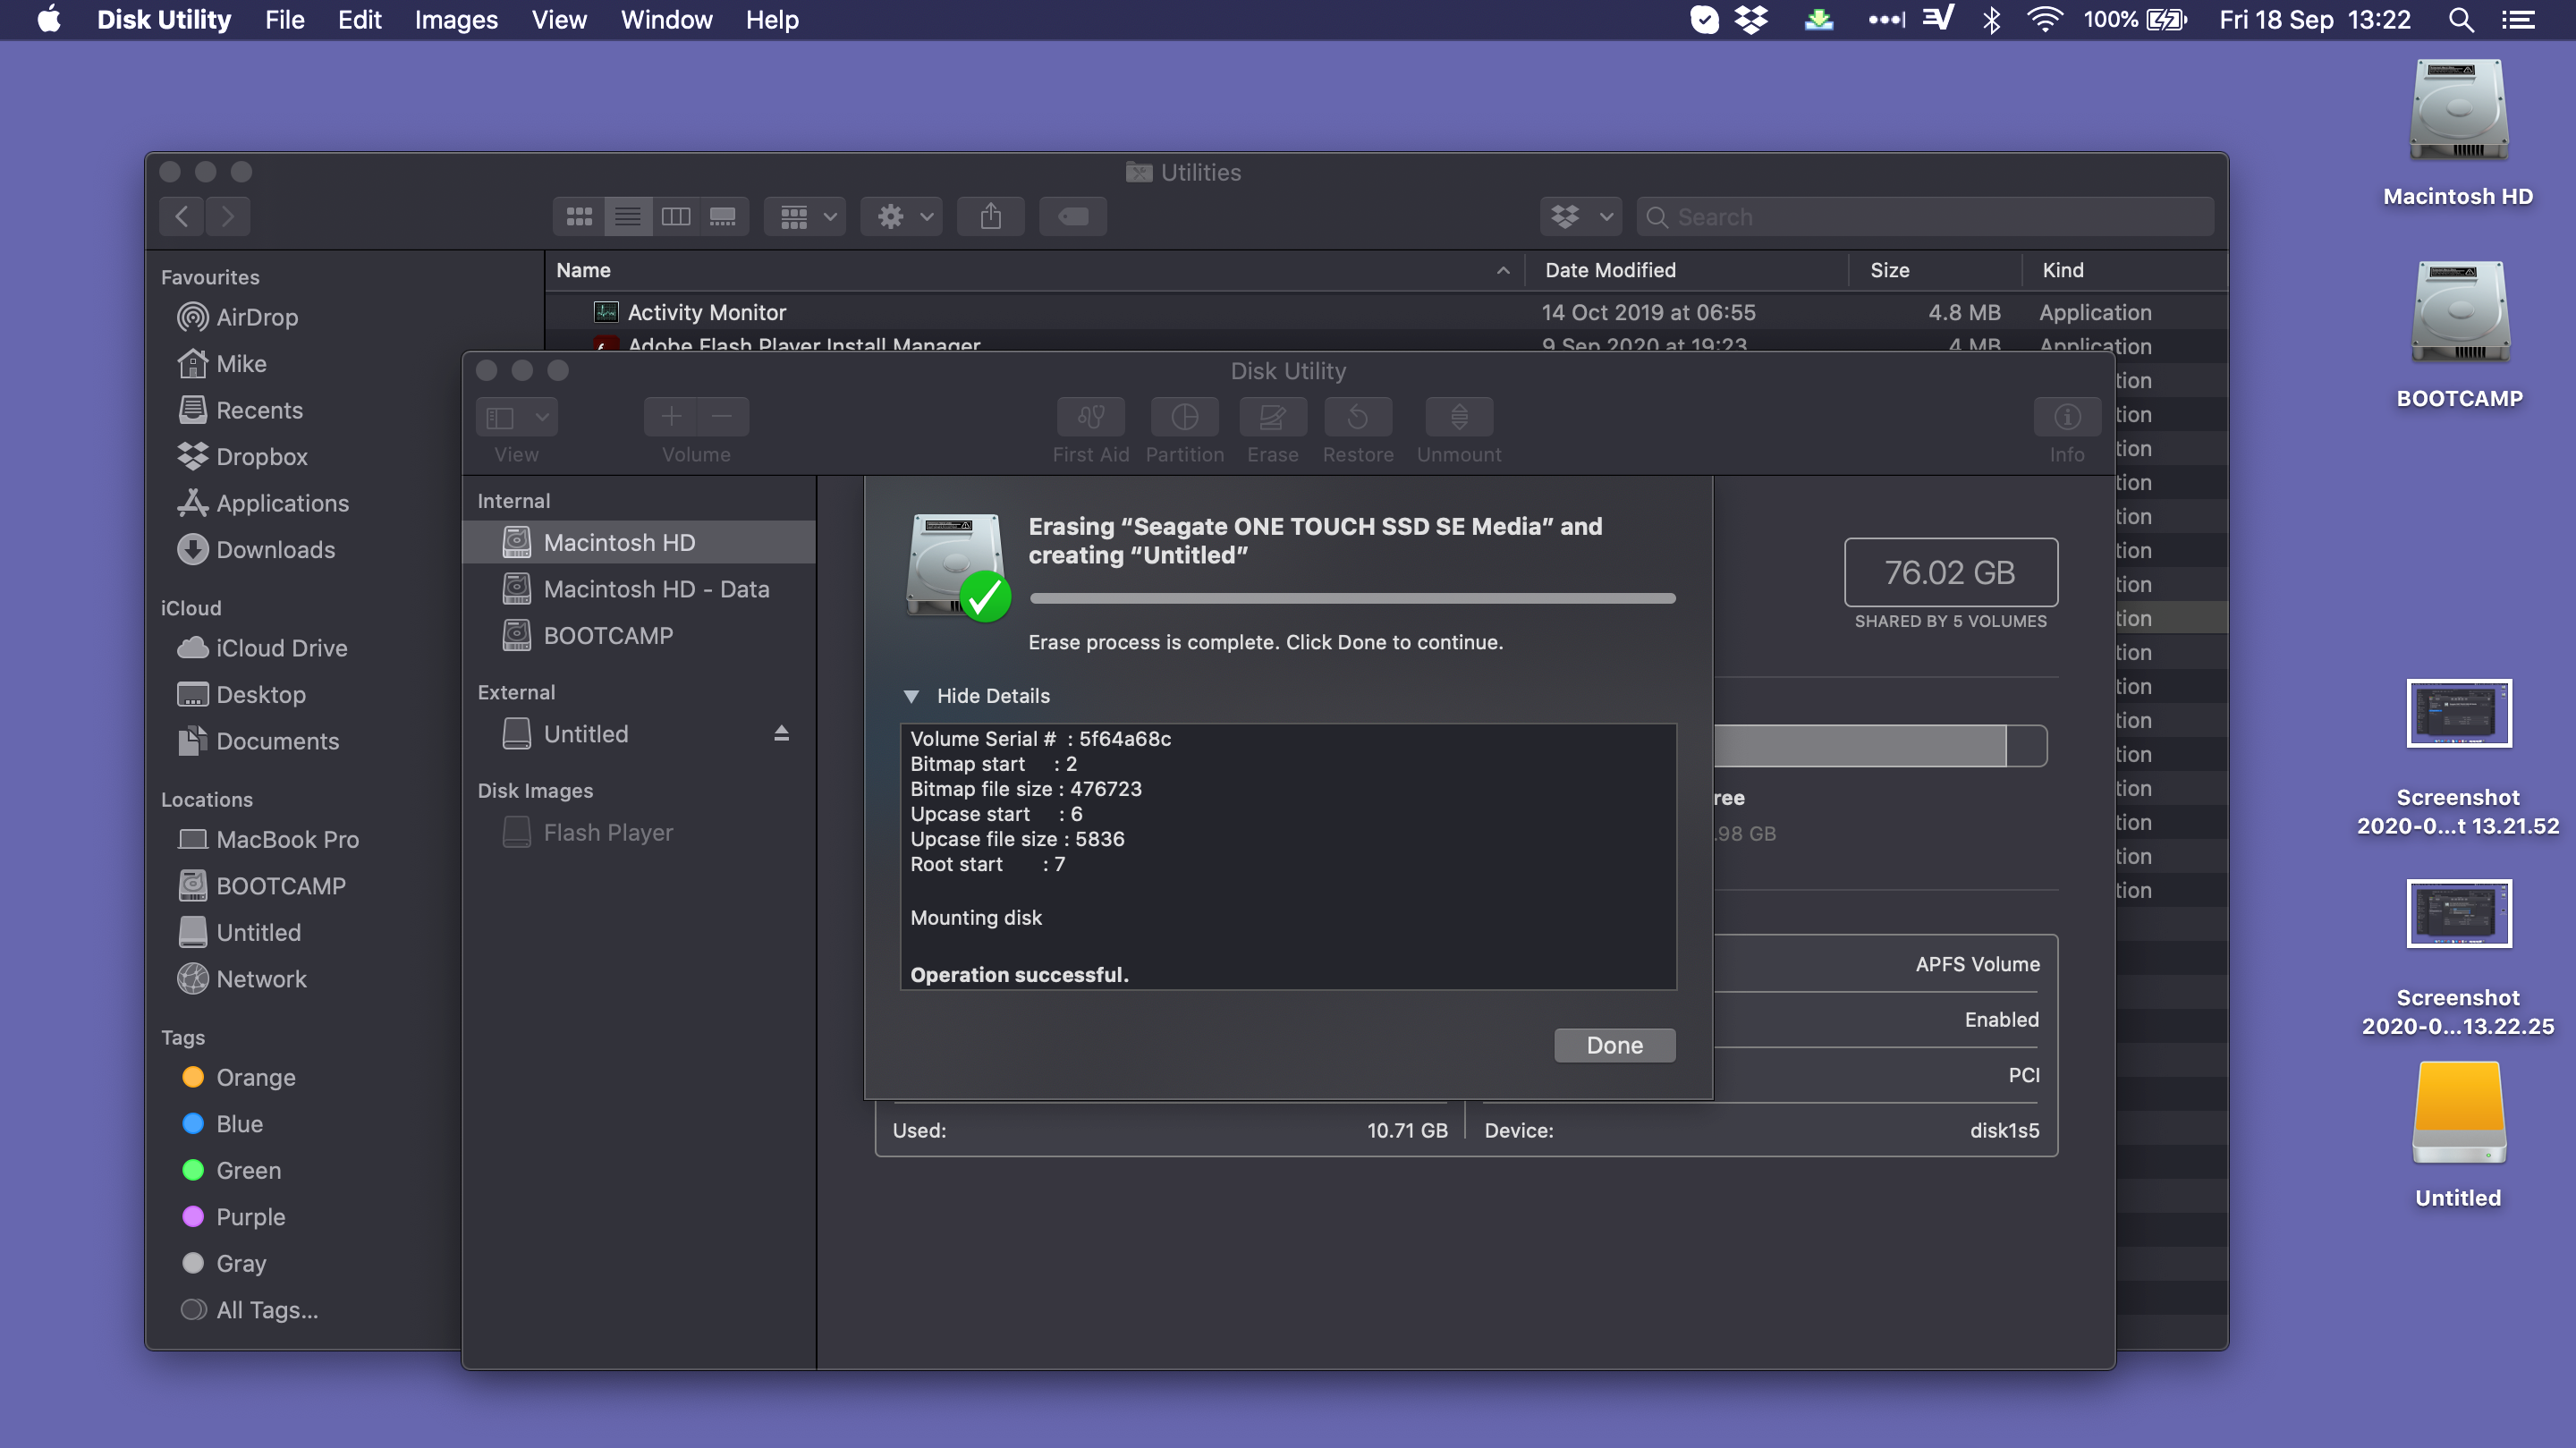
You can also rename the drive here if you’d like. If a window appears and asks if you’d like to use the new volume with Time Machine, click Don’t Use. And that’s it – you've just learned how to format an external hard drive for PS4 and your external drive is now ready for your PS4.
Mike has worked as a technology journalist for more than a decade and has written for most of the UK’s big technology titles alongside numerous global outlets. He loves PCs, laptops and any new hardware, and covers everything from the latest business trends to high-end gaming gear.