
 Become a TechRadar Insider


Need to know how to edit a YouTube video on iPhone? We’ve got you covered. If you’re looking to make some minor changes to your video (like cutting out a section, or blurring out something on screen), you can do it all from YouTube’s own editor - it’s not a tool as fully featured as the best video editing software or even the best video editing apps for mobile device. However, it’s ideal if you need to make changes to stay compliant or when facing a copyright strike.You can explore this method in our guide How to edit a YouTube video.
YouTube’s mobile app doesn’t let you perform such changes from your iPhone, but since everything’s going handheld, there is one editing capability your iPhone excels at: editing a clip into a ‘Short’ video - no need to invest in the best video editing Mac to bring your content to life.
Shorts are YouTube’s answer to TikTok. They’re predominantly shot vertically, and must be no more than a minute long. It is possible to create shorts using a traditional desktop video editor, but why go through all that hassle when you can simply shoot, edit and upload, right from your handheld device? This is what we’ll be exploring here.
How to edit a YouTube video on iPhone: Basic steps
What to do
- Launch the YouTube app, and tap on “Upload a Video”;
- Tap on ‘Edit into a Short’;
- Trim your clip, add some music, text, a voice-over, colour effect, and publish
What you'll need
- An iPhone
- A video already shot and stored in your Photos library
- A YouTube account
- An Internet connection
Although you can access YouTube via your iPhone’s web browser, the service you need works best via its dedicated app. If you haven’t got it yet, download it from the App Store, and log into your account.
Wherever you are in the app, you’ll find a large ‘plus’ icon at the bottom of the screen. This is where you get to ‘Create a post’, a written piece similar to most other social media platforms, start a stream (‘Go live'), ‘Create a Short’, which will record something right there and then, or 'Upload a video’, which will be the focus of this tutorial.
Step 1: Choose a clip

Choose a video from your library. By default, YouTube will preview it and by default, it will be uploaded as is. However, on the lower left of the screen is an ‘Edit into a Short’ button. Tap on it to enter that editor.
What you’ll see is your video, cropped for vertical viewing, playing on a continuous loop. You can trim the start and end of it by dragging the white handles over the timeline inwards.
As you’d expect, a vertical orientation will crop out a lot of what you could originally see. You can drag the footage to the left or the right, until you’re happy with what’s preserved. Sadly you cannot alter that crop over time, so it’s highly likely, unless everything you shot was more of less in the center of your screen, that you might end up having to compromise, settling for the crop that shows most, but not all, of what you need the audience to see.
Step 2: Add sounds

Once you’re happy with your duration and crop, tap on ‘Next’, lower right of the screen. This brings up the various effects you can apply to your clip.
‘Sound’ brings up YouTube’s library of royalty-free music. You can search for something specific, or simply browse through the recommended list, or available genres. You’ll see the duration for each (most are one-minute long), and how many shorts already use that song. Tap on any of them to hear the tune. Once you find the one you like, tap on its blue arrow, and it’ll be added to your video.
If your clip is shorter than the song itself, you’re able to choose which section you’ll hear over your video. To do this, tap on ‘Adjust’, lower left of the screen. Drag the waveform left or right until you’re happy with your selection. Alternatively, there’s also a bin icon top right to get rid of that song altogether.
Step 3: Text

Next you’ve got a tool to add text to your video. You’re given a choice of 8 fonts (which you can cycle through by tapping repeatedly on the font name), different backgrounds for your title, a choice of colors, and of course, the ability to alter its size.
Although simple to use, your options are limited. You can't, for instance, alter the position of the text aside from the absolute basics of left, center or right. The choices you make above also have to apply to all your words - there’s no ability to mix and match. Further, the text is applied to the entire duration of your video.
If you’d rather have more flexibility as to its length, tap on Timeline instead. The preferences you set in ‘Text’ are preserved here by default, although you’re free to change them for each text box you create. This is where you can also trim the duration of the text, making it appear and disappear wherever you like over your video.
Step 4: Voiceover

If you’ve got something to say, the Voiceover tool is a cool addition. With it selected, tap and hold on the record button and start talking immediately (there’s no lag to help you prepare yourself like many other voice-over tools have). The moment you release the button, the recording stops, and although the recording starts at the beginning of the video, you can end it at any time. If you’re not happy with what you recorded, there’s a handy ‘undo’ button to delete it.
Mixing the Voiceover with the original audio could be an issue, but that’s where ‘Volume’ comes in. With it selected, you’ll be presented with two sliders. One for the original audio, and the other for your Voiceover. Both are on 100% by default. Slide one down to bring out the other. This alteration is applied to the entire clip. You can’t change it over time.
Step 5: Add filters & Upload
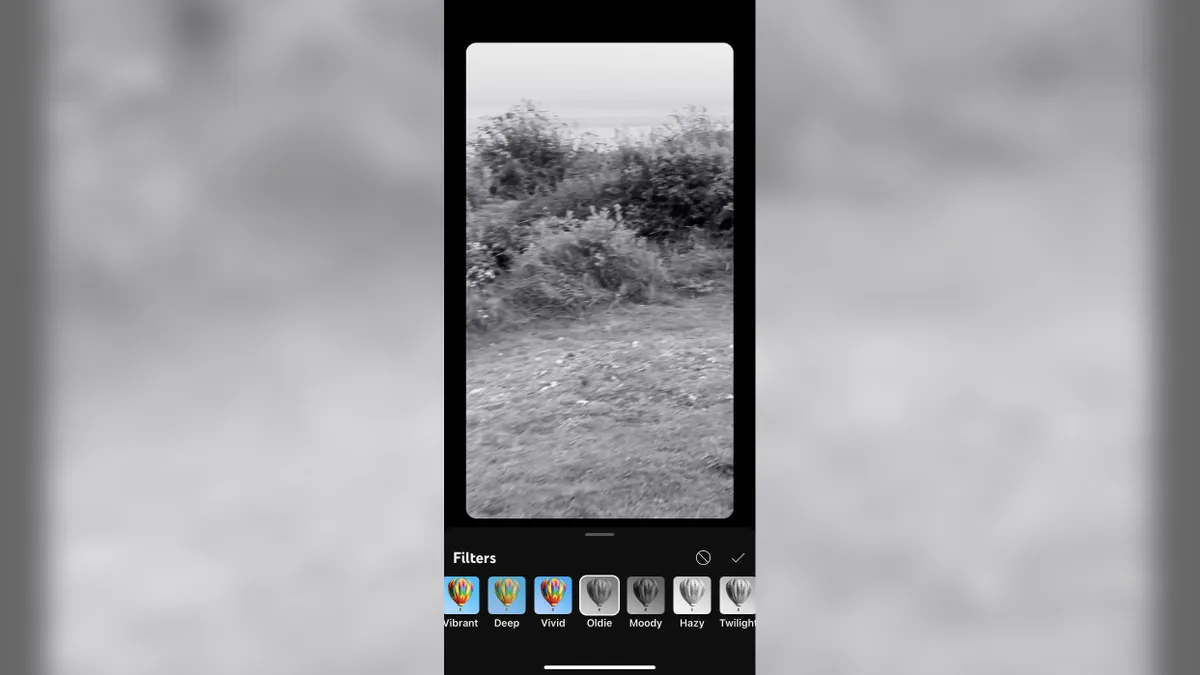
Your last option is ‘Filters’, and works pretty much like Instagram filters. You have 20 to choose from. Tap on them to see how they affect your video, and once you tap on the tick, it’s applied to your entire project.
With all your work done, tap on ‘Next’, top right of the screen, to apply the usual information to your video, as you would with any other (title, description, etc). One big thing worth noting, is if you upload a Short to YouTube from your desktop, you cannot choose the thumbnail that will be displayed. Doing this from an iPhone still won’t allow you to add a custom thumbnail, but you will be able to scroll through your video to select the exact frame you feel will represent your video the best.
In order to do this, simply tap on the current thumbnail, top left of the screen. Once you’ve added all the information you need, tap on ‘Upload Short’, and you’re done.
Final thoughts
Editing a YouTube video on iPhone is quite different to the tools available on the desktop version. But as it’s geared for mobile use, it makes sense YouTube’s focus would be on creating and editing shorts. These offer a good number of options to help you make your clip stand out from the crowd.
Perhaps the most useful trick is being able to select your own thumbnail. It’s a shame such a feature isn’t available when working with shorts elsewhere. You can’t do that with shorts you uploaded from the best video editing PC or even the best video editing laptops. Still, if you like shorts, and like a quick way to make them pop a little more, then YouTube may well have the simple tools you’re after.
