If you’re a landscape photographer one of the most useful, if not essential, accessories you can own is a set of neutral density graduated filters. These filters allow you to maintain detail in a sky that’s significantly brighter than the ground.
It’s really that simple, but how do they compare to HDR photography, and do you really need them – aren’t they complete waste of time?
We think ND grads actually save photographers vast amounts time, but let’s take a look at some of the facts and arguments in favour of each approach.
Article continues belowGrads vs HDR
It’s understandable that many photographers now believe that the days of ND grads are numbered, if not already over. Advances in HDR technique, and also the software used to merge a number of exposures together certainly support the idea.
Using software such as the Aurora HDR 2017, and the HDR Merge feature in Lightroom have made it easier than ever to create HDR images that look as natural as the scene looked to your eyes when you took the shots. They’re so good in fact, that it’s almost impossible to tell that they’re HDR.
With this compelling argument against the use of ND grads you may be thinking that the argument is already over, but it’s quite not that simple. HDR photography requires you to take a series of images of a scene in quick succession, at a range of exposures to capture detail throughout the shadows, mid-tones and the highlights.
The minimum number is three, although you can achieve better image quality by shooting more exposures. This means that for a single scene you could have three, five, seven or nine Raw files.
So even if we go for three exposures, that’s still three times more storage space required on your hard drive than if you’d shot a single image using grads. Of course, hard drives are cheap these days, but that’s no reason to go wild and fill them with a number of images where one would be sufficient. The main point here ultimately comes down to processing time, and with HDR you will always have to spend significantly more time at the computer processing images, than if you use ND grads to control exposure at the point of capture.
Another important point is that you can shoot handheld with grads attached to the lens, whereas with HDR you really need to have the camera attached to a tripod to avoid any camera movement between shots. HDR software can fix image alignment problems to a degree, but it can’t work miracles.
The best approach is both
Shooting with ND grads ultimately saves time because you get exposure perfect in-camera rather than spending huge amounts of time sitting in front of a computer. For 75% of my landscape work I use ND grads. Shoot more and edit less is what it’s all about, right?
The main downside however, is that they have to be purchased and carried around on shoots taking up valuable bag space, but I can live with that.

For the rest of our landscapes we would say that we do shoot HDR, and this comes down to several reasons: we're travelling light and don’t have space in our kit bag for a grad set, we’ve forgotten our grads, or most importantly it’s that HDR is the technique or look we're aiming for. Even with a natural looking conversion, HDR images look different to those taken with grads, and that’s a good thing.
There are strong cases in favour of both approaches to levelling exposures, but having as many strings to your technique bow as possible is what’s most important. So while we will shoot more with our ND grads in the foreseeable future, HDR is a powerful tool that we will always turn to when the time is right.
We want to be spending more of our time shooting rather than sitting indoors in front of a computer, and that’s exactly what ND grads helps us to achieve.
If you've never used ND grads before, take a look at this quick and easy tutorial that shows you how to get started...
Step-by-step: How to use ND grads

As a rule of thumb, in bright conditions use a 1 stop grad for a natural result, in more contrasty conditions use a 2 stop, and when the sky is significantly brighter than the foreground such as at sunrise and sunset, you may need to use a 3 stop grad.
At these times you need to use more than one grad.
Shooting with ND grads is a simple technique, but there are a few things to bear in mind to make sure you get the best results possible.
The first thing you’re obviously going to need is an ND grad set, which often includes a 1, 2 and 3 stop grad, and there are two types of filter available.
The first is a circular screw-in type, which simply screws onto the front of your lens and can be rotated to get the graduated section level with the horizon. The major downside to screw-in grads is that you can’t control where the grad starts and ends because it’s fixed.
So as long as you position the horizon line in exactly the same place for all your shots you’ll be fine, but in reality nobody composes all of their landscape shots the same way.
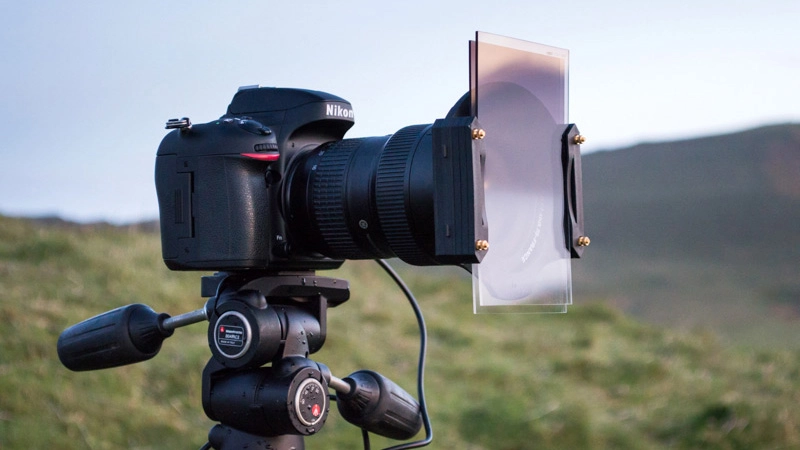
The most popular and versatile option for ND grads is to use drop-in sheet types filters. These a made of either glass or resin, and drop into a special holder that attaches to the front of lenses using an adaptor ring that matches the filter thread size of your lens. You can then position the grad so it matches the position and/or angle of the horizon in your shot.
1. Attach the holder

The first thing you need to do is screw the adaptor ring to the filter thread on the front of your lens. With this in place you can now slide the filter holder on and make sure it’s securely attached.
Most filter holders have some kind of locking facility to stop them falling off the adaptor ring. Now make sure the holder is the right way up.
2. Position the filter

Select a filter and drop it into the slot closest to the lens while looking through the viewfinder or using Live View on the camera’s LCD screen.
Push the filter down until the bottom of the graduated section sits just below the horizon – this will provide a seamless exposure blend between the brighter sky and darker foreground.
3. Use the right metering

Set your camera up to shoot landscapes, so for most people that’s going to be aperture-priority at f/16 with ISO 100. Now set the metering mode to centre-weighted.
This mode reads light from the central area of the frame, so it misses out the darker area of the grad which can result in a slight overexposure if using Evaluative/Matrix metering.
