Audio is one thing, but it's in the area of video where things start to get messy. This is largely because a video file consists not only of an audio stream but a video stream.
How these two streams are packaged can be thought of as the file's format. To decode this you need the correct audio and video codec – that's coder-decoder – this can be a system-wide one or one that's internal to the player. We'll come back to codecs later on, at this point we just need to know they exist. But decoding the audio and video streams is just the beginning.
The audio has to be piped from your PC's sound card to your speakers system via your connection of choice. This could be anything from a mono-speaker through to eight channels of high-definition audio, including low-frequency effects for subwoofers via mini-jacks, HDMI, optical or S/PDIF connections. Additionally, you may want to apply normalisation, virtual surround and equaliser effects.
Equally, the video stream once decoded needs to be scaled to the correct size, colour corrected, have any post-processing applied to remove blocking artefacts and then have any subtitles added over the image. That's a lot of stuff to handle and if you've had a poke around iTunes or Windows Media Player you might have noticed there are not a lot of options in regards to any of these.
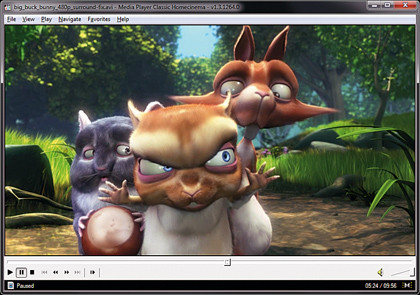
That's where two of our favourite media players come into play. Opinion is divided as to which is best, but there's no doubt you'll love either VLC from videolan.org or Media Player Classic Home Cinema from mpc-hc.sourceforge.net.

If we got into a stand-up shouting match we'd probably end up siding with VLC as it's better supported, but Media Player Classic does have a heap of advanced output options. Both of these are open source projects that provide streamlined media players with internal codecs that support the majority of audio and video file formats.
Alongside this basic feature-set, they also offer advanced playback options that can enable you to get more from your system; both in terms of image and audio quality, but also speed. This latter point can be invaluable if you're trying to play hi-def video on a low-power system or laptop.
Sign up for breaking news, reviews, opinion, top tech deals, and more.
Single core processors struggle and any help they can get is a real boon, but again we'll cover ways you can tackle this as we go along. At their most basic, both enable you to just drag files to them and play.
Unlike Windows Media Player they also support the obvious universal pause/play shortcut of pressing the [Space bar] rather than [Ctrl]+[P].
VLC really is the 'Wash & Go' option, it'll handle pretty much anything you throw at it, even damaged, partly completed or locked files.
Tweak it
When it comes to playback options it's hard to beat Media Player Classic. Select View > Options to see the true horror of everything that's available. The key elements to improving playback can be found under Playback > Output and Internal Filters > Audio Switcher.
The choice of 'Renderer under Output' influences performance, though it's a complex issue depending on the OS you're running and the format of the video you're playing. Technically, 'Overlay Mixer' is the fastest, however it'll force Vista and Win7 to use compatibility mode as it requires a 2D overlay.
We've found 'WMR9 (renderless)' to offer the best compatibility with slightly poorer performance. With Vista onwards you can use the 'EVR Custom Pres' option – your graphics card and drivers will need to be up to date to avoid issues – this supports hardware acceleration and enables you to select an enhanced resizer such as 'Bicubic' to ensure you get the best upscaling.
For audio the Audio Switcher provides a way to remap the internal channels to your external speakers. If you find your rear speakers have their channels the wrong way around, then this provides an easy way to switch the output without having to rewire anything.

Select the 'Enable Custom Channel Mapping' and select the correct number of channels. You then select which channels are outputted to which speakers. Additionally, Media Player Classic offers the ability to apply post processing to the video image, using the graphic card's shader-based filter operations. These will only work when the renderer is using a 3D surface, such as one of the VMR renderless or EVR options. Select Play > Shaders to see a full list.
On the face of it you can only apply a single one at a time. However, select the 'Combine Shaders…' option and it'll enable you to do just that. The Sharpen options can be tempting for SD content but you may find them a little harsh.
Older versions of Media Player Classic had a bug that caused blocking on red areas, the YV12 Chroma shader was a work around for this. Also certain display devices – mainly TVs and projectors – are optimised for an RGB range of 16 to 235. If you find your blacks are washed out try one of these to compress the output colour range.
Format confusion
Let's attempt an impossible job: make codecs sound something approaching interesting. For any media player to successfully play audio or video data they either need the correct internal or external codec.
The big issue is that there are so many different types available and it's not always clear which codec a file actually requires; more so for video than audio. When it comes to identifying the type of codec used, we recommend MediaInfo.
This is a longstanding media-file analyser that does a great job of spotting the format of your media. Open a file with it and it'll produce a lot of technical information about the file. Largely this information is going to state which audio codecs have been found, such as MP1-3, AC3, DTS, AAC or LPCM. There are also video codecs, such as MPEG-2, DivX, Xvid, h.264, x.264, MPEG-4, WMV and FLV.
To confuse matters you also have container formats such as AVI, OGM, MKV, MP4, FLV and TS. These effectively contain one or more video and audio streams potentially alongside multiple subtitles. If you had to individually support all of these it'd be a nightmare.
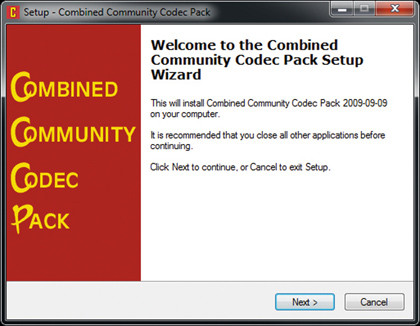
The best one-stop solution is to use a well-known codec pack. If this is the option you want to pursue, then we would recommend CCCP. This uses a collection of open source codecs and utilities to solve if not quite all, then most of your playback problems.

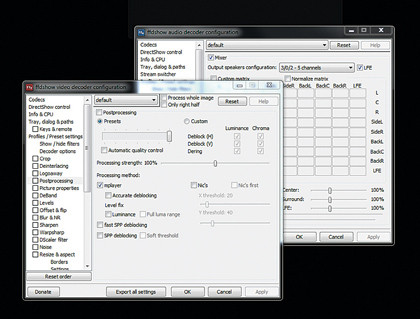
To start with it's based around Media Player Classic and includes all the major audio and video codecs required, along with container formats. It does this through the open source program, ffdshow which is an advanced audio and video decoder.
Along with this is a Haali 'media splitter' that takes container formats, such as MKV and splits the separate audio, video and subtitle streams off. Finally, there's VSFilter, which is an advanced subtitling program.
Once installed it's worth taking time to look at the options from each configuration program, stored in the Start > Programs folder > Combined Community Codec Pack. This single pack will solve 90 per cent of your playback issues in one fell swoop.
One thing it can't help with though is poor processor power. Single-core processors really struggle with HD material; you can try tweaking, but ultimately you need an optimised codec.
If you're prepared to pay $13 (£8) then we highly recommend CoreAVC from CoreCodec, which can even play HD video on Atom-based netbooks. HD snobs will say technically it does this by cutting corners on the decoding, but you'll never notice. The other brilliant feature for CoreAVC is that it supports Nvidia CUDA, so you'll get acceleration from compatible graphics cards on top.
We should also touch upon subtitles. We've already mentioned these can be embedded within a container file such as an MKV. Depending on which player you use, then either the player itself – Media Player Classic, for example – will handle the rendering of the subtitles or an external decoder will be thrown into action.
It's fine when subtitles are embedded, but if you need your own, then these come in a variety of formats: SRT, UTF, IDX or SUB. Sites like www.opensubtitles.org try to catalogue these files. When you are using external subtitles put them in the same folder and name them the same as the video file. An external file will overrule an internal one.
To get subtitles working in ffdshow, access its Properties either from the Start menu or when its icon is displayed in the Notification Area, and locate the Subtitles section. Make sure the 'Heuristic' search option is ticked, as this will intelligently identify external subtitle files, usually in the same folder. The Text and Font section enable you to position and customise the look of the subtitles.
The often used alternative is DirectVobSub, which is the large green arrow that appears in the Notification Area. This requires almost no setting up, but you may want to tweak the font size and positioning.