Windows 7 will generally do its best to work fully automatically, managing your PC with no intervention. There are, however, situations where a more hands-on approach pays dividends.
The Fault-Tolerant Heap (FTH), for example, is a smart feature. It looks out for processes that are particularly unstable, detects those that seem to crash due to memory issues and applies several real-time fixes that may help solve the problem. If these work, great; if not, it reverses the changes.
Although it's an excellent tool, FTH can be confusing because it makes application behaviour seem inconsistent. From your point of view, a program will seem horribly unstable, then start working again for no apparent reason. Or, if you've made some tweak yourself, you may think you've fixed the problem when the FTH deserves the credit.
To check for a situation like this, run REGEDIT, go to HKEY_ LOCAL_MACHINE\Software\ Microsoft\FTH and examine the State key. Any executable protected by FTH will be listed there.
To turn off FTH monitoring, set the 'Enabled' value to 0. Your PC will probably be less stable, but if there are crashes you'll be able to spot the program responsible – FTH won't be masking things.
Experimentation is key here – you need to change the FTH monitoring algorithm to suit your needs and computing style. Drop the 'CrashVelocity' value from 3 to 2, for instance, and increase 'CrashWindowsInMinutes' from 60 to 120. FTH will now intervene if an application crashes twice in two hours, rather than three times in one hour. This will make it more likely to detect and fix problems.
The system does have its limits. If the crash isn't heap-related it'll do nothing, but there's no harm in trying and tweaking further. Find out more about FTH by visiting Microsoft's Ask The Performance Team blog.
Sign up for breaking news, reviews, opinion, top tech deals, and more.
Windows 7 has many other weapons in its fault-finding arsenal. Chief among these are the management and monitoring tools. These do a great job of monitoring your PC's boot and shutdown processes, and will alert you to any programs that are slowing things down.
Launch the Event Viewer (eventvwr.exe) and browse to Applications and Services Logs\ Microsoft\Windows\Diagnostics – Performance\Operational to take a look. Scroll down the list and you'll see many services, programs and processes that are listed as compromising your computer's performance. Many of these will be essential drivers or Windows components, but if a program you've installed seems to be causing regular system slowdowns, consider uninstalling or updating it.
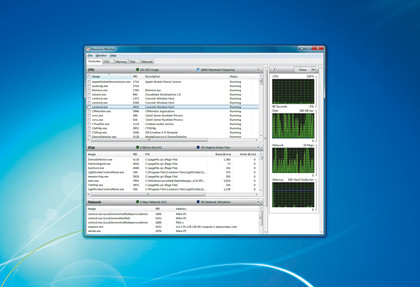
If you want a more in-depth look at how your PC is being used, the upgraded Windows 7 Resource Monitor is a useful tool. To access, it, click 'Start', type resmon.exe and press [Enter]. You'll find tabs that detail your running processes and their use of CPU, RAM, hard drive and network bandwidth.
Do you want to know which programs are accessing the internet? Click 'Network | TCP Connections' to view them all. Is your hard drive thrashing for no apparent reason? Click 'Disk | Disk Activity' to spot the culprit.
Perhaps a file is locked, making it impossible to move or delete. If this happens, you'll need to know which program is to blame. Click 'CPU | Associated Handles', type the file name in the Search box and press [Enter]. The more you use Resource Monitor, the more you'll grow to love it. It gives you a great handle on what's happening under the hood and is an indispensable tool.
Monitor calibration
1. Launch the wizard
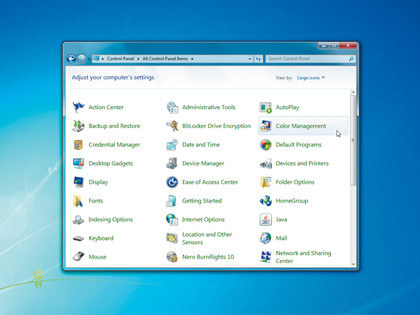
If you use your monitor's default settings, there's no way to be sure it's displaying images accurately. Your photos may look great to you, but appear washed out or with poor colour balance to everyone else. The solution?
Calibrate your display. Use any software that came with your monitor first, otherwise launch the Windows Display Calibration Wizard, either from Control Panel or directly (it's dccw.exe).
2. Gamma
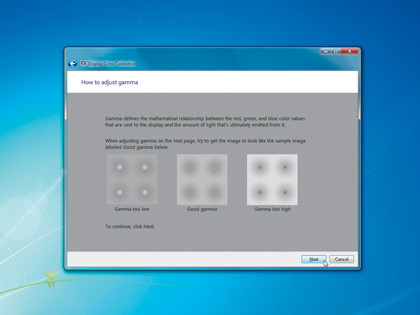
The program is a straightforward wizard, albeit in the slightly odd Windows Vista/7 style (the 'Back' button is top-left on the screen, making it easy to miss). Read the instructions and keep clicking 'Next' until you reach an explanation of the first test: the gamma check.
You need to use the slider on the next page to minimise the visibility of the dots in the centre of each circle. Click 'Next' to give this a try.
3. Brightness
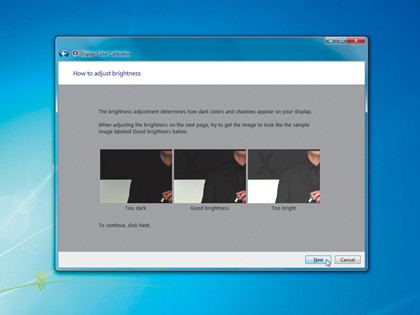
The next test is for brightness. You'll need to access and tweak the brightness control on your monitor so that you can distinguish the man's black shirt from his black jacket, while keeping the 'X' in the background at a point where it's only just visible – it shouldn't stand out, as it does here in the right-hand 'too bright' picture. Click Next and adjust your brightness, clicking 'Back' to remind yourself of the sample images.
4. Compare and contrast
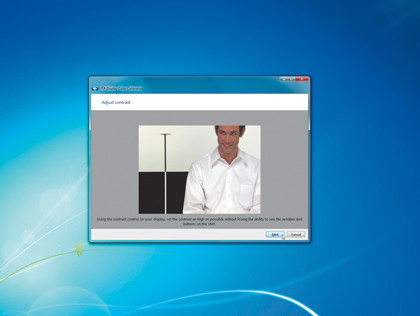
Click 'Next' and you'll be presented with the contrast test. Turn your monitor's brightness setting up so that the two colours in the background are a bright white and deep black (neither should be tending towards grey). Go too far, however, and the creases in the man's shirt begin to disappear. You need to turn the contrast up as far as you can, but stop just before the point where you start to lose detail.
5. Colour balance
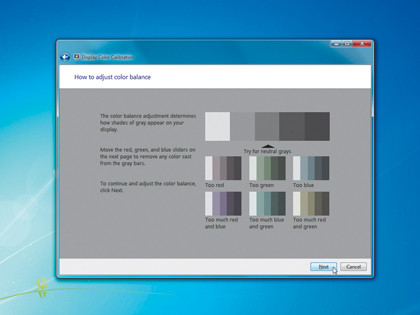
The colour balance test follows. Click 'Next' after this explanatory screen and you'll see a range of grey bars – or at least that's the idea. If your colour balance is incorrect then you may see a slight colour tint to the greys, which will also influence colour images. Use your monitor's colour balance controls to correct this. Click 'Next', and if you're happy with what you've done, click 'Finish' to recalibrate your display.
6. Tune your text
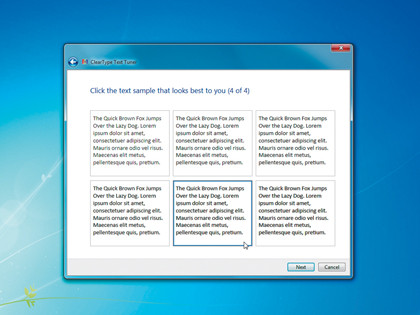
Windows 7 now displays the ClearType Text Tuner, which checks that your PC is displaying text as clearly as it can. A range of text samples is displayed and you need to click the ones that look best. Windows should now display images and text accurately and clearly. Bear in mind that this calibration is affected by variables such as room lighting, and you should calibrate the monitor again if there are any dramatic changes.
Current page: Windows 7 optimisation & calibration
Prev Page Windows remote access, VPN and IIS Next Page Windows Media Center and Windows shortcuts