12 handy OpenOffice Writer tips
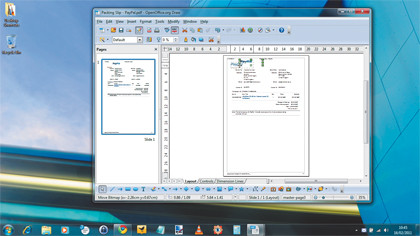
Complex formatting issues can cause problems even between versions of Word, and the simplest way to combat them is to export the document directly as a PDF.
5. Create text frames
On the subject of formatting, text boxes don't exist in OpenOffice.org Writer. Instead, it uses frames. These are designed to hold all kinds of objects, including images, graphics, formulae and watermarks.
The benefit of using a frame for text is that you can then place it anywhere on the page you like. Choose 'Insert | Frame'. Accept the defaults in the dialog that pops up and click 'OK'. You should get a small rectangle on the page, which you can then resize using the green handles or pick up and drag by its edges.
Click inside the frame and begin typing to add text. Once you've finished writing, you can move the frame wherever you like.
6. Apply formatting to frames
Double-click the edge of a frame to see its options dialog. Here you can set margins, text wrapping and the number of columns contained within the frame. Click the 'Borders' tab to change the line around the frame. Choose 'None' or opt for one of the many line styles.
Sign up for breaking news, reviews, opinion, top tech deals, and more.
You can also set the shadow effect behind the frame from this tab. Move to the 'Background' tab to set a background colour or image. If choosing a colour, you can also tweak the degree of transparency to prevent it looking too garish. Click 'OK' to accept the changes.
7. Add new extensions
OpenOffice.org can accept extensions for additional features. You can find a full list of available extensions at http://extensions.services.openoffice.org/en.
Use the search tool to find the function you want, bearing in mind that some extensions are designed to complement other areas of OpenOffice.org and may not work in Writer. Download the extension and launch it.
To remove an extension, choose 'Tools | Extension Manager', then select it and click 'Remove'.
8. Export in PDF format
You can export a document as a PDF by choosing 'File | Export as PDF' and then providing a filename and location. It's also possible to import PDF files and edit them if you install the Oracle PDF Import Extension from here.

Now open a file and browse to the PDF you want to edit. How well it works depends on whether the PDF has embedded text information. Those including an embedded ODF file work best, but many others also work.
Editing takes place in OpenOffice.org Draw, but this includes text modification tools.
9. Add a table of contents
In large documents, it can be useful to produce a table of contents or an index to help readers navigate. If you use styles to format headings, making a table of contents is easy.
Choose 'Insert | Indexes and tables | Indexes and tables'. Select 'Table of contents' and 'For entire document', and click 'OK'. The table will be inserted at the current cursor point. You can use the 'Indexes and Tables' dialog to modify your table and select styles to include or exclude.
10. Create an index
If you need to make an index, Writer can't use styles because the terms mentioned are often dotted around the body text. Instead, you need to tag words that you want included in the text.
Highlight a word or term, then choose 'Insert | Indexes and tables | Entry'. The word should appear under 'Alphabetical index'. Tick the box to make this the main entry and also choose to apply to all similar texts to index every instance. Click 'Insert'. Repeat for each term you want indexed.
Once complete, put the cursor where you want your index to appear and pick 'Insert | Indexes and tables | Indexes and tables'. Select 'Alphabetical index' from the list and then click 'OK'.
11. Cite references
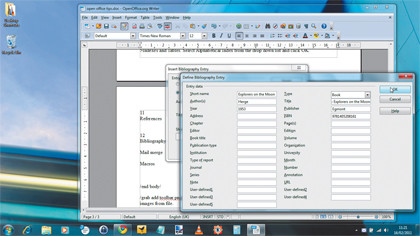
If you need to cite references within a document, you can store them in Writer. Place the cursor just after the text that relates to this reference and choose 'Insert | Indexes and tables | Bibliography entry'. Select 'From document content' and click 'New'.
Now put all the information you have about this reference into the fields provided, including a short name for the reference. This will be entered into the text here, so you might give it a number or refer to it by its authors' names ('Cassels et al', for example) depending on the convention you need to follow.
Click 'OK' followed by 'Insert' to add the short name reference to the text in square brackets. To refer to the same work again, choose 'Insert | Indexes and tables | Bibliography entry' and select it from the list.
12. Make a bibliography

Having set up a list of references and inserted their short names within the text, producing a bibliography is easy. Select 'Insert | Indexes and tables | Indexes and tables' and choose 'Bibliography' from the list.
-----------------------------------------------------------------------------------------------------
First published in PC Plus Issue 307. Read PC Plus on PC, Mac and iPad
Liked this? Then check out 20 things we'd change about OpenOffice.org
Sign up for TechRadar's free Week in Tech newsletter
Get the top stories of the week, plus the most popular reviews delivered straight to your inbox. Sign up at http://www.techradar.com/register