How to migrate your data to a new Mac
The right way to move to a new Mac
Sign up for breaking news, reviews, opinion, top tech deals, and more.
You are now subscribed
Your newsletter sign-up was successful
Back up your PC
Make a copy of your PC files before you ditch Windows for OS X
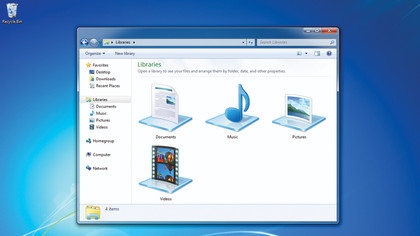
Perhaps you're in the process of moving from a PC to a Mac. While it's likely you'll be eager to leave Windows behind, it's unlikely to be true for the documents you've created. As when moving from a Mac to another Mac, Apple makes it easy to migrate your data from a PC (see 'From PC to Mac' later in this feature), but we nonetheless strongly recommend you clone your PC in its entirety before shutting it down for the last time.
In doing so, you ensure you have a copy of everything, and can later access any data that either Apple's Migration Assistant or your own drag-and-drop process missed. Given how affordable external hard drives are, you'd be mad to not keep a tiny copy of your PC in a drawer, and if you later decide you really don't need it, you can always repurpose the hard drive as a back-up unit for your new Mac.
Although the more modern iterations of Windows include built-in back-up systems, they have a tendency to create output that's opaque, much like Apple's own Time Machine. What we instead recommend is something closer to SuperDuper! on the Mac, to create a clone that can subsequently be easily browsed using Finder.
Macrium Reflect is one such product, and, much like SuperDuper!, it generously comes in a free incarnation (macrium.com/reflectfree.aspx) that enables you to do a one-off clone.
Before you start, get your house in order. Tidy up your PC so your files are in their most logical locations, in case you need to find them later. Additionally, where possible, export data from applications you'll no longer be able to use on the Mac, and then file it somewhere suitable. You'll also need to ensure the hard drive is in an appropriate format.
Macs now read NTFS-formatted drives but won't write to them. If you want a Windows drive that you can also copy documents to from your Mac, opt for ExFAT.
Sign up for breaking news, reviews, opinion, top tech deals, and more.
Once your clone's complete, it's time to test it. Use Windows Explorer or Finder on your new Mac to explore the disk and make sure your important files are intact. Ideally, you should then migrate data to your Mac and again test it before selling or giving away your Windows PC.
Clone your PC: Keep your files safe
1. Connect your drive
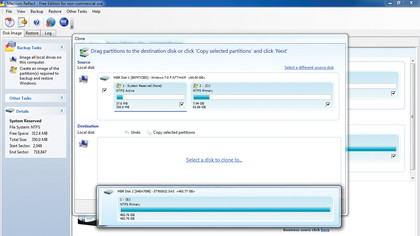
With your USB drive connected, launch Macrium Reflect. Click 'Clone this disk'. In source, your PC's disk will be shown. Under destination, click 'Select a disk to clone to' and choose your external drive.
2. Make the clone
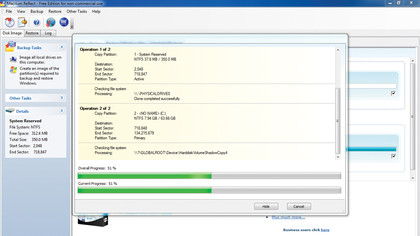
Click Next to see an overview of what will happen. Ensure the source and destination are correct. Click Finish. You'll be warned about existing data being overwritten. Click Continue to start the process.
3. Browse your disk
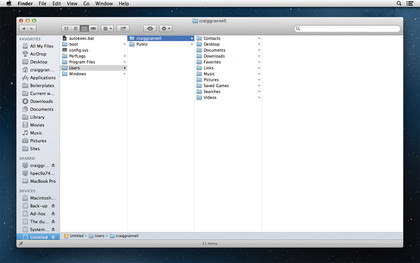
Eject and disconnect the hard drive from your PC and connect it to your new Mac. It should appear in Finder's sidebar (as 'Untitled') and be browsable. The Users folder will house the majority of your important documents.
Automatic migration
The easiest way to get data from an old to a new Mac
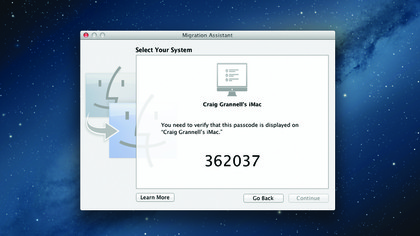
Migration Assistant provides a relatively painless means of transferring user data, applications and settings between two Macs. Automated systems sometimes make old-hands a little twitchy, but these days they're pretty robust, if not quite entirely problem-free.
That's not to say Migration Assistant is for everyone. If your old Mac's well-behaved and in good working order (few crashes, no obvious software problems, little cruft), it's a good bet, unless you're the kind of person who absolutely has to start with a clean slate with each new machine. However, if your old Mac's been having problems, Migration Assistant might bring them across to the new one, and it would therefore be sensible to consider a manual migration, as outlined on the opposite page.
Avoid migration horror
If you decide to use Apple's migration tools, we have two important tips. First, if something goes wrong, no matter how slight the error, it pays to have a full copy of your old Mac's drive, to later 'rescue' missing files or data. Therefore, clone your Mac before you begin.
Secondly, do the migration during your Mac's set-up process, and certainly before you've done any major work with it. Although you can later launch Migration Assistant and pull data across from an old Mac, you cannot easily migrate data from a user account into one of the same name that already exists on the new machine. You'll therefore be left with two accounts and fiddling about with the horrors of permissions to try and merge them, which isn't at all fun.
When it comes to the migration itself, ensure the old (source) Mac's software is up to date and that any laptops are plugged into the mains. The two Macs need to be connected somehow, either via a cable or on the same Wi-Fi network. Cable transfers are typically faster.
If using Thunderbolt or FireWire, you'll need to restart the source Mac into target mode by holding the T key as it boots. On the 'Transfer Information to This Mac' screen during set-up, choose 'From Another Disk' if using Thunderbolt or FireWire (or a connected Time Machine backup, which is an alternative option), and confirm the source in the 'Select the Source' screen.
If using Wi-Fi or Ethernet, select 'From Another Mac' and launch Migration Assistant on the source Mac. It will ask for permission to close all open apps, and you'll also have to confirm a passcode key on both Macs before continuing.
Then decide which data to copy: user accounts, applications, settings and 'other files and folders', the last of those being files you've created outside of your user folder.
Migration methods
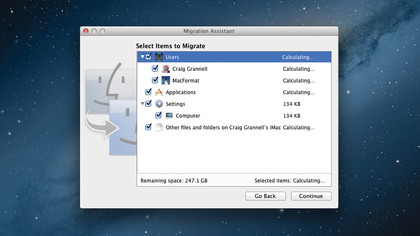
If later using Migration Assistant on your new Mac, the process is broadly similar, although on the new Mac you need to first confirm you want to transfer data 'From a Mac, PC, Time Machine backup, or other disk', and then select a migration method ('From a Mac or PC' or 'From a Time Machine backup or other disk').
As noted earlier, however, you're better off doing the migration during the initial set-up of your Mac, not later on.
Manual Mac migration
If you want old data on a fresh Mac without cruft, here's how
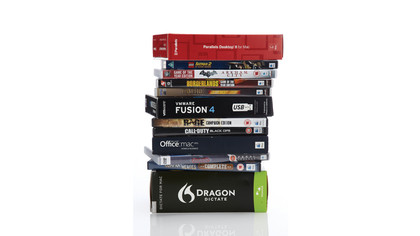
Should you use a Mac for a long time before you unbox its shiny new replacement, chances are it will have acquired a certain amount of cruft. The old Mac might be stuffed full of applications you no longer use, some of which might not be compatible with the version of OS X running on your new Mac; it might also have fonts you no longer care for and system add-ons that slow the computer down.
The Mac might act strangely now and again - perhaps it'll sometimes freeze for no reason, or occasionally crash entirely. If that's in any way the case, it's worth considering manually migrating your old data to the new Mac. Doing so is more time-consuming than letting Migration Assistant get on with its job, but it also gives you total control over the data you bring across, and also when you decide to do so.
This is a method various members of the MacFormat team tend to use, because it lessens the likelihood of conflicts on a new Mac, and it also cuts any clutter that might have built up on the old machine. In short, manual migration typically results in a more reliable and faster Mac - it's a clean slate to which you can add specifically chosen documents and applications.
Should manual migration be the route you decide on, it's best to use a clone of your old Mac to copy data from. It is possible to browse Time Machine disks and restore files from them, but it's faster and more efficient to use a clone.
It's also worth noting that there's no real need to rush anything. Although you can attempt to bring all your data across to the new Mac in one sitting, we find it's often useful to instead take a more relaxed and incremental approach. Keep everything handy by having your clone connected for a few weeks, and copy files across as and when you need them. You'll find personal documents (as in, anything you've created) will probably be copied over almost immediately, but application support files might never need to be migrated, if you decide against installing the products they support.
First steps: To a fresh Mac set-up
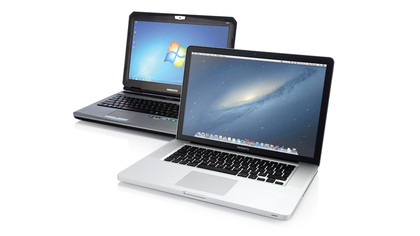
1. Be prepared
Before starting your migration, it's good practice to make careful notes of anything you think you're going to need to access your information. For example, you will need serial numbers of any software you're going to reinstall, and passwords for websites and social networks you use.
Additionally, you might find it useful to screen-grab aspects of your old Mac (such as the Dock), as a reminder of your favoured set-ups. You can do this with the key combination Shift+Command+3.
2. Sign in
During the set-up of your new machine, you'll be asked to sign in with your Apple ID, assuming you already have one. If you do and you've previously used Apple services, some aspects of the migration will already be simpler for you. This is because, once the Mac's connected to the internet, iCloud will be able to pull down data for your calendar, contacts and Safari bookmarks.
3. Explore defaults
Something people like to do with Macs is make them 'theirs', by changing some of the system settings. However, Apple subsequently updates the defaults with each new OS release, and often (but not always!) makes them better.
Therefore, take time to explore the way your new Mac works in its vanilla state, and avoid the temptation to make everything as it was before. Remember, you can always bring settings and add-ons back later.
4. Install your apps
If there are apps you know you'll need to use almost immediately, install them. Mac App Store apps can be installed by signing in and accessing them from the Purchases tab. For other apps, install these from DVDs or disk images; where possible, download the latest versions from the web. Again, try using apps in their vanilla states before copying across old preferences.
Apple Apps: Document transition
5. Copy your documents
Your personal documents will be found in /Users/[account name] on your clone drive; if you like, every folder's contents (Documents, Music, Pictures and so on) can be copied into its equivalent location on the new Mac. Again, though, it often pays to be less hasty – for example, if your Downloads folder was full of junk, do all the files and folders within really need to be copied to your new Mac? Go through your files and assess what's essential and what can be discarded.
iTunes
Your iTunes library is located in /Music/ iTunes, and can be copied across as-is. On first launching iTunes, the app might update the library and you'll also need to authorise the Mac to play DRM-protected files. Local iOS device backups can be copied from /Library/Application Support/MobileSync.
iPhoto and Aperture
iPhoto and Aperture libraries are located in /Pictures, and these can be copied across to the equivalent location on the new Mac. Like iTunes, iPhoto will probably need to update the library on first launch, but everything should then work fine. You can put the libraries elsewhere, and hold Option while launching to point the app at them.
Mail stores your email in /Library/Mail and downloads in /Library/Mail Downloads. Copy those folders across to your new Mac and then launch Mail. It will update the database and you'll subsequently also have to enter your account password before receiving new email.
Notes
If you were previously using iCloud with Notes, they should download on launch. If you're moving from OS X Lion, launch Mail before Notes and the latter will be populated with existing data. If you had a mailbox called Notes, you must change that on the old Mac prior to migration, or it'll be deleted.
Backups
All backup sets will need to be recreated. That goes for whether you're using Time Machine or some other third-party system. Don't overwrite an old backup; rather, start from scratch on a newly formatted drive. Also, don't wait until migration is totally complete before doing so - start backing up during your new Mac's first day.
Where are my files?: Finding folders
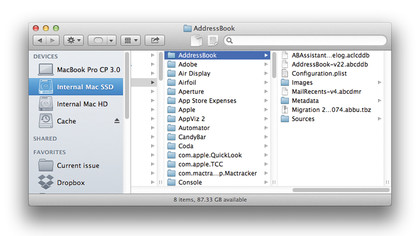
Most important files you'll want to copy across from your clone are housed in obvious locations in your user folder; some other data will be in iCloud, and will be downloaded by your online Mac when needed.
However, as the Mail section above shows, this isn't always the case, and one of the problems with a manual migration is in knowing not only where OS X keeps certain files, but also if and when those files need transferring to a new Mac. What follows are some examples of common document types whose hard drive locations you might need help finding.
Calendars and contacts
If you don't use iCloud, Calendar data is in /Library/Calendars, and contacts in /Library/ Application Support/AddressBook.
Safari bookmarks
Safari data is stored in /Library/Safari. You'll need to copy the Bookmarks.plist file if you don't sync bookmarks via iCloud.
GarageBand support files
Instruments live in /Library/Application Support/GarageBand, and user settings in /Library/Application Support/GarageBand.
Dropbox documents
To save Dropbox from downloading everything, copy the Dropbox folder from your clone's user folder and point a new Dropbox install to it.
App settings
If you miss an app's set-up, copy its preferences from /Library/Preferences. Use Spotlight to filter for an app's name.
More support files
Other application support files are usually found in a folder not unusually called /Application Support. Copy across an application's folder if something's missing.