How to clean up and declutter your Mac
Claw back space and improve performance
You've cleared a bit of space, but now it's time to sort things out permanently

Hopefully you've now cleared enough space from your drive to help resolve any low disk space messages you've been getting, and to ensure your drive has at least 10% free space.
That's great in the short term, but unless you consider some more permanent solutions, the same problems will reappear. The simplest thing to do is to move as much of your data as you can to an external hard drive.
Network drives
Network drives act as a central repository for all of your networked computers' spare files, but don't work with all files (such as iMovie Events). Performance will also depend on the speed of your network - use wired or HomePlug connections as opposed to wireless where possible.
Most of your data will be stored inside your Home folder, which resides inside the Users folder on your system drive. By moving some or all of the data inside this folder to your external drive, you'll free up a significant amount of space depending on how many photos, videos and other large files you possess.
The obvious solution is simply to move your entire Home folder to your external drive. While it's technically possible, it's both fiddly and potentially dangerous. If you move the Home folder, then your external drive must always be attached or connected in order for you to log into your account when your Mac starts. If the drive is lost or damaged, you'd be locked out of your profile or - if you're the only user of your Mac - your entire computer.
A safer, better solution is simply to move enough files to free up a comfortable amount of space. Which files should you move? The obvious answer is the largest ones, but you also need to consider convenience: will your external drive always be plugged into your Mac?
If you're a MacBook user, you may not want to be tied to even the slimmest external drive in order to access your files. So it makes sense to ensure those files you can't do without are always accessible on your Mac's system drive, while less essential files are moved to external drives.
Sign up for breaking news, reviews, opinion, top tech deals, and more.
Span your media

Which files you decide to keep and which ones you move across ultimately depends on your personal preferences, but you'll probably find it's practical to leave the contents of your Documents folder where it is, while any files you've kept in the Downloads folder can be safely moved across to your external drive.
Where things may get tricky is with your media files - you may find yourself wanting permanent access to certain movies, photos or music, while others can be safely stashed away on your external drive.
When it comes to the contents of your iTunes library, your music, movies, podcasts and TV shows, you have two choices. To move the entire library across to your external drive, follow the step-by-step guide here.
If you'd like to split the library between your system drive and your external drive so that favourite tracks are always available, it's possible to span your collection across two or more disks without messing up your iTunes library.
To do this, install a free program called TuneSpan. The step-by-step guide below reveals all you need to know about using it.
When it comes to your iMovie video collection, it's possible to move selected movies from your Event Library to your external drive.
Fire up iMovie, then click the drive icon next to Event Library to see all available drives. Now Command-click on those Events you wish to move to select them. Finally, hold Command as you click and drag the Events to your external drive to move them to that drive and update iMovie's references.
They'll remain in the library, but will only be accessible when your external drive is connected and switched on.
How to span your iTunes folder across multiple drives
01. Pick tracks to move

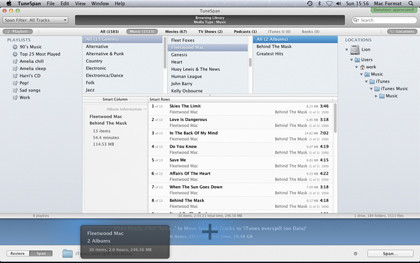
Install TuneSpan and launch it. Select an external drive as the location to span selected iTunes content to. Then drag and drop tracks, albums or the entire output for a selected artist to the grey bar near the bottom of the screen. The bar shows the space freed.
02. Start Spanning process

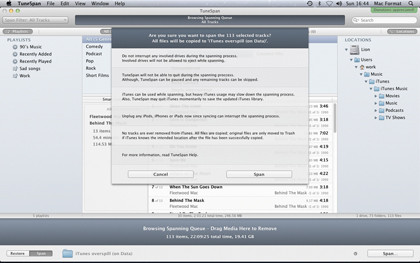
Once enough space is freed, press Command+B to review the items you've added to your queue (press again to return). When ready, click the Span button. Read the warning before clicking Span again - you'll need to manually update the iTunes library for any missing tracks.
03. Spanning in practice

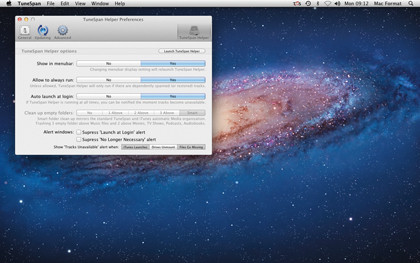
When the drive isn't present, TuneSpan can remind you of what tracks are unavailable in iTunes: select TuneSpan > Preferences > TuneSpan Helper and set both Allow to always run and Auto launch at login to Yes. Close and reopen TuneSpan: click Allow.
Manage iPhoto library
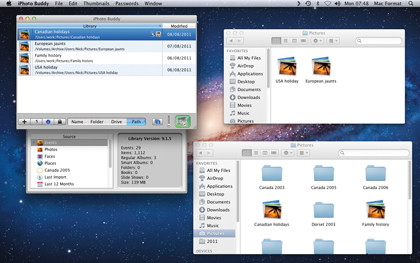
You're probably aware just how large your iPhoto Library file is (you'll find it in your Pictures folder). It's quite unwieldy, but what can you do about it? iPhoto supports multiple libraries, so one solution is to create different libraries for different groups of photos, allowing you to move some libraries to your external drive while keeping others to hand on your system drive.
Use iPhoto Buddy (free) to help manage and switch between multiple libraries in iPhoto quickly and easily. It's also possible to keep the size of your new iPhoto library down.
Before importing any photos, choose iPhoto > Preferences > Advanced tab, then untick Copy items to the iPhoto library. This prevents the photos being duplicated in your library unless you subsequently edit them (they're then duplicated into the library to protect the originals).
That's all well and good if you're just starting out with iPhoto, but if you've got a massive library already in place, packed full of photos you've already edited, what then?
One solution is to right-click the iPhoto Library file and choose Duplicate to create an exact copy. Rename it according to the subset of photos you wish to include (for example, 'Family holiday 2011') and then use iPhoto Buddy to open it in iPhoto. Remove all the photos and folders apart from your family holiday snaps (remember to empty the iPhoto Trash) and then marvel at this slimmer library. Simply repeat the process for each new library you wish to create.
When you're finished, delete the original library. You can now split the remaining libraries between your system hard drive and your data drive accordingly.
Current page: Long-term solutions
Prev Page Top 10 tips for freeing up space Next Page How to upgrade your Mac hard drive