How to declutter your Mac's menu bar
Organize the status icons to make things manageable
Sign up for breaking news, reviews, opinion, top tech deals, and more.
You are now subscribed
Your newsletter sign-up was successful
The right end of a Mac’s menu bar can get crowded, making icons hard to find and allowing status changes to go unnoticed. This is where Bartender 3 ($15, £15, AU$24) is useful.
Its purpose is to declutter and rearrange the menu bar icons to your needs, providing you with the option to hide and reveal them as and when you want.
Let’s get down to giving your menu bar an unseasonally early spring clean! After you install the app, you’ll eventually close its preferences window. To get back to it, Option-click the app’s menu bar icon or, if you choose to hide Bartender’s own icon, open the app from Finder.
A quick tour of Bartender’s preferences
1. Tailor each icon
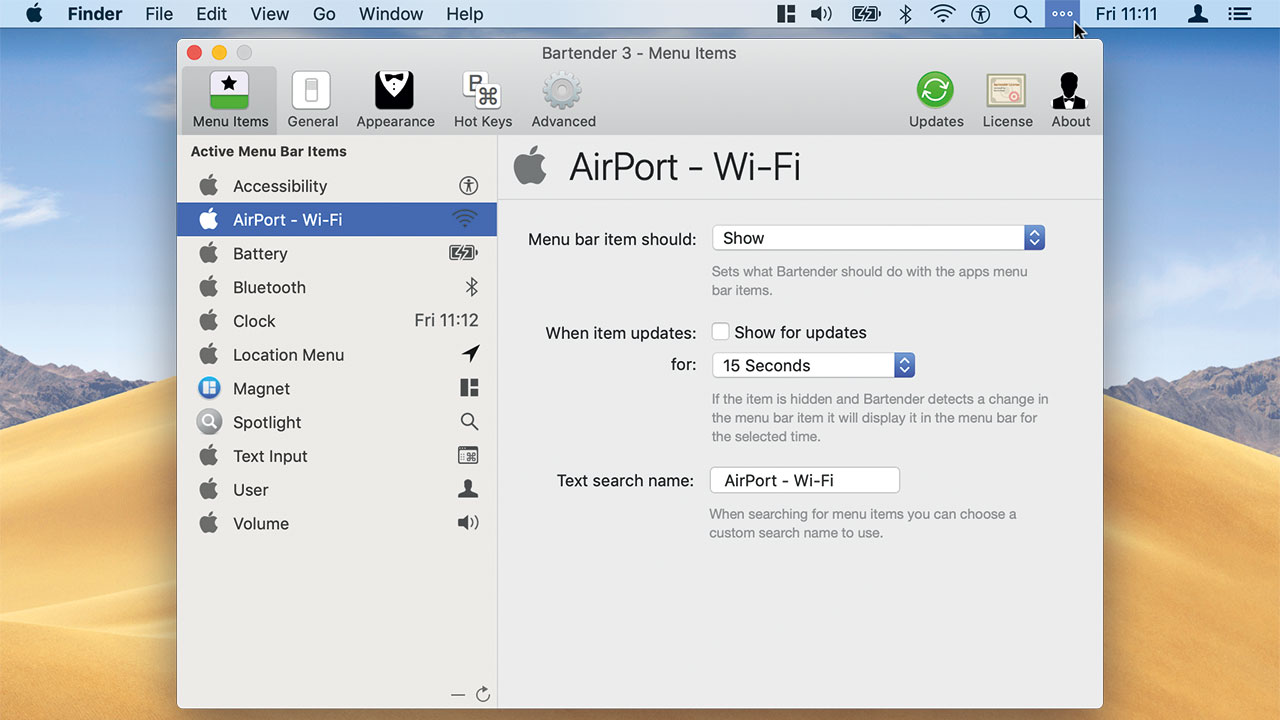
Set visibility and searchable names for icons in the Menu Items tab. So, when using Bartender’s keyboard-based search feature, you may want to type ‘wifi’, not the default ‘AirPort’, to reveal the corresponding icon.
2. Keep it around
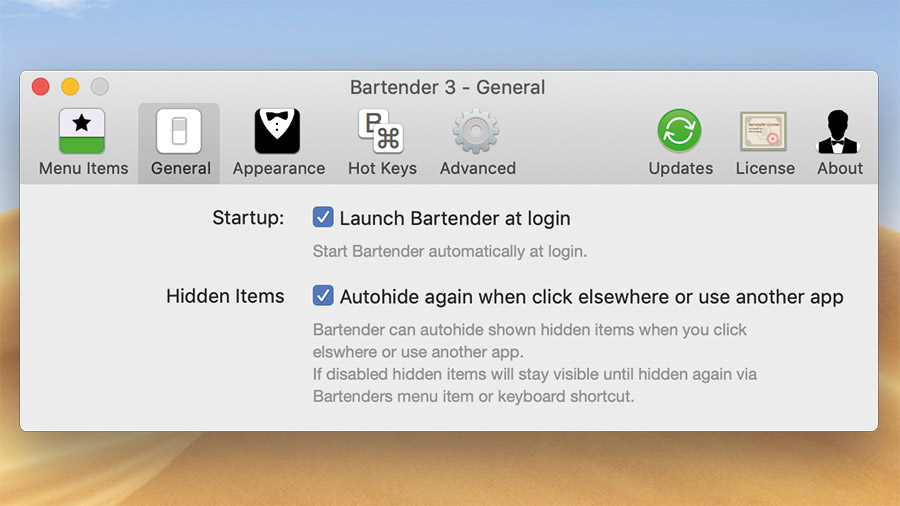
Bartender doesn’t open at login by default. It’s wise to alter that, so your icon arrangement kicks in whenever you use your Mac. The option for this is in the General tab.
Sign up for breaking news, reviews, opinion, top tech deals, and more.
3. Bartender’s own icon
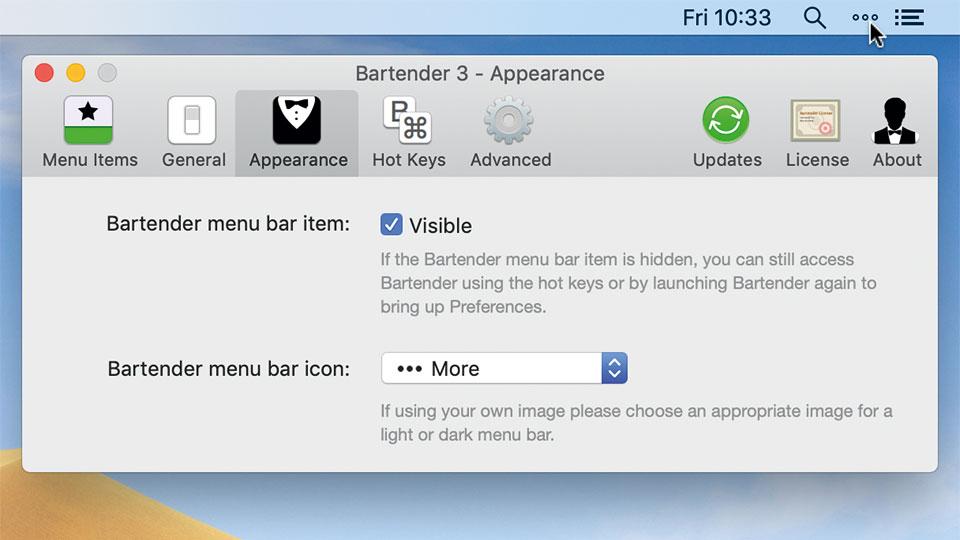
You can pick from a range of premade designs, add your own, or wholly hide Bartender’s icon from the Appearance tab. Note that Bartender’s hot keys will still work, and you can easily open its preferences from Finder.
4. Refresh rate
To save battery power, reduce the frequency at which Bartender checks for status updates that will change the visibility of icons. This is done in the Advanced tab.
Customize the icons
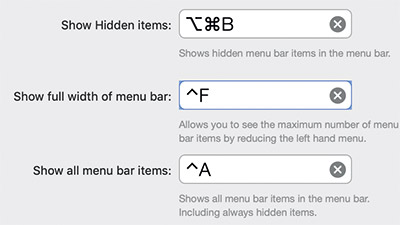
Bartender’s ‘hot keys’ are simply keyboard shortcuts used to control it: to toggle icon visibility, search for a status icon by typing its name, and navigate using the keyboard.
Set them in the Hot Keys tab in its preferences. Ensure you use combos not already used by other apps.
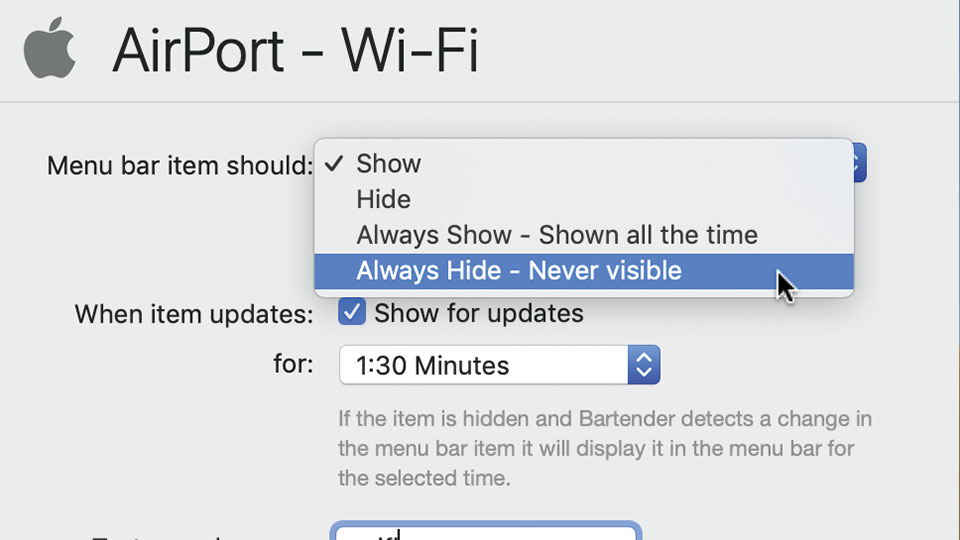
Click Bartender in the menu bar and it’ll toggle the icons that are visible in that area between two states: those whose visibility is set to Show and those set to Hide. The latter category is a good choice for icons you need only occasionally.
There are some exceptions. Set an icon to Always Show and it’ll be visible regardless of Bartender’s state.
Pick Always Hide and the icon will appear only if you: press the Search hot key and type its name; press the Show All Items hot key; or set the icon to display when it has a status update to tell you about.
When icons that are set to Hidden are currently shown, they’ll hide again when you switch app. You might turn that off (in Bartender’s General preferences) to co-opt the two visibility states so each contains icons related to different tasks.
No matter which visibility setting you pick, ticking ‘Show for updates’ will cause the icon to reappear for a limited time if a change in its status is detected.
Tools that sync to cloud storage are a good choice for this, to alert you if their connection drops.
To rearrange the status icons, hold Command, then drag icons left or right. macOS itself allows this, though not for all items. You should find more are movable (with the exception of Notification Center) while Bartender is running.
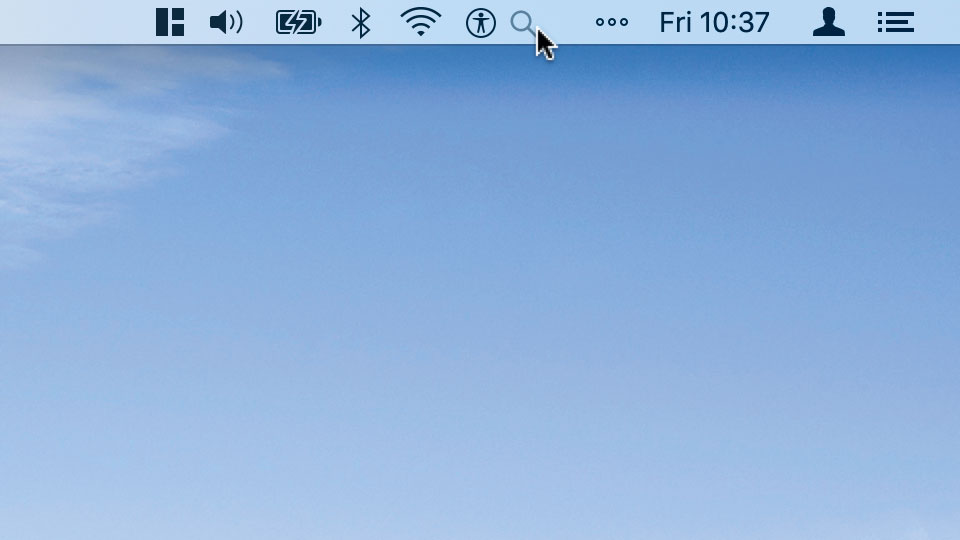
Note that even those icons you’ve set to Always Hide will appear if you press Bartender’s Show All Items hot key.
To reset an icon to its default behaviour, select it in the Menu Items tab of Bartender’s preferences and click the (unintuitive) minus icon below the list.
For more help with your Mac…
This article was originally published in MacFormat #335 and Mac|Life #152. Get regular features, how-tos and reviews for Apple kit by subscribing to MacFormat in the UK or Mac|Life in North America. Subscriptions are also available worldwide.

Daryl is a freelance writer and author of two books—The Making of Tomb Raider and 50 Years of Boss Fights. A third book, the follow up to ‘Tomb Raider’, comes out in 2026. Having worked at TechRadar previously as a software writer from 2021 to 2023, Daryl understands how software can benefit users, as well as having an interest in how accessibility features can benefit others.
With over a decade of experience, his work has been featured in Tom’s Guide, SUPERJUMP, Pocket Tactics, Radio Times, The Escapist, and more.
