How to make Windows 11 look like Windows 7
Give Windows a more retro look
Sign up for breaking news, reviews, opinion, top tech deals, and more.
You are now subscribed
Your newsletter sign-up was successful
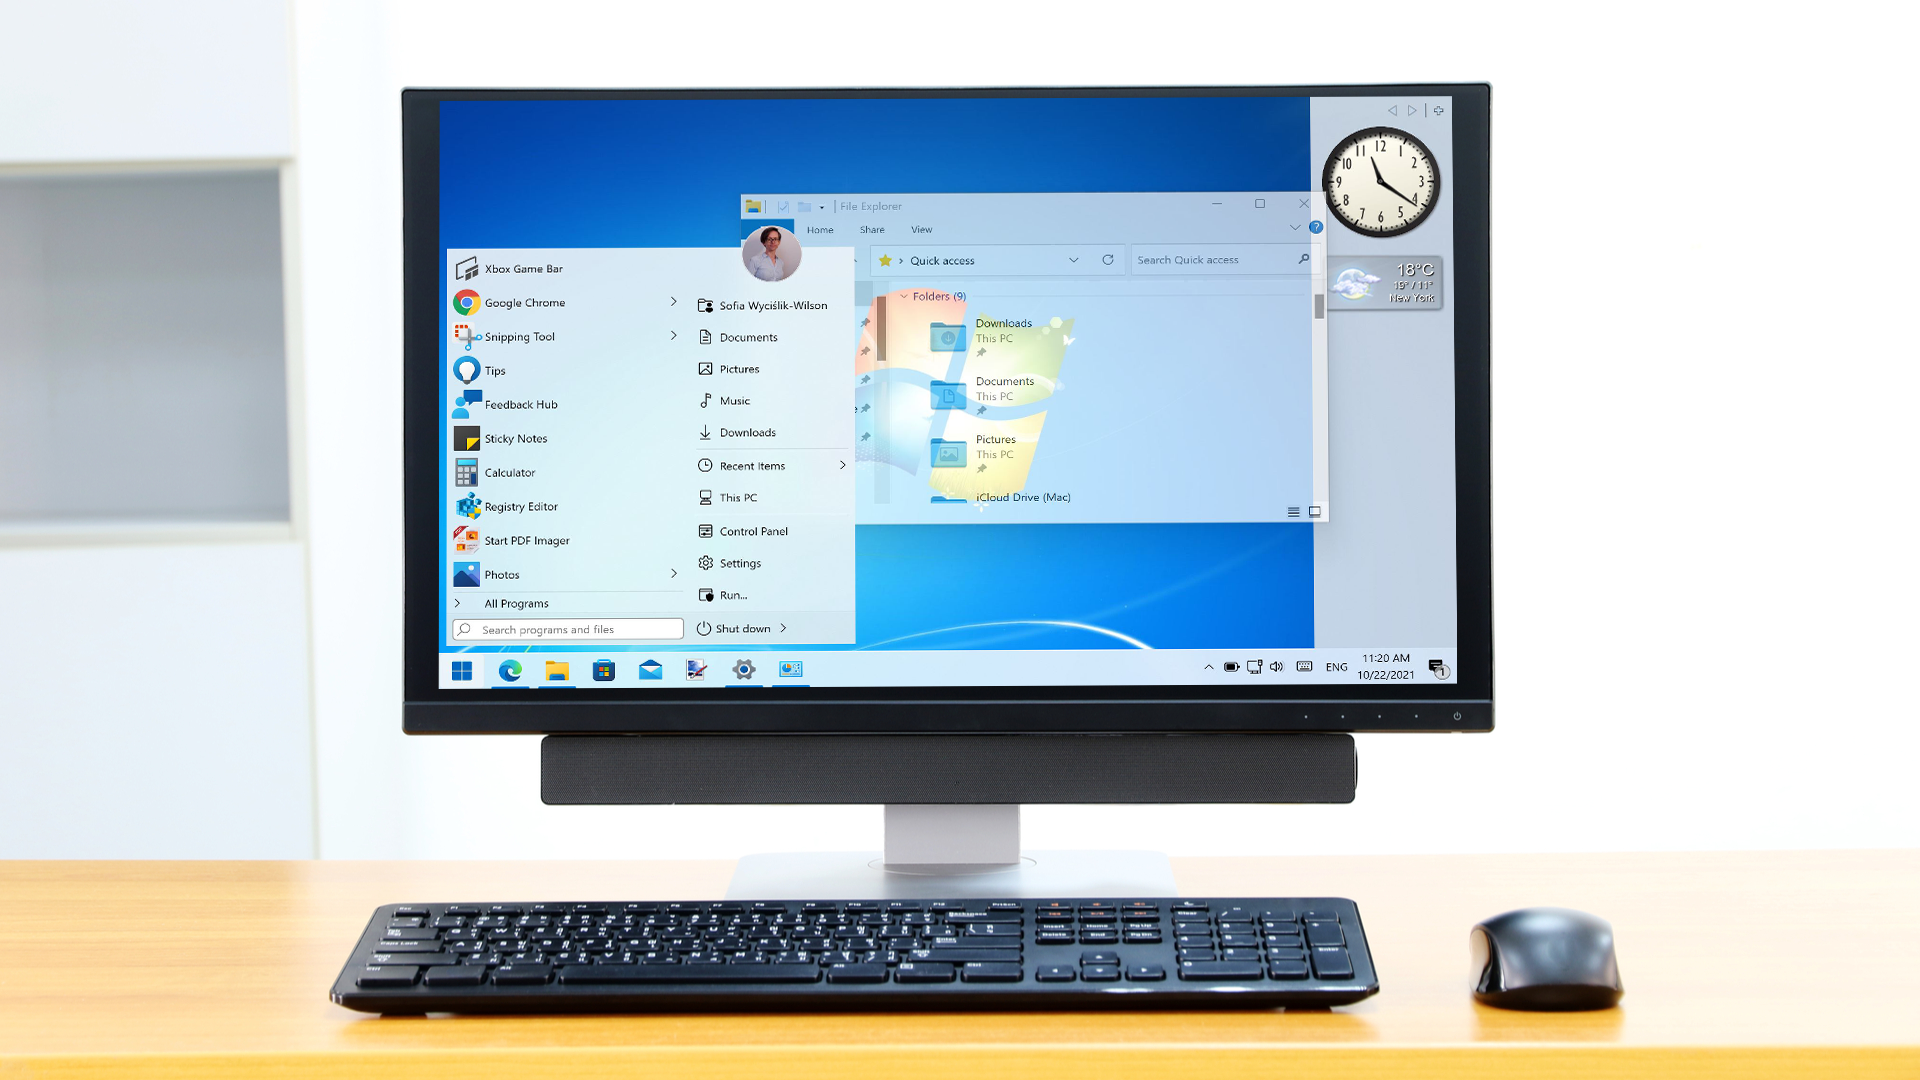
The look of Windows 11 is rather different from its predecessors, and for many people this is a nig part of the attraction of upgrading. But for others, the updated look leaves a little to be desired, and may even lead to yearnings for the aesthetics of older versions of Windows. If you've ever wondered about how to make Windows 11 look like Windows 7, we're here with the answers you've been looking for.
There are various reasons for wanting to revert back to the look of an old version of Windows. It may just be a personal preference when it comes to appearance, but there are also practical reasons.
Microsoft introduced some fairly significant interface changes to Windows 11, and these were not all to everyone's liking. If you opt to make Windows 11 look like Windows 7, you can also regain some of the functionality.
It is possible to enjoy the best of both worlds. You can have Windows 11 installed so you benefit from the very latest features and security options, but implement the look of Windows 7 if this is the look you prefer. Let's dive in and take a look at how to make Windows 11 look like Windows 7.
- How to download and install Windows 11 right now
- Windows 11 problems: how to fix the most common issues
- How to check if your PC will get Windows 11 update
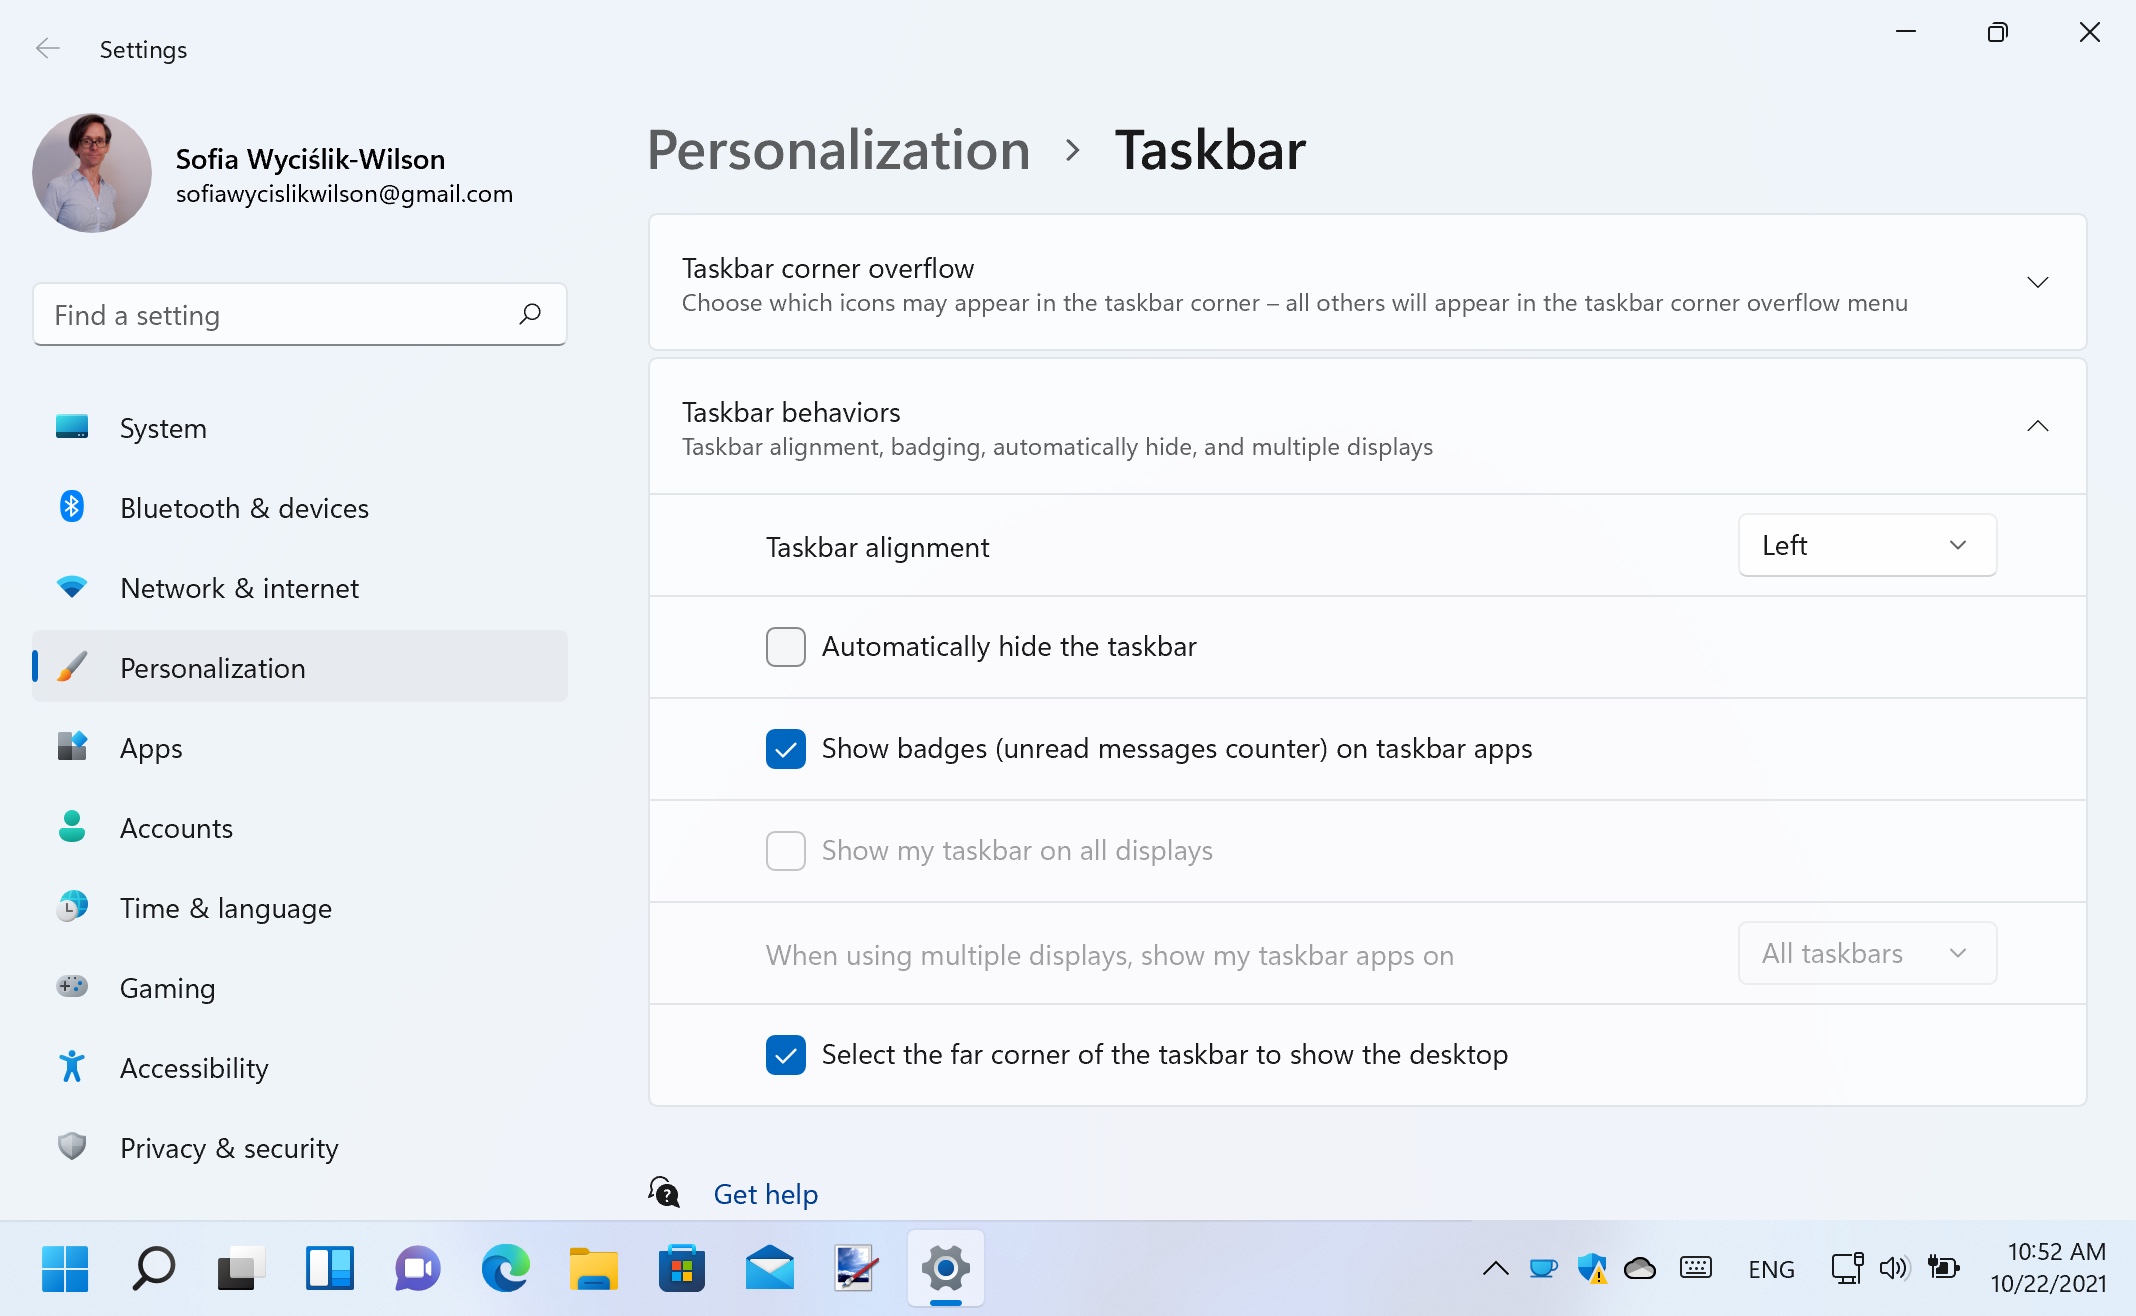
1. Perhaps the most obvious change to Windows 11 is the repositioning of the Start button and other apps to the middle of the taskbar. Thankfully, Microsoft has made it easy to move it back to the left hand side of the screen for people who prefer things the way they used to be.
Right-click an empty section of the taskbar and select Taskbar settings, then look for the Taskbar behaviours section. Click the drop-down menu labelled Taskbar alignment, and select the Left option. The Start button and all of the other buttons in the taskbar will all be aligned to the left.
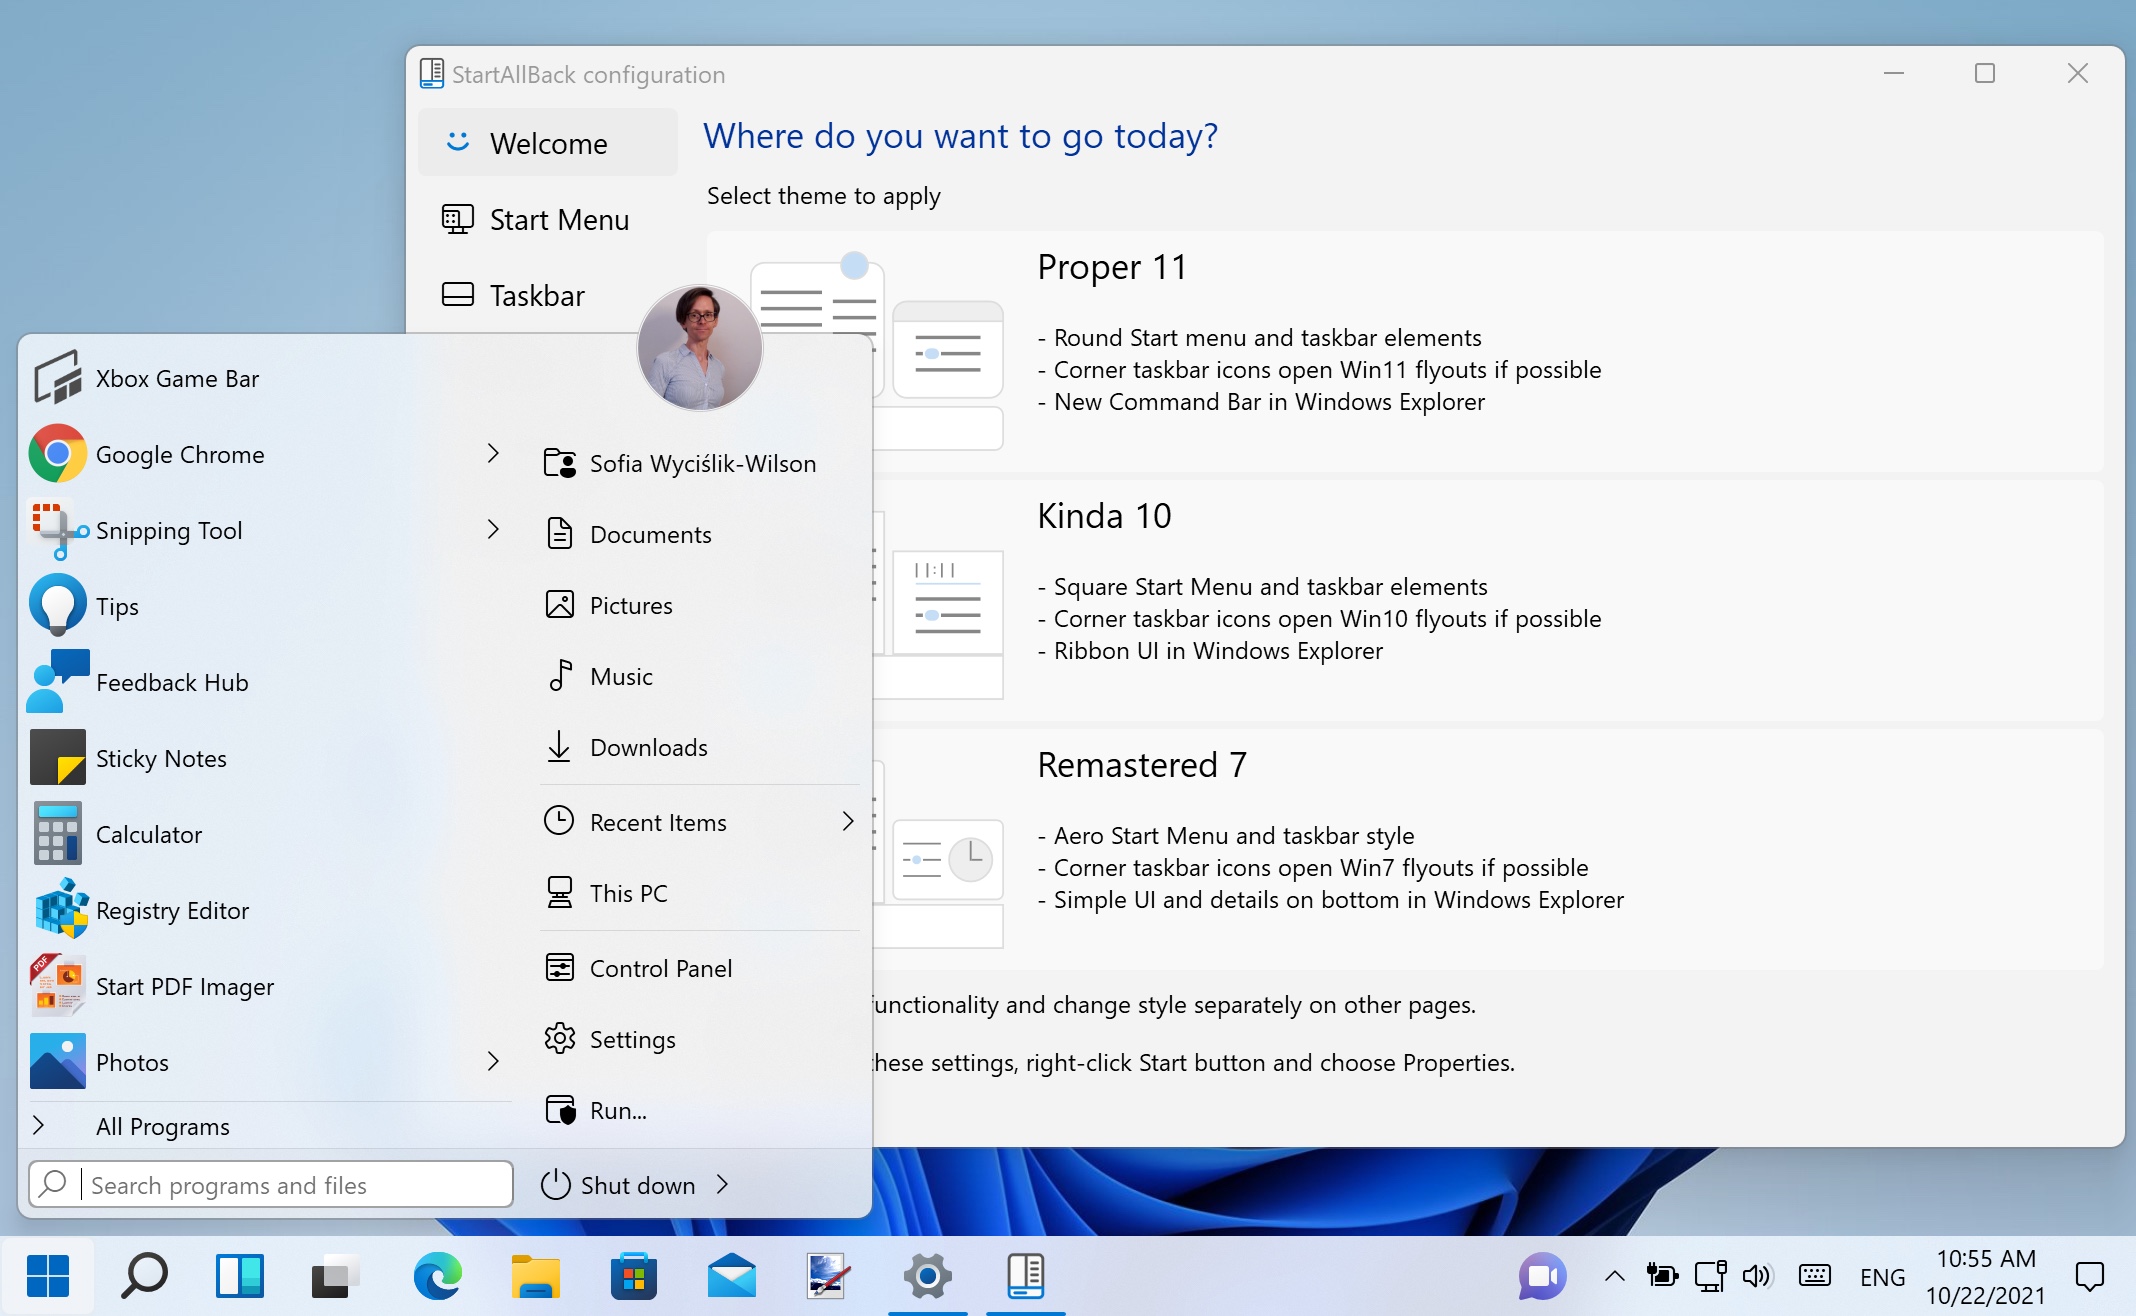
2. Moving the Start button is one small win, but you'll still see the Windows 11 Start menu when you click it. By installing StartAllBack, however, you can very closely mimic the look and feel of Windows 7 – the full version of the app costs $4.99, but there is a free trial available as well.
Sign up for breaking news, reviews, opinion, top tech deals, and more.
After downloading and installing the app, select the Remastered 7 option in the Welcome section. This will reinstate the Windows 7 Start menu and taskbar instantly, but you can customise things further by working your way through the Start Menu, Taskbar, Explorer and Advanced sections of the app.
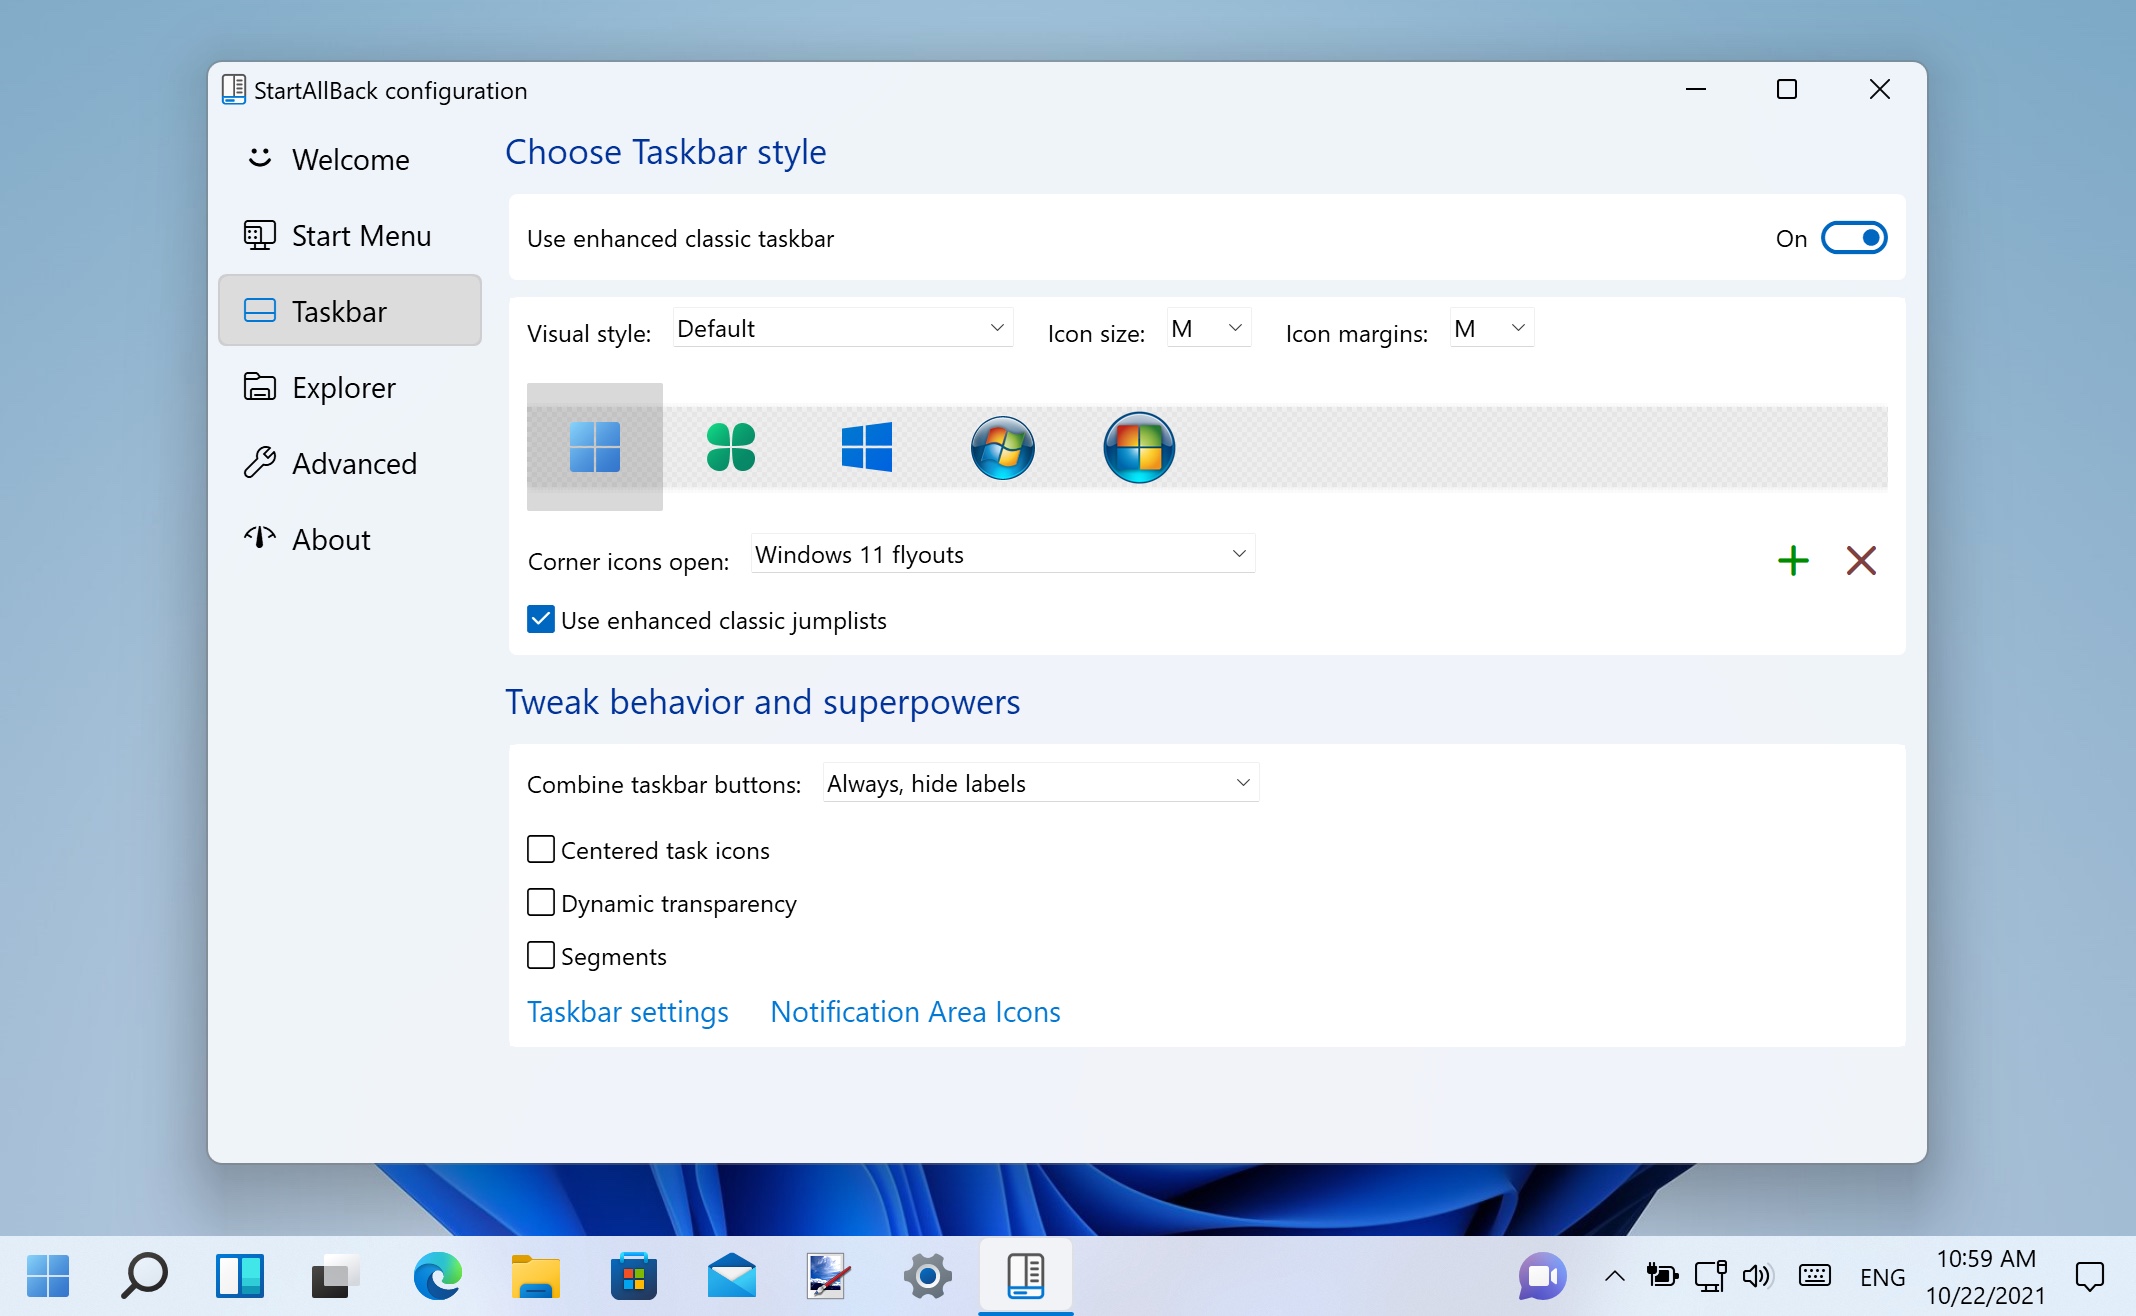
3. In the Start Menu section you can choose which shortcuts can be displayed in the menu, as well as opting to add fly-out menus for many items. In the Taskbar section, you can customise the appearance of the Start button and other elements of the taskbar.
You can combine elements of Windows 11 and 7 by deselecting the Use enhanced classic jumplists to retain the more modern menu when you right-click on taskbar button. There are further options in the Explorer section including the Classic context menu setting that lets you choose between old and new style right-click menus throughout Windows 11.
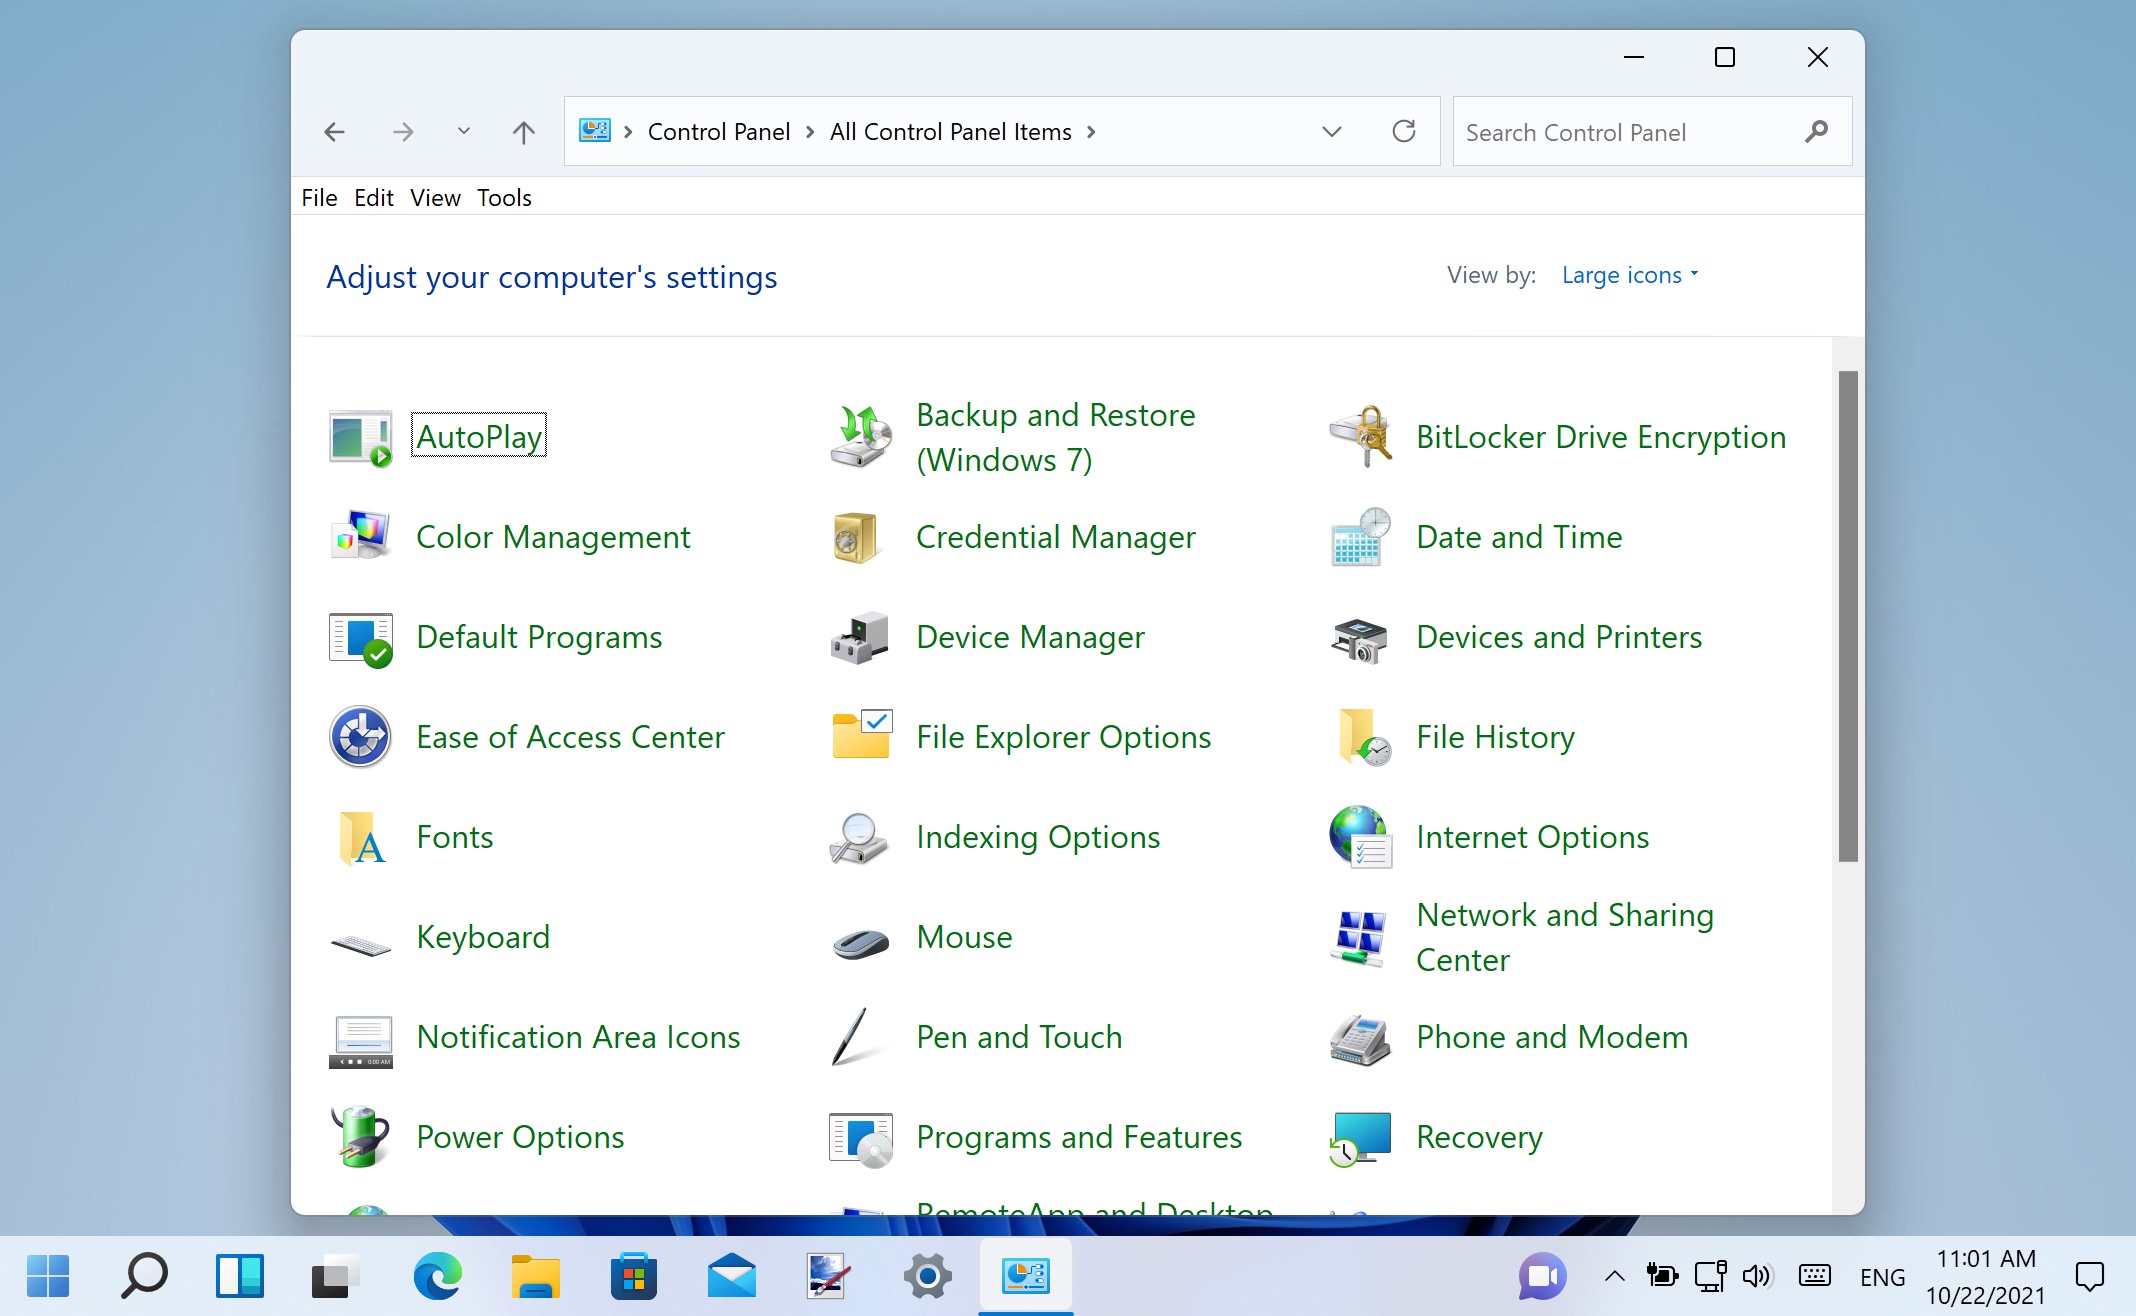
4. The move away from the Control Panel has been underway for some time now, with Microsoft encouraging you to use the Settings app whenever possible. While this makes sense a lot of the time, you may well yearn for the days of the Control Panel.
This is still available in Windows 11, but it is far from obvious in how to access it. There are various ways to get to the Control Panel, but perhaps the easiest is to press Windows + R at the same time to bring up the Run dialog, and then type control before pressing Enter. You may also want to make it easier to access in the future – just right click its taskbar button when it is running and select Pin to taskbar.
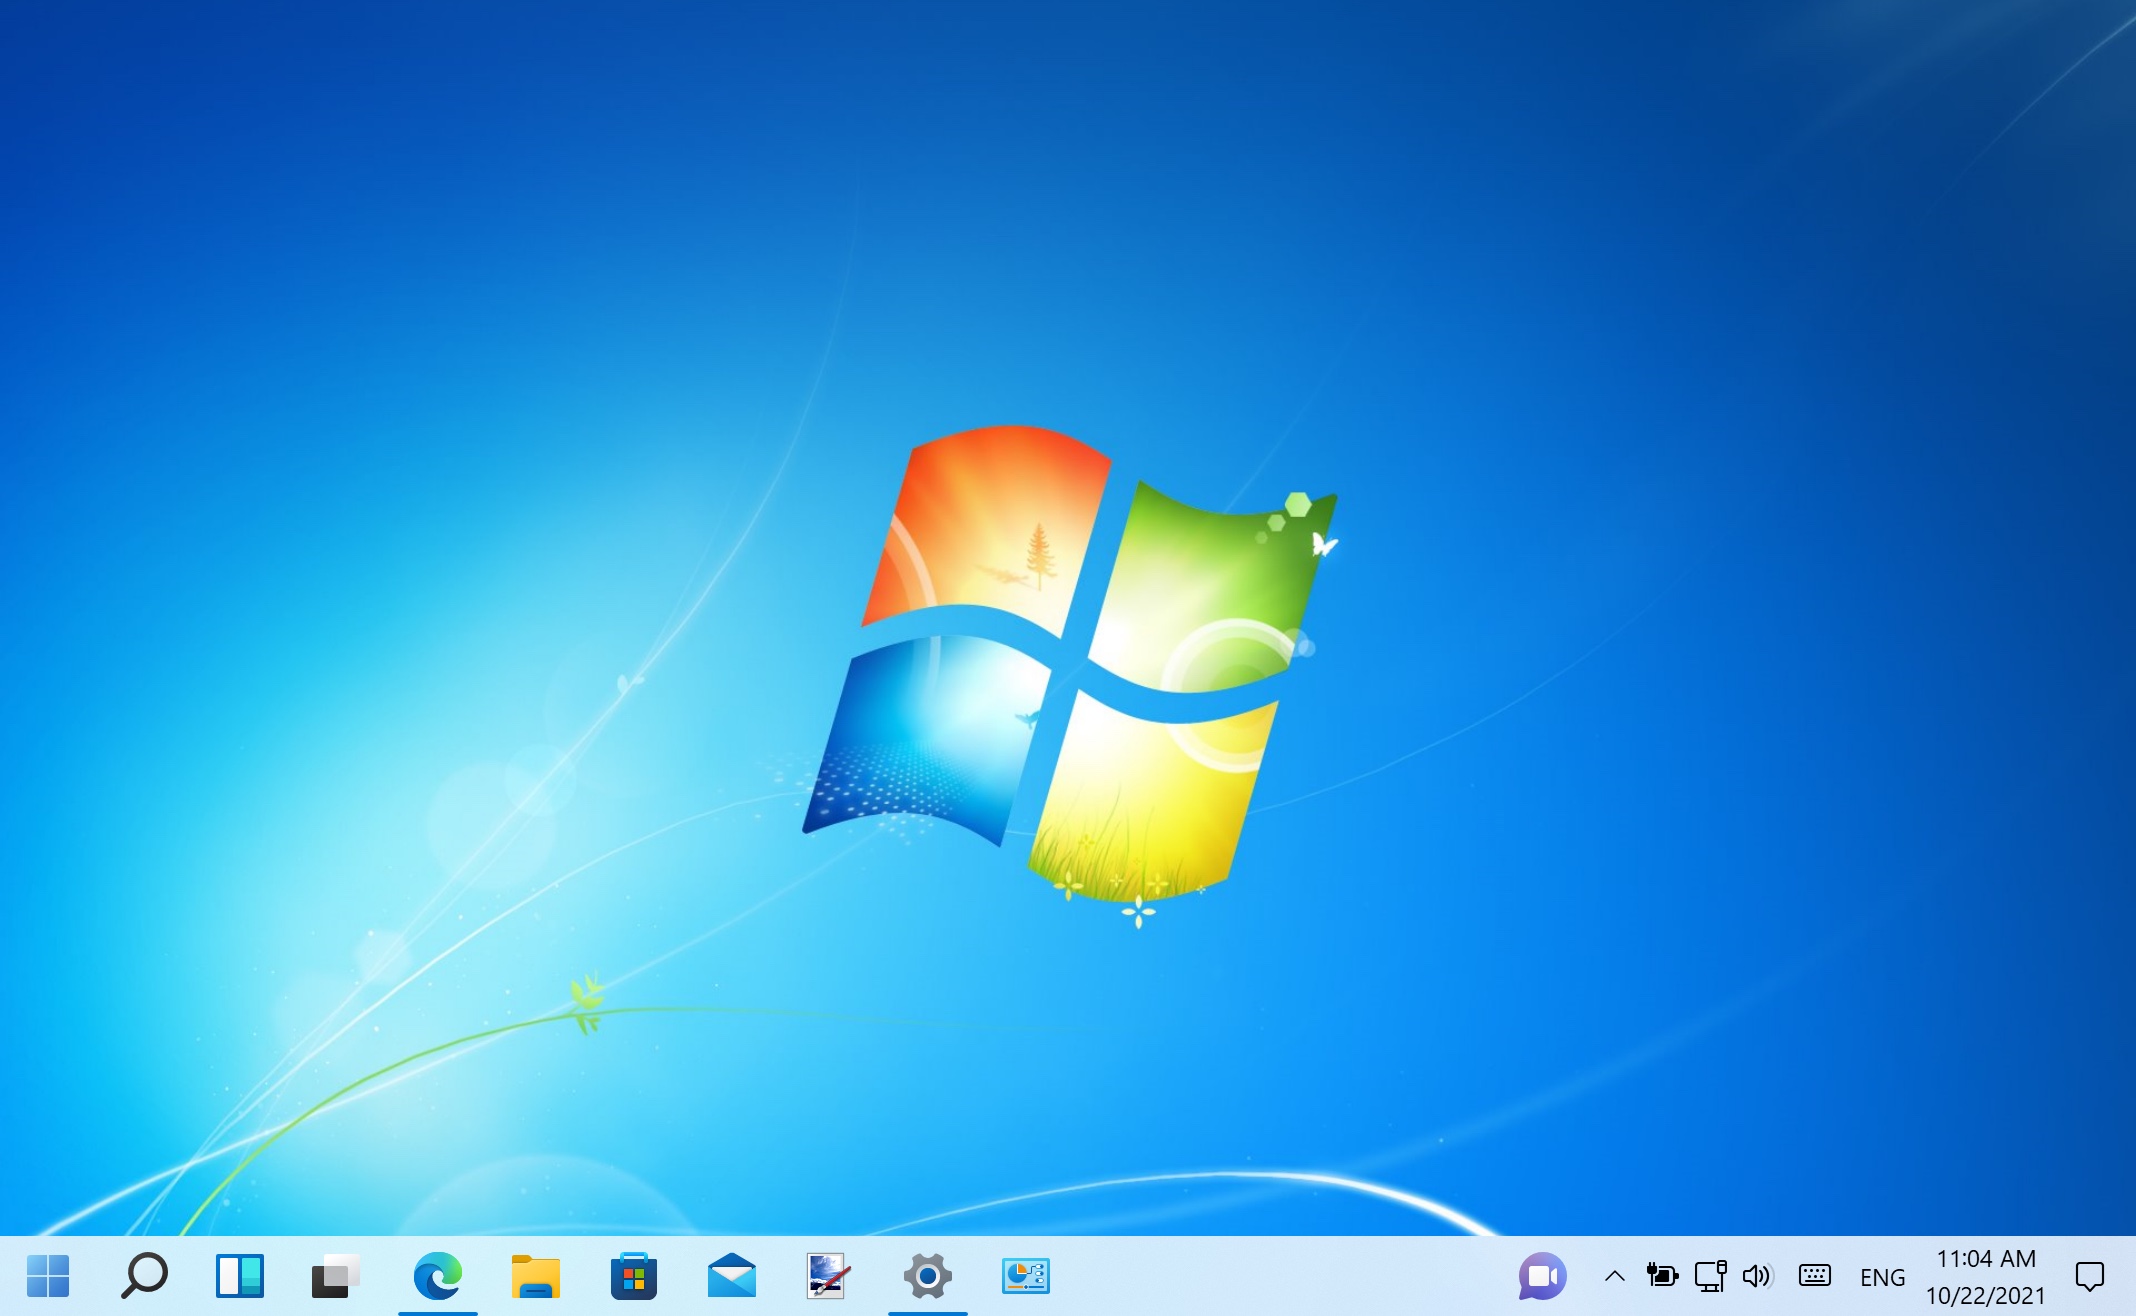
5. It's great to customize your desktop with a photo you have taken or another image you love. But if you're looking to take a trip down memory lane even further, you could reinstate the default Windows 7 wallpaper.
Sadly, Microsoft decided not to include this image with Windows 11, but you can download it from various websites including the Windows Wallpaper Wiki. With img0 (or Harmony as it is known) downloaded to your hard drive, right-click an empty area of the desktop, select Personalize and click Background. Click the Browse photos button and navigate to the folder containing the image you have just saved.
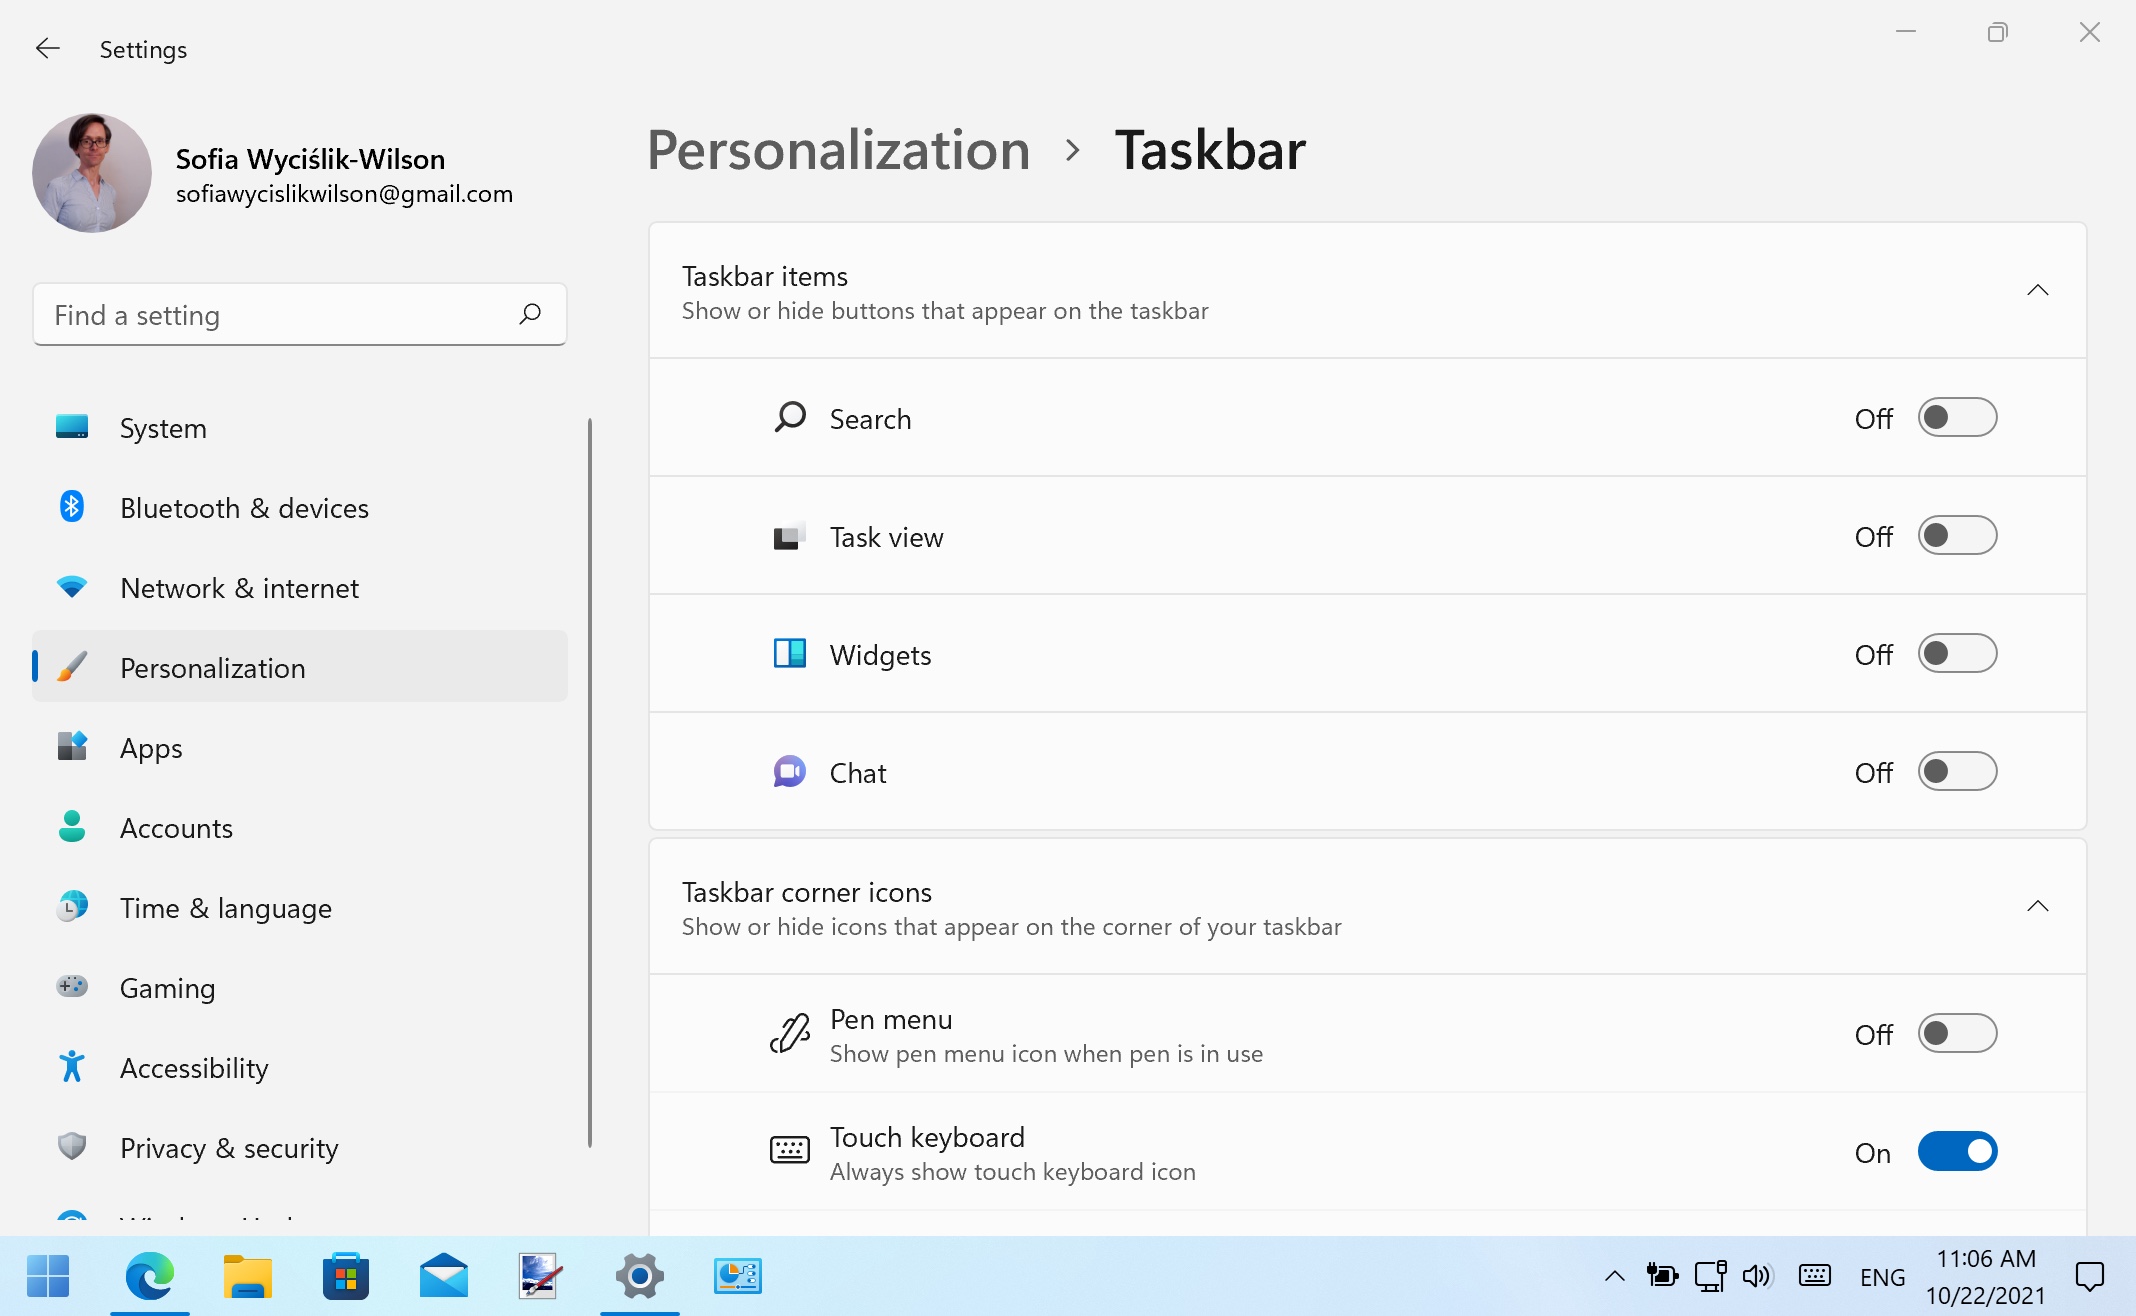
6. Windows 11 includes numerous components and features that simply did not exist in Windows 7 and this means that there are various extra elements dotted around that you may not need.
In the taskbar for instance, Windows 11 has buttons that serve as shortcuts to Search, Task view and Widgets. You can get rid of all of these – assuming you do not want them – by right-clicking an empty section of the taskbar and selecting Taskbar settings. In the Taskbar items section, use the toggles to disable any buttons you would prefer to hide.
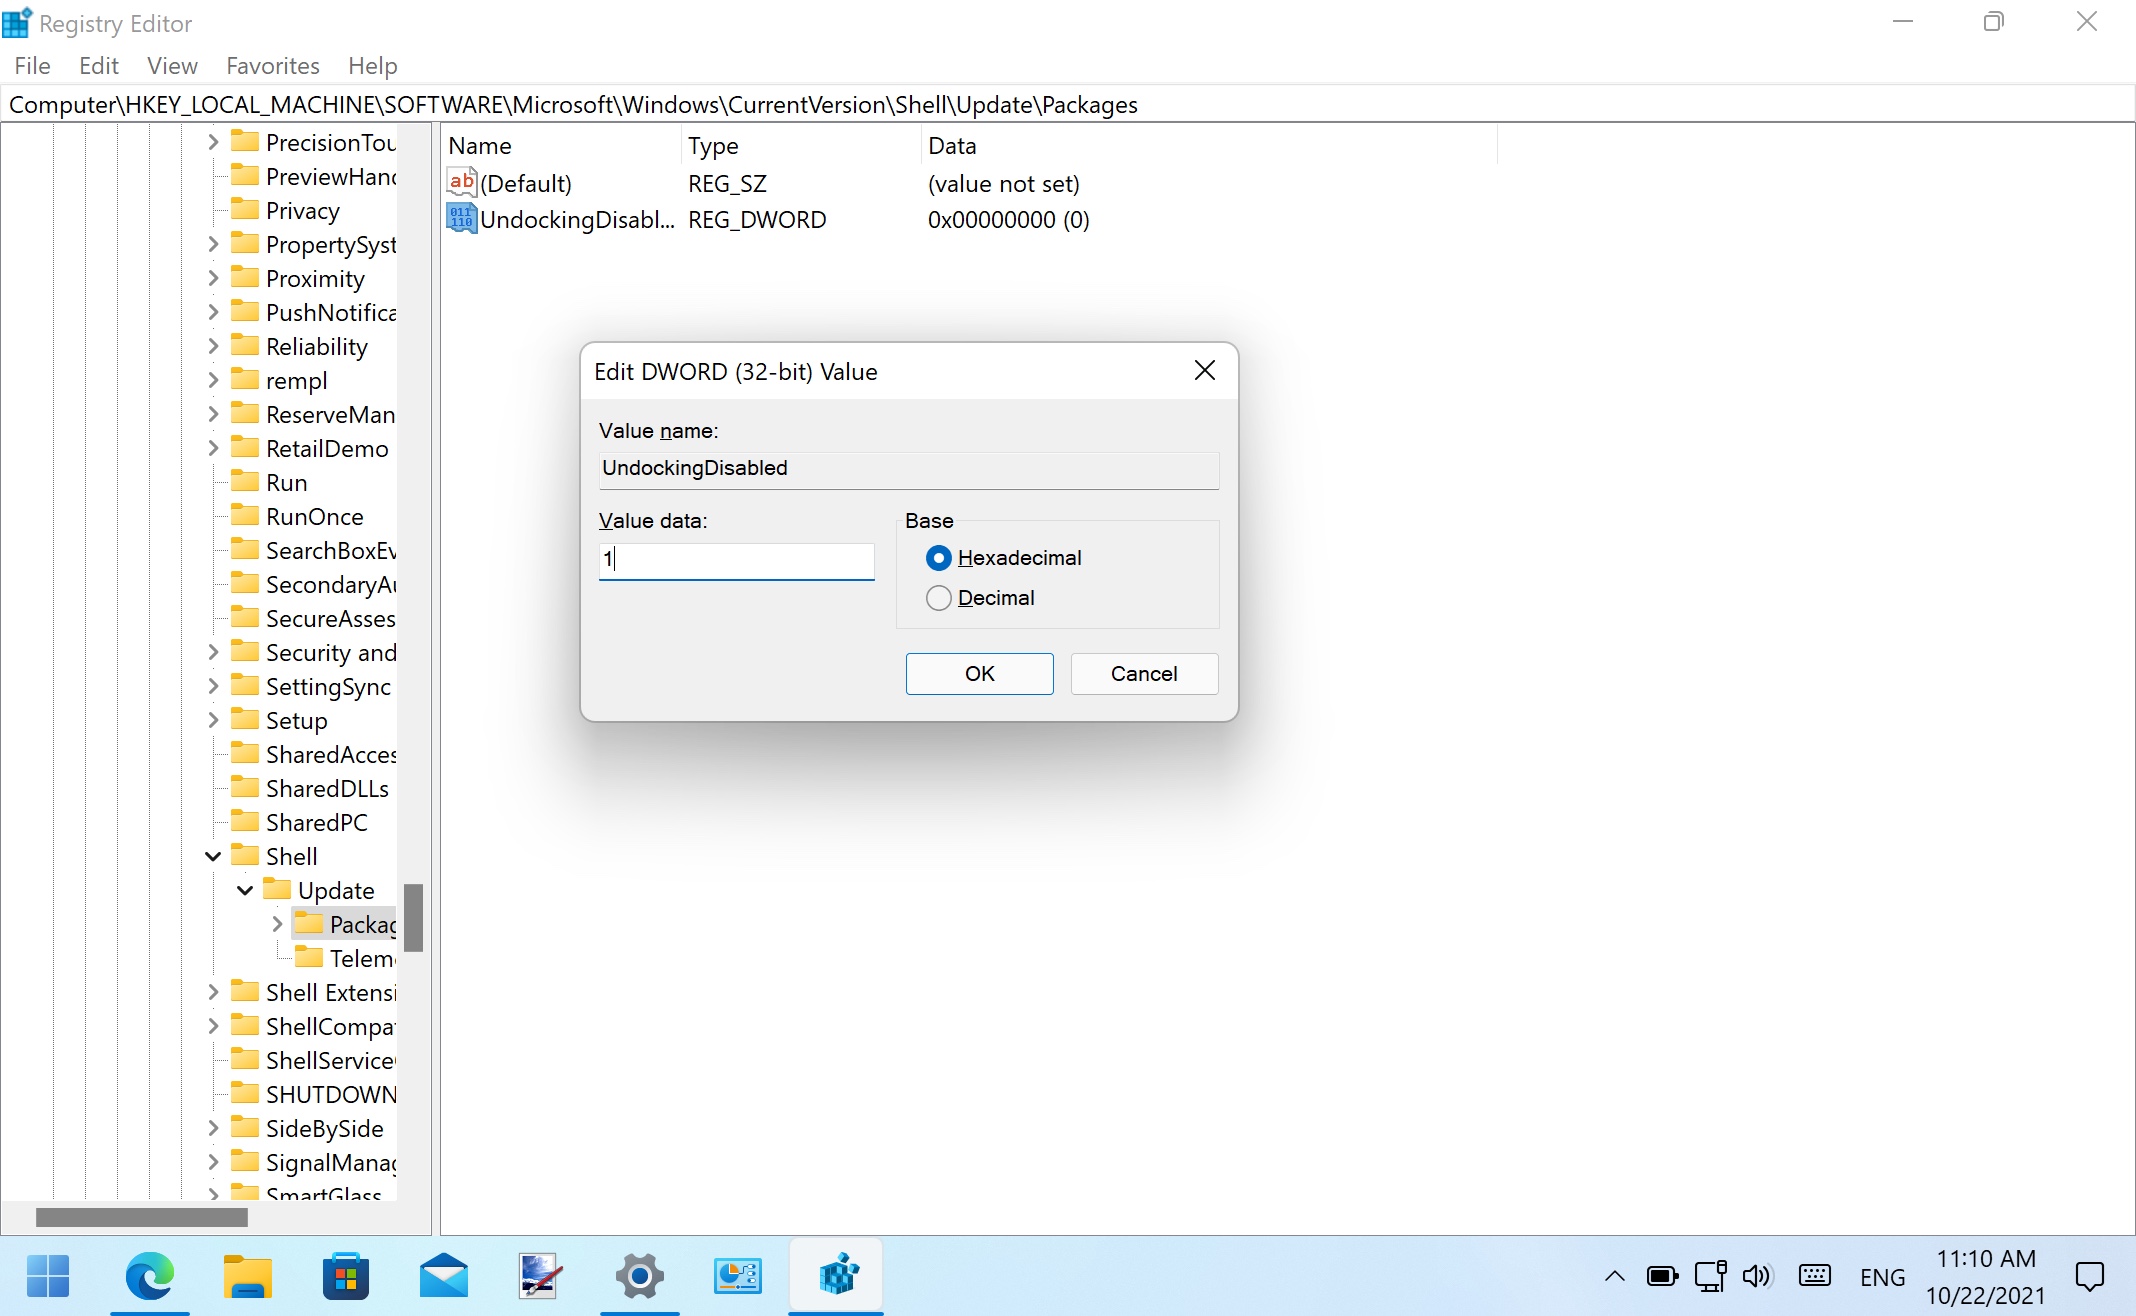
7. A strange change in Windows 11 means that it is no longer possible to drag and drop items onto the taskbar to create a shortcut, or drag and drop files onto a taskbar button to open it in the associated app – but you can change this by editing the registry. Press Windows + R, type regedit and press Enter.
Navigate to HKEY_LOCAL_MACHINE\SOFTWARE\Microsoft\Windows\CurrentVersion\Shell \Update\Packages, click Edit > New > DWORD (32-bit) Value and create a new entry called UndockingDisabled. Double click this new item and assign it a value of 1 before restarting your computer to enable the new drag and drop ability.
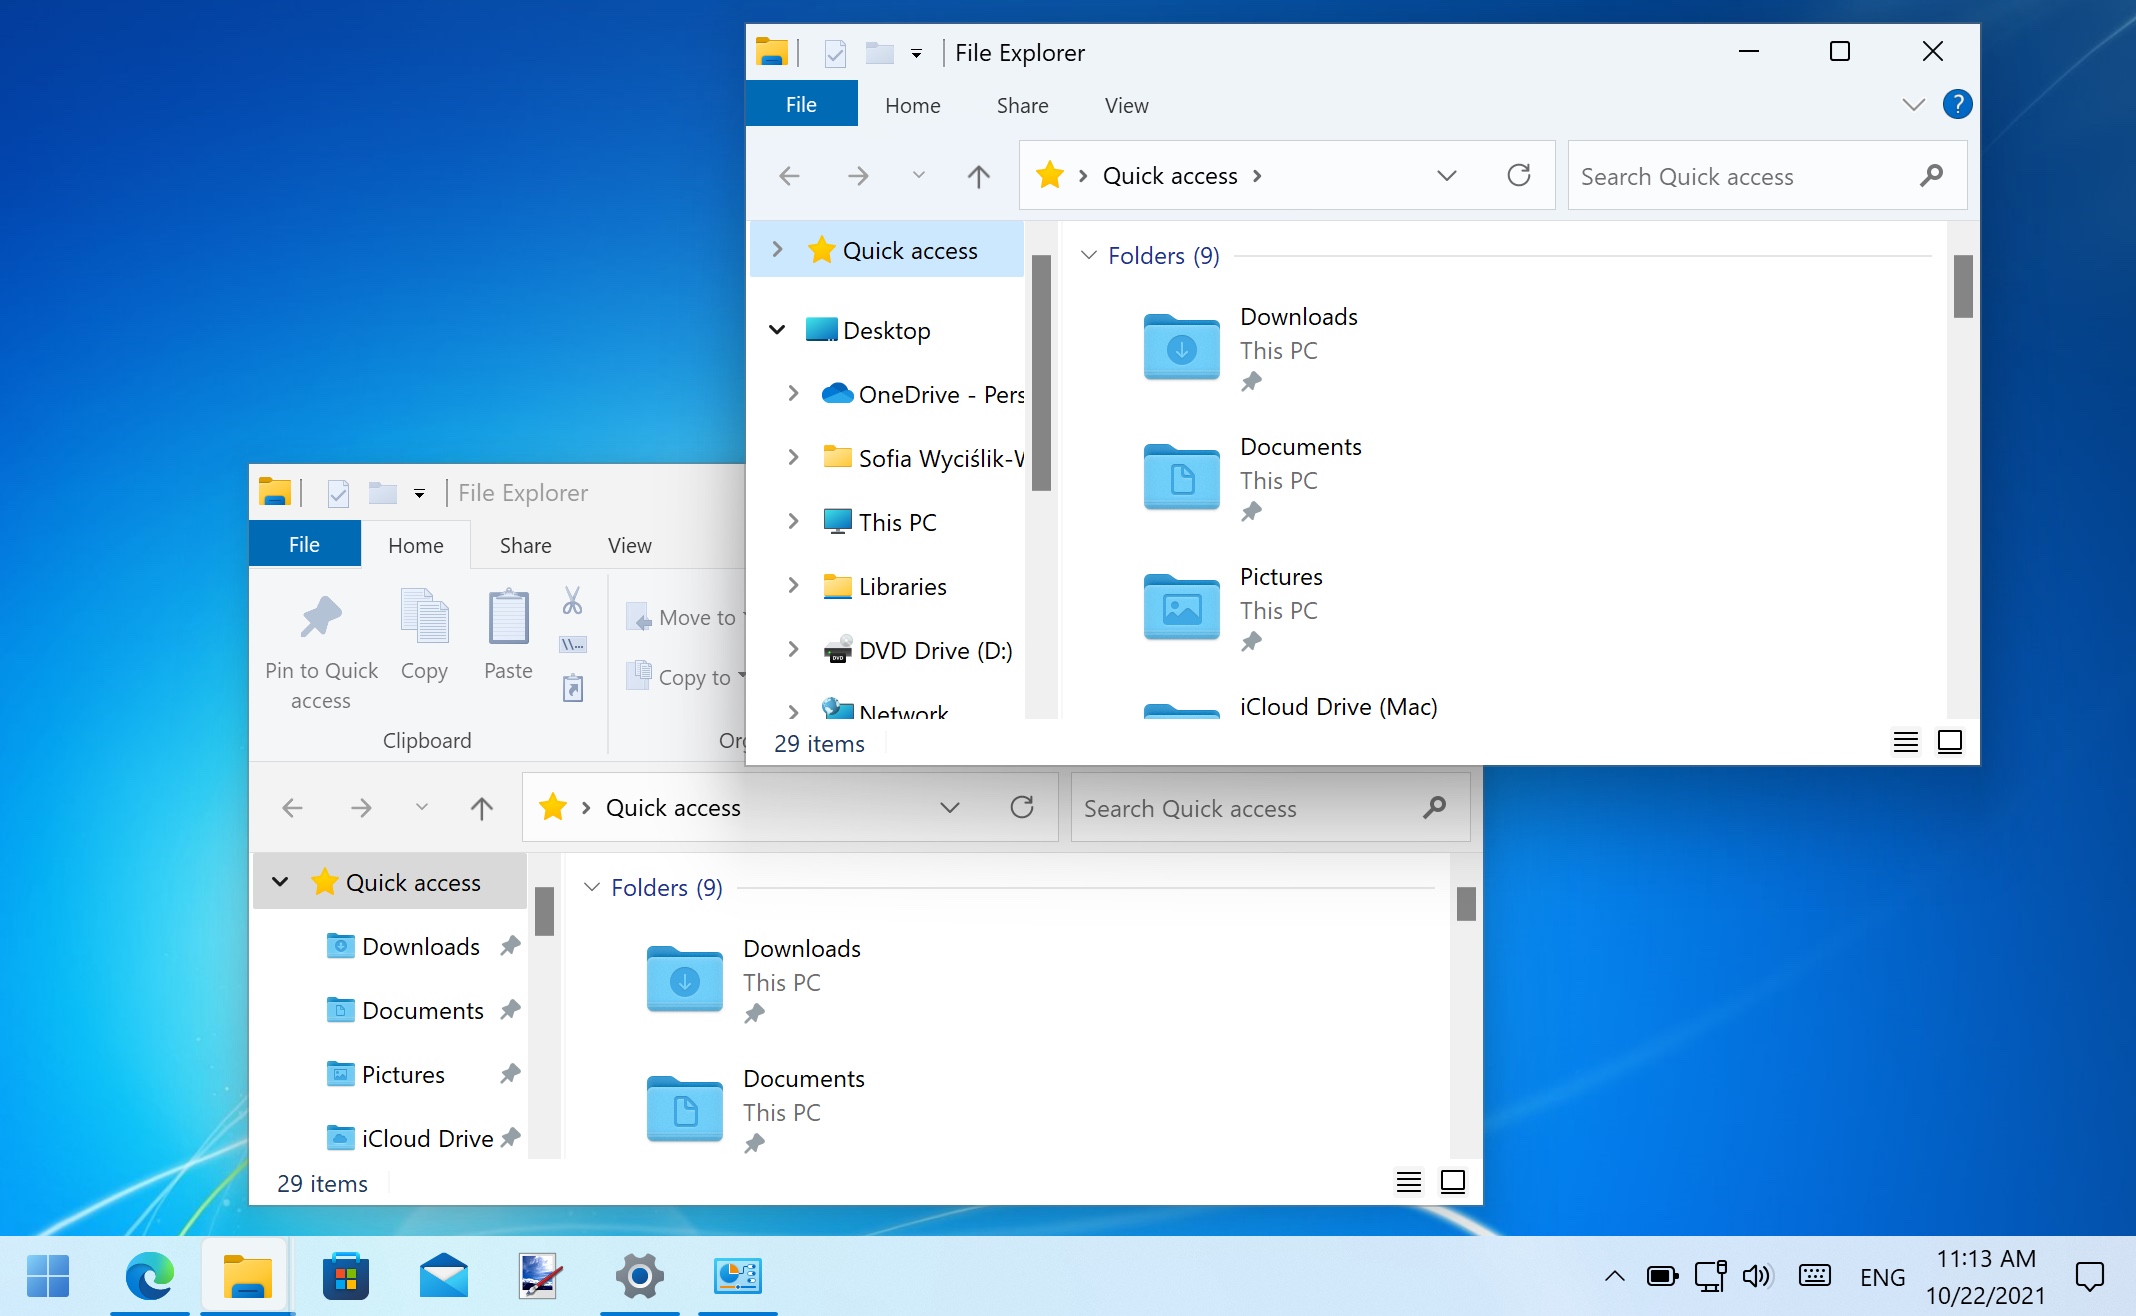
8. One of the aesthetic changes Microsoft introduced in Windows 11 is rounded corners – and it is not something that's to everyone's taste. There is no built-in option to disable rounded corners on windows and applications, but the appropriately named Win11DisableRoundedCorners can help.
Download the utility, and double click to launch it. When Microsoft Defender SmartScreen springs to life, click the More info link and then the Run anyway button. You may also need to click a User Account Control confirmation, and then rounded corners will be banished and replaced with square ones. You can run the tool again to get them back if you change your mind.
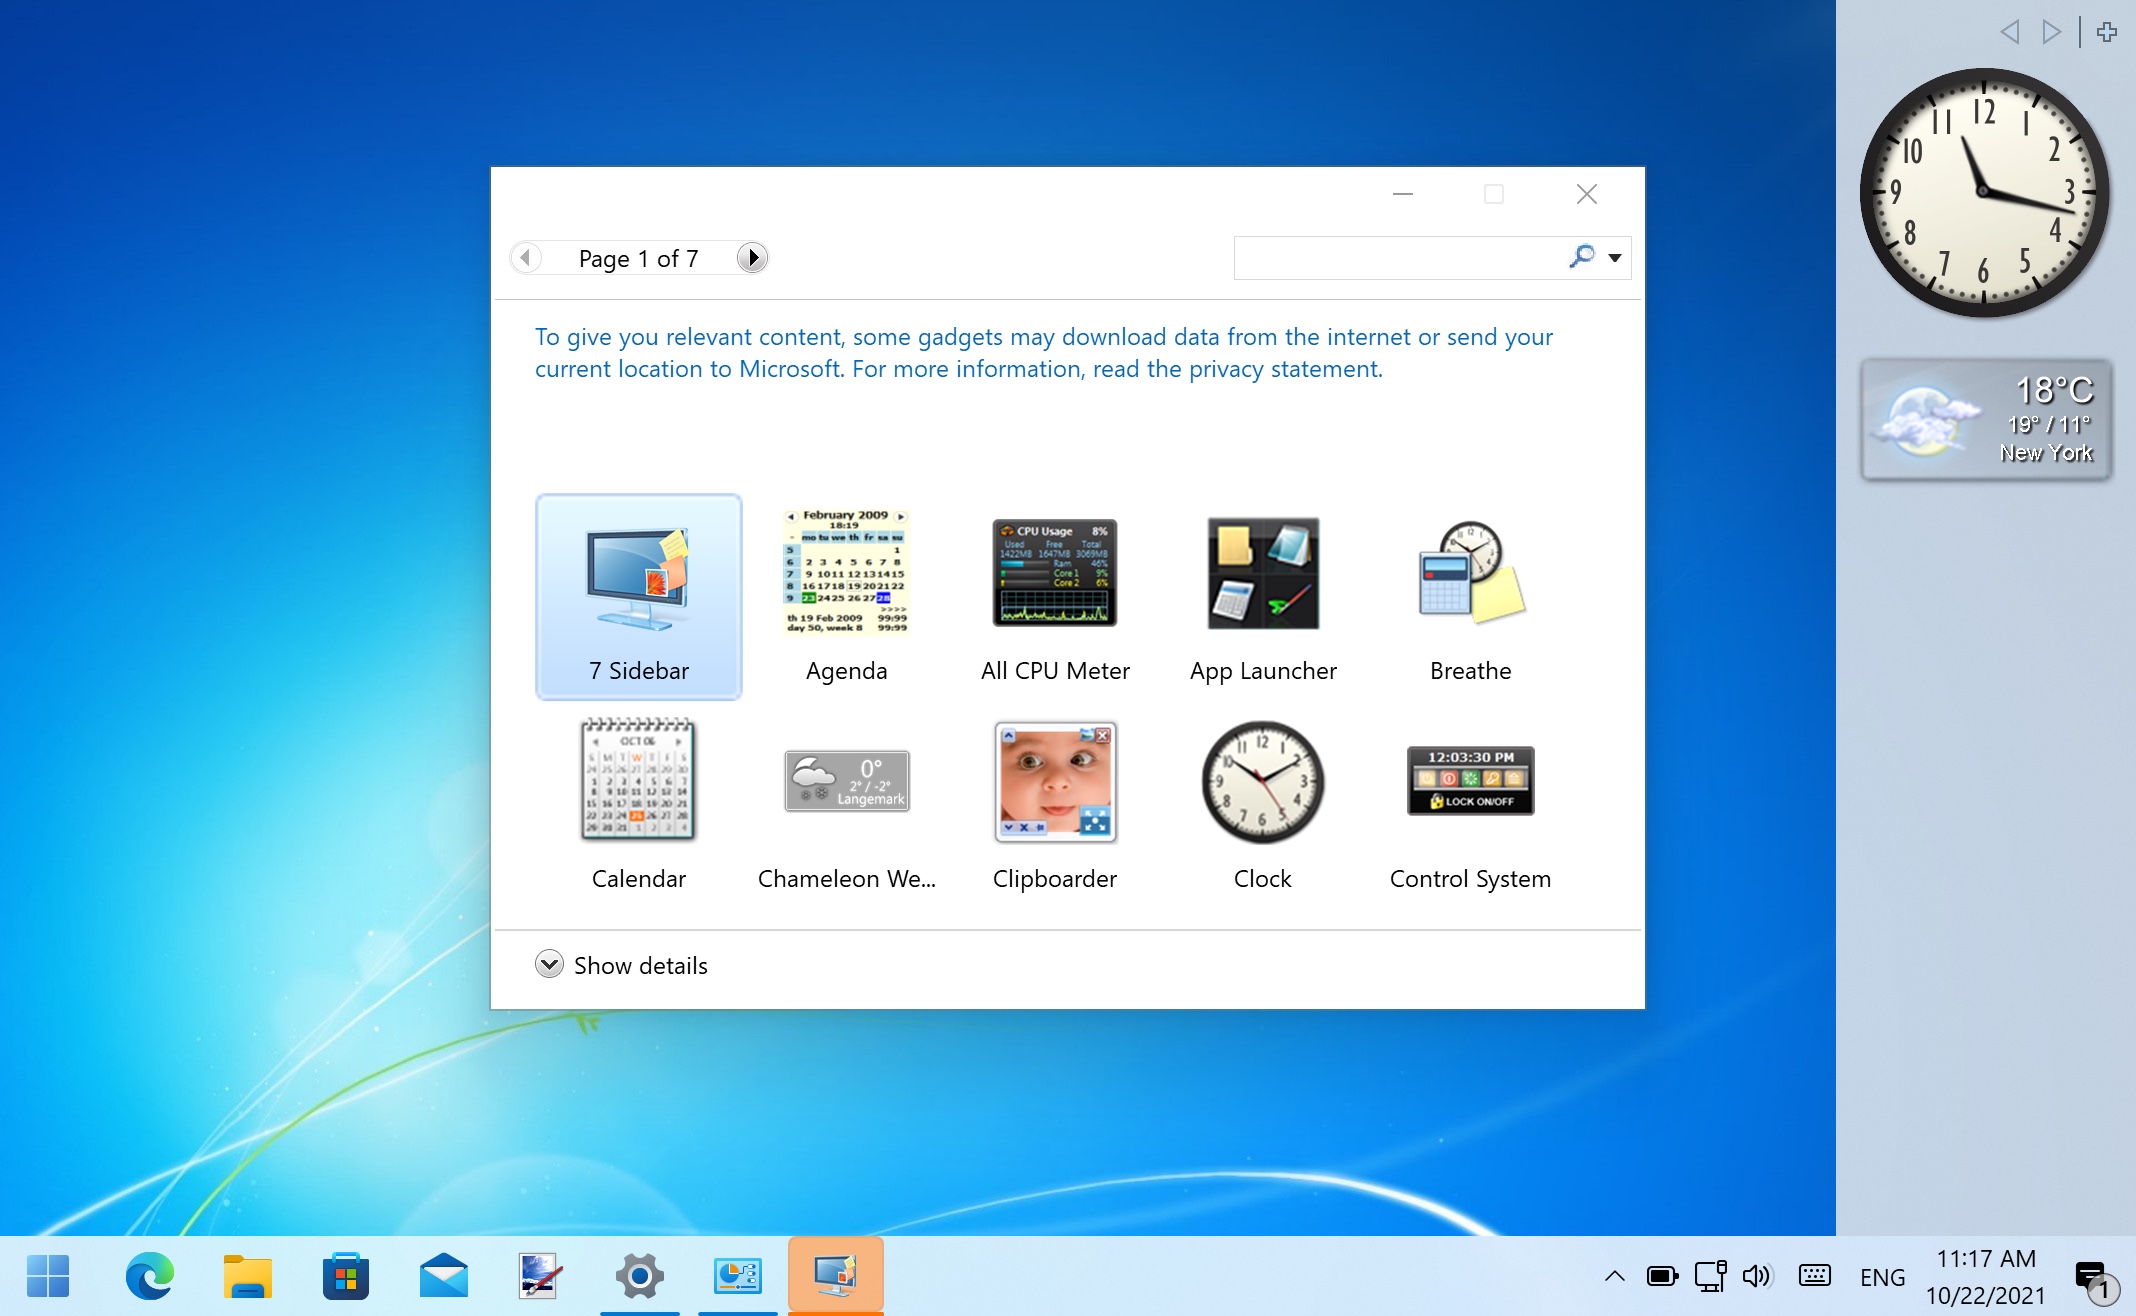
9. Windows 11 includes Widgets (press Windows + W to bring the Widget panel into view), but Windows 7 used to include something similar called Gadgets. Although no longer officially available, you can port Gadgets back into the latest version of Windows using 8GadgetPack.
You can download this free utility here and when it's installed, the Gadgets bar will appear to right hand side of your screen. Right-click an empty space and select Add gadgets to browse through the selection of tools and information panels, adding any that take your fancy.
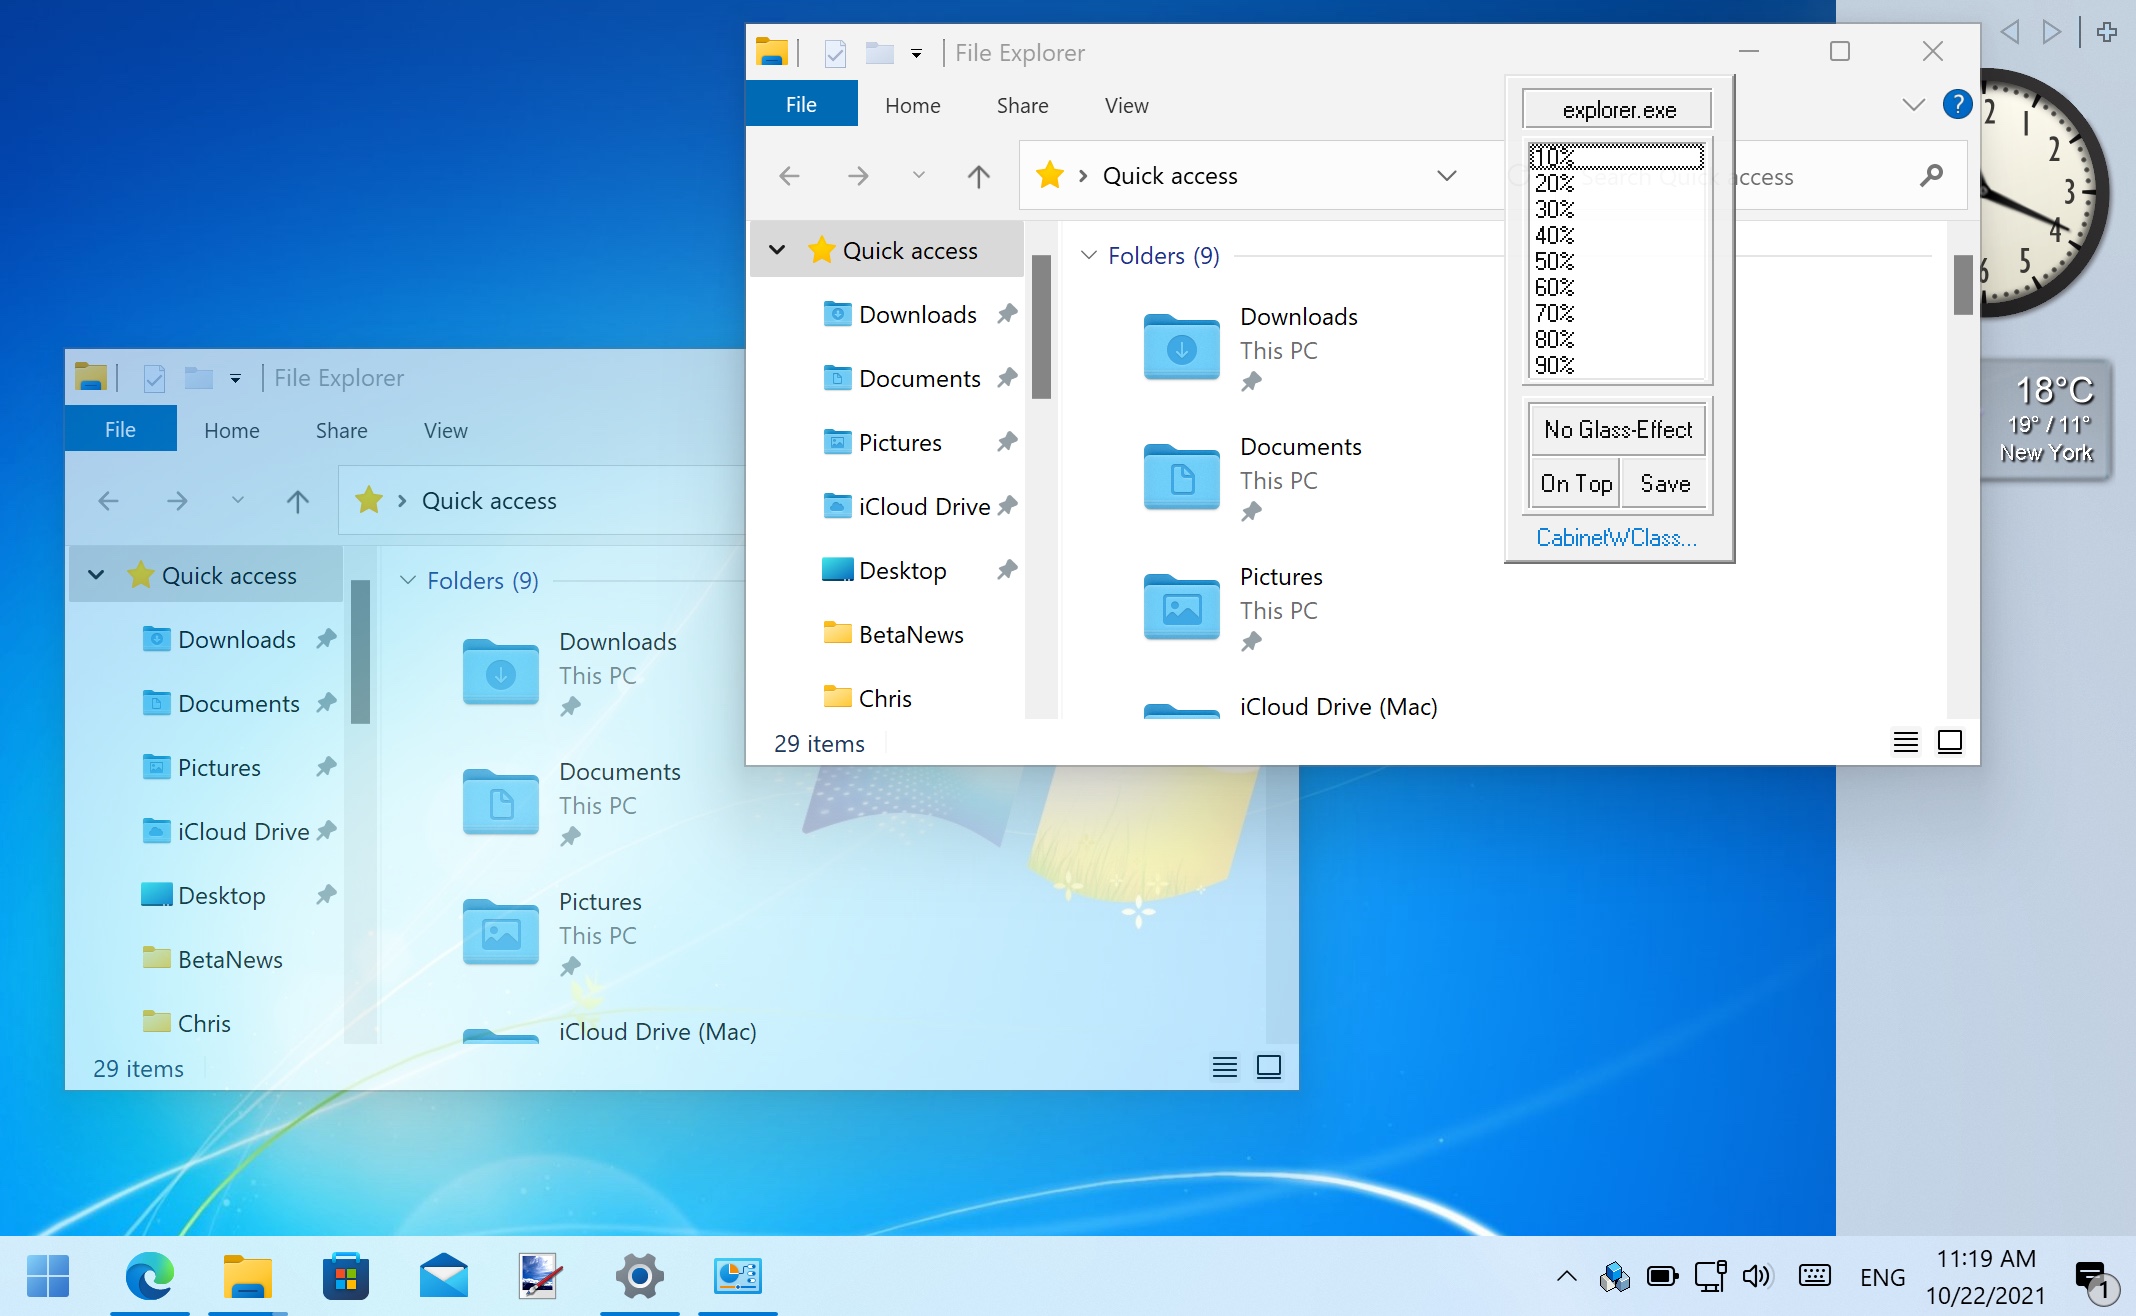
10. If you would like to recreate the Aero transparency effects used throughout Windows 7, you should look no further than the free tool Glass2k which you can download here.
Once installed, you can right click the title bar of any running app or open window to set a transparency level. You can configure Glass2k to start automatically with Windows and it will remember different settings for different apps and windows so you don’t have to keep tinkering with settings.

Sofia is a tech journalist who's been writing about software, hardware and the web for nearly 25 years – but still looks as youthful as ever! After years writing for magazines, her life moved online and remains fueled by technology, music and nature.
Having written for websites and magazines since 2000, producing a wide range of reviews, guides, tutorials, brochures, newsletters and more, she continues to write for diverse audiences, from computing newbies to advanced users and business clients. Always willing to try something new, she loves sharing new discoveries with others.
Sofia lives and breathes Windows, Android, iOS, macOS and just about anything with a power button, but her particular areas of interest include security, tweaking and privacy. Her other loves include walking, music, her two Malamutes and, of course, her wife and daughter.