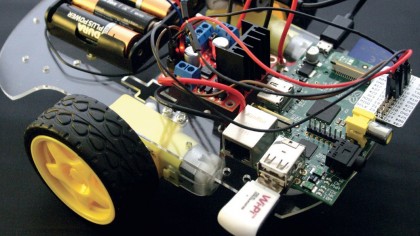
How to build a robot with Raspberry Pi
C3-Pi-O
We now create four functions that will handle driving our motors in a particular direction. Each of the functions will take an argument, a duration of time that's expressed as an integer or a float:
def forward(i):
[Tab] GPIO.output(fwdright, True)
[Tab] GPIO.output(fwdleft, True)
[Tab] time.sleep(i)
[Tab] GPIO.output(fwdright, False)
[Tab] GPIO.output(fwdleft, False)
Sign up for breaking news, reviews, opinion, top tech deals, and more.
Remember that where we've put '[Tab]' just press the Tab key on your keyboard to indent the line. Our first function, forward(i) , will turn on fwdright and fwdleft pins and then wait for the value of i , our argument before turning the motors off.
On to our second function:
def right(i):
[Tab] GPIO.output(revright, True)
[Tab] GPIO.output(fwdleft, True)
[Tab] time.sleep(i)
[Tab] GPIO.output(revright, False)
[Tab] GPIO.output(fwdleft, False)
Our second function, right(i) , spins our robot on the spot in a clockwise direction for the duration provided as the argument (i) . To turn right we set the right motor to reverse and the left motor to forwards, wait for the user defined number of seconds and then turn off the motors.

For our left and reverse functions you can refer to the full code.
The last section of code is a try and except test:
try:
[Tab] print("R E A D Y")
except KeyboardInterrupt:
[Tab] print("E X I T")
[Tab] GPIO.cleanup()
This will print R E A D Y when the code is executed, but if we press CTRL+c it will print E X I T and then clean up the GPIO pins ready for use by another project:
Save your code as robot.py but we won't be running the code, rather we will now create a new file and save it as test. py in the same directory as robot.py.
Next, we'll import our robot.py code and use the functions inside of it to control our robot.
import robot
robot.forward(1)
robot.right(2)
robot.left(2)
robot.reverse(1)
Save the code and click Run > Run Module to test. Remember to pick up the robot before pressing Enter or you will have to chase after it!
- Enjoyed this article? Expand your knowledge of Linux, get more from your code, and discover the latest open source developments inside Linux Format. Read our sampler today and take advantage of the offer inside.