Why you can trust TechRadar
The Nikon Coolpix P520's large grip and generally large body makes this almost akin in size to an entry-level DSLR, with of course the added benefit that the flexible 42x zoom brings.
For those looking for a serious-looking camera that is weighty and sturdy, without the bother of having to change lenses, this should be a serious contender.
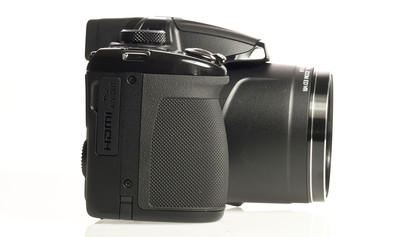
Although the camera is made from plastic, there is a rubberised coating around the hand grip, on the area next to the lens and where your thumb rests at the back of the camera. This gives it good purchase, especially when shooting one-handed, and also lends the camera an air of quality that it might not have if it was entirely plastic in appearance.
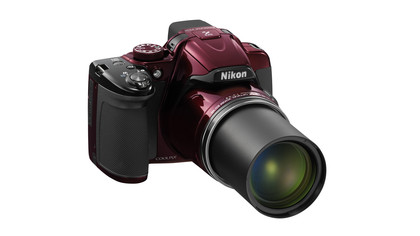
Much of the button layout is also very similar to a DSLR. For starters, there's a dial on top of the camera for quickly switching between different modes. Here you'll find all those at home on a DSLR, including full manual mode and semi-automatic modes (shutter priority and aperture priority). On this dial you'll also find full automatic mode, scene mode, effects mode and space for a user-defined group of settings, which is useful if you often find yourself shooting in one particular scenario, such as low light.
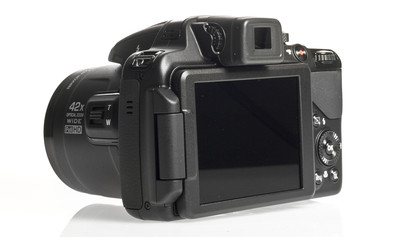
Unlike most DSLRs, there's no dial on the finger grip for making changes to settings such as aperture priority. Instead, there is a dial at the rear of the camera, which you can reach with your thumb. This can only be used when in fully manual mode for making changes to shutter speed.
To change aperture (or shutter speed in shutter priority mode) you need to use the scroll dial around the OK button further down the back of the camera.
To change the autofocus point, you need to hit that OK button and then use the scroll dial, or the directional keys which the scroll dial doubles up as, to navigate around the scene to the point you want to use. This is reasonably quick to do, though it could be speedier if a touchscreen was included.
Sign up for breaking news, reviews, opinion, top tech deals, and more.
Other settings accessed via the four-way directional pad include exposure compensation, self-timer/drive mode, flash settings and focusing settings. You can choose between standard autofocus, macro focusing, infinity focusing and manual focusing.
There's no quick menu available here, so you will need to delve into the full menu (accessed via a dedicated button) if you want to make extensive changes.
There is, however, a small Function button just next to the mode dial - here you can assign a number of different functions, including white balance, ISO and metering modes. You can change which parameter to access via the button itself, making it almost like a quick menu, if a bit of a convoluted one.
Confusingly, there's a Display button next to the viewfinder, but pressing this while the articulating screen is in the standard home position doesn't switch on the viewfinder. In fact, you can't use the viewfinder at all unless the screen is packed away from view.
Once the screen is packed away, the EVF automatically fires up. It's logical that this happens when the screen is not in use, but not being able to access it when the screen is out is more than a little annoying if you only want to use the EVF sporadically. Having to articulate and unarticulate the screen often gets frustrating pretty quickly.
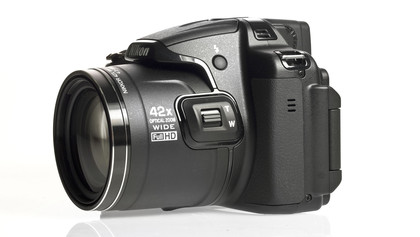
The 42x optical zoom can be controlled in one of two ways. First, there's a standard zoom switch around the shutter release - common for compact cameras. Secondly, there's a switch on the lens barrel itself, which can be pushed two ways to zoom in and out.
This switch on the lens barrel can also be used to control manual focus if you prefer, setting this via the main menu.
A handy setting that can be configured via the main menu is to have the zoom always set to a certain position on start-up. This is handy if you're finding you're often shooting at one particular focal length towards the end of that huge zoom.

Amy has been writing about cameras, photography and associated tech since 2009. Amy was once part of the photography testing team for Future Publishing working across TechRadar, Digital Camera, PhotoPlus, N Photo and Photography Week. For her photography, she has won awards and has been exhibited. She often partakes in unusual projects - including one intense year where she used a different camera every single day. Amy is currently the Features Editor at Amateur Photographer magazine, and in her increasingly little spare time works across a number of high-profile publications including Wired, Stuff, Digital Camera World, Expert Reviews, and just a little off-tangent, PetsRadar.
