Build your first game using Scratch on the Raspberry Pi
Ideal for first-time programmers
3. Create and name variable
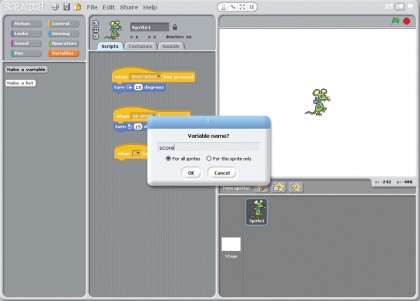
Click on Variables in the top-left (see above for more details on what they are). Click on Make A Variable and enter the variable name as score. Repeat the process to create a variable called over.
4. Reset the score
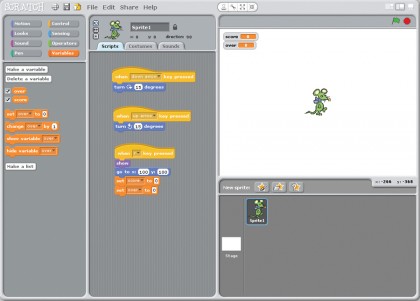
Under the script When r Key Presses, add the lines show (from Looks), Go To X:100, Y:100 (from Motion, don't forget to change the 0s to 100s), Set Score To 0 and Set Over to 0 (both from Variables).
5. Add Broadcast
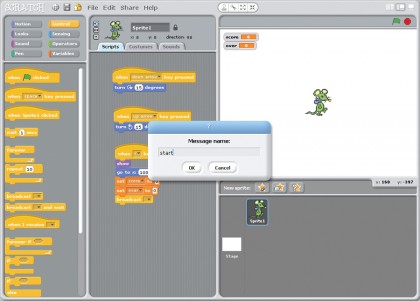
Add the block Broadcast… to the bottom of the When r Key Pressed script. Once it's there, click on the drop-down menu and select New... and give the message the name 'start'. We'll use this to let the other sprite know that the game has started.
6. Create a loop
Sign up for breaking news, reviews, opinion, top tech deals, and more.
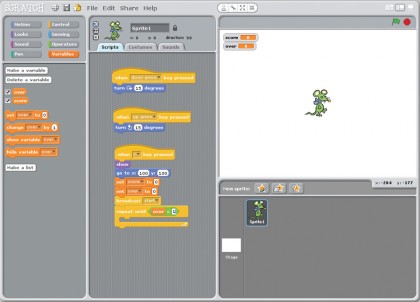
We can create loops that cycle through the same code many times. Continue the script with Repeat Until… (from Control), and then drag and drop … = … (from Operators), then drag Over (from Variables) into the left-hand side of the = and enter 1 on the right.
7. Add to your loop
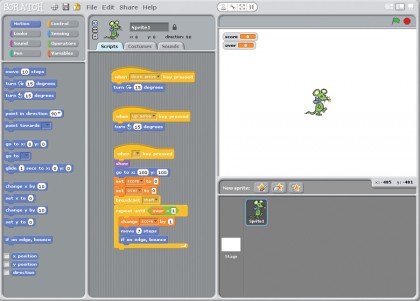
Inside the Repeat Until Over = 1 block, add Change score By 1 (from Variables), Move 7 Steps (from Motion) and If On Edge, Bounce (also from Motion). These three pieces of code will be constantly repeated until the variable over gets set to 1.
8. Hide the mouse
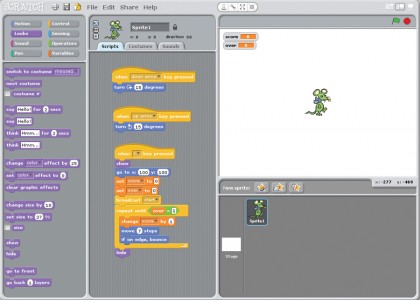
Once the game has finished (and the cat has got the mouse), the Repeat Until loop will end and the program will continue underneath it. Drag Hide (from Looks) under the loop, so the mouse disappears when this happens.
9. Resize your cat
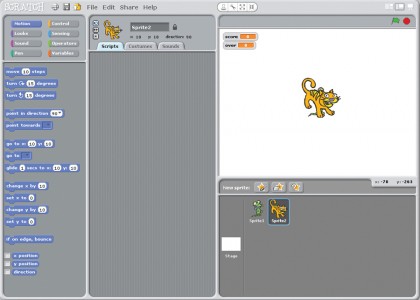
Select Choose New Sprite From File > Cat 4, and shrink the sprite down to an appropriate size, like we did with the mouse. Each sprite has its own set of scripts. You can swap between them by clicking on the appropriate icon in the bottom-right.
10. Move the cat
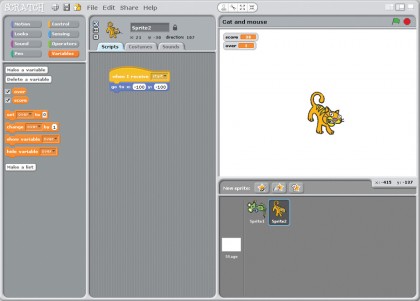
In the scripts for the new sprite, start a new script with When I Receive start (from Control), and Go To X:-100 Y:-100. This will move the cat to the opposite corner of the screen from the mouse. (0,0) is the middle.
11. Give the cat a loop
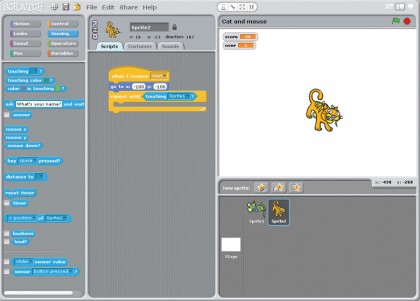
As with the mouse, the cat also needs a loop to keep things going. Add Repeat Until (from Control), and then in the blank space add Touching Sprite 1 (from Sensing). This will keep running until the cat (sprite 2) catches the mouse (sprite 1).
12. Set the difficulty
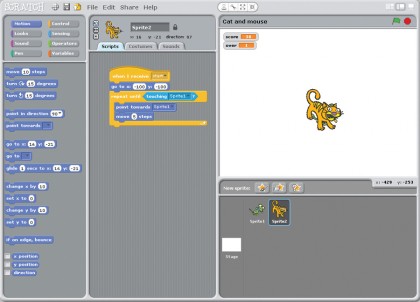
Inside the Repeat Until block, add Point Towards Sprite 1 (from Motion) and Move 4 Steps (also from Motion). The amount the cat and mouse move in each loop affects the difficulty of the game. We found 4 and 7, respectively, to work well.
13. Finish the loop
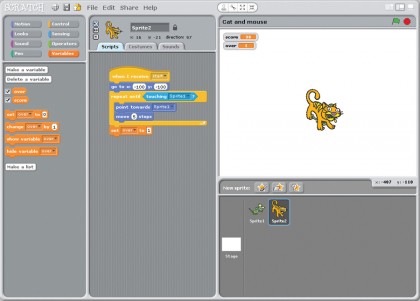
The loop will finish when the cat has caught the mouse - the game is over, so we need to stop the script on Sprite 1. We do this by adding Set over To 1 (from Variables) underneath the Repeat Until block. This will cause Sprite 1's main loop to finish.
14. Tell the player the game is over
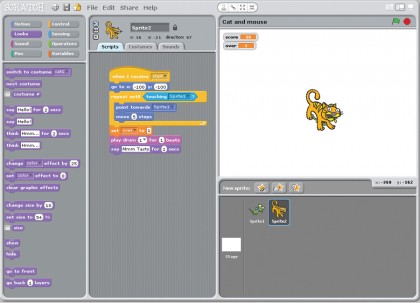
We now want to let the player know that the game is over. We will do this in two ways: with audio, and on screen. Add Play Drum 1 for 1 Beats (from Sound), then Say Mmmm Tasty For 1 Secs (from Looks).
15. Display a score
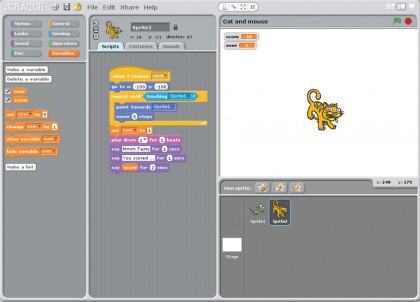
Finally, we can let the player know their score. We increased the variable score by one every loop, so this will have continued to go up. Add Say You Scores … For 1 Secs, then drag another Say … for 1 Secs block and then drag score (from Variables) into the blank field.
16. Play your game!
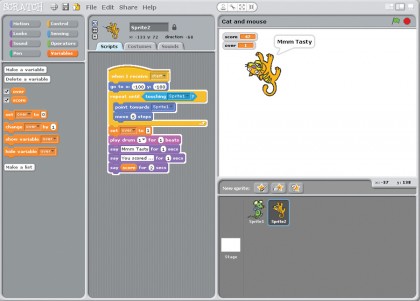
Press r and play! You can use the up and down arrows to move the mouse around. You can make it easier or harder by changing the size of the sprites and the amount they move each loop. Good luck and happy gaming!
- Find out what else you can do with the tiny PC with our collection of Raspberry Pi Projects