WordPress: a beginner's guide
Create your own site or blog with our step-by-step walkthrough

While there's no one-size-fits-all way of getting a website these days, the options have never been more elastic. You can get a blog for free and have your first posts up in minutes, simply by visiting a site like wordpress.com or tumblr.com.
If you don't mind spending a little more per year, you can attach a proper domain name to your blog instead of having to use the subdomain, as well as unlock extra features such as video hosting or the ability to customize themes.
But let's assume you want a little more than that: your own full website, that you control and can mess around with at will. It could be a personal blog, or something for your gaming group. You might want the main page to be a simple list of news posts, with the meat of the site in a forum on the back-end.
Whatever you want though, WordPress makes it (relatively) easy. WordPress is one of the most powerful and popular blogging systems in the world, both out of the box and in terms of the number of plug-ins and themes you can bolt on top of it without needing any programming or web design know-how. There are so many options but the best WordPress hosting options are listed in our buying guide.
Sharing boxes
To install it, you need a web server. Most small sites use what's called 'shared hosting' – in short, many different websites being served up from the same box. This isn't ideal for popular sites, but it's cheap, and good enough for most.
You'll be looking at between £5 and £10 a month for this, compared to £50 to £100 to host your site or sites from a dedicated server. Even if you can afford that, you shouldn't jump straight into it. With shared hosting, you only have to look after the software that you install, like WordPress. Your host will usually keep backups in the case of disaster, have technical support if you have any questions, and more.
With dedicated hosting, you're not completely on your own, but it's assumed you know what you're doing, and will handle things like updating the server software, patching security holes, and taking care of yourself. For a busy forum, or a really popular site, you may have no choice, but you'll know when you need that power.
Sign up for breaking news, reviews, opinion, top tech deals, and more.
Choosing a host
Wisely choosing shared hosting is, unfortunately, the easy bit. Actually finding a good one can be a real challenge.
Simply Google something like 'best web hosts' and you'll get lots of lists and rankings that simply aren't reputable. Official reviews from honest websites are rarely much more helpful, as they won't actually have run a live site on the server and invariably base their verdicts on feature listings rather than actual performance.
As for forums, people are far more likely to complain than praise, so they don't give you a great view either. In short, you should look for reputable sites with 30-day refund policies, but at some point you do have to cross your fingers and take a leap of faith.
The key technical features you need for a WordPress installation are PHP 7.4 or later, MySQL 5.6 or MariaDB 10.1 support and at least one database. More is good because it makes for tidier backups and doesn't put all your eggs in one basket, but don't let only having one be a deal-breaker. You can just as easily run WordPress, a forum, and anything else you need from one as three.
Features like bandwidth and file storage are slightly trickier. Previously, a site offering too much was a warning sign. These days, you only need to worry if the numbers are insultingly small. "Unlimited" bandwidth always has a fair-use clause attached to it, and there isn't much practical difference between it and, say, 50GB per month anyway.
If you go over your bandwidth limit, you won't be charged megabucks. If it's a one-time thing, such as your site suddenly being linked to from the frontpage of Reddit, most hosts will turn a blind eye to you going over your paid-for limit, and only politely suggest you upgrade your package if it becomes a regular occurrence. The others will simply switch you off until you get in touch. If you see any hint that they'll bill you instead, run like hell.
While all this host-hunting can be a genuine pain, the good news is that you should only have to do it once.
As soon as your site is set up, the majority of technical problems disappear. WordPress handles almost all of the difficult stuff for you, and the most technical parts of setting it up are copy-and-pasting username and password information from the welcome letter your host will send you, before FTPing it to the address provided.
As soon as you're done, the fun bit starts – picking themes, adding cool plugins, and actually writing your first few posts.
Part 1: Dressing for success
Finding the perfect theme for your website
1. Browse themes
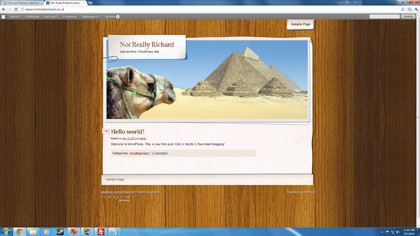
WordPress themes come in many forms, from simple blog designs to 'magazine' layouts that look more like regular sites. Visit the Themes panel on the Dashboard and click 'Install Themes' and you can browse through, preview and enable one of the many free ones available online. Usually, the only price for using these on your personal site is giving a linkback or credit to the original author.
2. Paying for themes

Commercial themes are available too, prices ranging from 'very little' to 'holy sweet crap'. These often have advantages, like very advanced control panels that let you do lots of customization without the need to edit the original files, and won't be as commonly used as the nicer free themes. However, for most small blogs, there's no point paying through the nose when there are so many good ones available for nothing.
3. Frameworks
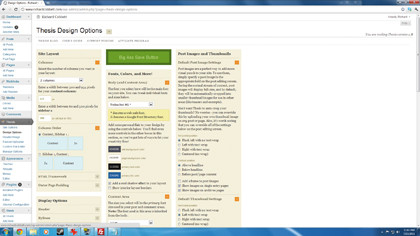
Warning: Don't even think about it if you're not comfortable getting your hands dirty, but 'framework' themes like Thesis (www.diythemes.com) can be spectacularly powerful. Out of the box, they're usually ugly as sin, but make for an excellent starting point if you simply want to skip the tedious stuff and get to the fun 'make WordPress work like you want' bit. Thesis is commercial, but there are free alternatives.
Part 2: Installing WordPress
Getting it running, and essential plugins to install immediately
1. Download WordPress
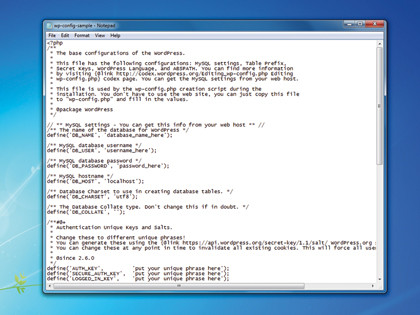
Download and unzip the latest version [https://wordpress.org/download/]. Open the file wp-config-sample.php in a text editor, and fill in the database name, address, username and password from your host's welcome letter. (Depending on your host, you may need to create a database first, which will be done in some sort of Control Panel). If you don't have this information, drop tech support a quick email.
2. Upload to directory
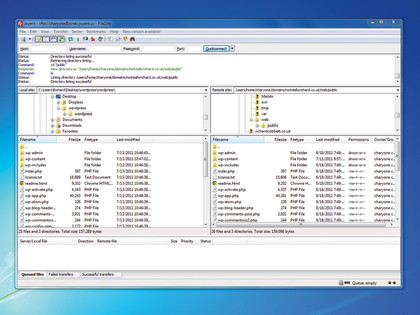
Save this file as wp-config.php. Using an FTP client like Filezilla, upload everything into your web directory. This will usually be something like /public_html/ or /web/, but again, it varies depending on your host. When uploading is finished, your root directory should contain the folders 'wp-admin', 'wp-content', 'wp-includes', possibly 'cgi-bin', and a stack of individual files.
3. Open in browser
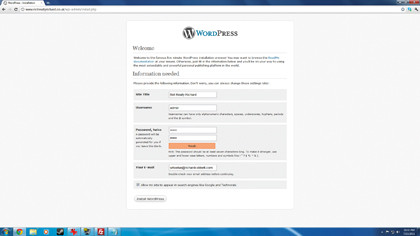
In your web browser, visit www.[your-domain-here].com/wp-admin/install.php. As long as you put the right database information into your wp-config.php file, everything else is automatic. The only potential hold-up is that if you only just created the domain name, or redirected it to this host from elsewhere, it can take up to 48 hours to start pointing here. If so, keep trying every few hours.
4. Admin bar
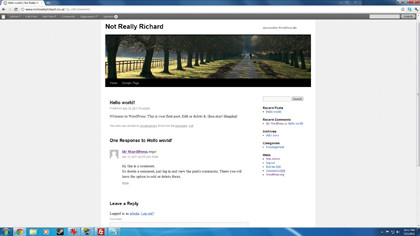
WordPress ships with a default theme, and automatically creates a post and a comment so you can see how it looks. You'll see an Admin bar at the top of the screen when logged in, but users don't. This offers shortcuts to the admin interface, the Dashboard and creating posts and pages. Posts are blog entries, to be browsed. Pages are static chunks of information, like an About Me page.
5. Install WP Super-Cache
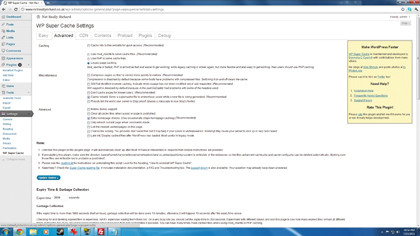
Before any of that though, you need two important plugins. Look in the Admin menu for the Plugins tab and click Add New. Type 'wp-supercache' and click the button, then 'Install Now' next to its name. Follow its instructions to the letter. Even a simple WordPress site can easily beat your server senseless: WP Super-Cache lets it create pages once and simply show them to everybody.
6. Install backwpup
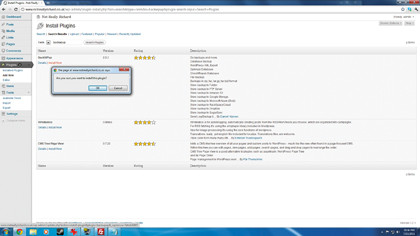
Second, return to the Add New screen and type 'backwpup'. This is a handy plugin that takes automatic backups of your site on whatever schedule you want (weekly should be fine) and saves them in your choice of cloud storage. You can ignore most of the settings in it, but make sure it does both database and file backups. Do a test run, and leave it to its thing. You'll be emailed if it hits any errors.
Part 3: Polishing and promoting your site
How to keep track of – and increase – traffic to your website
1. Suck up to Google
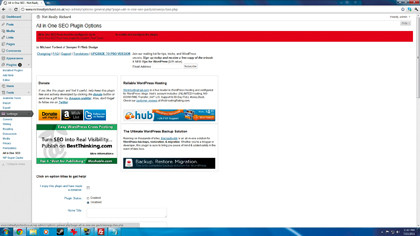
Getting traffic is tricky, but far from impossible. The easiest way is to suck up to the search engines. Visit the Plugins section and add the 'All In One SEO Pack' to your site. This lets you customize things like the metadata Google displays when people find your site, and tune your links. You also want 'Google XML Sitemaps', which tells Google exactly what you've got, and when you've updated.
2. Statistics
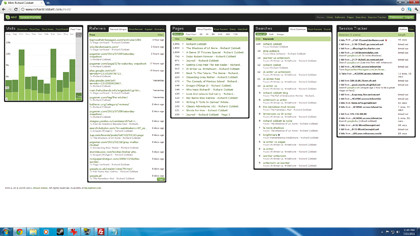
Next stop, stats! The in-built web statistics service will show you stats on your Dashboard when you log in. If you need something meatier, you can't beat Google Analytics.
3. Social buttons

Look into adding social sharing buttons to your posts, perhaps using the Social Buttons plugin. The most effective is Facebook's 'Like' button, and there are several plugins to add it automatically. Generic 'Share This' buttons usually go ignored though, and it's better to have a couple of prominent ones than a whole line of tiny icons. With Facebook, always click 'Like' yourself. Other people are more likely to do so if someone else has first.
5. Create SEO optimised posts
In addition to using the SEO plugins we’ve mentioned earlier, it’s also important you write SEO-friendly titles and descriptions for all posts. Use the SEO plugins to make sure the meta descriptions and title tags have all the relevant keywords that best describe the content.
6. Customise Permalinks
You can ask WordPress to generate permalinks for your posts, but it’s up to you to make sure these URLs to the posts are not only readable but also contain some of the relevant keywords.
- Check out the best website hosting services