3. Restoring the MBR
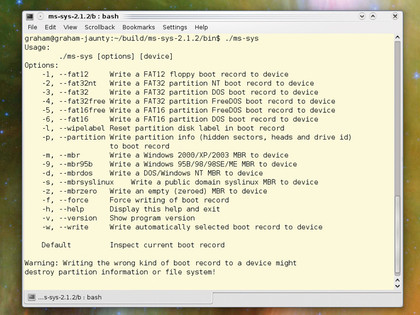
If you ever need to reinstate the Microsoft Windows bootloader onto your disk's master boot record (MBR), you can use the Windows rescue disk and the 'fdisk' command. However, there's also a handy open-source utility called 'ms-sys' that performs the process from a Linux installation.
With the tool installed, typing ms-sys-w/dev/hda will create a Microsoft MBR on the first drive. But this may leave you with the opposite problem to the one we started with if Linux is on the same drive. To resolve it, you'll need to reinstall Grub to get back to your Linux desktop.

MS-SYS: This handy app lets you create and edit the MBR from the Linux desktop
Even if you can't get to your Linux desktop, if you can get to the Grub boot menu then there's still lots you can do to troubleshoot an installation, whether that boot menu is off a Live CD or a standard installation. Press [Escape] when you see the boot menu, and 'e' on the line causing you problems, and you can now edit each entry on the fly.
These are the same lines we were editing in the 'menu.lst' file, and you can edit in-place options like the root partition for the operating system or the locations of the RAM disk image and kernel. Finally, rather than pressing 'e' for edit mode, try accessing the same command-line we used to search for the missing Linux installation. Just press 'c' to be dropped to the prompt.
'Find' is just one of around 30 commands that you can use to fix problems on your hard drives, list directories and even examine the contents of text files (the 'cat' command). For more details on what's available and how to use it, type help.
Sign up for breaking news, reviews, opinion, top tech deals, and more.
4. Fixing a partition table
Another situation that initially appears to be catastrophic but can be resolved without data loss is if you happen to destroy the partition table of one of your disks. This is the kind of error that could render an entire disk's worth of information useless, and it will also prevent your PC booting.
But partition tables are stored independently of the data on the disk, and there are ways that you can rebuild them. You might think that it's particularly difficult to destroy your partition table, but there are ways that you can easily do this accidentally.

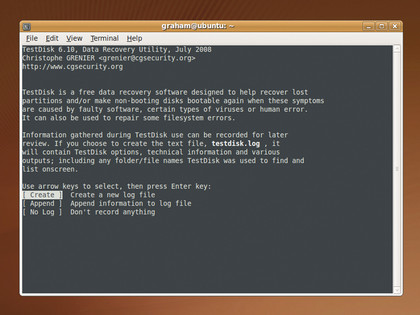
TESTDISK: You can rebuild your broken partition table with this clever program or diagnose the fault
The most common cause is if your PC is forced to restart while resizing a partition. You might find that the entire partition table is corrupt, despite the fact that no other partitions on the drive were touched by the process.
Another likely scenario is that the wrong device name is used while installing Linux onto an external USB device with a command like 'dd', resulting in your principle hard drive becoming the incorrect destination for a write command.
This can happen from Windows installations too, but Linux can fix both. The command you need to use is called testdisk. This is one of the most useful commands we've ever had to use in an emergency, though it's not installed on many Live CDs by default.
With the latest Ubuntu Jaunty, you'll need to install it from the Live CD environment using the package manager. After this is done, you should type sudo testdisk on the command line. If you don't use the sudo command to run with administrator privileges, testdisk will ask for your password when the main page first appears.
Before you get to that step, though, you'll need to let the app know whether you want to create a log file or not. The correct answer is 'Create', but most people skip this stage and move straight on to the repair. Before you select the 'No Log' option, just remember that a log file can really help if testdisk fails or makes the problem worse. It's the only way that you'll know how far the along the process the repair procedure managed to get before it stopped, and where any fatal errors might have occurred.
5. Writing the new table
After choosing whether or not to create a log file, the next screen you'll see will list the storage devices attached to your computer. The size of each disk should be correct, along with the unique identifier for the drive at the end of the line.
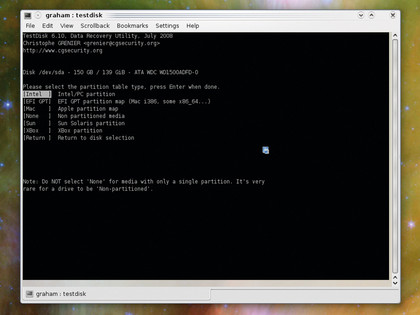
Use the cursor keys to select the drive that you want to repair and press [Enter]. The screen that now appears is the most important, because you need to give testdisk some indication of the type of drive partition used on your system.

WHICH PARTITION: You will need to know what type of partition your broken install used before going ahead
In the vast majority of cases, this is going to be the first option – an Intel/PC partition. If you're using a system other than this, then there's a good chance you'll already know what it is. You may be using the ultra-new EFI standard, for example, and this can be selected from the list.
After pressing [Enter] again, you'll see a page that has another list of options. You need to choose the first one to analyse the contents of the drive. This will first display the registered partition details, if possible, before allowing you to perform a quick search for the table configuration within the data on the drive. There's also an exception for Vista-based partitions, as these are handled slightly differently.
If the search is successful, you will see the list of partitions discovered on your drive. If not, you'll be presented with the option to perform a deeper search, but we've never found this necessary on a normal Intel Linux system. From the page that lists the discovered partitions, make sure that the general parameters are correct – such as one of them being labelled as bootable – and press [Enter].
From this file list of partitions, select 'Write' to make the list of partitions you can see on the screen permanent. After a system reboot, you should find your drive fully restored, although there's a chance you might need to install the Grub bootloader.
-------------------------------------------------------------------------------------------------------
First published in PC Plus Issue 285
Liked this? Then check out 10 essential tips for recovering lost files
Sign up for TechRadar's free Weird Week in Tech newsletter
Get the oddest tech stories of the week, plus the most popular news and reviews delivered straight to your inbox. Sign up at http://www.techradar.com/register
- 1
- 2
Current page: Restoring the MBR and fixing partition tables
Prev Page Corrupt Windows and Linux boot menus