Partition your hard drive: keep your data safe
Partition your hard drive to protect your files
Sign up for breaking news, reviews, opinion, top tech deals, and more.
You are now subscribed
Your newsletter sign-up was successful
We've always advocated keeping your docs, files and other data on a separate drive to Windows and your applications. That way if something goes wrong with Windows, your data is kept safe.
It's not always viable to purchase a second internal hard drive for your PC though, which is where partitioning comes in. Partitioning allows you to divide a large hard drive into two or more smaller drives, each one to all intents and purposes a separate physical drive.
In this tutorial we'll show you how to divide a single drive into two partitions, then move your data across to the new partition so Windows knows where to find it.
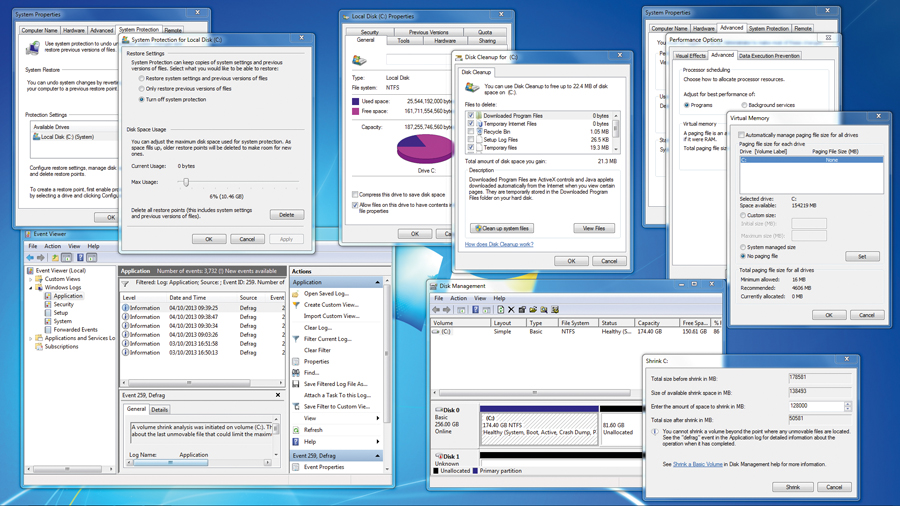
The actual partitioning process is simple, but we suggest caution following the tips in the annotation opposite if unmovable files are preventing you from shrinking drive C: to an acceptable size. You might find using Partition Wizard Home Edition useful as well.
Step-by-step: Partition your hard drive in two
1. Review available drive space
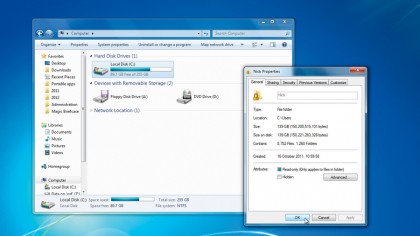
Click the 'File Explorer'/'Windows Explorer' icon in the Taskbar and select 'Computer' from the left-hand menu. Check the free space available for the C: drive - remember, this drive needs to be large enough to hold all your data. To get an idea of how much data you have, browse to C:\Users, right-click your username and choose 'Properties' - you'll now see the amount of space needed to proceed.
2. Move data to an external drive
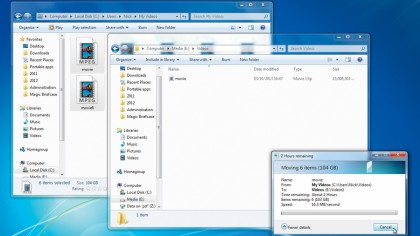
If your user folder is larger than the available free space on the C: drive, you'll need to move some of its contents to an external hard drive. Open the relevant folder - typically Documents, Pictures, Music or Video - and move its contents into a folder of the same name on your external drive. Repeat until the size of your user folder is smaller than the drive's free space.
3. Open Disk Management
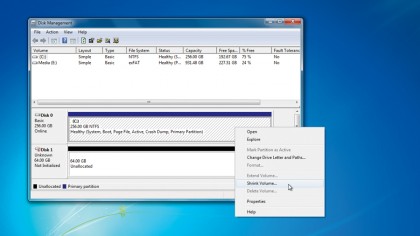
Windows 8 users should press [Windows]+[X] and select 'Disk Management' from the Quick Access menu. For Windows 7 and Vista users, you'll need to click 'Start', select 'Run' and type diskmgmt.msc into the dialog box, before clicking 'OK'. When the Disk Management window opens, right-click drive C: as shown in the screenshot above and choose the 'Shrink Volume…' option.
Sign up for breaking news, reviews, opinion, top tech deals, and more.
4. Shrink drive
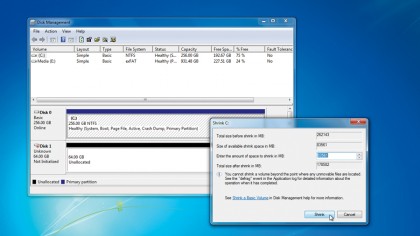
After a short pause, Windows will display the maximum size that the C: drive can be shrunk by. If this seems a little too small, the annotation above will show you how to temporarily remove the files that are responsible. If the figure is acceptable, click 'Shrink' - if it's too large, enter a different figure in MB. The average user needs around 50GB (around 51,200MB) in total.
5. Create a new partition
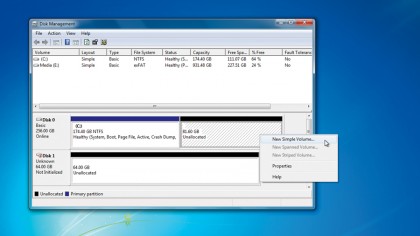
Now wait while Windows resizes the drive. When it's complete, you'll see a new Unallocated section will appear next to the drive in the Disk Management window. This will become your new data partition. To set it up, right-click the empty space and choose 'New Simple Volume…' to start the process of setting it up. Now click next on the New Simple Volume Wizard.
6. Set up data partition
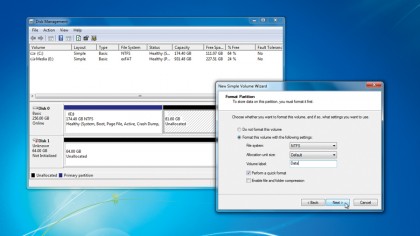
When asked to specify the volume size, leave the default figure alone and click 'Next'. If you want to assign drive letter D: to the new partition, simply select 'Do not assign a drive letter or drive path' for now and click 'Next'. Give the volume a suitable label (such as 'Data'), leave the other options as they appear and finally click 'Next', followed by 'Finish'.
7. Change drive letter
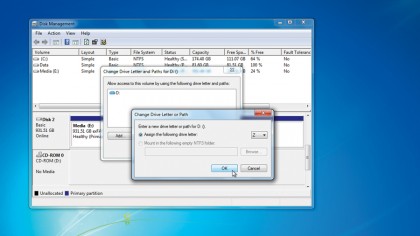
Locate the drive that's been allocated the D: drive letter, then right-click it and choose the 'Change Drive Letter and Paths…' option. Now click 'Change' to pick a new drive letter (such as 'Z') and click 'OK' followed by 'Yes'. Now right-click your new data partition and select 'Change Drive Letter and Paths…' when you're done. Finally, click 'Add', select drive D: and click 'OK'.
8. Move documents folder
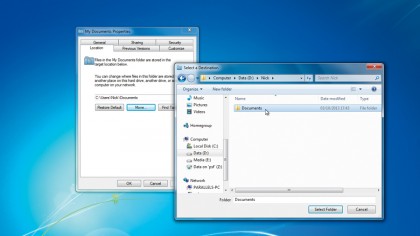
Open a folder window and browse to C:\Users\Yourusername. Right-click the 'Documents' folder and choose 'Properties'. Switch to the Location tab and click 'Move'. Open your new drive and create a new folder with your username. Create another folder inside it called 'Documents'. With this folder selected, click 'Select Folder', then choose 'OK', followed by 'Yes'.
9. Move other folders
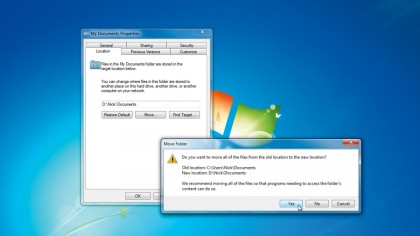
Once the files have been moved to your data partition, repeat the same process for all the other user folders you need: typically Desktop, Downloads, Pictures, Music and Videos, but you might also consider using Contacts, Favourites and Saved Games, too. Once done, transfer back any files you moved to your external drive into the relevant folders on your data partition.
10. Finishing touches
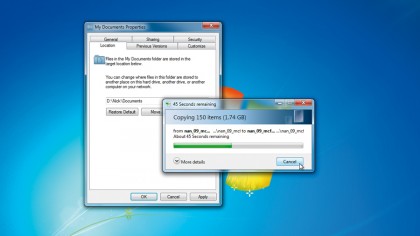
Congratulations, you've set up a data partition on your drive to keep your documents and other files separate from Windows. You can now take a drive image of your Windows partition using the incredibly useful Windows Backup tool (or by using third-party programs, such as Macrium Reflect Free) and restore this image in future without ever having to touch your files.