How to Play Videos on Your iPad with PlayerXtreme
What You Need:
>> iPad with iOS 4.0 or later
>> PlayerXtreme (free, for limited time)
1. Round up your files
PlayerXtreme supports many different file formats right out of the box. Here’s a full list of all of the video files you’ll be able to play: 3gp, asf, avi, divx, dv, dat, flv, gxf, m2p, m2ts, m2v, m4v, mkv, moov, mov, mp4, mpeg, mpeg1, mpeg2, mpeg4, mpg, mpv, mt2s, mts, mxf, ogm, ogv, ps, qt, rm, rmvb, ts, vob, webm, wm, and wmv.
Think that’s a lot? Yeah, we think so too!
2. Transferring your videos into iTunes
Getting videos into the PlayerXtreme application is an easy thing to do with iTunes. With the application installed on your iPad, and your iPad connected to your Mac, launch iTunes.
3. Transferring your videos over Wi-Fi

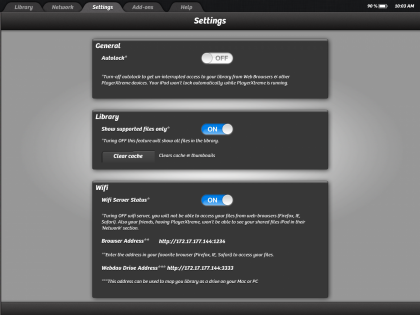
If both your Mac and iPad are connected to the same network, then you can easily transfer videos over Wi-Fi. To do this, open the PlayerXtreme application, and navigate to the Settings tab. Once there, locate the “Wifi” settings, and slide the switch to “ON” for the Wi-Fi Server.
4. Playing Your Videos
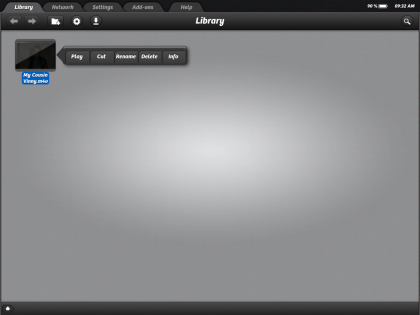
After launching the PlayerXtreme application on your iPad, ensure that the Library tab is selected. Here, you can see all of the videos have been loaded onto your device, and can organize the videos with folders, or search through your library by tapping on the small magnifying glass at the top, right-hand side of the screen.

Tapping on a video file will bring up a list of options: Play, Cut, Rename, Delete, and Info.
Sign up for breaking news, reviews, opinion, top tech deals, and more.