How to use auto-tune in your favorite audio editors
Want to know how to use auto-tune?

Most of the best audio editors have some sort of pitch correction built-in and if not, there’s usually a handy plug-in that will allow you to shorten the distance between notes, both for pitch correction and in pursuit of stylistic novelty and innovation. Apps differ greatly in terminology and functionality, but we’ve got you covered with how to achieve these effects in many popular audio apps.
Auto-tune is a much more flexible tool than you might think, and often listeners won’t even know it's there. Although opinions differ, it cannot be denied how useful auto-tuners are to simply and easily correct ‘permanent’ mistakes in vocal recordings.
Auto-tuners in audio editing software work by reducing the distances between notes, which can bring slightly off ones into tune. When taken to the extreme, this shortening produces the sliding sounds so characteristic in certain genres.
It’s important to remember with all auto-tuners that they can’t correct for pitch if they don’t know what the pitch is supposed to be, so you’ll need to find out what key signature your project is in. This information isn’t hard to find and there are plenty of tools online. Or you can simply bring up a keyboard and find the tonic (root) note by trial and error. However, you do it, this detail must usually be entered again for every new element you bring in, including the plug-ins.
Auto-tune tools aren’t always called the same thing, some apps have built in versions, and many others support VST plug-ins. It’s a big subject, so let’s look at how to use the auto-tune feature in your favorite music-making software.
CyberLink Audio Director is a top-rated Audio Editor
Techradar editors praise it for the powerful AI tools and integration capabilities that allows you to edit, mix, and record and restore audio to produce professional-level sounds. Visit CyberLink.com to try it for free.
How to use auto-tune in Cyberlink AudioDirector
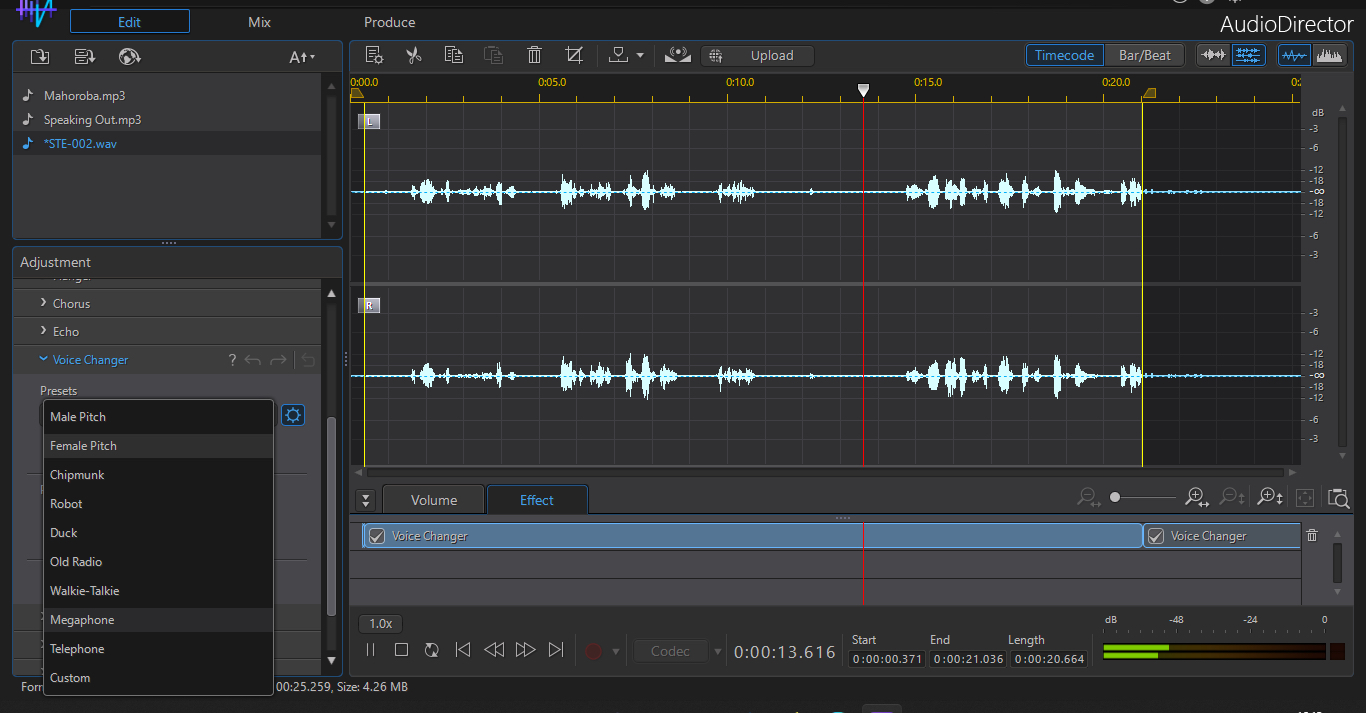
CyberLink AudioDirector features several methods to modify voice, although none are actually called autotune. You can work on multiple tracks or individually.
In the adjustment window on the left of the screen select ‘Adjust Audio’. Then choose between pitch shifter, pitch bender, and Speech Pitch Contour which provides a moveable curve on the selected area of the track for fine editing of notes. All these will have different effects on spoken word than on music, and the controls found in the advanced (cog) menu to the right of the selected preset allow you to move beyond presets altogether to make manual adjustments.
Sign up to the TechRadar Pro newsletter to get all the top news, opinion, features and guidance your business needs to succeed!
AudioDirector also has a convenient preview toggle switch on many effects and transformation panes that shows up directly below the controls on many to give you more control editing panes, so it’s super easy to hear if it’s what you want before applying any effect.
An alternative Pitch Correction tool is found in ‘Apply Effects’ in the Adjustment window. From there, choose ‘Voice Changer’. Clicking on the cog icon next to the preset menu opens a pitch control slider to manually change pitch along with several preset voices which are also further adjustable.
How auto-tune audio in Audacity
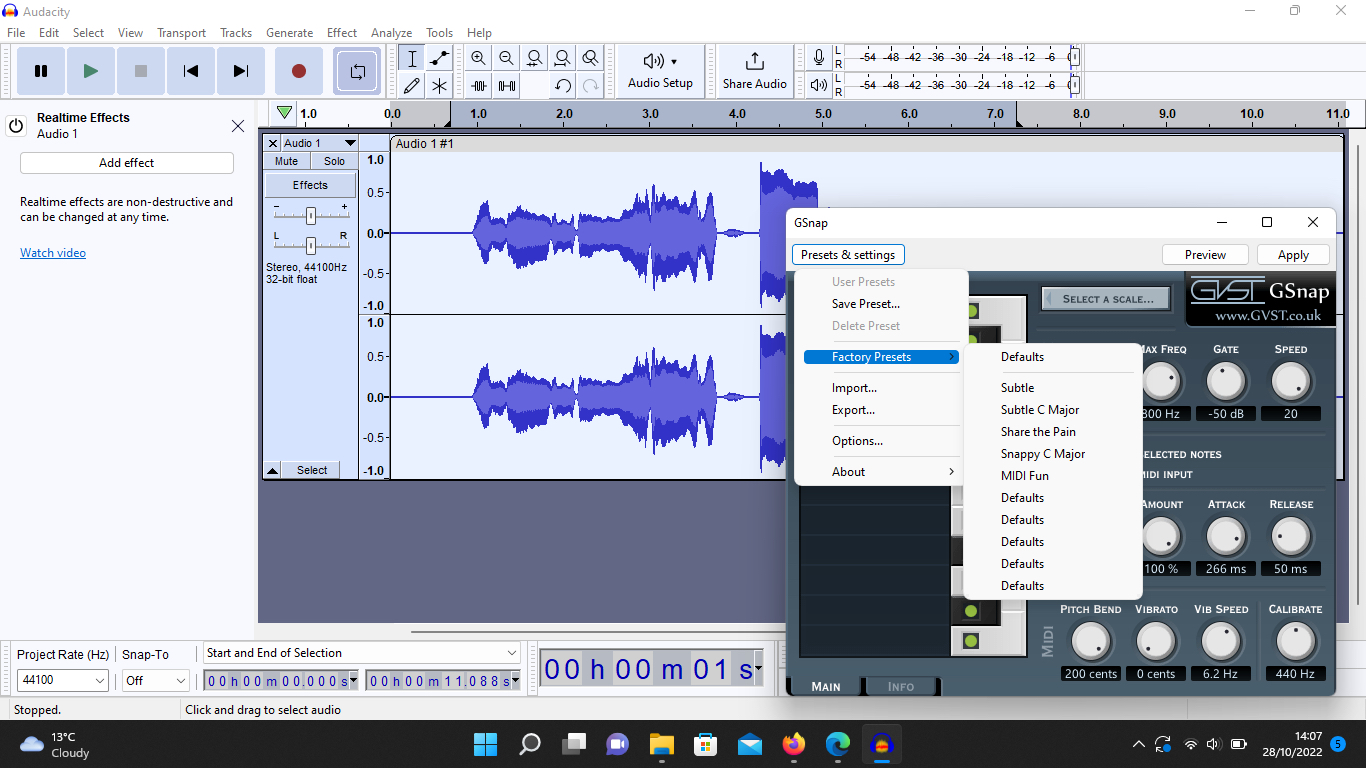
Audacity itself doesn’t contain a native auto-tune but with its increased VST functionality it is even easier to add any of the many auto-tune plug-ins available. The best free option is touted to be GSnap by GVST where you’ll find download options for Windows, Mac and Linux.
Once downloaded, the plug-in needs to be copied and pasted into Audacity’s plug-ins folder. This is somewhat easier on a PC than a Mac. To achieve this Mac users need to control-click on the Audacity icon in the Applications folder to bring up the necessary menu of ‘show package contents” which is far from obvious.
Whichever platform you’re using, once installed don’t forget to first enable the plug-in and then restart Audacity.
With that done, there is lots to play with. Clicking on ‘Presets and Settings’ brings up factory presets and you can experiment to your heart’s content. “Share the Pain” despite the T-Pain homage in its title is quite a subtle tool, and using the dials to reduce sound intervals will give you the familiar sliding sound. Holding the Shift key gives you finer adjustment of dials while Control-click gives you the default values
How to use auto-tune in Apple GarageBand
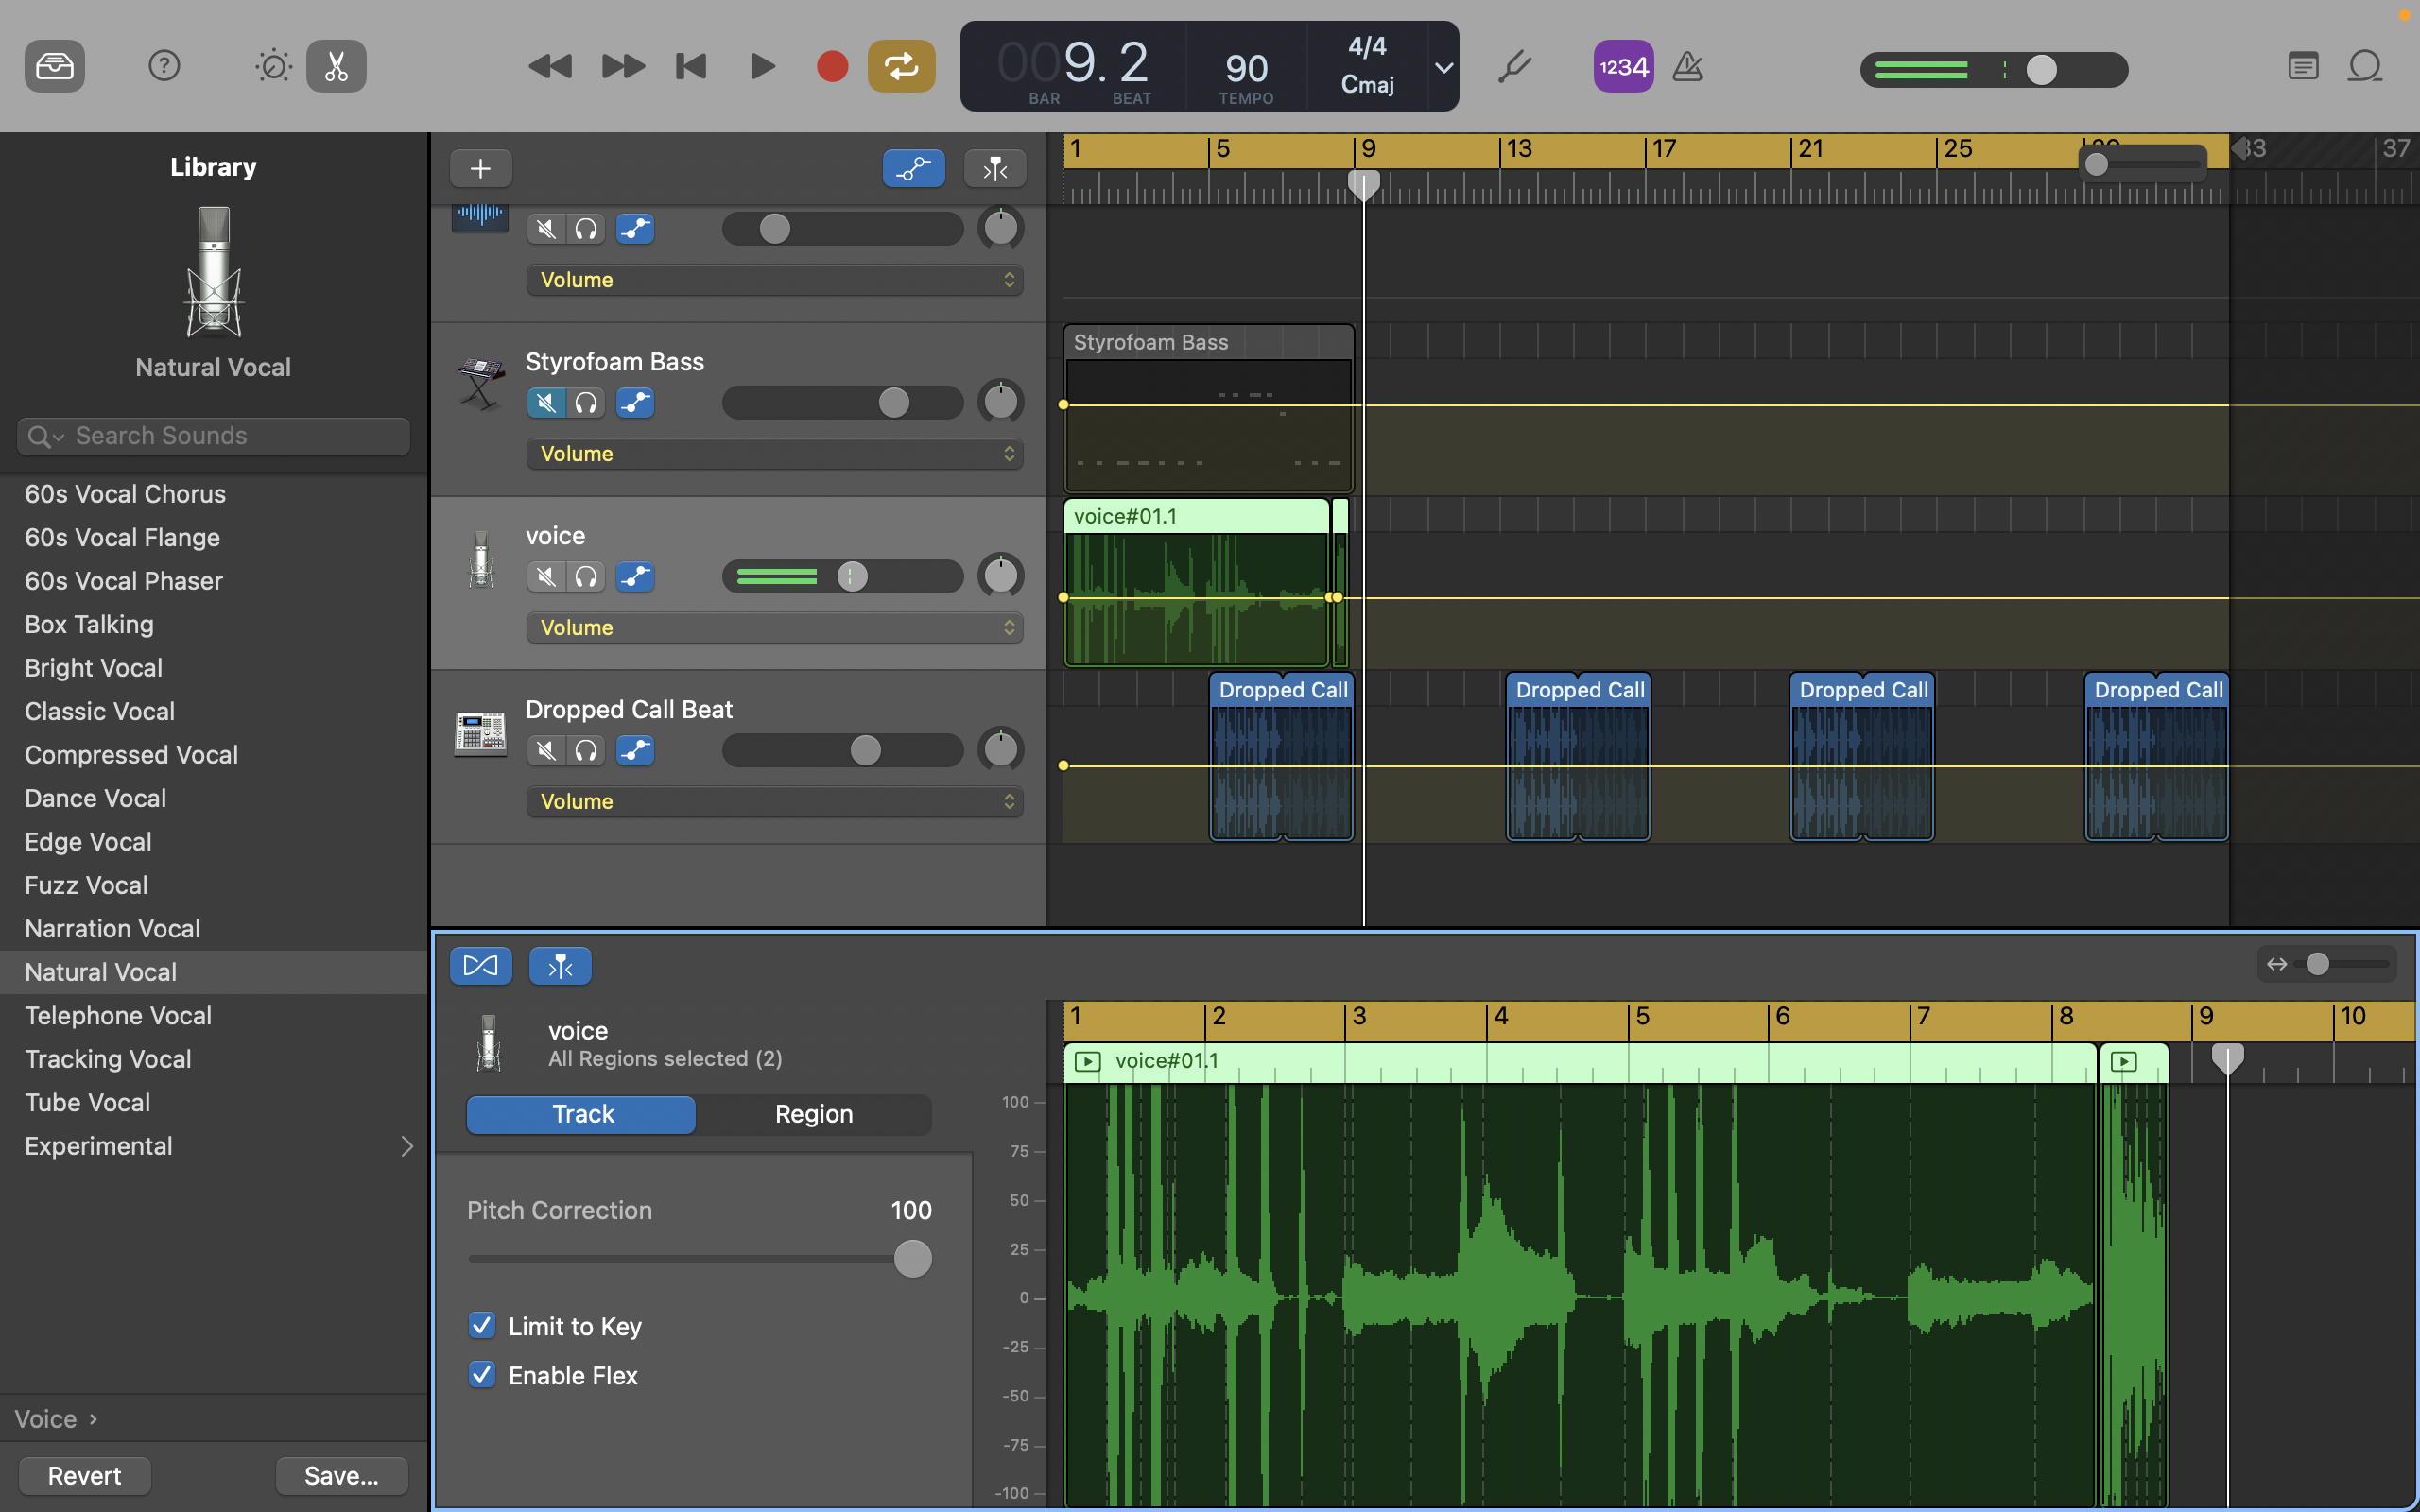
In Apple GarageBand, select the track you want to adjust and open it up in the Editor. The most reliable way to do that is through View/Show Editor: it then appears in the bottom third of the DAW.
Make sure ‘Track’ is selected, not ‘Region’, and the pitch correction slider will show up. As you’ll have identified the key of your song before starting (always advised) you can check the ‘Limit to Key’ button which will ensure that you are making adjustments to the correct key signature. You can also check the ‘Enable Flex’ button to allow GarageBand to adjust note and beat timing for a more naturally cohesive result.
You can make reasonably subtle adjustments with the slider and if subtlety isn't your thing, knock yourself out with pitch correction’s satisfyingly extreme results.
How to auto-tune in Logic Pro
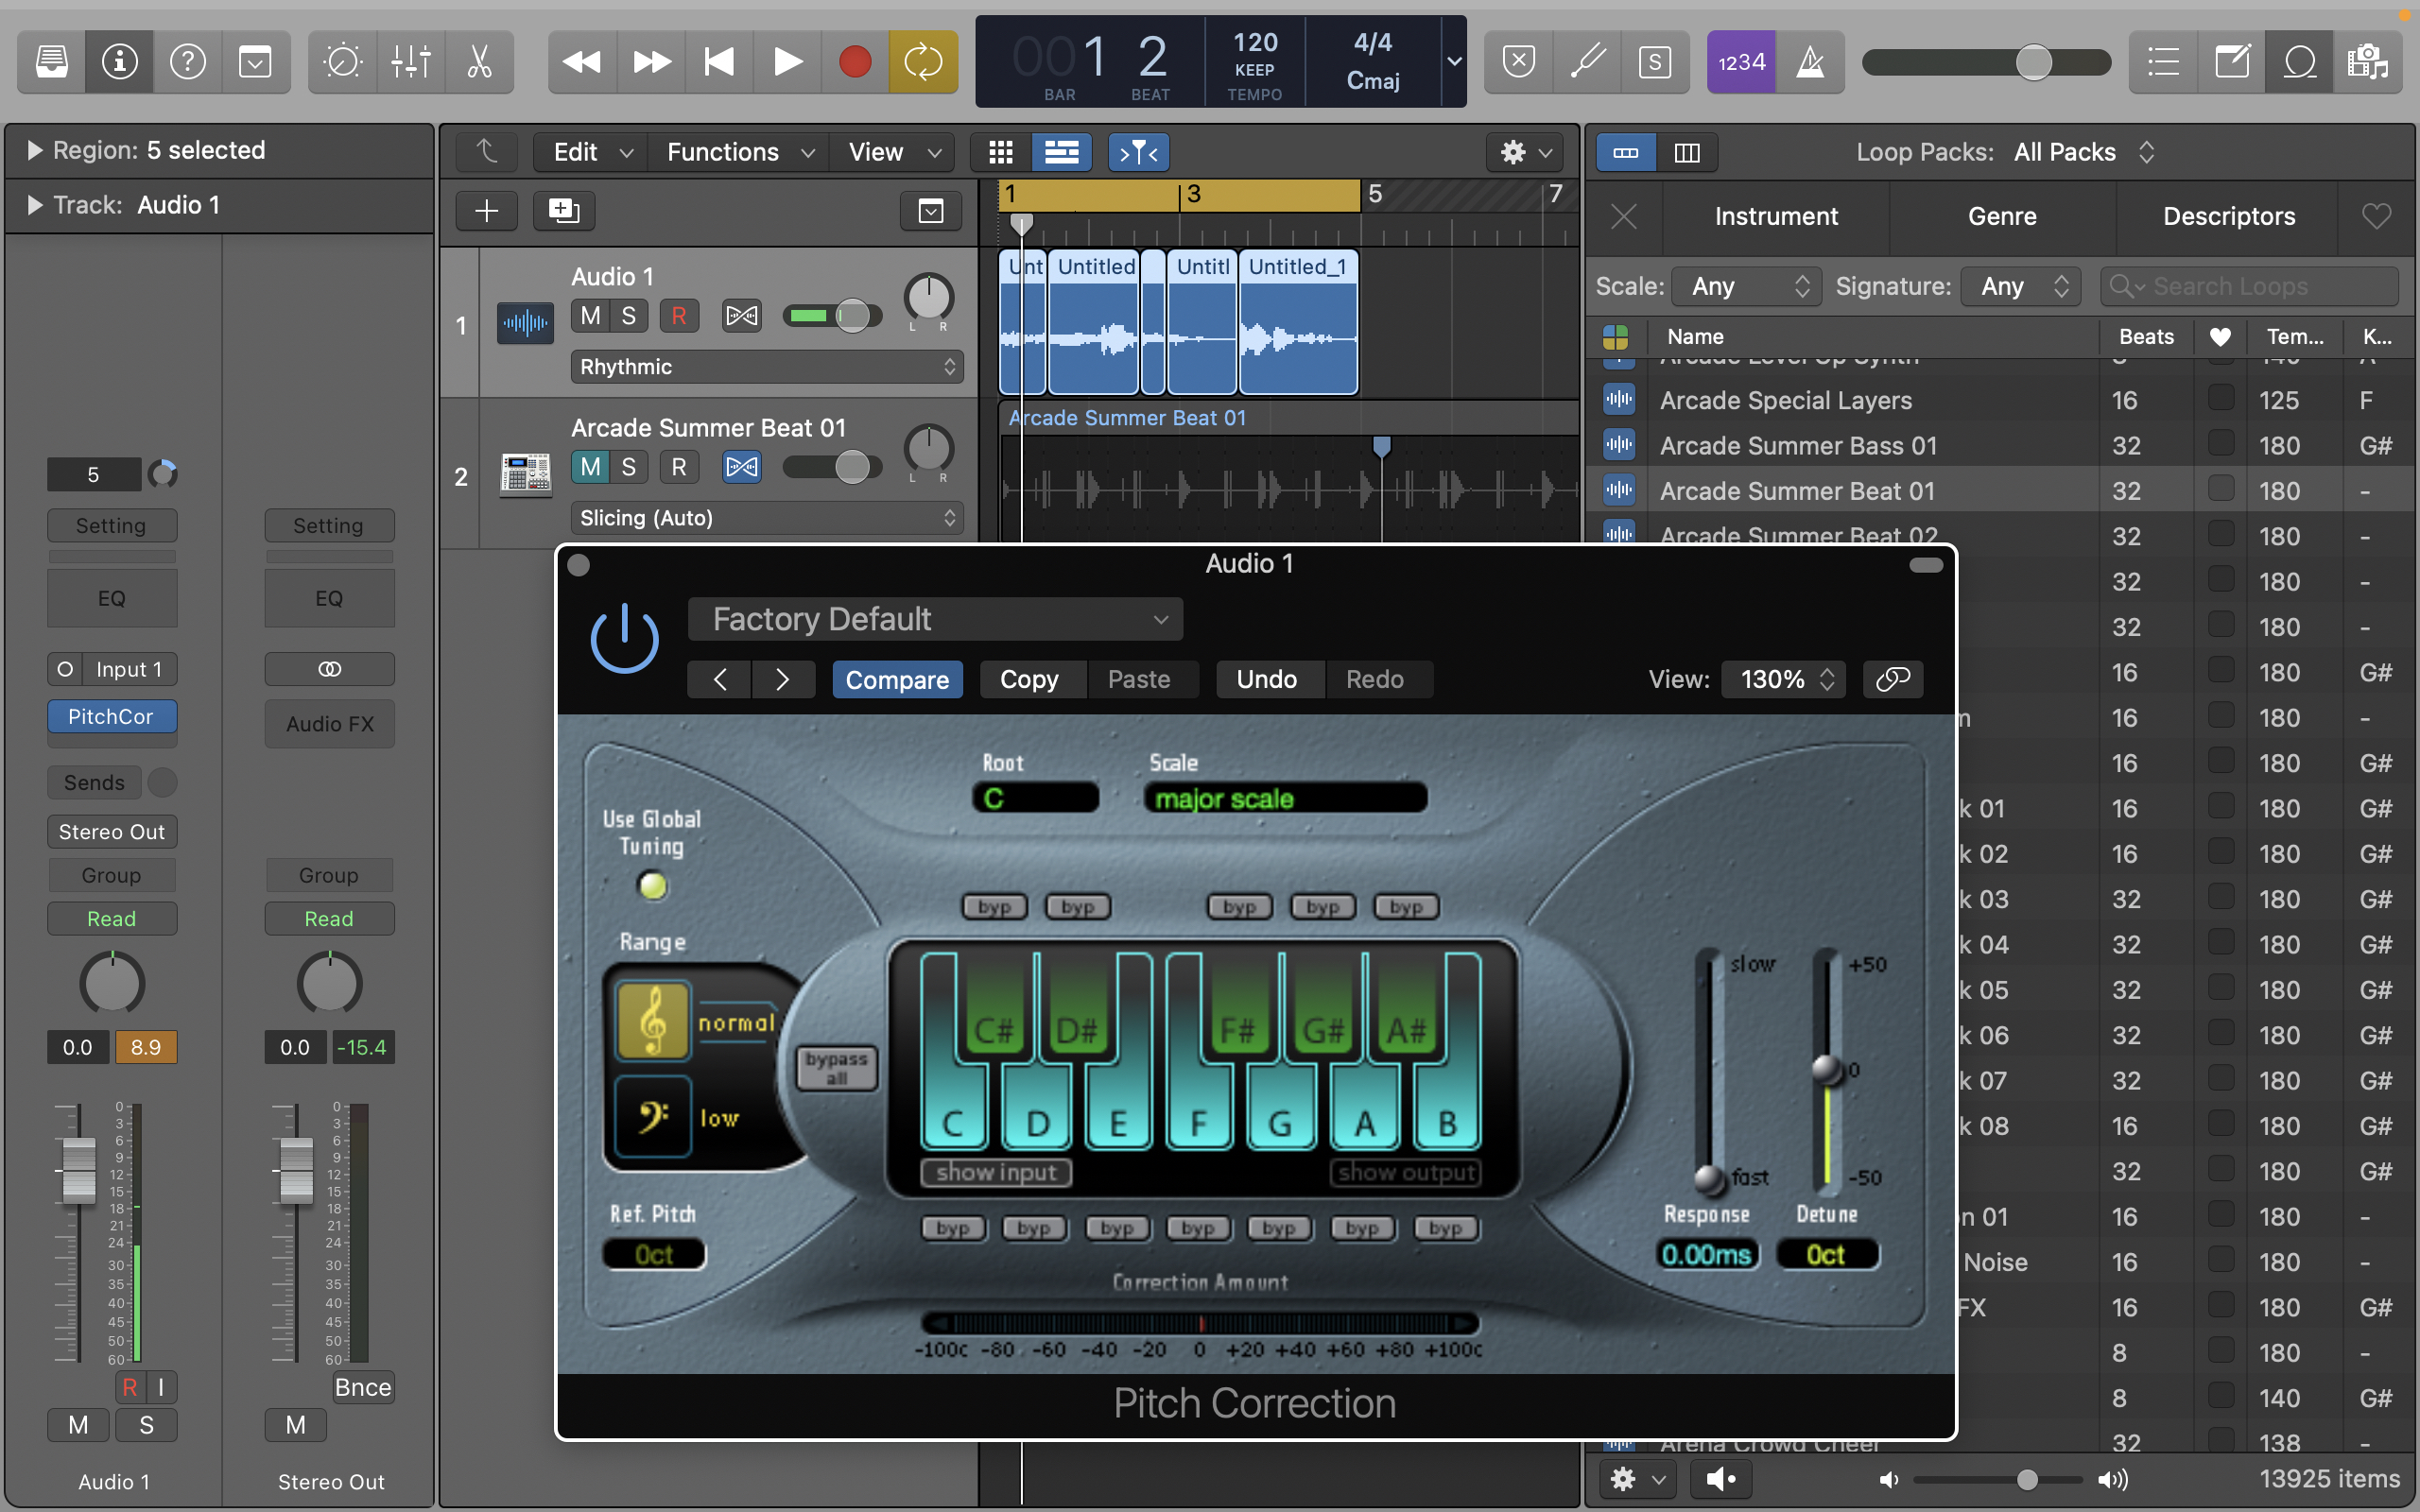
The auto-tune options in Apple Logic Pro are simple to find and reassuringly reliable. Select your vocal track and identify the key signature. After making any EQ, Reverb and Compression changes, hit the Flex button at the top of the window to quantise and edit the pitch, ironing out problems without having to trim, move, nudge, or crossfade.
Once you’ve done that go to the Audio FX tab in the inspector channel strip on the far left of the screen. Choose ‘Pitch’ and then ‘Pitch Correction’. This brings up the pre-installed plug-in.
Lessening the response rate, lengthens the gaps lessening the response rate, and then experimenting with the slider to get the sound you want.
The keyboard exempts notes from pitch quantisation grids. While the Bypass buttons above the keyboard exclude the selected note from pitch correction entirely. The Bypass All button is a toggle to quickly compare the corrected and original signals.
The faster the response rate, the quicker the voice reaches the corrected destination pitch which depends on the singing style, tempo, vibrato, and accuracy of the original performance.
How to use auto-tine in NCH WavePad
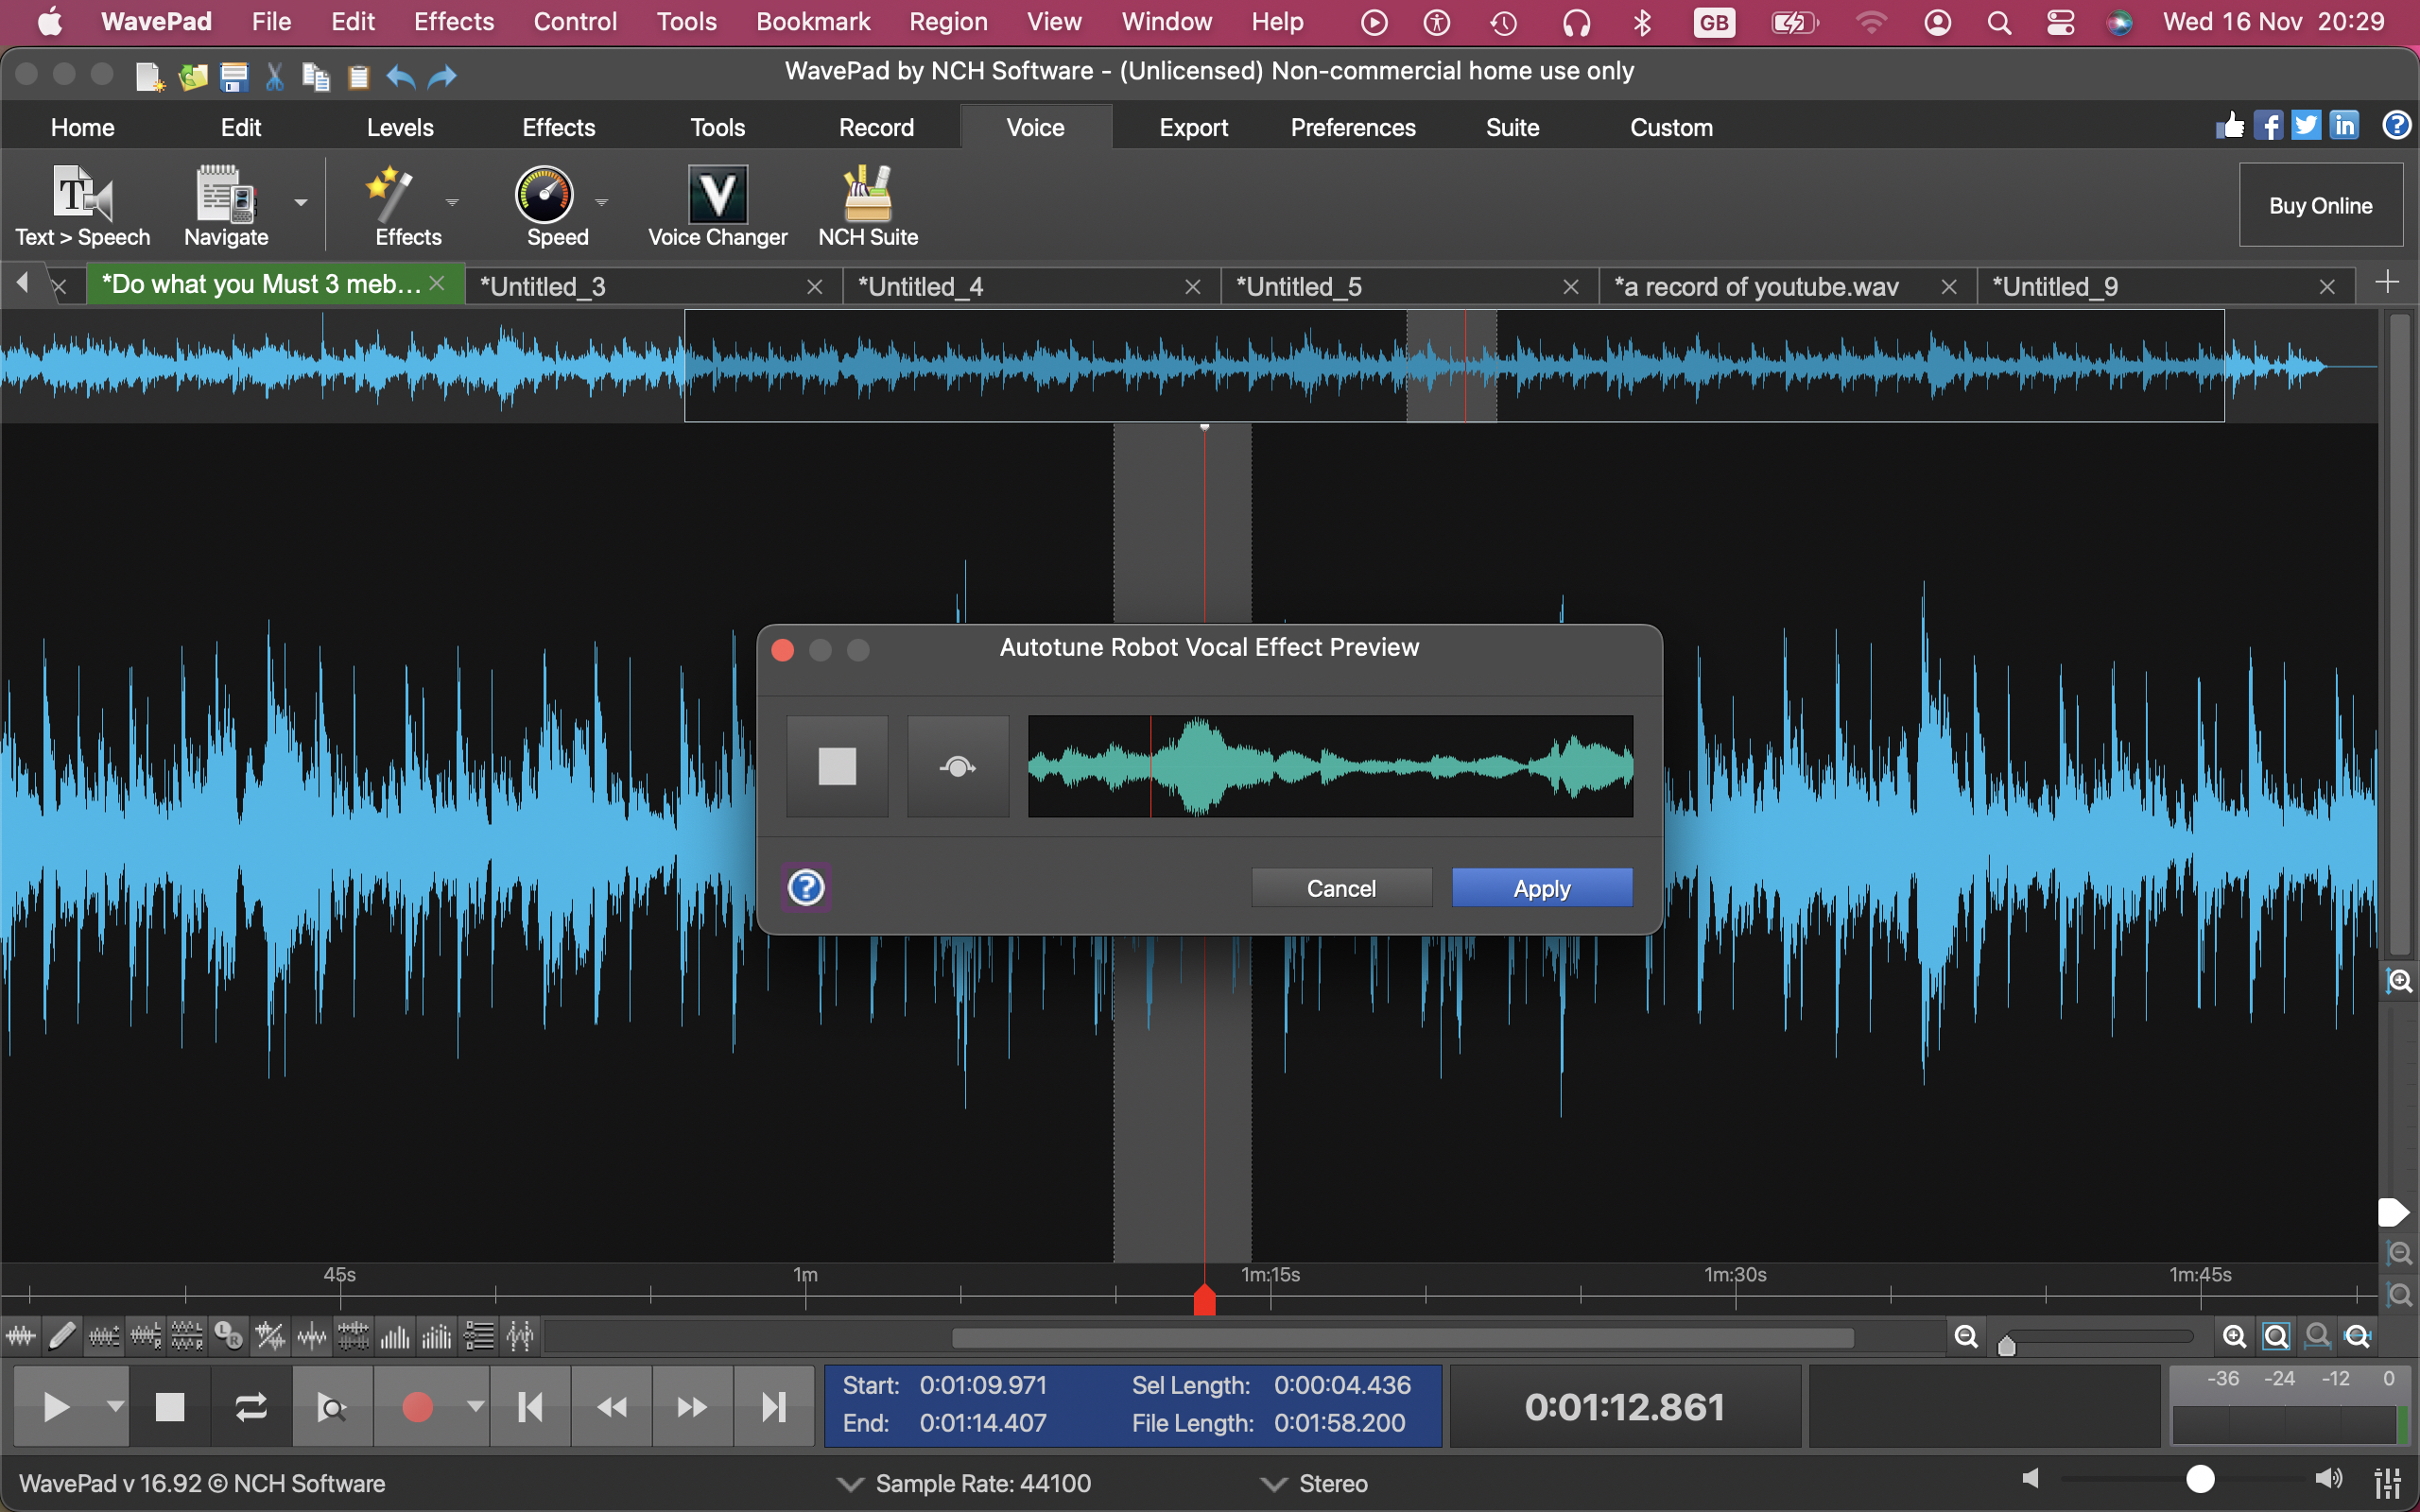
WavePad, from NCH Software, has lots of pitch correction and change tools, as well as noise removal, reverb echo, and so on. So, you can try and fix notes that might not be quite in key.
For anything called auto-tune, however, you’ll have to either opt for the robotic auto-tune effect, or stump up for the Master's Edition of WavePad, where you’ll be able to add your autotune plug-in of choice to the VST menu and apply it to your recordings.
To access WavePad’s robotic auto-tune feature, go to the voice menu in the main bar and choose effects. Alternatively go to the effects menu, where you’ll find the effect in both the basic and popular options.
How to use auto-tine in Ocenaudio
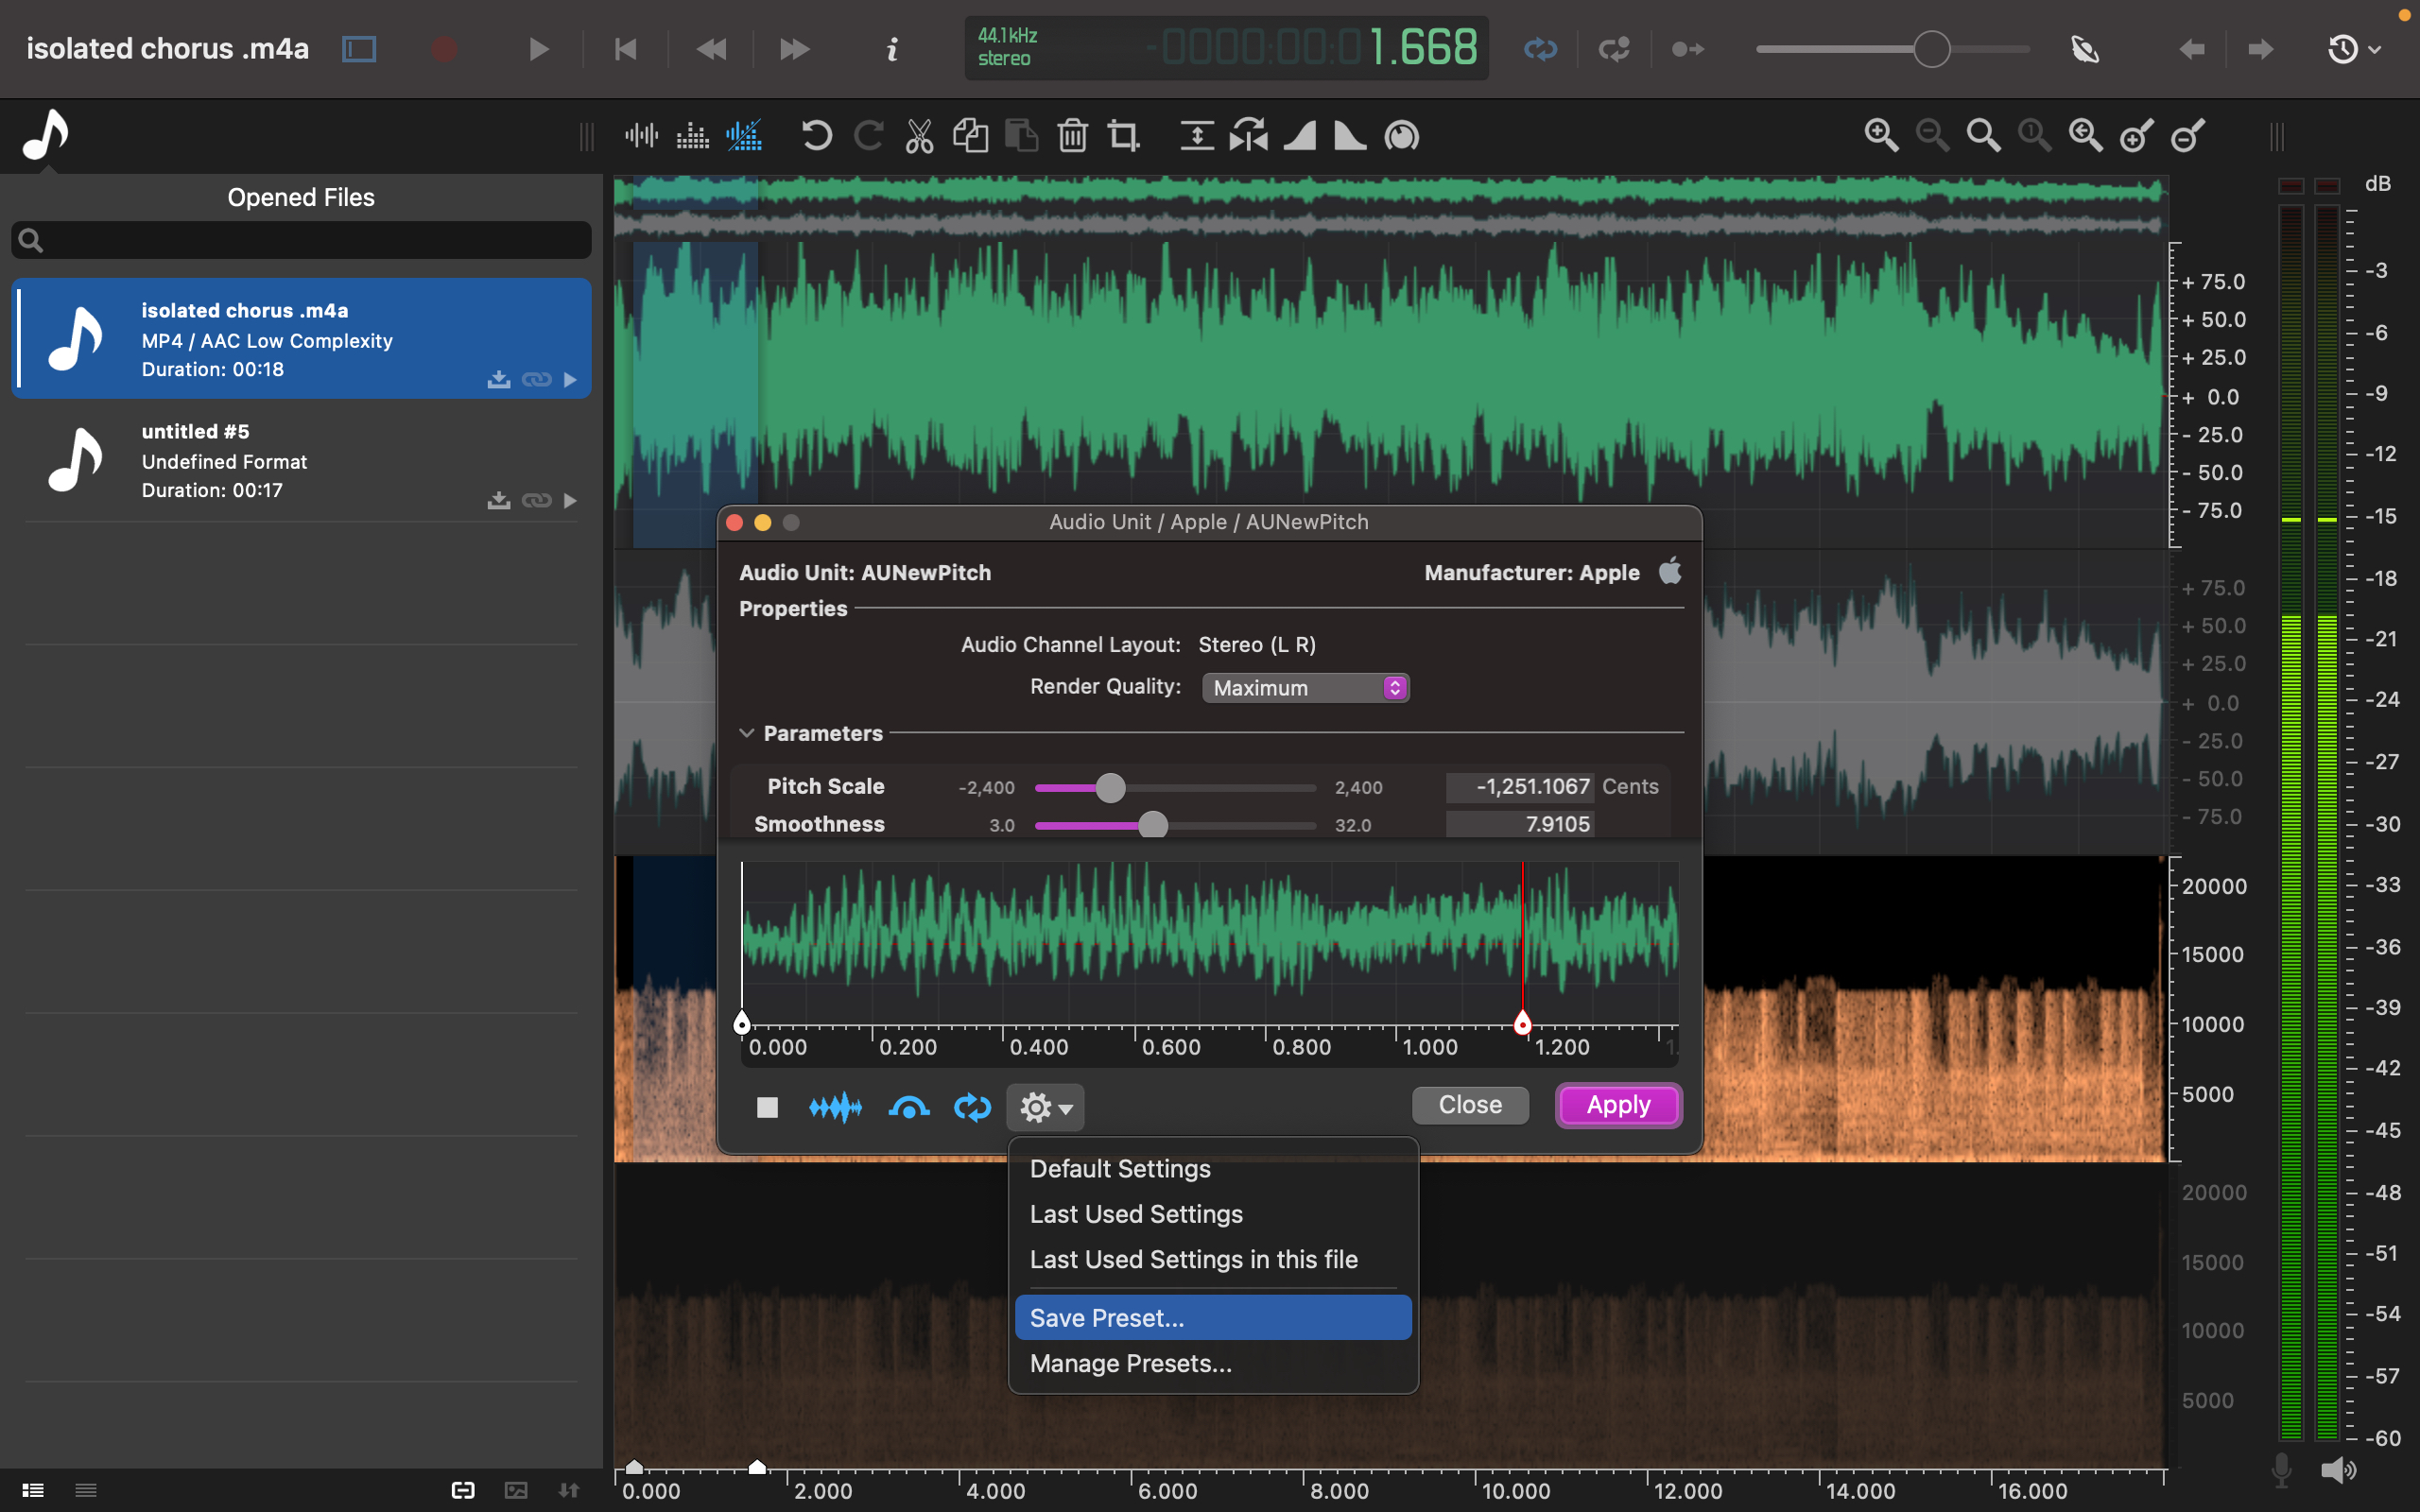
Ocenaudio has its own time/pitch adjust functions in the effects menu, while also offering Apple new pitch and Apple pitch.
In the time/pitch menu move the slider or just choose how many semi-tones you want to move the note, region, or track.
If these controls aren’t enough for you, Ocenaudio hosts VST plug-ins including the free GSnap. Once you’ve added it through the dedicated preferences pane you’ll need to restart the audio editor, at which point it will turn up in the VST section of the effects menu.
The software allows use of these dials on quite precise parts of audio, you can also add custom effects to the whole track. Once you have a preferred set dialed in, you can save it as a preset.
- Discover the best audio PCs and the best laptops for musicians and music production
Angel has been making and composing music since she was 4. Music has always featured in the many performance styles she’s been involved in, from backing music for cabaret, through theatre, live singer song-writing and recording, and video journalism. For over 20 years she’s taken full advantage of the explosion in technical capability, flexibility of use, and expanding tools for creating content, and loves pushing software to its limits in service of creativity.

 Become a TechRadar Insider


