How to remote access and control your Mac remotely from your iPhone and iPad
Yes, you can control a Mac from your iPhone and iPad
In recent years, Apple has gone out of its way to make macOS increasingly like iOS. Therefore, it shouldn't be a surprise that the company makes it possible for someone to access their Mac from their iPhone and iPad. The preferred method has changed in recent years, however. Despite this, it's still relatively easy to do so.
Why would it be necessary to access a Mac from an iPhone? Various use cases show why connecting your iPhone with your Mac might be required. The first is rather mundane yet obvious: to remotely access files stored on the computer. In another scenario, there's the usefulness of troubleshooting it provides. Whether it's being able to connect to your Mac at work or popping into a family member's computer on the other side of the country, remote access is a great way to fix a computer-related problem.
For iPad, Apple has made accessing macOS much easier, and rightly so; a tablet offers a much better solution because of its larger display.
For many years, Apple offered the Back to My Mac remote access feature in macOS (and early Mac OS X). The feature utilized Bonjour to discover and connect to external devices via the internet. Apple discontinued Back to My Mac in macOS Mojave in 2019.
Even with Back to My Mac's demise, there are other ways to remotely access and control your Mac from an iPhone and iPad. Some options are easier to use than others, and each varies in its purpose, as you'll see below.
- You might also be interested in the best remote desktop software.
Using Mac Screen Sharing
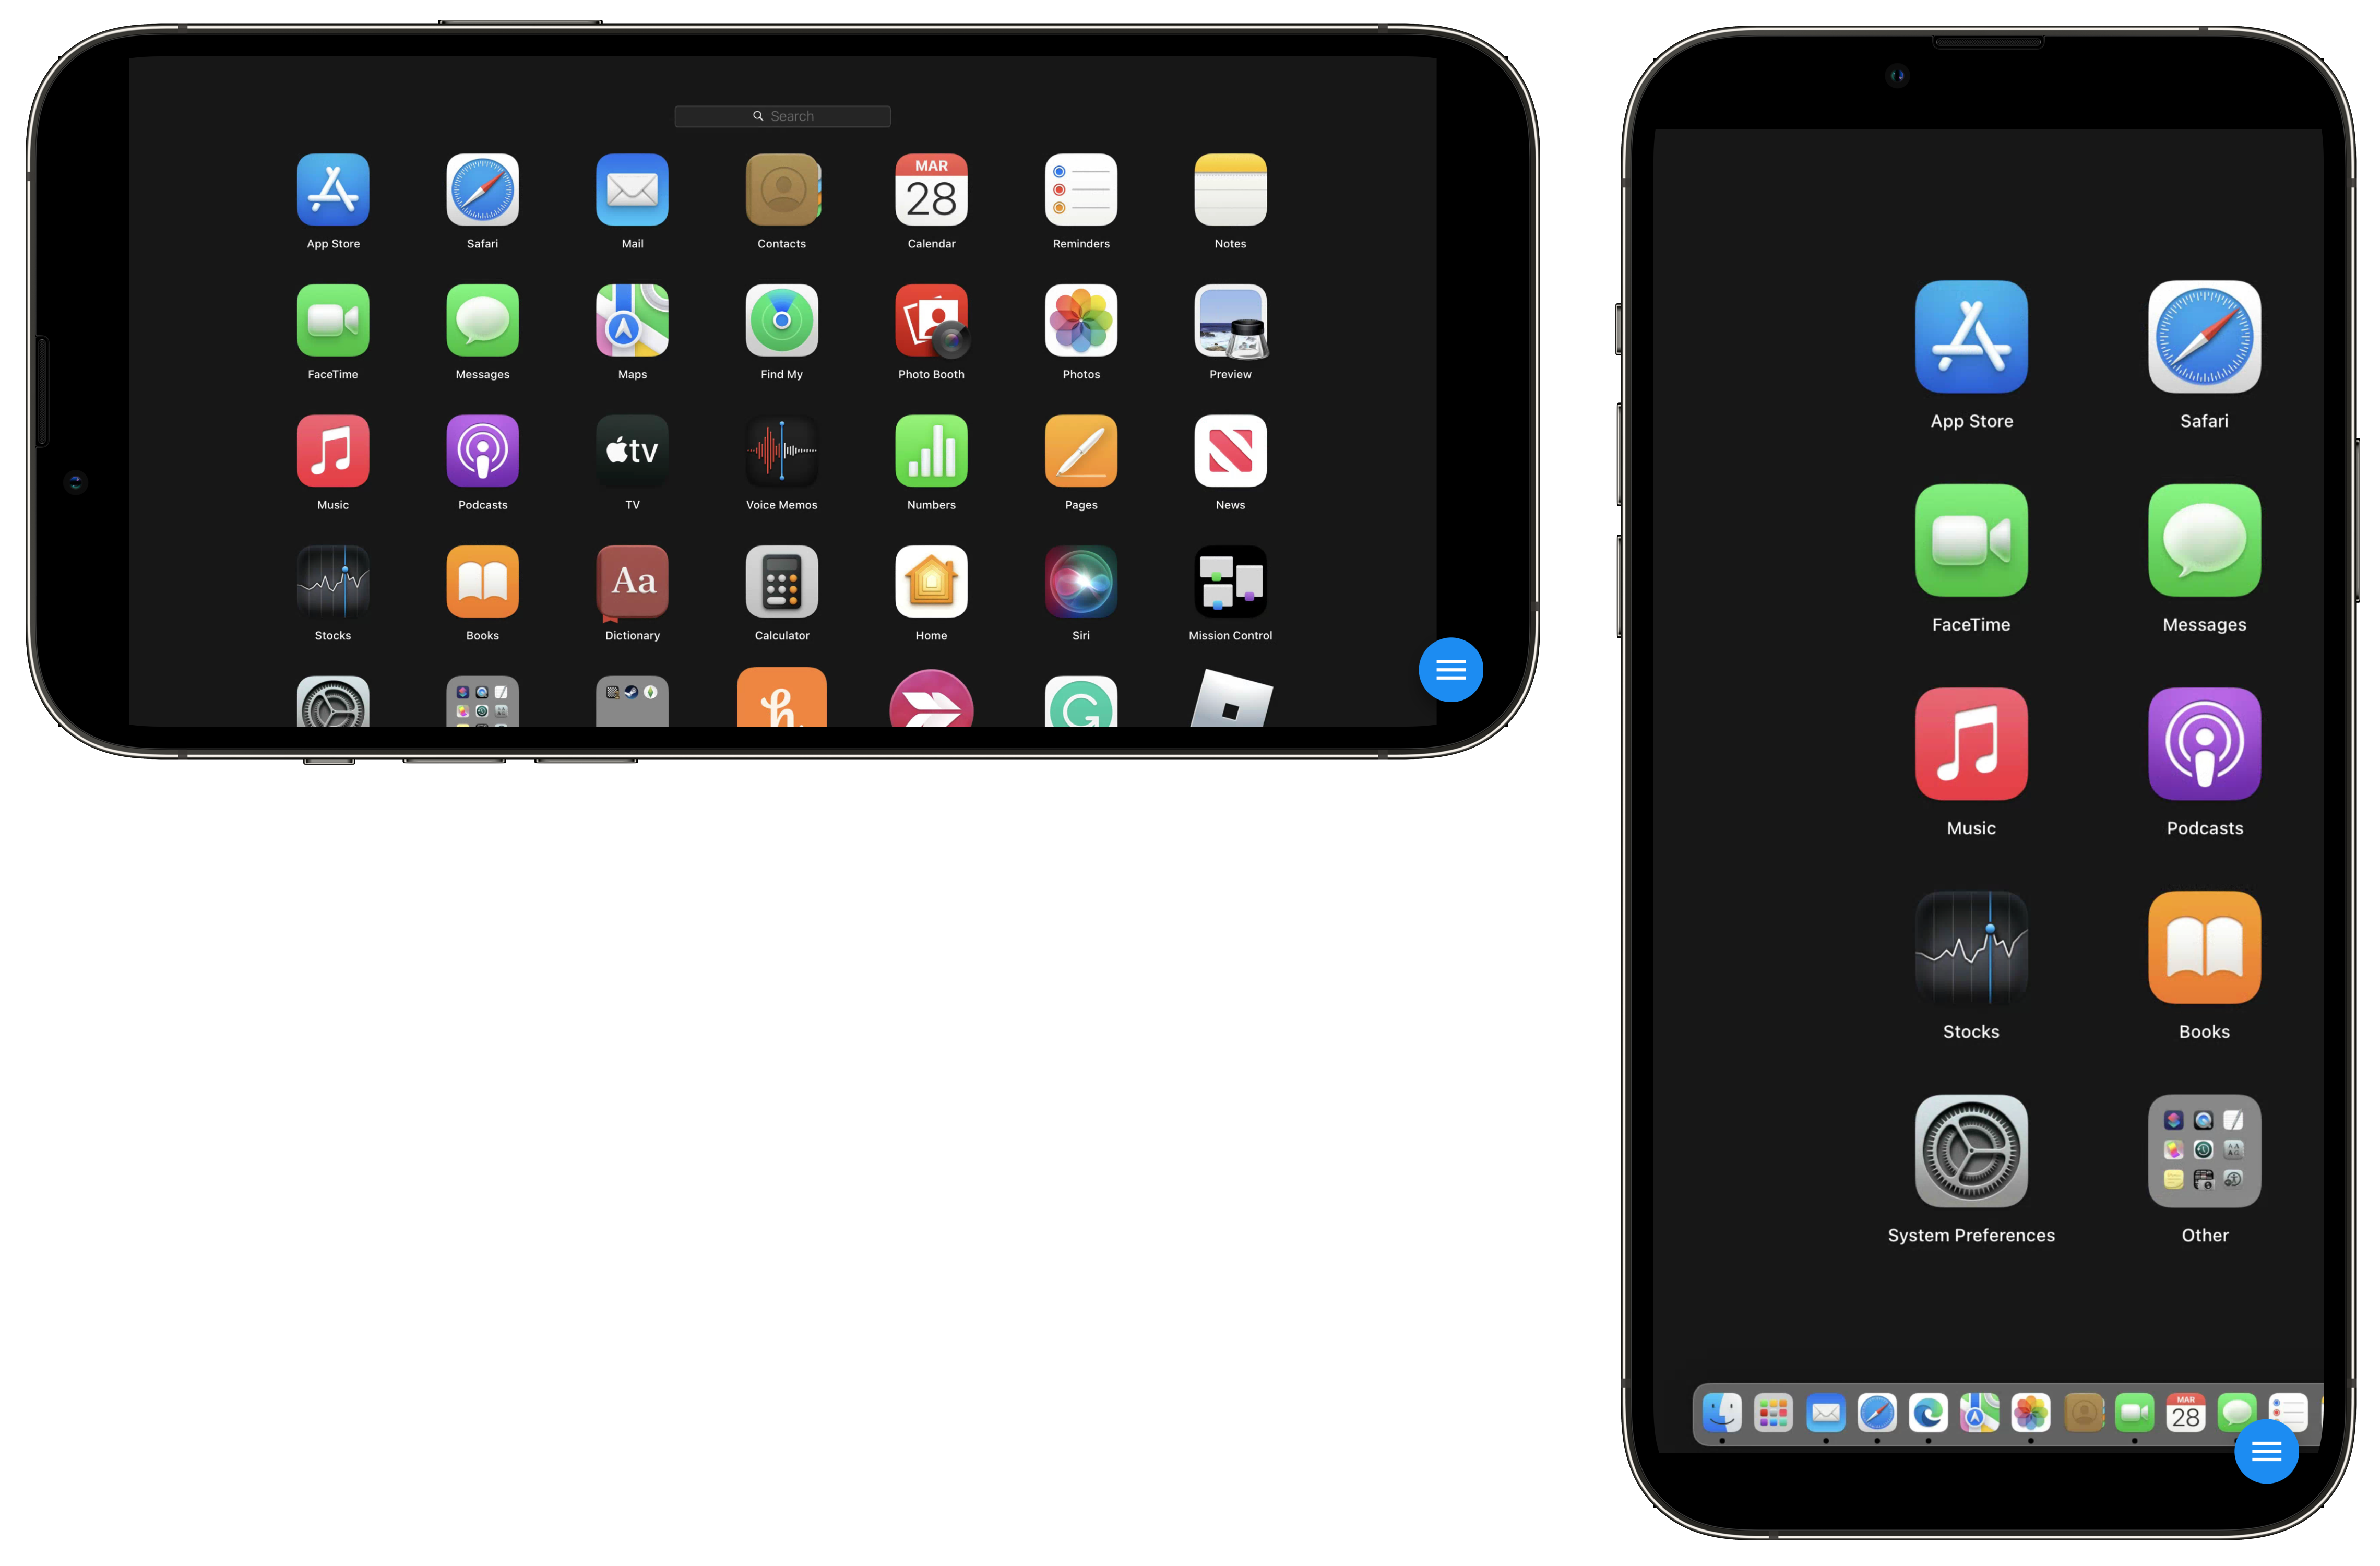
With the built-in Mac Screen Sharing tool enacted in macOS, it's possible to access a Mac anywhere with an internet connection. It also provides a mechanism to collaborate with others on a project like a presentation or a website.
To date, Apple doesn't offer a native remote access feature for iPhone users to gain control of a Mac. However, you can still do so using a free app.
Sign up to the TechRadar Pro newsletter to get all the top news, opinion, features and guidance your business needs to succeed!
Perhaps the easiest way involves using a Google account and a Chrome browser on iPhone.
As a first step, you must enact Mac Screen Sharing by going into "System Preferences" on the computer. Next, choose "Sharing." Next, check the box on the left next to "Screen Sharing." If it's a grayed-out box, click on the lock icon at the bottom left, log in with your Mac account, and check the box.
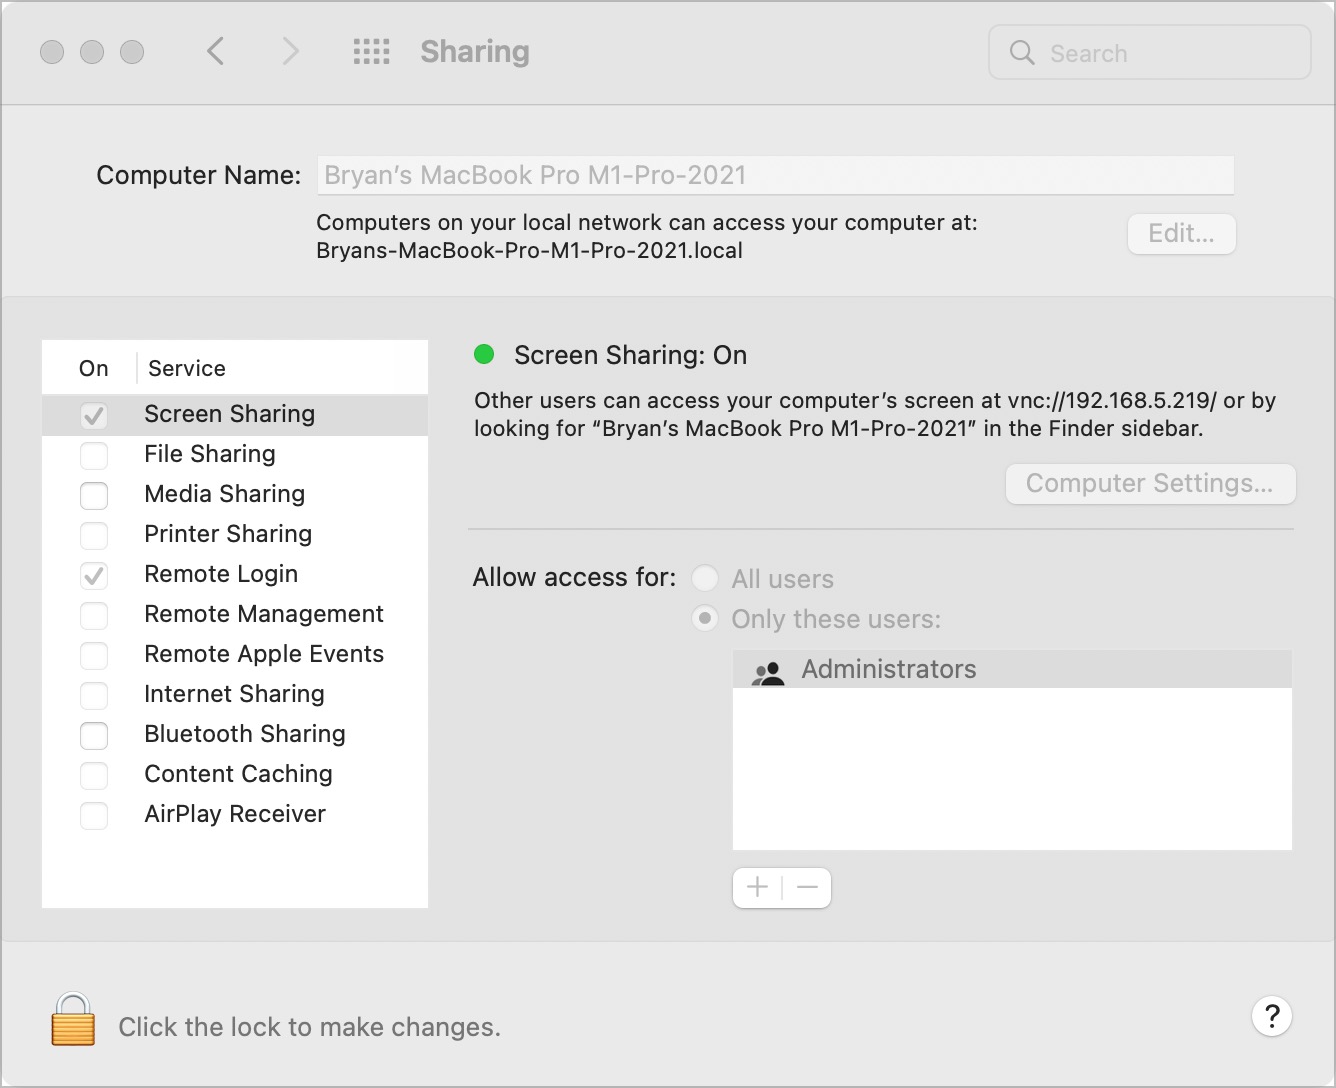
With Screen Sharing activated, note the address and computer name under the 'Screen Sharing: On" section at the top right.
Install the free Google Chrome browser app on your Mac. Visit https://remotedesktop.google.com/access/ through the Chrome browser and look into your Google account if you haven't already done so. Click the button for 'Set up remote access.' Next, click the icon 'Add to Chrome.' Follow the on-screen instructions to install the remote access extension on your Mac.
Once the extension is installed, you'll head back to the Google Chrome browser and add the computer's name in the box. It will show the default name, which you can change or replace. Choose 'Next.' Enter, reenter a six-digit pin, click 'Start,' and follow the additional directions.
There are paid remote desktop options available to save you a step or two. Nonetheless, you can still get the job done for free using Google Chrome. Paid options worth considering include TeamViewer and LogMeIn.
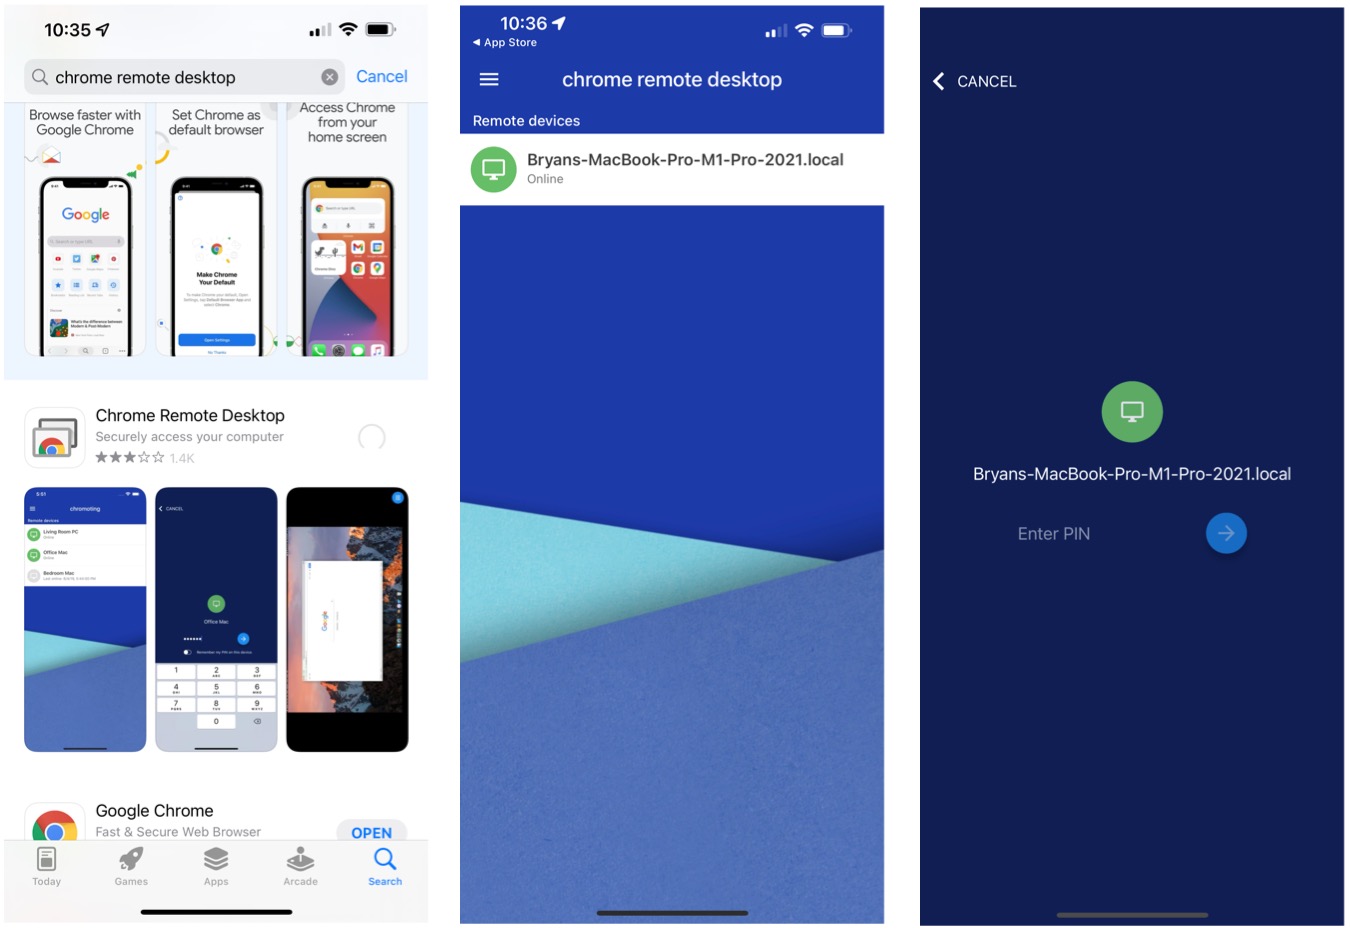
Install the Chrome Remote Desktop app on your iPhone, then open it. Sign in to the same Google account that was used on your Mac. Once you do, you'll see a link to access your computer remotely. Click on it. Enter the six-digit pin assigned above the tap on the arrow icon. You can now control your Mac from your iPhone.
There are various options available within the app to control the Mac, including the ability to disconnect. However, Chrome Remote Desktop must stay active on your Mac to continue working. To turn this off when not in use, go back into the Chrome app on your Mac, and click on the trash can icon next to the computer name on the Chrome Remote Desktop page.
Using SharePlay with FaceTime
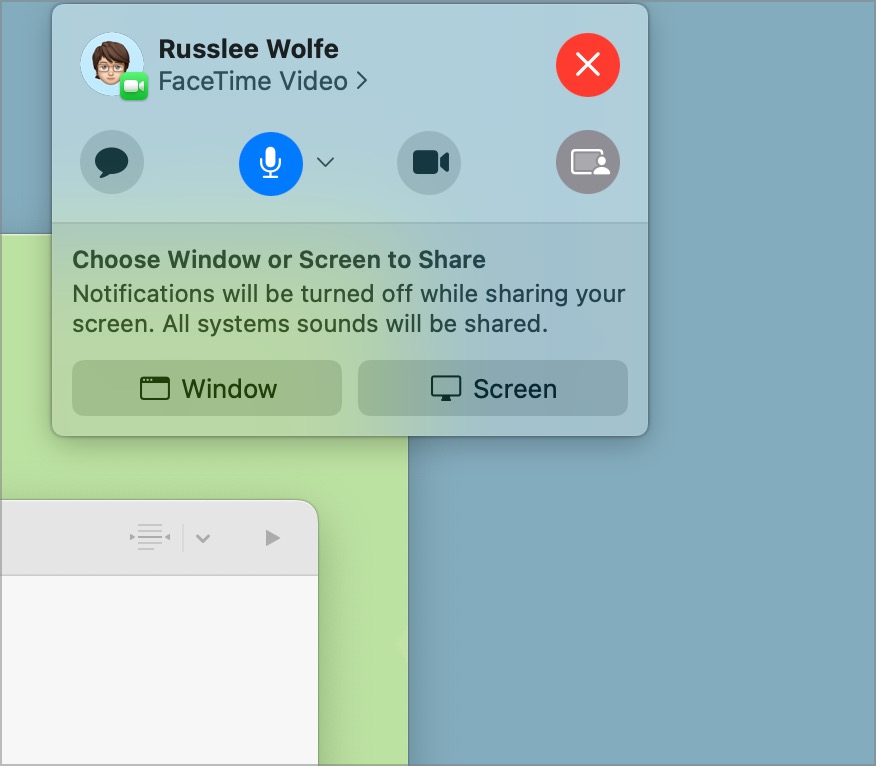
One of the newer ways to share your Mac screen is FaceTime's SharePlay feature. Although this feature is often advertised for its entertainment-based features, it works very well as a troubleshooting or training tool. The intended uses are to share the Mac screen to show apps, webpages, and more. And thanks to FaceTime, everyone on the call can react and comment about what they're seeing.
To get started, you must already be on a FaceTime call. Next, the Mac user must click the FaceTime button, then click the Screen Share button. The two choices are to 'Share the app window' or 'Share the whole screen.'
To stop sharing, click the FaceTime button again, then choose 'Stop Sharing.'
Please note: FaceTime doesn't allow another user to control a Mac desktop physically. It's included here because it can serve as an easy-to-use troubleshooting tool.
Using iCloud Drive
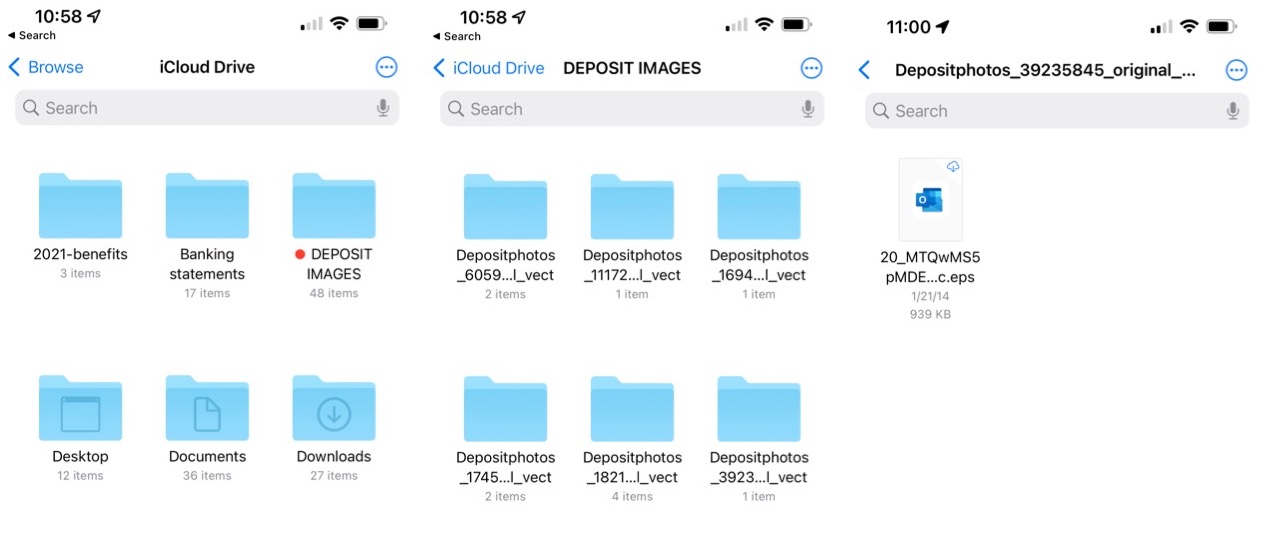
With iCloud Drive, you can share folders and files across multiple Apple devices, including iPhone and Mac. For this to work, you must be logged into the same Apple ID on both machines and use iCloud to store files. To access the content on iPhone, use the Files app.
iPhone limitations exist
An iPhone isn't ideal for controlling a Mac from a mobile device. This is the No. 1 reason Apple hasn't released a native remote feature. And yet, it's possible by turning on Mac Screen Sharing and using a third-party solution such as Google Chrome or a paid option.
Using iCloud Drive might be the best way to share files and folders. At the same time, SharePlay and FaceTime allow Mac users to show anyone with an iPhone (or another device) what's happening on a Mac window or the display.
It would be nice if Apple made it easier to control a Mac from iPhone in the future. Maybe this will finally become a reality if future iPhone displays get bigger! Until then, more hoop-jumping is required to get the job done.
Using iPad
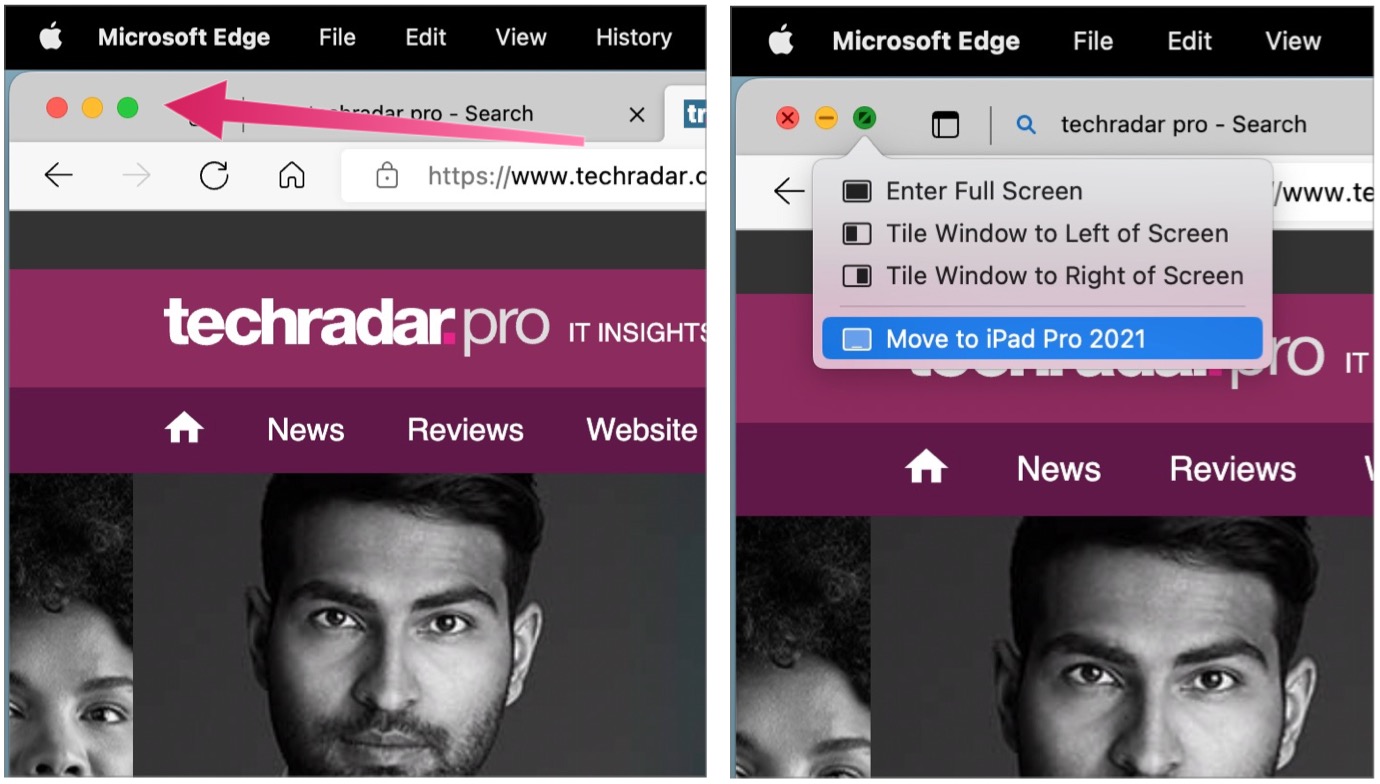
With Sidecar, you can access a Mac from an iPad that's within 10 meters of each other. Both devices must be signed in with the same Apple ID using two-factor authentication and have Bluetooth and Wi-Fi turned on. Handoff on Mac should also be turned on. When all the requirements are met, you can extend the Mac display to your iPad or mirror the computer on the tablet.
To move Mac windows to an iPad, move your mouse pointer over the green full-screen button of a window on your computer. Then, from the pull-down menu, choose the option to move that window to your tablet. Repeat these steps to transfer additional windows from Mac to iPad.
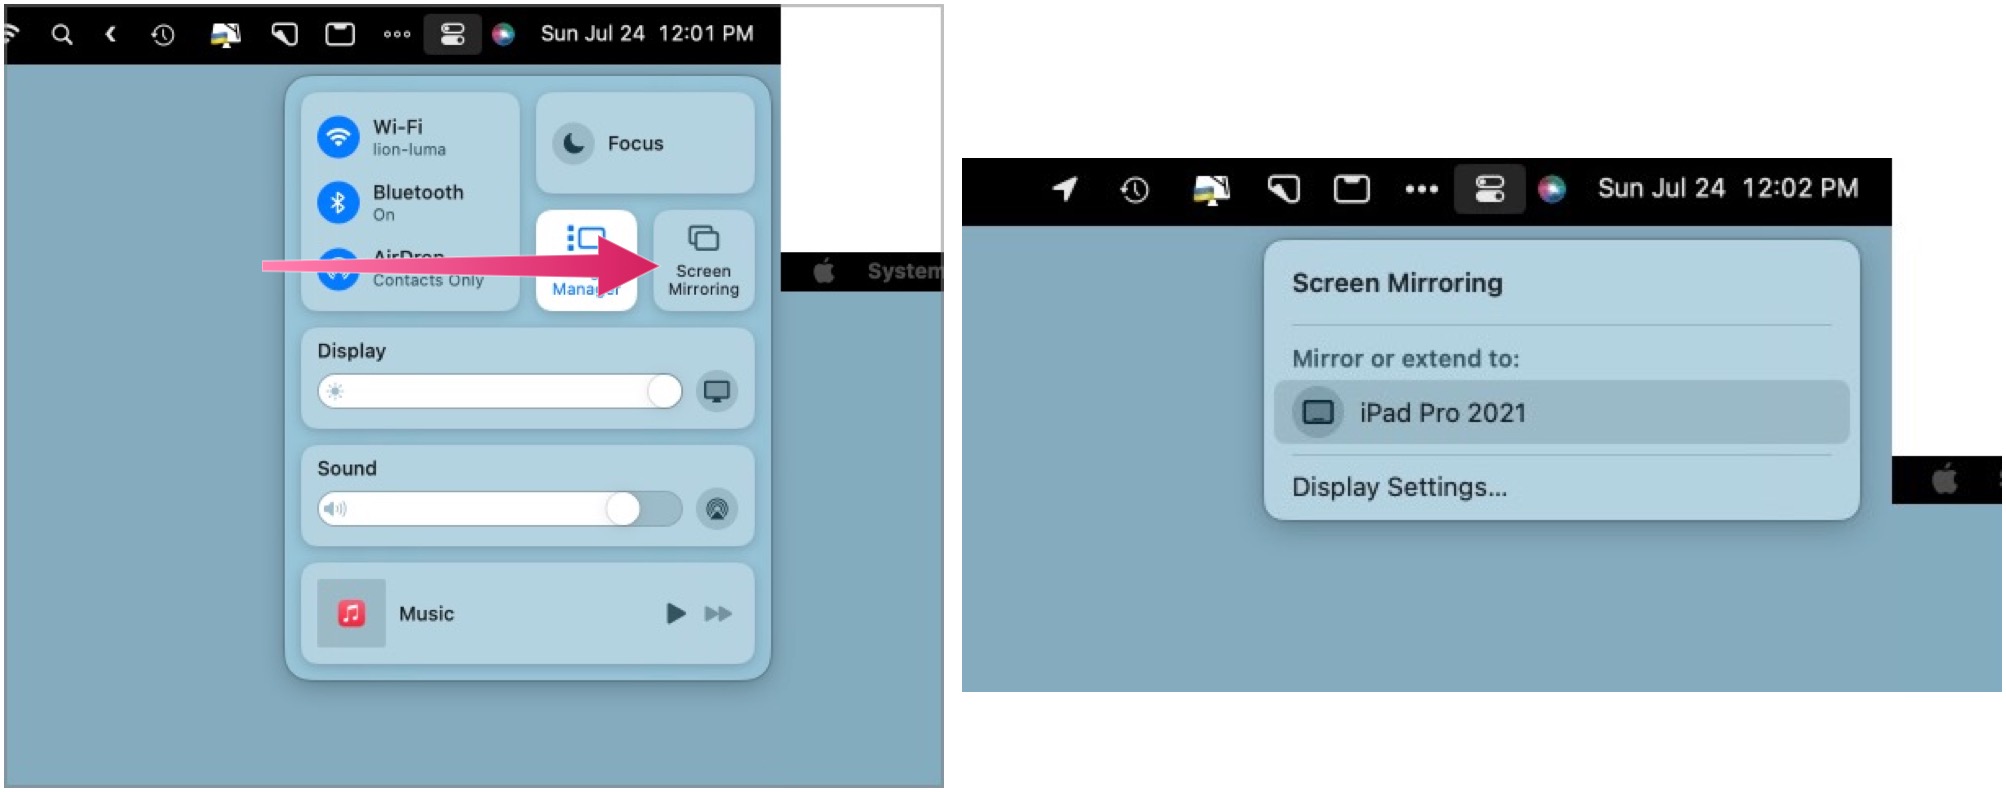
To mirror what's happening on your Mac on an iPad, choose a mirroring option from the Screen Mirroring menu in the menu bar.
Note: Universal Control brings Mac and iPad even close by allowing you to control multiple Macs and iPads with a single keyboard and mouse. By doing so, moving windows back and forth between devices is that much easier.
You can also consider the paid remote desktop options mentioned above on the iPad. Paid options worth considering include TeamViewer and LogMeIn.
You might also be interested in our reports on the best browsers and macOS 13 Ventura.
Bryan M. Wolfe is a staff writer at TechRadar, iMore, and wherever Future can use him. Though his passion is Apple-based products, he doesn't have a problem using Windows and Android. Bryan's a single father of a 15-year-old daughter and a puppy, Isabelle. Thanks for reading!
