Numbers for Mac: 15 productivity-boosting tips
Make your spreadsheets work harder and look better
Sign up for breaking news, reviews, opinion, top tech deals, and more.
You are now subscribed
Your newsletter sign-up was successful
11. Filter your spreadsheet
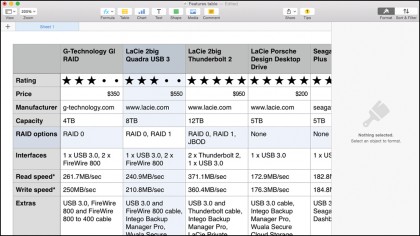
One really handy feature in Numbers is the ability to filter your tables. In this way, you can quickly focus on bits of data that you need to examine more closely. What's more, you can set the filters up and then switch them on and off with a checkbox, hiding or revealing data instantly. For example, if you used a Numbers spreadsheet to track invoices, you could set up a filter so that you can hide invoices that have been paid by clicking the Sort & Filter button at the top-right. There are a few ways you could do it, but if you have a column recording the dates your invoices were paid, add a filter for that column to match the condition "cell is blank."
12. Temporarily highlight a cell's column and row
It's easy for your eye to skip a row or a column on big spreadsheets, so hold Option while the pointer is over a cell to highlight the cell's row and column in blue. (If you do this often, consider using Numbers' Alternating Row Color formatting option, which makes it easier to read across wide spreadsheets.)

13. Add headers and footers to printed pages
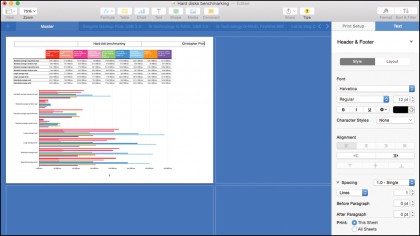
When you print Numbers documents you get a page number automatically centered at the bottom of each page, but it's not clear how to remove it or add other information to the header and footer. Moving the pointer over the top or bottom of the print layout display you get after you press Command + P displays a thin grey box divided into three. Click in any one of these areas (including the one with the page number, which you're able to delete) and a text pane will appear next to the Page Setup options in the sidebar. Here you can change the format of the header and footer text, and choose whether they appear on all sheets or only the sheet you're typing in. Under the Insert menu you'll find options such as Page Number and Page Count – which you could combine by choosing Page Number, typing " of " and then choosing Page Count – and Date & Time. To change a date's format, click on it after you've inserted it.

14. Custom date and time formats
As well as choosing from the extensive list of date and time formats built into Numbers, you can set up custom formats to mix dynamic data placeholders with entered text. For example, our friends at Mac|Life might track deadlines using a column of dates for their print edition and another column for their iPad edition, and in a third column note down how many days they have to build the latter after sending the former to the printers. By setting up a custom date format, they can display this as "[days] to make the iPad edition."
15. Reference cells on other sheets
Like most spreadsheet software, Numbers lets you set up multiple sheets per document, and it's easy to refer across these sheets in formulae. You could, for example, have a price list on a second sheet and an order form on the first. If you enter "3" as a quantity in column B on the order sheet then, in the total cost cell of the same row, start typing =B2* and then click on the tab at the top of the document to switch to the price list and click the appropriate cell. Numbers will reference that cell's value to calculate what three of that product costs. If the price list is updated, the order form will be too. If you need to change a cell reference in a formula that you've already written, double-click the cell that contains the formula. This reveals the formula in a floating bar. Click once on the colored lozenge that points to the currently referenced cell – if that cell is on a different sheet, the view will switch to it – then click on the new cell you want to reference.
Sign up to the TechRadar Pro newsletter to get all the top news, opinion, features and guidance your business needs to succeed!