
 Become a TechRadar Insider


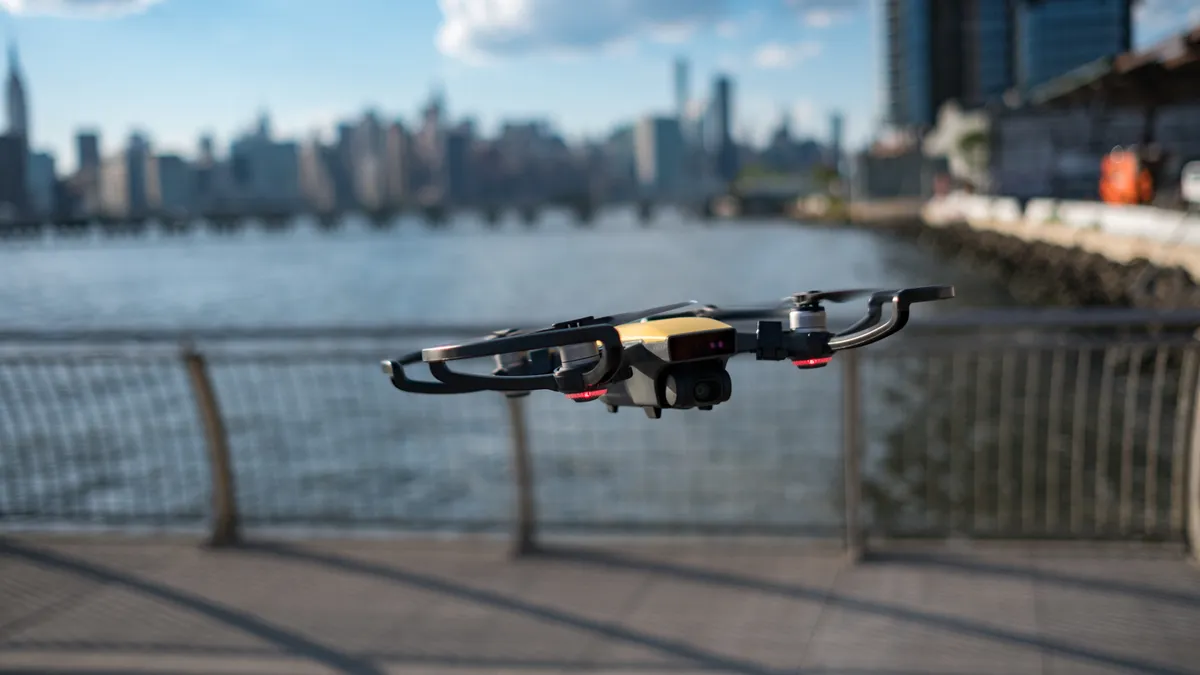
If you’ve just bought a new drone – or you’re about to – there’s every chance you’ll be itching to get airborne. After all, the best drones make it easy and entertaining to shoot photos and videos from the sky. From small folding drones to bigger premium models, these flying machines are the fun-sized future of aerial imaging.
But there are a few important things to keep in mind before you head for takeoff. While flying a quadcopter should be fun, it should also be safe. That’s why it’s important to take precautions before taking to the sky. This means researching the legal requirements for purchasing and flying a drone, finding a safe place to fly, and understanding how to pilot your craft in a way that doesn’t endanger you or the public around you.
If that sounds like a lot to digest, don’t worry: we’ve put together these top tips to help drone beginners get off the ground. While this isn’t a complete course on how to fly a drone – and shouldn’t be treated as a substitute for one – the advice below should give you a solid foundation for approaching drone flight, as well as some key things to keep in mind when you’re at the controls of a quadcopter. With the right mindset and plenty of practice, you’ll be a drone pro in no time.
1. Choose the best drone for beginners
If you’ve already purchased your first drone, you can skip to the next section. But if you’re yet to choose a quadcopter, there are a few things to keep in mind. While flagship drones offer the best flight times, safety features and camera performance, most will be overkill for first-time flyers.
What’s more, they also tend to come with a hefty price tag attached. This isn’t just important for your bank balance: when you’re learning to fly a drone, the fear of crashing an expensive model can add unwelcome stress to the experience.

For these reasons, we recommend looking at our guide to the best beginner drones. Our favorite options are easy for beginners to operate, yet still come with the right features for safe, fun flying. Most are also conveniently compact and straightforward to set up. Besides limited baggage, this means – depending on your location – most can be flown with limited or no registration requirements, so you won’t be held back by paperwork.
Importantly, the best beginner drones are accessibly priced. They aren’t cheap toy drones that will blow away at the first hint of wind. Instead, they offer excellent value for less than the cost of a long-haul flight. All of them are fundamentally novice-friendly, but depending on your budget, you’ll have different options to choose from: the cheapest are relatively basic, such as the Ryze Tello, while the best offer more room to grow, like the DJI Mini 3 Pro. You can also consider slightly older models like the DJI Mini 2.
2. Research the laws around drones
Before you get airborne, you’ll need to research the legalities of drone flight in your local area. To keep the skies safe for everyone, drone laws tightly regulate what, where and how you can fly. Rules are usually strictest around restricted airspace – you can’t fly close to airports, for example – and in built-up areas, where privacy is a concern.
If your drone weighs less than 250g, many regions – including the US – don’t require you to register with a civil aviation authority. Even if registration isn’t necessary, you will still need to follow other rules. Most drone laws mandate that you must maintain a line of sight with your drone, for example. Many also limit the height at which you can fly: in the UK, the Drone Code sets this ceiling at 120m above the ground. If you’re flying an FPV drone like the DJI Avata, you’ll need an observer with you, too.

Certain countries require registration, whatever the weight of your drone. The UK is one: owners of any drone equipped with a camera are required to register it with the Civil Aviation Authority. You’ll need to get an Operator ID, which costs £10.33 per year, provided you’re 18 or over. You’ll also need an ID if your drone weighs more than 250g, a process which requires you take an online test, answering 40 multiple-choice questions based on the Drone Code.
Before your first drone flight, be sure to research the laws applicable to your location. Breaching these legal requirements can result in hefty fines or even jail time. While this might seem draconian, the rules are designed to ensure you’re a safe flyer.
3. Get to know your drone
With registration out of the way, the next step is to understand what your drone can and can’t do. While the latest drones have a range of safety features and pilot assistance skills, not every model is the same. The last thing you want is to find yourself mid-flight, wondering how exactly your drone can help you out of a tricky situation.
We suggest carefully studying your drone’s spec sheet and user guide. You’ll want to know how long your drone can fly for with a full battery, so that you can plan your flights accordingly. You’ll also want to understand whether it has a return-to-home mode, and how this can be activated. Many beginner drones can automatically fly back to their start point, either when you hit a button or when the battery drops below a certain level. This is a useful option if you lose sight of your drone.

Most drones have a transmission range of several kilometers, much further than the line of sight rules in most countries’ drone codes. That said, it’s still worth knowing how far your drone can technically fly. It’s also good to know your drone’s windspeed resistance: as a rule of thumb, this is two-thirds of its maximum speed, but you’ll find the exact numbers by consulting your drone’s spec sheet.
Finally, look at whether your drone has obstacle avoidance sensors. These are a safety feature which you won’t find on many beginner drones. If your drone has them, they can help you steer clear of trees – but the system doesn’t work the same way on every model. Some drones only have sensors on the front, while the best have three-axis sensors. Similarly, certain drones will stop in place when they detect an obstacle, while others are smart enough to steer around. Unless you’re only planning to fly in wide open spaces, you’ll want to know if and how your flying machine can help you avoid mid-air collisions.
4. Learn how to control your drone
Once you’re familiar with your drone’s skills and abilities, it’s time to get yourself accustomed to its flight controls. By doing this before lift-off, you’ll reduce the likelihood of making knee-jerk inputs when airborne.
Drone controllers come in a range of shapes and sizes. Many drones can be flown using a connected smartphone, either by itself or by attaching it to a compatible control accessory. Some FPV drones, such as the DJI Avata, work with motion-sensitive joysticks that let you make intuitive inputs while wearing a headset. Most drone remotes, though, adopt a standard dual-joystick setup, even if the ergonomics vary by brand and model.
In general, the left joystick controls a drone’s altitude and rotation. Pushing it forwards and backwards adjusts the height of your quadcopter, while pushing it left and right causes it to rotate in that direction. The right stick is usually responsible for a drone’s roll and pitch. Pushing forward or back on it will cause your craft to tilt and move forward or back. Pushing to either side will result in it banking and strafing (without rotating).

However your drone’s remote is configured, remember that the outputs are reversed if it’s flying towards you – so pushing left on the roll stick will move it right from the pilot’s perspective. This can take some time to wrap your head around, so it pays to start slow (see below).
Other buttons and shortcuts will be specific to your controller. Many feature a speed toggle, a return-to-home shortcut and a hover button. Some more advanced remotes, such as the DJI RC, have integrated touchscreens which show a live video feed from your drone’s camera. Premium remotes might also include customisable buttons and precision camera controls, such as shutter triggers and scroll wheels for panning and tilting the gimbal.
5. Find a safe space to fly
With familiarisation sorted, it’s time to find somewhere to fly your drone. As above, your first criteria should be legality: consult your local drone regulations to check which zones are fit for take-off. Anywhere near an airport flight path is an automatic no-go, as are most residential areas.
Ideally, you’re looking for a wide open area, such as a park or field. If it’s private grassland, be sure to get permission from the landowner before considering a flight. Either way, you’ll need to survey the vicinity for potential hazards, particularly power lines and trees. These don’t mean you need to cancel your flight plan, but you’ll want to keep well clear.

Also think about the terrain: flatter is better, to ensure you can maintain a line of sight at all times. For your first few flights, consider asking a friend to join you as an observer. This way someone will always have eyes on your quadcopter – and any obstructions it might encounter – even if you look down to adjust the controls.
If you do need to make an emergency landing, it helps if your surroundings make drone recovery easy. We don’t recommend flying over water until you’re a confident pilot.
6. Conduct a pre-flight checklist
Tempting as it might be, don’t get airborne without first double-checking your drone setup and chosen location. Conduct a visual inspection of your quadcopter, to ensure everything is securely assembled and that there’s no obvious damage to the body, camera or propellers. Check the battery levels of both your drone and controller before lift-off, so that you have a clear idea of available flying time.

You should also assess the weather and visibility, both what’s forecasted and what’s in front of you. Be especially alert to changeable wind conditions, which can drastically affect the handling of your drone. You should already know the maximum windspeed that your drone can safely handle (see above) but it still pays to think carefully before flying on gusty days. Similarly, consider the likelihood of rain: showers can damage your drone’s electronic components, limit visibility and reduce transmission range.
Finally, confirm that your drone is connected to your controller and fully calibrated, and that your memory card is correctly inserted. If your quadcopter is equipped with GPS, ensure that it’s locked on to a satellite signal. And if it’s your first flight, run through a quick mental reminder of the function of each control input.
7. Take off, hover and land your drone
Assuming that you’ve followed all of the tips above, you should be ready to get airborne. Start by turning on your drone and placing it on the ground in front of you. Do a final inspection of the area around you and, if you’re sharing the area with others, announce that your drone will be taking off. Then, maintaining visual contact, gradually push the controller’s throttle stick forward until your drone lifts into the air.
At this stage, don’t try anything more adventurous. Instead, keep your drone hovering a few feet in the air. This controlled hover should help you get comfortable with assessing information while your drone is airborne, such as real-world wind conditions. Remember that you’ll also need to monitor battery levels during every flight, however short, to ensure that you have enough power remaining to safely return to the landing zone.

When you’re ready to bring your drone down, perform the reverse of the take-off procedure. If it’s drifted from its take-off point, use gentle inputs to steer it back towards the target area, before alerting anyone nearby that it’s coming down. Pull back slowly on the left stick to avoid slamming your drone into the ground. Once it’s touched down and the props have completely stopped, switch off your drone to keep fingers safe.
If you’re keen to keep practising, we recommend investing in a few spare batteries. Several drones can be bought with bundle packs that include extra cells, such as DJI’s Fly More Combo.
8. Try some basic flying techniques
After a few hovers, you should start to understand how your drone handles in the air. Next is to build up your confidence with the controls. At this stage, it’s all about going slow and using careful inputs to steer your quadcopter; yanking on the sticks can quickly see you lose control.
Follow the steps above to bring your drone to a hover, then try flying forwards and backwards with the right stick. Use moderate inputs to maintain a steady speed, moving just a few feet in either direction. Once you’re back in a hover, you can try moving to either side by pushing the right joystick to the left and right.

Because drones tilt and roll to move, you might lose altitude during these manoeuvres. This is a good time to introduce simultaneous inputs on the left stick: push the throttle stick forward to regain any lost height. You can also use that same stick to keep your drone facing in the right direction, by pushing left and right to rotate it.
You can bring these basic movements together by flying in a simple square pattern. Keeping your drone facing away from you, fly straight forwards before pausing in a hover. Then use the right stick to roll it a few feet to the left or right, before again coming to a hover. To complete the square, pull the right stick towards you to bring the drone back a few feet, before rolling it back to the start point.
9. Try more advanced flying patterns
Once you’ve mastered the basics of drone flight, you can try your hand at some more advanced aerial techniques. Many top drones feature automated modes which can execute skilled manoeuvres at the touch of a button – all you have to do is make sure their path is clear of obstacles. But half the fun of flying is learning to perform these tricks yourself.
Circular patterns are a good place to start, because they require you to use multiple inputs at the same time. From a hover position, push the right stick forward, then set the drone into an even turn by moving the left stick to the left or right, and holding it steady. This combination of forward momentum and constant yaw will lead it to fly through a full circle.
You can then add roll into the equation to fly a banked turn. Repeat the technique above, but instead of pushing the right stick directly forward, push it diagonally forward in the direction of the turn. You’ll also need to use the left stick to add throttle inputs to maintain the drone’s altitude.
Even something as straightforward as flying in a banked circle requires inputs on both axes of both joysticks. This gives you a good grounding in the level of control required to achieve smooth drone flight. You’ll need to monitor and adjust for pitch, roll, yaw and elevation simultaneously, with your drone often facing in a different direction to you. This requires plenty of practise before you pick up speed.
After you’ve mastered it, though, you’ll be well-placed to tackle figure-of-eight patterns, before moving on to continuous drone flight. And once you’ve earned these wings, you’ll be able to make the most of your drone’s camera abilities – or simply relish the fun factor of a tiny flying machine.
