
 Become a TechRadar Insider


Personal video recorders (PVRs) are usually quite expensive – and for good reason. This is the device you are entrusting your favourite entertainment to: shows like 24 and Lost, that crucial sporting fixture or last summer's Hollywood blockbuster that you missed at the cinema and are desperate to see.
What if your PVR runs out of space and is unable to record anything on the one night you're kept late at work and can't make it home to watch your team in the cup tie of the century? Even worse, what if your PVR's hard disk fails completely, losing that entire series you'd recorded and religiously avoided any spoilers of for the past three months, just so you could watch it all over a single weekend?
The mental anguish and resulting window repair bill (due to a PVR-shaped projectile) could all be avoided simply by building a robust PVR yourself with MythTV.
Install MythTV
Installing MythTV can be as easy or as difficult as you want to make it. You could install a plain vanilla Linux distro and then install and configure MythTV with a lot of nasty terminal and command-line work, but if you fancy going down the easy route, it's simple to install a Linux distro with MythTV built in to the installer.
Some of them will be based on distros we're all familiar with (MythDora is based on Fedora/Red Hat, for example) and some will be a little more obscure. Ubuntu is one of the most widely used Linux distros, thanks in no small part to the user-friendly Windows/Mac feel of its front-end, and a Ubuntu installation with MythTV built-in is just too good an opportunity to pass up for this system.
Having decided how you're going to install MythBuntu, it's a rather straightforward procedure.
Anybody who has installed Ubuntu before will be instantly familiar with the first section – select your language, location, time zone, keyboard localisation and installation drive (select the 'Erase and use entire disk' option for better MythTV performance) before moving on to selecting what you'd like your machine to be called, what your main user account will be, the respective password and so on.
It's all fairly standard stuff, and none of these options are particularly critical. Ubuntu's installation procedure has been in this format since Hardy Heron (version 8.04), and it's as easy to navigate as the Windows installation process is.

INSTALL: Impressively for an operating system with such large added extras, Mythbuntu installs just as quickly as regular-flavour Ubuntu
When asked to select which installation type you would like, be sure to select 'Primary Backend w/Frontend' from the options available. This is the first option anyone should use when installing MythTV, as any network or system containing MythTV requires a back-end first and foremost.
Once this is in place and working, you can add front-end clients or even secondary back-end machines to expand your capabilities, but getting this up and running is your first task.
For additional services, make sure to tick every box – they are all potentially very useful and provide handy remote administration tools as well as easy connection to Windows and Linux machines for file-sharing and easier setup of an additional MythTV front-end client. Even if you don't use them all, they take up little in terms of time and space, so they're worth having just in case.
If your TV card has a remote control, check the 'Enable Remote' box and search for your device (or something close if the exact one doesn't exist; those from the same manufacturer are usually quite compatible). Click through the next summary screen, then go off and have a coffee while the installation runs.
Once the Ubuntu portion of the installation is complete, you'll be presented with the Configure Guide Data/Backend screen. If you're not in the USA, you won't need to do anything to the Schedules Direct section as this is a US service that distributes TV guide information. If you're anywhere else in the world, your guide will be pulled in via the tuner, as with a normal television.
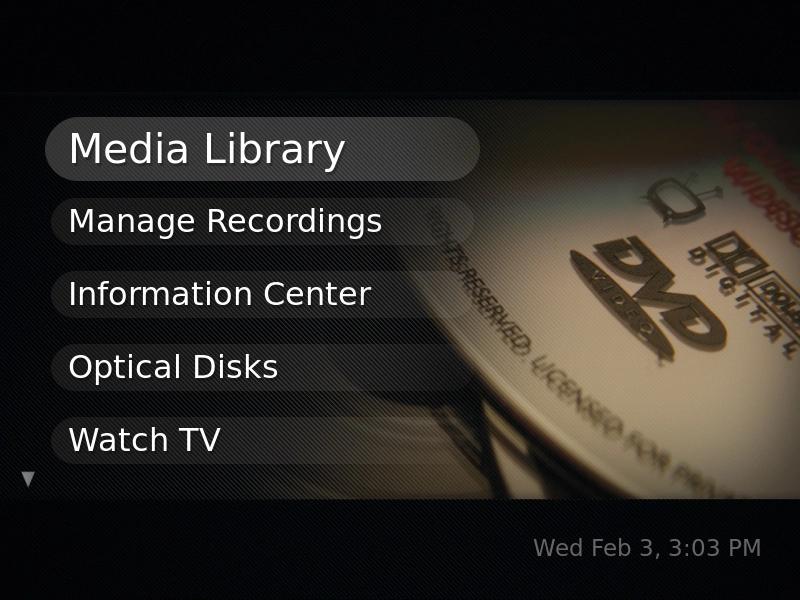
Now click the button to 'Launch MythTV Setup' and prepare to be a little overwhelmed!
Set up MythTV
At first glance you'd be forgiven for thinking that MythTV's setup isn't particularly scary – it's a rather friendly-looking, big chunky-buttoned GUI that looks quite innocuous. However, start delving into some options and you'll soon see how configurable it actually is.

CONFIGURATION: The setup looks simple now, but just you wait until you start tweaking…
Under the General section there are 12 pages of various options, from simple things like the IP address of the back-end (it happens to be the address of the machine you're on) to customising the terminal commands and port/transport settings.
Generally speaking, you can leave it all alone and everything will work, but it's something you might want to experiment with later to get more out of your system.
Also note that there is no mouse support through these menus, so there will be a lot of using [Tab] to get down to the 'Next/Back' buttons until you get everything right!
The Capture Cards section, on the other hand, is very important – this is the menu item in which you will be selecting your installed TV card. In most cases MythTV picks your card up automatically, and all you have to do is scroll left or right through the various card types, move down to the Video Device option and scroll through there until your card is displayed.

TV TUNER: If your TV card isn't being picked up automatically, try adjusting the aerial or installing the drivers manually to get it to show
It's hard to know which type your card will fall under as they're all slightly different, but if you scroll through all the available options, yours should eventually turn up.
If it doesn't, don't panic! Ours didn't either, probably due to the fact that the system we were installing Myth TV on is in a basement with very thick walls – if the TV card doesn't pick up a signal from the off, then MythTV won't realise it's there, and it won't appear under any of the dropdown menus.
You'll need to exit the MythTV setup, install the driver for your TV card manually from the Ubuntu terminal and then go back into the MythTV setup. You'll now find that it's available under the dropdown menus mentioned before.
For the uninitiated, installing drivers manually in Linux is a pretty terrifying prospect – it's all done through the terminal rather than a nice graphical Control Panel-style interface, and you end up with strings like this:
'wget http://www.wi-bw.tfh-wildau.de/ pboettch/home/linux-dvb-firmware/dvb-usbdib0700-1.10.fw'.
Fear not, though: every problem you encounter has been encountered by someone else previously, and a quick scan of the web – in particular the exhaustive MythTV wiki – will give you the exact commands you need to get back on track.
Having finished the MythTV setup, it will tell you that you need to run the MythFileDatabase command in order to prepare for viewing/recording, before rather helpfully offering to run it for you when you are leaving. Following an automatic reboot, you will find yourself at the MythTV front-end main screen, with your MythTV back-end or front-end machine set up and ready to go.
The default configuration of MythTV should easily be sufficient if you simply want to watch and record TV on that machine, but given that your PVR may be a noisy, multidisk monster that never stops spinning, it's probable that you would rather watch your shows elsewhere.
To achieve this, a lot of MythTV users prefer to stream their media from a noisy but powerful back-end workhorse to a front-end client that's situated somewhere comfortable.