How to migrate from WordPress.com to WordPress.org
A simple step-by-step guide with some additional information

If you want the freedom to shape your WordPress website to your heart’s content, you might be considering shifting it from WordPress.com to WordPress.org. However, before starting with the steps you’ll want to make, let’s clear up the differences between WordPress.com and WordPress.org.
The main difference between WordPress.com and WordPress.org is that with WordPress.com you’ll get a web hosting service while with WordPress.org you’ll have to find one on your own and install WordPress software on it. So, in short, WordPress.com is easier to start out with, but it offers less freedom.
Also, many web hosting providers offer managed WordPress-oriented hosting, so if you’re willing to pay a bit more for this ease of use, you can consider these solutions as well.
While WordPress.com offers a free entry-level plan, it comes with some severe restrictions such as placing your site under a subdomain, putting WordPress.com’s ads on your site, scanty disk space of 3GB, inability to monetize your site, and lack of support for plugins outside the platform.
Even if you go with one of the pocket-friendly paid plans, you still won’t be allowed to install templates, themes, and plugins off the platform, which is a deal-breaker if you want to make your site look like one in a million.
On the other hand, with WordPress.org you can build a fully functional and completely customizable site for less than fifty bucks per year, but you’ll have to get your hands dirty with hosting, third-party tools, and building your site from the ground up.
Why move from WordPress.com to WordPress.org?
The real WordPress (that is, WordPress.org) is a free, open-source CMS software that’s surprisingly simple to learn and use, so it comes as no surprise that over 43% of all sites are using it at this moment.
Sign up to the TechRadar Pro newsletter to get all the top news, opinion, features and guidance your business needs to succeed!
With WordPress.org, your site, its content, and all its data will be yours, and yours alone. Since you’ll have complete control, your site won’t be shut down (and all your precious data forever lost) because someone thinks you’ve broken a rule or unintentionally skipped one payment.
As mentioned above, WordPress.org permits a superior level of customization, which means you can shape your site with free, paid, and even custom plugins, apps, and templates. Also, you can turn your site into an ecommerce store, or a membership site, and even run your ads and earn some pocket money.
Things to know before you start
Since you’ll gain full ownership of your WordPress site, you’ll be in charge of updating it, which luckily can be done in a couple of clicks (simply check the update button). Also, you’ll be the one making backups of your site, which can be simplified by a few handy WordPress backup plugins that will allow you to automate them.
All in all, with WordPress.org you’ll have to overlook the security of your site and make sure it’s safeguarded from all sorts of cyber threats. So, choose a secure web hosting provider and make sure your site stays smart on security.
As for customer support, while WordPress.org offers a thorough knowledgebase thick with how-tos, you won’t get any professional, person-to-person support channels such as live chat or telephone line.
Steps to migrate from WordPress.com to WordPress.org
Once you’ve understood all of the above, it’s time to set the site migration in motion.
1. Pick up a web hosting plan
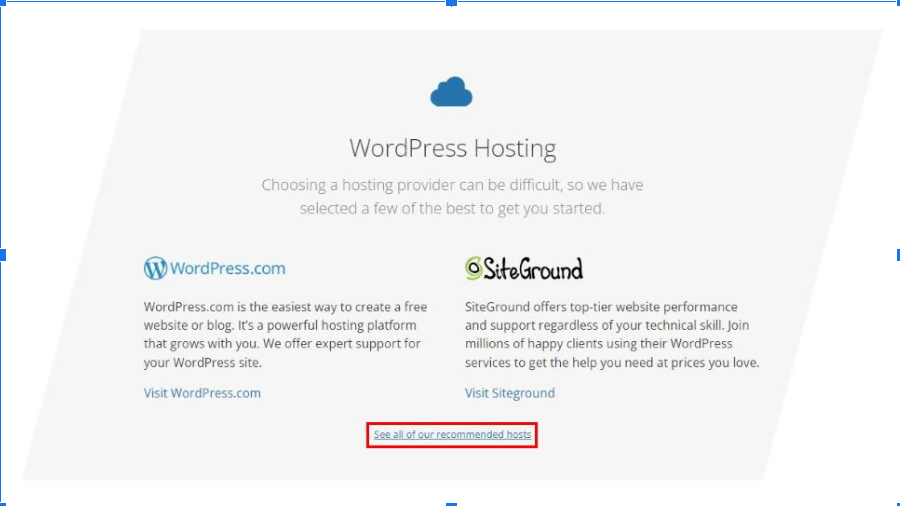
As we write, only three web hosting providers are officially recommended by WordPress, including Bluehost, SiteGround, and DreamHost, so if you’re looking for a perfect WordPress-oriented hosting plan, you might want to check these hosts right from the start.
Their entry-level plans are pretty pocket-friendly for new users, packed with top-notch features, and backed by money-back guarantees.
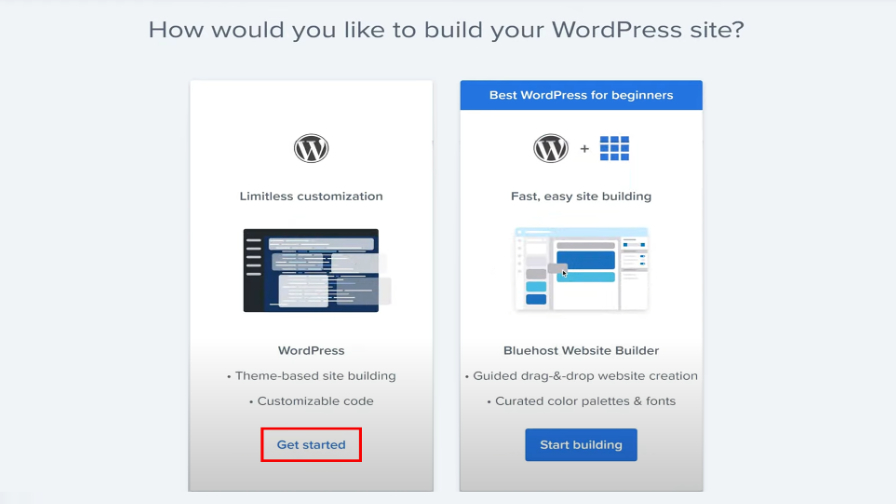
2. Install WordPress.org
Since most WordPress-oriented hosting providers offer one-click WordPress installs, setting up WordPress on your site should be super simple. You only have to log into your hosting account and search for a WordPress icon. Once the installation is complete, you’ll be able to set up your site’s title, create a username, and come up with a solid password for your WordPress account.
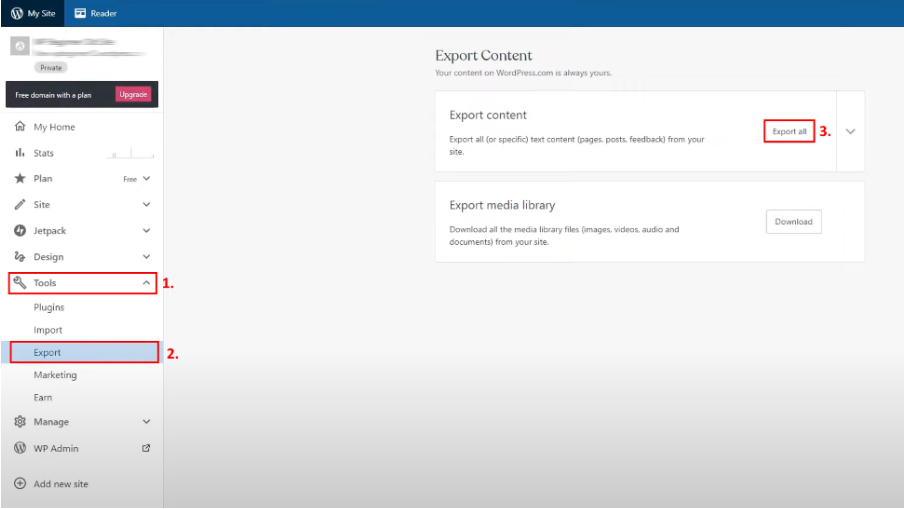
3. Export all your data from WordPress.com
Now you’ll want to sign in to your WordPress.com site, go to the dashboard, and find the “Tools” button on the left column. Tap on it, then into the “Export” button, and finally click on the “Export all” button that’ll appear on the pop-up window.
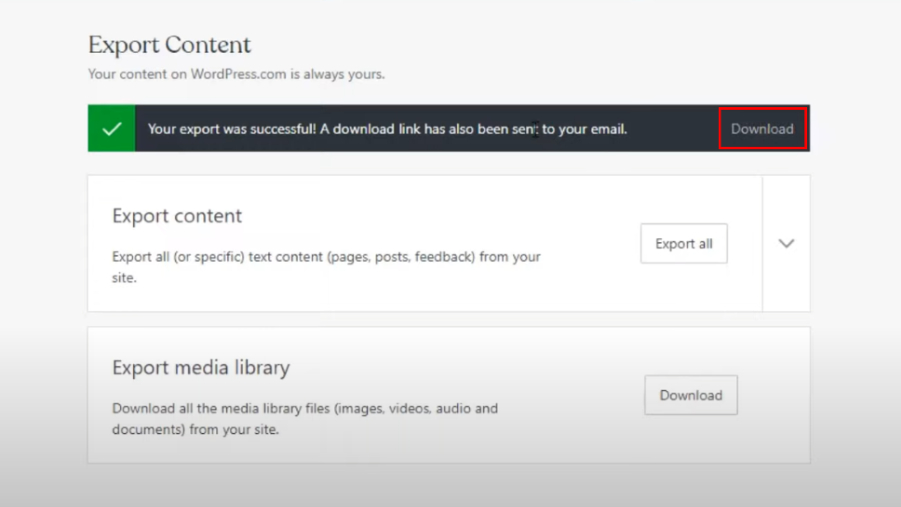
Once the export file is ready, a download link will appear, so click on it to download the zip file on your PC.
4. Import that data to your new WordPress.org site
To do this, you’ll want to login to your newly installed WordPress site’s admin area and go to “Tools”, tap “Import” and then click on the “Install Now” button just under “WordPress”. Now WordPress will install the WordPress importer for you, after which you’ll need to click on “Run importer” to go on with the procedure.
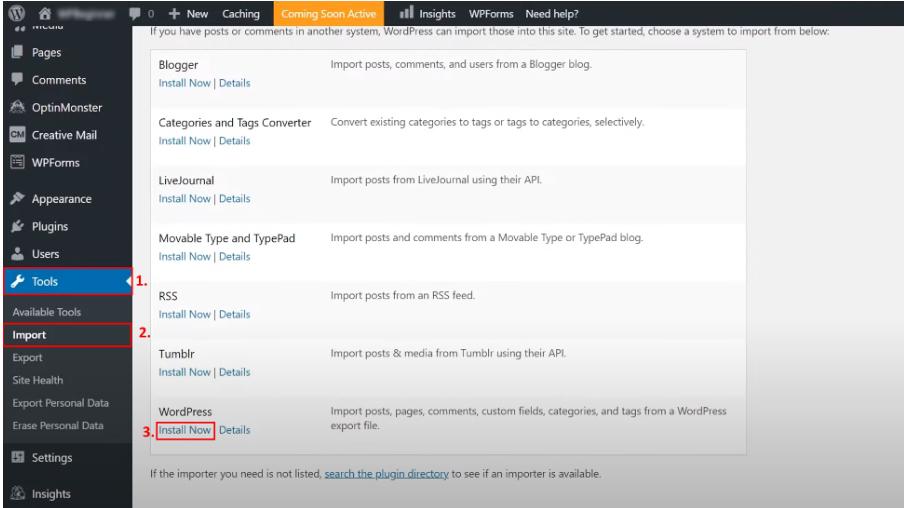
This will take you to a new screen where you’ll have an option to upload the WordPress.com XML file you’ve downloaded shortly before.
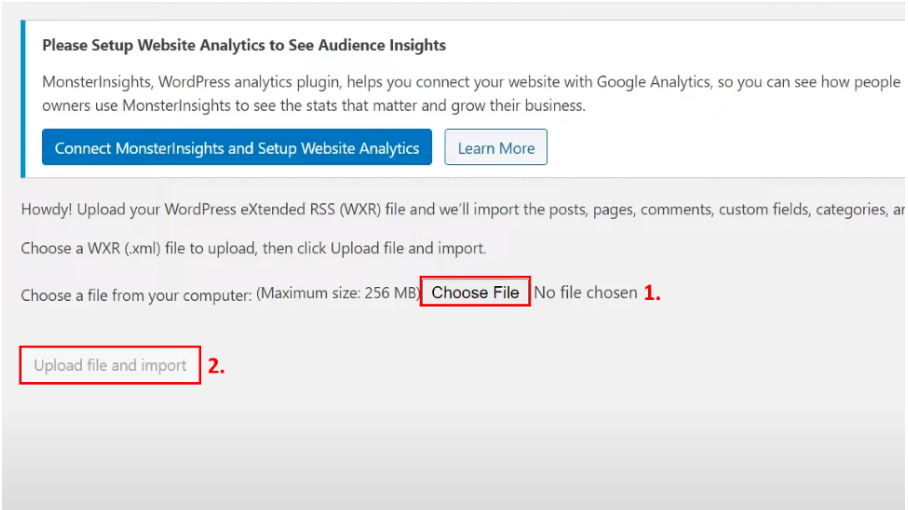
We should note that if the size of your file exceeds the permitted one, you’ll have to get in touch with your hosting provider and ask them to temporarily increase that limit. Or, if you have time to spend, you could split your file with a WXR file splitter.
5. Redirect your WordPress.com site to the WordPres.org and preserve its SEO
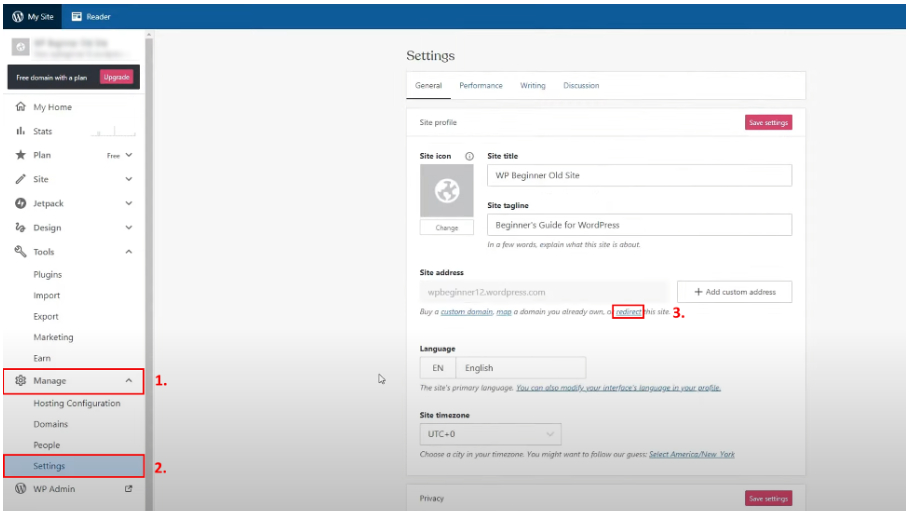
The final step of the migration process (well, besides checking out if everything works well) is to redirect your old WordPress.com site to your new WordPress.org site and you’re doing this to preserve its search engine rankings.
Since WordPress.com doesn’t offer access to .htaccess, you’ll have to purchase an upgrade feature called Site Redirect for a reasonable $13 per year and add this functionality.
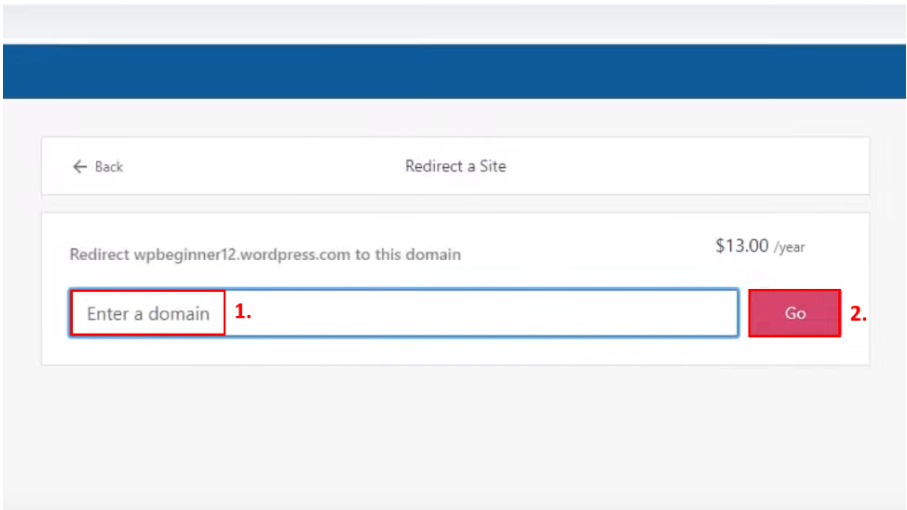
To do this, visit your WordPress.com site’s dashboard, go to “Manage” and then click on “Settings”. There you’ll find “Site Address”, so click on the ‘redirect’ link. When the next screen pops up, enter your new WordPress.org site’s domain name, tap the “Go” button, and that’s about it.
Benefits of moving to WordPress.org
While moving your site to WordPress.org does require a bit of work, there are lots of benefits to look forward to including a superior level of customizability, a wide variety of free and paid themes, plugins for pretty much anything, the ability to use Google Analytics for custom analytics and tracking, having complete control over files and codes, and coming into contact with all sorts of creators, designers, and developers from WordPress’ committed online community.
Since the migration of your site shouldn’t take more than a couple of hours (depending on its complexity), your site won’t be suffering any disastrous amount of downtime.
Final thoughts
Although it’s somewhat simple to start your journey with WordPress.com, after bumping into the boundaries of this platform, you’ll probably be moving your site to WordPress.org without a second thought.
It might seem a bit intimidating at first, but the migration process is surprisingly simple and, apart from redirecting your site, you won’t have to pay anything.
- Building a website? We have the best website builder services listed to help you on your journey
Mirza Bahic is a freelance tech journalist and blogger from Sarajevo, Bosnia and Herzegovina. For the past four years, Mirza has been ghostwriting for a number of tech start-ups from various industries, including cloud, retail and B2B technology.