Why you can trust TechRadar
Installation
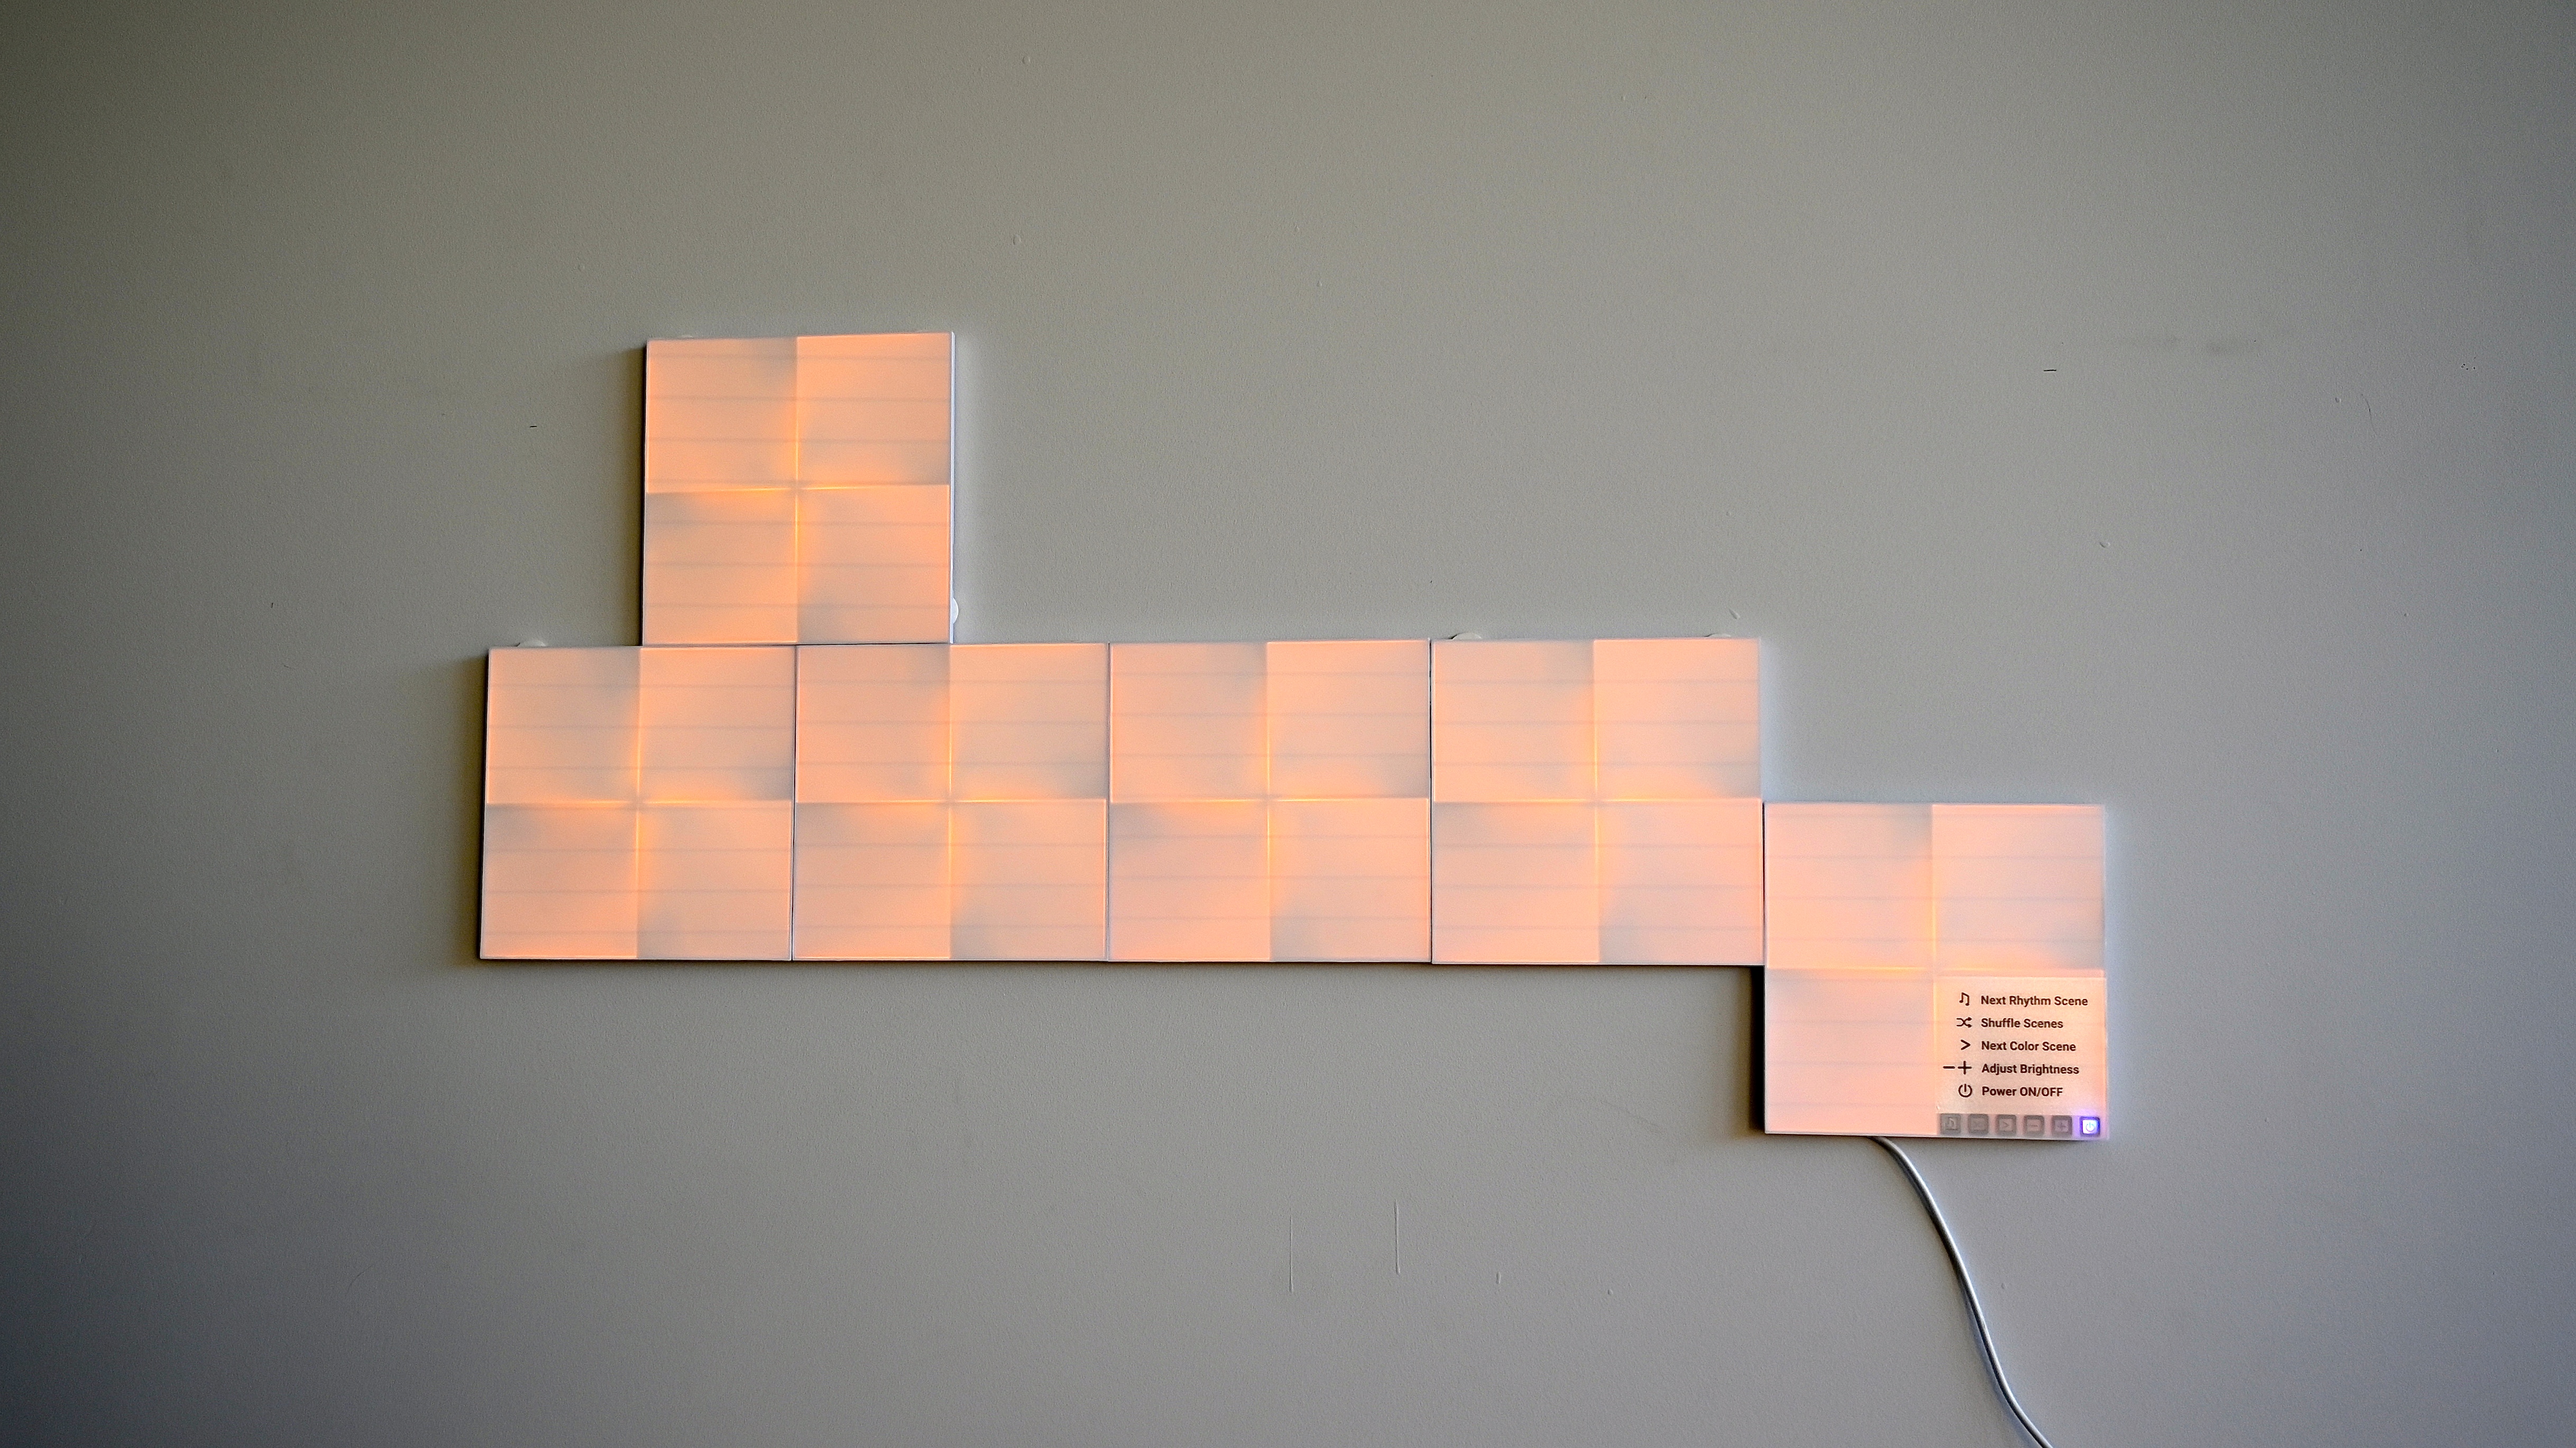
You’d be forgiven if you think installing the Nanoleaf Canvas on your wall is an intimidating task. Honestly, it’s not. But before you get too excited to start putting the panels up, you will need to decide on a design.
The Aurora came with triangular pieces of paper between each panel, which could be used to design the template. The Canvas, however, has no sheets of paper. The best way to build your design would be to lay the panels themselves on a large table or on the floor and go from there. You can also use the Nanoleaf Smarter Series app to come up with options based on the number of panels you have with the Layout Assistant – if your smartphone supports it, this process can also be done using augmented reality.

It’s important to keep in mind that you will need to align the linker slots to match your design, like a jigsaw puzzle. If those slots don’t line up when designing your template, you’ll need to adjust on the fly when putting the panels up and you may end up with a whole new layout on the wall.
When you’ve decided on your design, it’s time to get sticky. This process will require some patience as you’ll want to ensure everything is straight and exactly where you want it – once stuck, you’ll have a hard time removing the panel without damaging the wall.

Before you get the second panel on the wall, we’d recommend slipping the linker into it first in the slot that aligns with the first panel. While holding the panel at a slight angle so as to not accidentally stick it on the wall, slide the protruding end of the linker into the slot of the first panel already up. You may feel a tiny bit of resistance as the connector plates depress into the first square, but the linker slides in easily enough. Once in, you can stick the second panel on. Continue this process till you’ve got your layout on the wall.
Lastly, slide the linker on the power hub into the final panel and switch it on.
App control
APP UPDATE: The Nanoleaf Smarter Series app has been completely overhauled and, on iOS, is now available in dark mode. The new look is modern yet classy, although does take a while to get used to. Moreover, there are now several new scenes available in the Discover tab to help you focus (found under "Work from home" or to sate the need for travel (the "Wanderlust" list).
Sign up for breaking news, reviews, opinion, top tech deals, and more.
Thanks to the Control Square you don’t necessarily need the app to turn your lights on and off, or change scenes. It works wonderfully well straight out of the box. However, you will need the Nanoleaf Smarter Series app to set up voice control using HomeKit, Google Home or Amazon Alexa devices. You’ll also need it to download other scenes and set up schedules to automate the lights.
If you are a first-time Nanoleaf user, you’ll need to create an account with the company first. This also lets you link the Canvas to Google Assistant and Alexa.
Once your account is set up, you’re ready to pair. You just need to follow what the app prompts you to do. You will, however, need the product code (or QR code) printed on the user manual that ships with the starter kit. In case you’ve thrown that out, you’ll find it on the power hub (as mentioned above).
If you’re having difficulty pairing the device, do a soft reset by pressing the ‘-’ and power buttons on the Control Square together for 10-12 seconds and try pairing again.
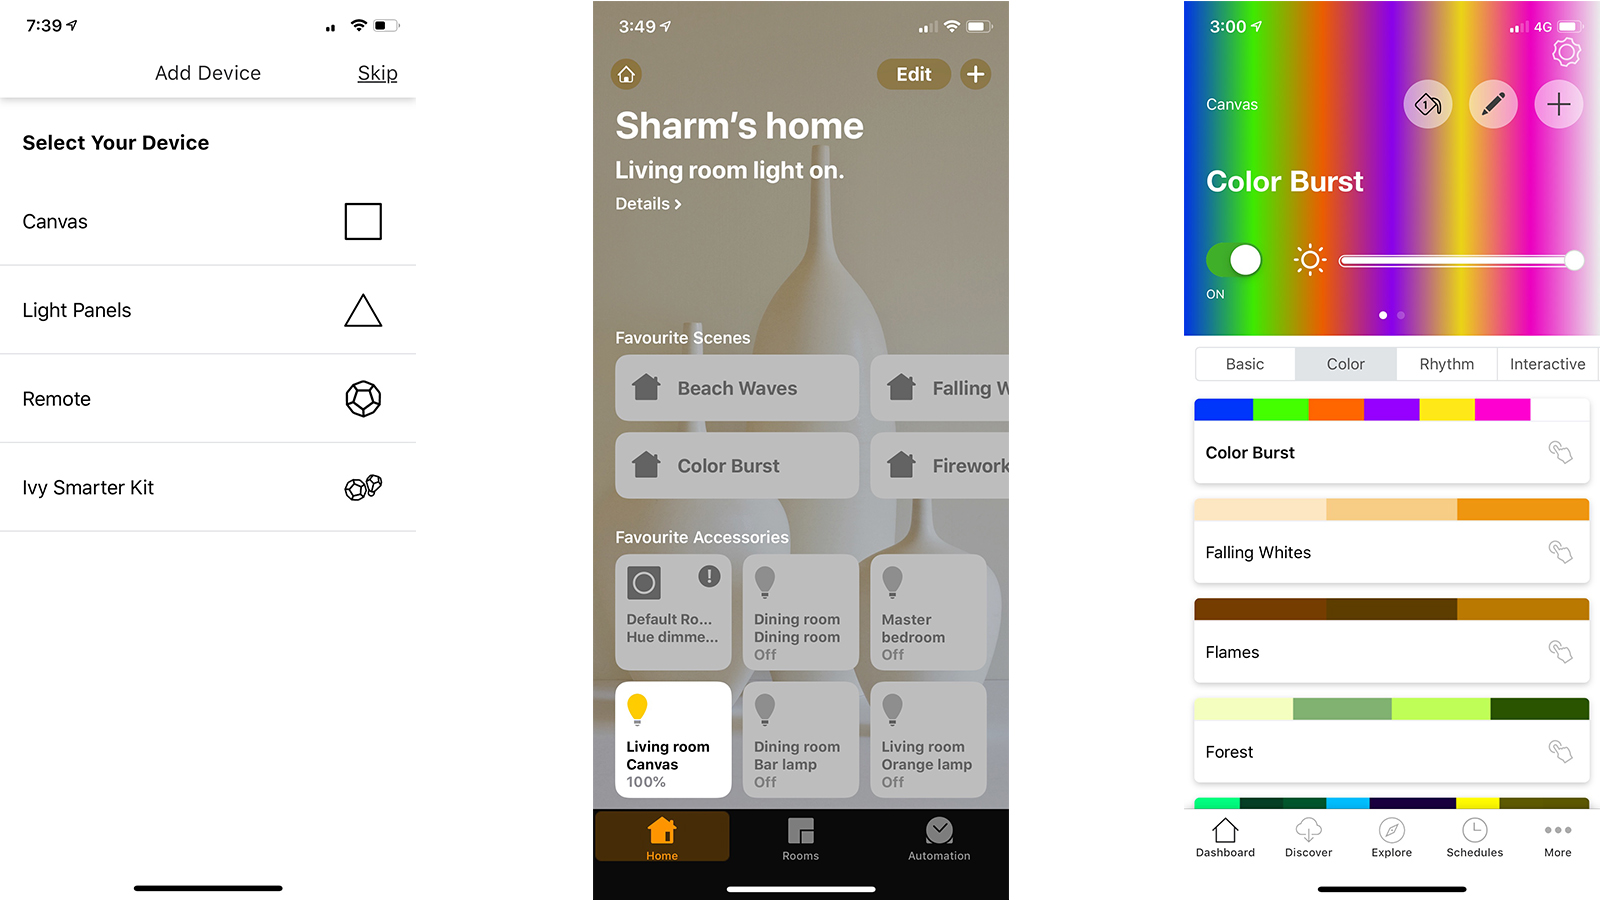
After the lights have been paired, you can assign it to a room and, if you’re using an iOS device, this process automatically adds the Canvas to Apple’s Home app, from where you can control the lights.
Keep in mind that you can’t control your lights remotely via the app – you will need to be on the same network for any changes to come into effect.
On the app you’ll find a plethora of Color and Rhythm scenes you can download. The color scenes get added to HomeKit on iOS devices automatically, giving you easy access to all your smart home devices in one place.
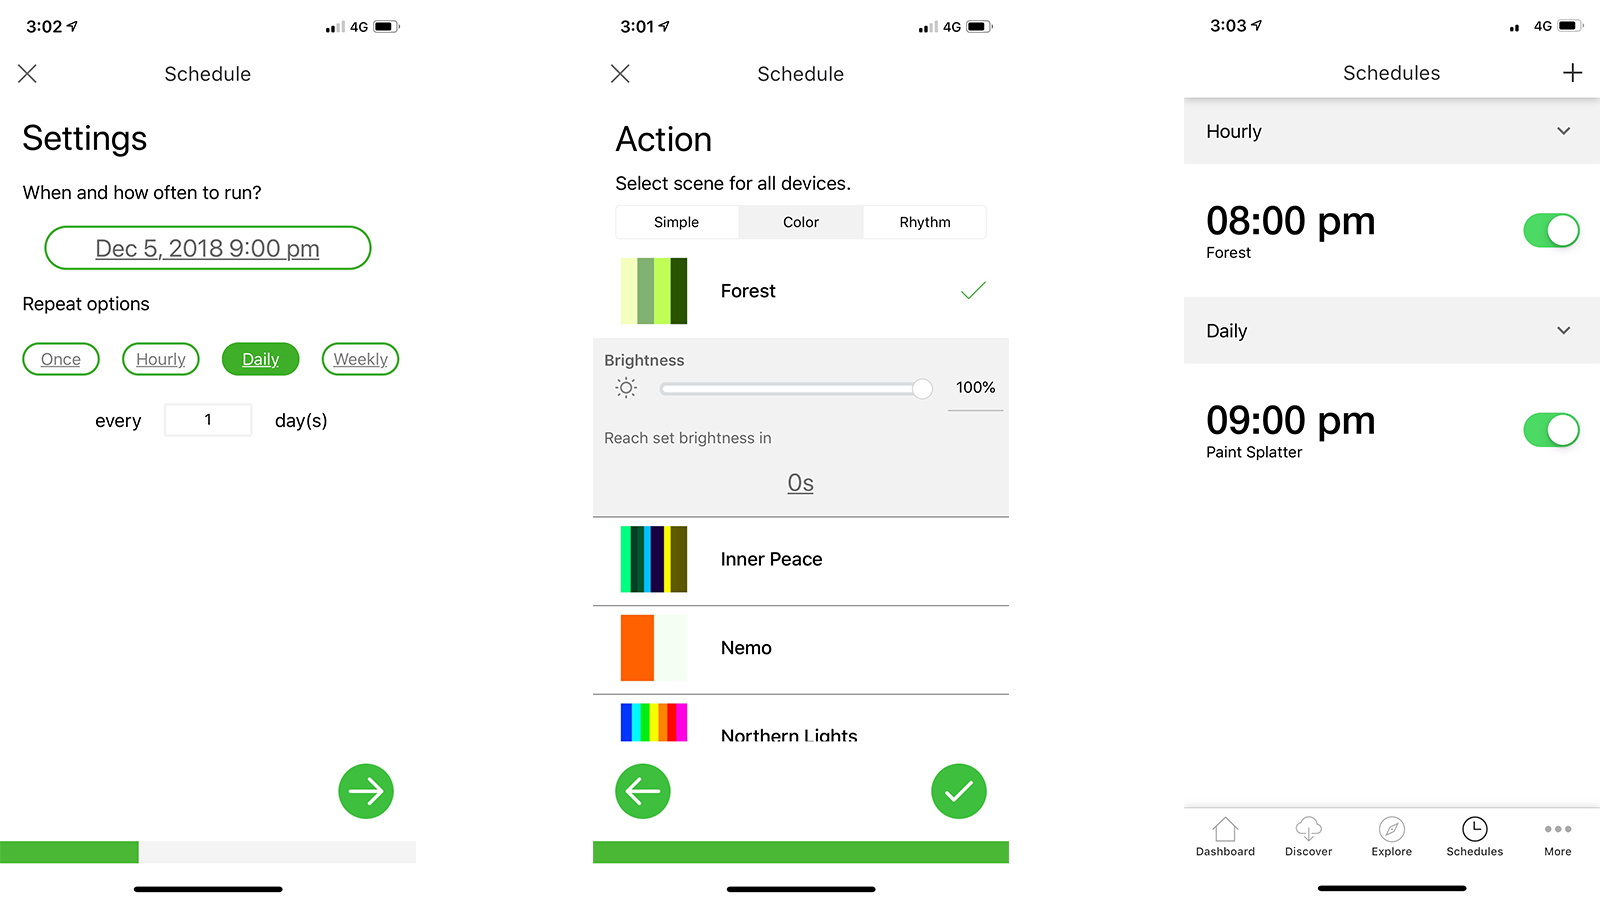
The app also allows you to set up schedules – you can set a time for the lights to turn on, how often you want scenes to change and so on.
Another standout feature of the Canvas lights is the ability to set a fade duration during scheduling. Similar to the fade in and fade out feature on Philips Hue bulbs, the Canvas lights can be programmed to do the same, even simulate a sunrise.
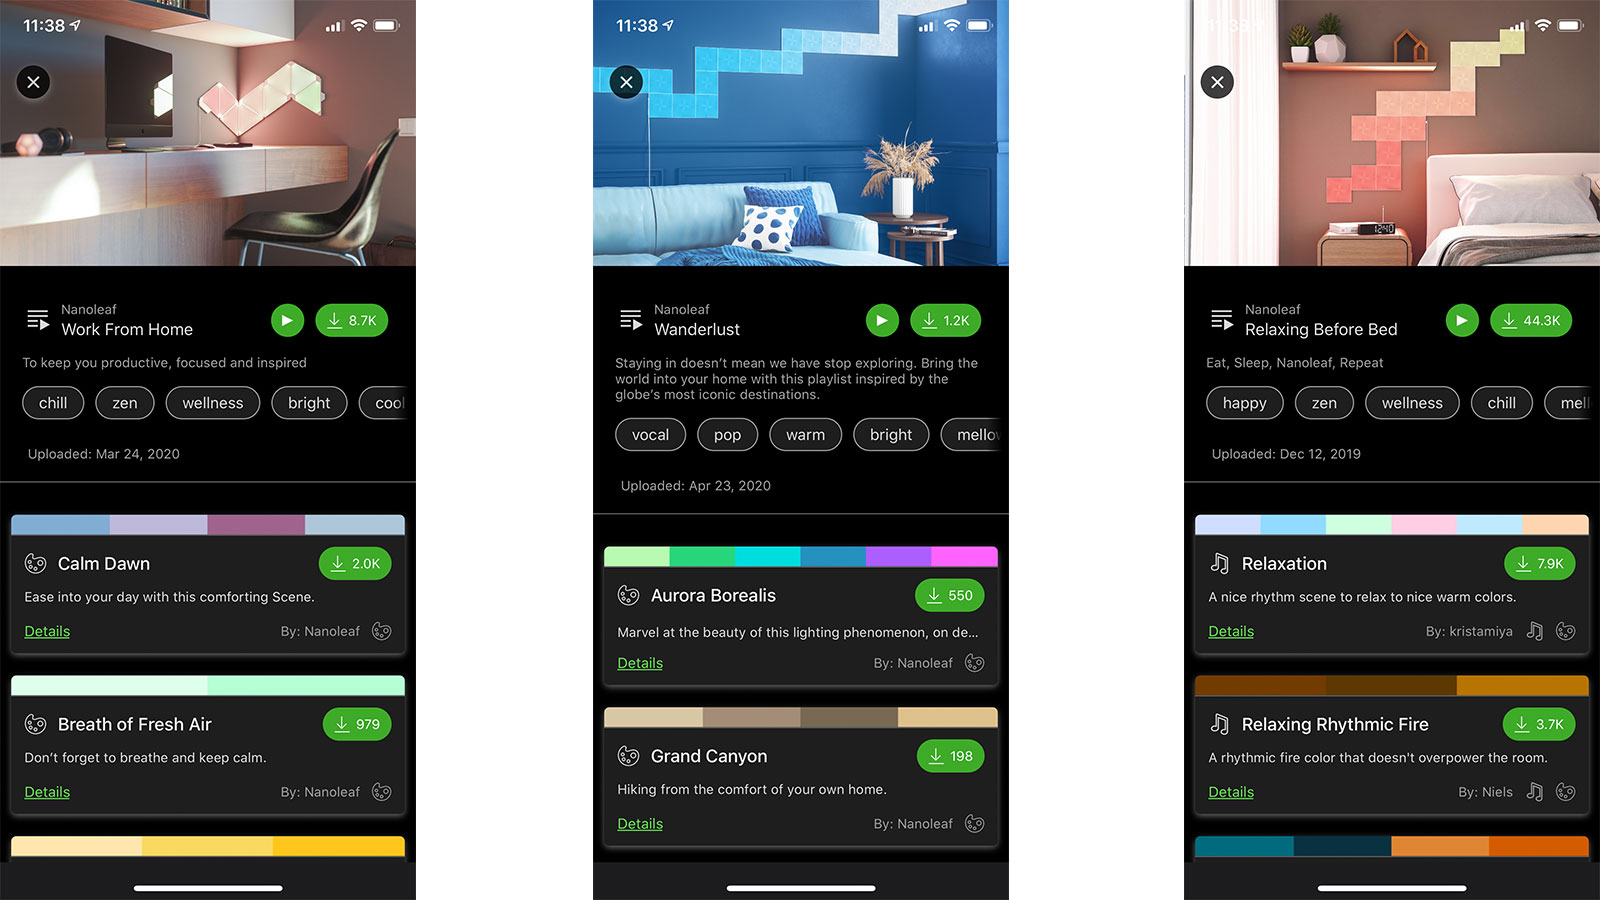
If you've been using Nanoleaf for a while, you'll have noticed that the app has undergone a complete design overhaul. On iOS (which is what we used during our review of the Canvas), the updated app is in dark mode by default, with a modern yet classy look that's far more appealing than the older version's functional setup.
With many of us stuck indoors – even working from home – during the Covid-19 pandemic, Nanoleaf has come up with several Color and Rhythm scenes to suit specific purposes, like helping you focus while working from home or relaxing before bedtime. Travel is also such an integral part of life but with international trips now on hold, there's scenes designed to help sooth the wanderlust in your in list aptly called "Wanderlust".
If you want to try any of the scenes, just switch on the Canvas, open the app, select the scene you'd like to try and it will be displayed on the panels until you turn the lights off.
Current page: Installation & app control
Prev Page Introduction, pricing & design Next Page Features & verdict
While she's happiest with a camera in her hand, Sharmishta's main priority is being TechRadar's APAC Managing Editor, looking after the day-to-day functioning of the Australian, New Zealand and Singapore editions of the site, steering everything from news and reviews to ecommerce content like deals and coupon codes. While she loves reviewing cameras and lenses when she can, she's also an avid reader and has become quite the expert on ereaders and E Ink writing tablets, having appeared on Singaporean radio to talk about these underrated devices. Other than her duties at TechRadar, she's also the Managing Editor of the Australian edition of Digital Camera World, and writes for Tom's Guide and T3.
