How to make your own home server

Sign up for breaking news, reviews, opinion, top tech deals, and more.
You are now subscribed
Your newsletter sign-up was successful
We've got to that point where most people have more computers in their home than TVs. Who can blame us? TVs are dumb devices, while computers will do everything a TV can and so much more.
It's not a typical case, but it wouldn't be far from the truth to describe editor Alan's house as a laptop graveyard. Turn over a cushion here or a sofa there and scores of the damn things come tumbling out, we're not making this up.
That's the problem, while once we used to have a single desktop, now we've got a host of devices: a gaming desktop, a living room PC, multiple laptops, netbooks and Wi-Fi-enabled mobile devices, such as the ubiquitous iPhone.
The principle of convenience is great but where do you start to store all of your documents, files, music and other media? Leaving files dotted around on different machines or USB drives is hardly a good idea.
There's always 'the cloud' but that's not going to work very well for your huge music collection or library of HD movies. There is a better solution… The home server.
Possibly, three of the dullest words you've recently read but stick with us, we're going to show you how one can revolutionise your home. Based around the FreeNAS server operating system we're going to show you how this can be linked with inexpensive hardware to create a perfect centralised storage and media server system.
Wrapped up as a 74MB download this all-in-one OS, NAS and server packs a serious amount of versatility into a tiny package. Just to start its software RAID can span a bunch of hard drives together, so you can pack epic levels of storage into a single shared network drive.
Sign up for breaking news, reviews, opinion, top tech deals, and more.
But that's just the tip of the iceberg, as part of the distribution it comes with a host of handy features: it's a UPnP Media server, iTunes server, Bittorrent client and can function as an FTP and webserver.
The base minimum hardware is as simple as a 486-class processor with just 512MB of memory. So any old system or laptop can do the trick, but the best way to learn about FreeNAS is to get on and install it.
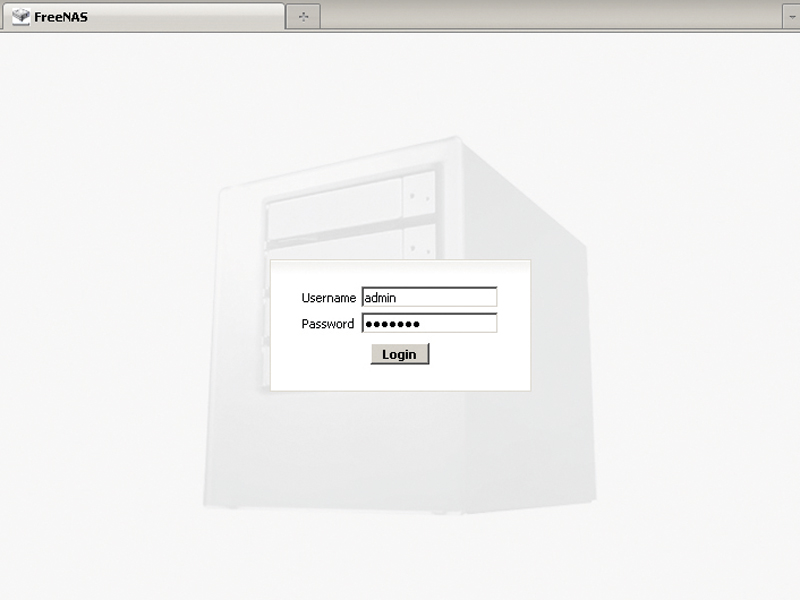
Just what is FreeNAS then? You've probably taken a glance at the screen grabs on these very pages and the carnival of BIOS shots mixed with grey, grey browser administration pages must be filling your heart with utter glee right now. While these screen shots might be about as exciting as saying FreeNAS is based on the FreeBSD operating system, it is the brilliant features that beat in its binary heart we love, not the colour scheme.
As a distribution FreeNAS is available from www.freenas.org, go to the download page and grab it with the generic 32-bit i386 version or the 64-bit AMD64 build. Get the LiveCD version as that's what we're going to be employing in this feature.
There are a host of other options such as installing FreeNas onto a flash drive or virtual box, but we're going to keep things as straightforward as possible for this, your first install.
Once you've got the 74MB ISO image you'll need to burn it to a CD. As with other LiveCDs, once you've burnt it, you can technically run the operating system directly from the disc. However, we want to create a permanent installation on a hard drive. We'd recommend that you first sort out the BIOS boot options for your new server hardware and make sure the first boot device is the optical drive.
Once done start up the server with the CD in its drive, if you've run BSD for Linux before the stream of screen nonsense will seem pretty familiar to you.
Ooh a rabbit hole
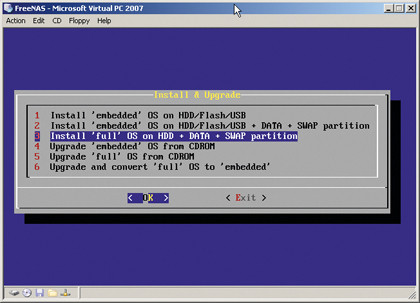
Eventually the initial run will rest at a text menu with nine options, choose '9' which is 'Install/Upgrade to hard drive/ flash device, etc'. This will present you with the marginally friendlier blue screen with another six install options.
This time select option '3' as this will create a full installation and automatically set up both the data and swap partitions.

First, we must make sure FreeNAS knows some important system settings. You need to select the CD drive for the 'cd0' device, the current optical drive should be the only one listed, unless you installed multiple optical drives, but why would you do that?
The next option is to install the hard drive, this will be listed as 'adx', where the 'x' will be the SATA controller number. You should be able to recognise the drive from its name, if you have more than one installed at this point.
Next, we need to specify how large the install partition and swap partition should be. The installation default is just 128MB and that's actually fine, we also want a swap partition and again the default swap size seems quite low at around 1,600MB, but that's fine.
At this point FreeBSD is installed onto the hard drive; it's a rapid process and once complete a page of important information is displayed. Make a note of the data disk device and the partition number, which will be along the lines of 'ad0, 2'. Also make a note of the swap partition device name, again this should be similar to '/dev/ad0s3'. Exit and choose to reboot.
At this point you can discard the LiveCD and, indeed, the optical drive if you can't see yourself using it again. Allow the operating system to boot and you'll be confronted by a similar text menu as before, but this time there's now no option nine!
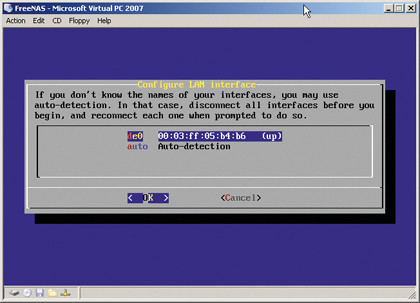
We are in fact all but done, we just need to check the network configuration of FreeNAS. Hopefully, if it has automatically picked up the network adaptor, you should see towards the top of the screen 'LAN IPv4 address:' and a sensible looking IP address to go with it.
