Turn an old laptop into a CCTV camera
Make your own motion-detection system
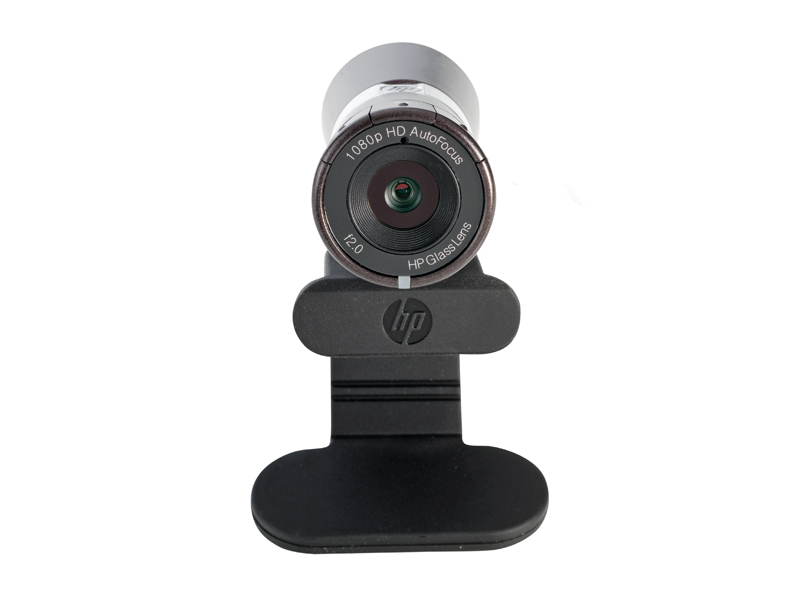
Look above the screen of a laptop or netbook, and there's a good chance you'll find a pinhole that hides a camera.
If you're anything like us, you haven't used this camera since last Christmas, when you tried to use it to connect to your family in Australia – then they had firewall problems and you all gave up.
We're going to put that neglected camera to use in a surveillance system – not the kind used by Gene Hackman in The Conversation, but a CCTV for stuff you'd like to keep an eye on, like the garage door or your rare Barry Manilow records.
We're using ZoneMinder. It runs alongside the Apache webserver, monitoring camera feeds and making them available through a web browser, but that's only the start. It can be expanded into a full home security system, complete with offline recording, motion detection and multiple camera zones, all of which can be run from your Linux laptop or netbook.
The first step is to get it working with a single camera – the one sitting above your screen.
Project requirements
A Linux PC
You can use either a netbook with a built-in Linuxc-ompatible camera or a PC with a webcam. We've used Ubuntu 11.10, but any recent version of Linux should work fine for this project.
Sign up for breaking news, reviews, opinion, top tech deals, and more.
A webcam
If you don't have a netbook or laptop, an external webcam attached to the PC will still do.
1. Troubleshooting
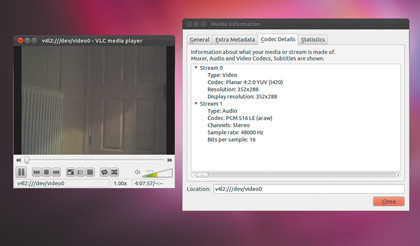
The key to a successful ZoneMinder installation is having a working camera before you start. ZoneMinder can't troubleshoot video input – it can only process what Linux has already configured.
The vast majority of cameras will be set up automatically, either when you install your distribution (in the case of a screen's bevel camera), or when you connect them to the USB bus. If a camera has been detected and a driver installed, the system will create the /dev/video0 virtual device on your filesystem.
You can check for it with the command line or a file manager. You might find it has a slightly different number, or no number at all, especially on older systems, but to test the camera, you need to make sure it's grabbing video data.
You can do this with the Gnome application Cheese, although it will need to be installed manually on the latest version of Ubuntu. You can use it to take photobooth-like images with the camera and add realtime effect to the video without any other configuration, but we prefer the austerity of VLC, which also needs to be installed.
This can stream video footage directly from the camera – just select 'Open capture device' from the File menu and make sure the video device name is '/dev/video0'.
If the video works, you can start installing ZoneMinder. If not, you'll need to check your system logs (type dmesg), but you'll probably have to track down custom firmware and a tool to load it into your camera.
If all else fails, you can use a cheap USB webcam or look into investing in a IP-enabled version.
From VLC, you need to make a note of the settings it's using to play back the video. You can see these by going to 'Tools > Media information' and selecting 'Codec details'. Make a note of the resolution and the codec being used – you'll need these when we add the camera to VLC.
2. Install ZoneMinder
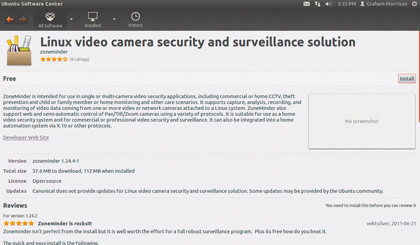
Ubuntu 11.10 includes almost up to date packages of ZoneMinder. We recommend installing these rather than tracking down the latest packages so you don't have any problems installing further dependencies. Just search for 'zoneminder' in the new Ubuntu Software Centre and click 'Install'.
About halfway through the installation will appear to stop, but what's really happened is that a requester window has appeared behind the Software Centre and is asking for input. Switch to this using the 'Minimise window' icon on the top left.
The first request is asking for a password for the root MySQL account. MySQL is used as the database for all the non-video data, and the root password is needed to create a database, and for administration.
You'll then be asked for the mailname of your system. You can keep this and the following questions at their default values.
Unlike the old Ubuntu package manager, Synaptic, it's not always obvious when the Software Centre is installing dependencies, but you can check what else was alongside ZoneMinder by switching to the 'History | Installation' view. You should see many packages installed, including Apache and PHP5.
You can check Apache is running by pointing a local browser at http://localhost. You will see the 'It works' message.
You now want to make ZoneMinder the root page for your Apache server. To this, open /etc/apache2/ sites-enabled/000-default with your favourite text editor as an administrator (try preceding it with 'sudo nano' if you don't have one). Look for DocumentRoot and change this to /usr/share/zoneminder, then do the same with by changing the /var/www part.
We also need to add the user who's running the web services to the group that can access the video device. You can do this from the command line by typing sudo usermod -a -G video www-data.
'Video' is the group created by Ubuntu for accessing the device and 'www-data' is the username used by Apache. You can check the group has been added correctly by typing sudo id www-data, and the output should look something like the following: uid=33(www-data) gid=33(www-data) groups=33 (www-data),44(video)'.
Now type sudo service zoneminder restart (tab completion works here), followed by sudo service apache2 restart.
Load http://localhost into a web browser, and you should see the ZoneMinder web interface.
3. Add a camera
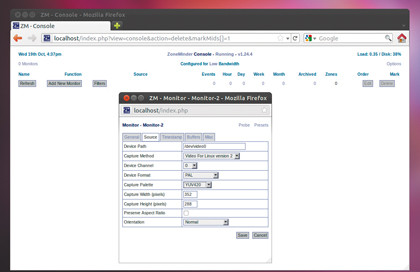
Don't be put off by the sparsity of the interface – there's plenty of power behind those frugal buttons.
The first thing we need to do is add our camera to the configuration. Click the 'Add new monitor' button. This will open another small window with five tabs.
On the first tab, change the name for the monitor to something descriptive – this will help if you decide to add any further cameras to your configuration later on. Below this, keep the source type set to 'Internal' and the function set to 'Monitor'.
Now switch to the second tab, labelled Source. In the first field, Device Path, enter the address of the video device we used earlier. For the majority of installations, this is going to be /dev/video0.
The capture method needs to be Video for Linux version 2 and the device channel is normally 0, although this is where we need to take our settings from VLC.
The device format should be either PAL or NTSC, but if one doesn't work, try the other.
Choose a capture palette from the menu that best corresponds to the codec used by VLC (ours was YUV420) and enter the width and height as the resolution from VLC too. Save the settings with the button at the bottom of the window and you should see your monitor listed in the main window.
The colour of each field in this table is important, and if anything is coloured red, that means it's not working. This is most commonly seen in the Source column, when an IP camera is no longer available or you've got the wrong device name in the monitor settings page.
You can check that it's working by clicking its name in the first column. This will open another window containing the video stream from your device.
4. Motion detection
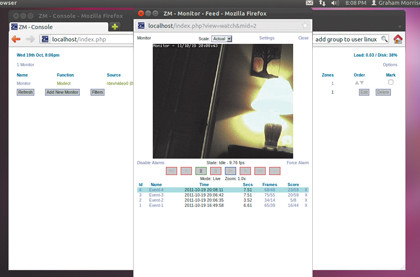
The point of a monitoring system like this is that you don't have to waste hours watching footage. You want to be told if something happens, and ZoneMinder does this by enabling motion detection for your monitor.
This is hidden in the source configuration page we used before, and can be opened by returning to the main table and clicking on your monitor's device in the Source column. Look for the Function menu on the first page. It should read Monitor, and we want to change this to Modetect. Other options include Record and Morecord.
Record uses no motion detection, but records snippets of input at set interval. Morecord is a combination of motion detection and record. Make sure the Enabled flag is set.
With Modetect set, save the settings. The colours for that monitor will be different, and the function should say Modetect. If you click on the monitor, you'll still see the input from your camera, but motion detection is now running.
From now on, if the system detects any significant difference in the video view, it will trigger an internal alarm and record the event to a buffer. Try it with your hand. The state will change to Alarm and an event will be added to the list under the stream.
When you click the name of an event here, another window appears, and from this you can play the video that was recorded from the buffer before the disturbance to a period of stability afterwards. You can fast forward, rewind and skip to time slices.
5. Event management
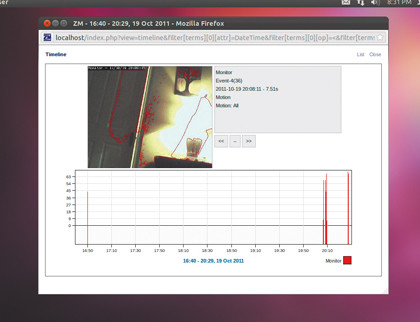
Going back to the table view, you'll see that each event is also registered in the hour/day/week/month columns, and you can click on the numbers within these to show a filtered list of events corresponding to your time scale.
From the event management window, you can choose to archive events, export, delete and edit them, although the last option is only for adding text notes. You can also use the Filters button to specify criteria for events, with a timeline view that can be used to highlight which part of the image triggered the event.
Clicking on the red line of the event will open the playback window. If you want to be informed remotely when an event is triggered, open the Options window from the main table view. Under the Email page you'll be able to enter your address and server details so that you can be informed as soon as something is detected.
It can also upload the events, along with the video, to an FTP server, which is useful if you want things backed up before a burglar finds your laptop.
Fortunately, now you've created the ultimate expandable home CCTV monitoring system, it will never come to that.
-------------------------------------------------------------------------------------------------------
First published in PC Format Issue 262