When you have a technical interest in Windows or PCs in general, there are few things as fascinating as a good computer forensics package.
This is partly because they're an excellent way to check exactly how someone is using a computer – the files they're accessing, the websites they're viewing and any information they may be trying to hide. It's a little sneaky, but if you have suspicions that, for example, an employee is doing something they shouldn't on a work PC, then this could prove very useful.
However, forensics programs also offer many other applications. They can help you recover deleted files, uncover even the stealthiest of malware, troubleshoot all kinds of PC problems, learn more about how Windows and your applications work, and let you pretend you're in your hometown's own version of CSI – perhaps.
This normally comes at a huge cost, with the top forensics packages running to thousands of pounds, but now there's a rare exception. PassMark Software has released a beta of a new package, OSForensics, which you can download for free and use until July 2011.
Despite being a beta, OSForensics is already fast, generally reliable, and packed with a host of useful features, so there's never been a better time to find out what forensics software can do for you.
Recent activity
Checking up on how other people are using your PC sounds a little morally dubious, but if you believe that they're engaged in activities you don't approve of – and maybe trying to hide them from you – then it seems to us that you're entitled to try to discover the truth. OSForensics can help you accomplish this in several ways.
Sign up for breaking news, reviews, opinion, top tech deals, and more.
Launch the program, taking care to give it administrator rights if you're running Windows Vista or 7 (right-click the shortcut and select 'Run as administrator'). Click the 'Recent activity' tab on the left-hand menu.
Accept all the default settings for the time being, click 'Scan' and, after a moment, OSForensics will list details relating to websites you've visited, files you've downloaded, documents you've opened, USB flash drives that have been attached to your PC, wireless networks that you've accessed (if appropriate) and more.
Some of this information is available from other sources. It's not difficult to browse through your web browser's history, for example, or check any cookies that have been downloaded, but other details are more unusual. If you're investigating a work PC, for instance, you could view the USB details to see if someone may be attaching unauthorised drives, perhaps in order to steal data.
Filter scan results
There's a definite advantage in having every detail available in a single interface though, and it's filterable, too. If you only want to look at the files that have been downloaded, for example, you can do this by selecting 'Downloads' from the 'Show Only' list.
If you're only interested in the events of the last week, select 'Search date range only', change the 'From' and 'To' dates accordingly, and then scan your system again.
If you click the 'Timeline' view, you'll see a classic timeline graph that enables you zoom in on a period of interest. You can click a year, a month or a day, then drill right down to the activities during that period. Right-click to export the results that interest you in CSV, HTML or TXT format.
The majority of forensic packages provide easy ways to search a hard drive beyond any system that might currently be installed (such as Windows Search), and OSForensics is no exception.
Click the 'Create index' tab, for instance, and you'll be able to choose a start folder that defines the file structure you'd like to search. Any subfolders will be included automatically, so to search the entire C: drive, you would simply specify 'C:\'.
It may take a very long time to index the whole drive, so if you only want to search for something in the Documents folder, browse to 'C:\Users\[Name]\My Documents' instead.

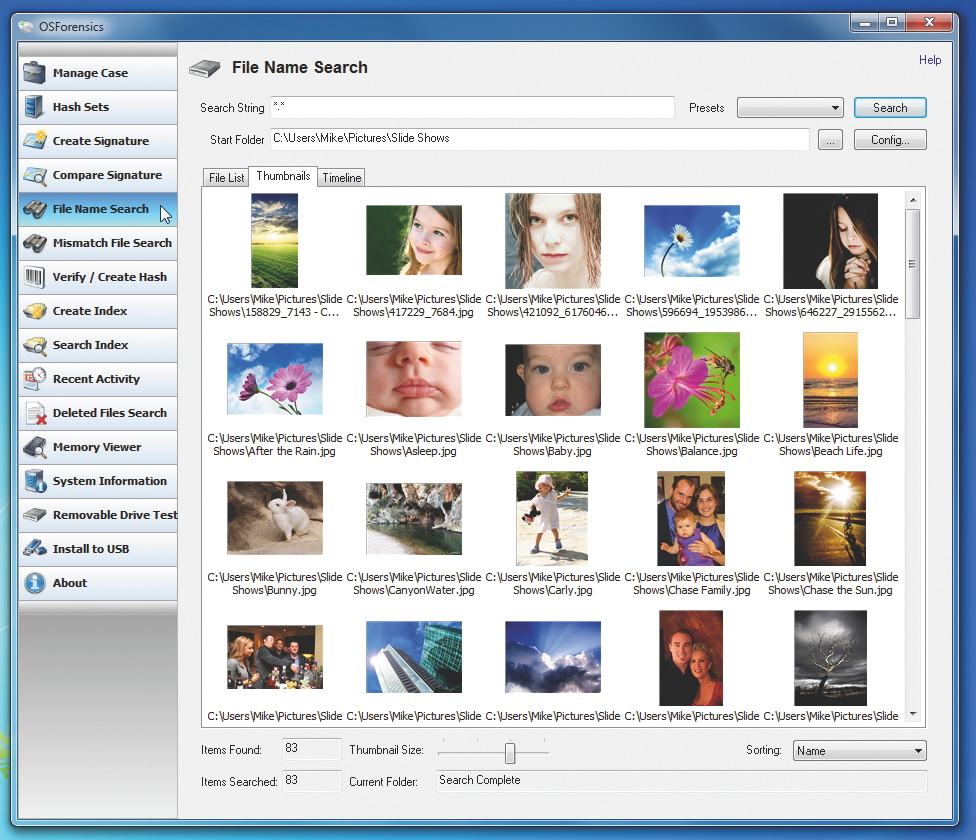
SEE HERE: Thumbnail previews are available in searches, making it easy to find anyimages you need, such as photos you've deleted and want to restore
The indexing is tool is already comprehensive, but you can make it even more so with a few extra tweaks. Click 'Config', then select both 'Scan files with no extensions' and 'Scan files with unknown extensions' to try to uncover content that other tools might miss. Then choose 'Files and unallocated sectors' to look for content in files that may have been deleted.
When you've finished, click 'Create index', then leave the program for a while. It will have to scan a huge number of files and the process will therefore take some time to complete.
It's worth the effort though, because when it's finished, you can use the 'Search index' tab to enter your key words and pull up matching files, images, emails and more almost immediately, including content that wouldn't necessarily be available if you used Windows search alone.
- 1
- 2
Current page: Checking on recent activity
Next Page Deleted files, AV signatures and file formats