Introduction
Presenting ideas concisely and with style can be the most critical – and nerve-wracking – business function. Most of us use Office 2016's PowerPoint app to transform dull speeches into interactive presentations, keeping the interest of our audience and enhancing concentration. But there's more to this than bland slides; if you want to make an impact, you'd better know your way around the software.
We've pulled together ten top tips for PowerPoint 2016 – things which will help you design more quickly and efficiently, and hidden tweaks which could save your presentation in a pinch. The majority will also work for earlier versions of PowerPoint, too, and on the Mac version of Office with the appropriate shortcut tweaks. Good luck!
- Also check out our top Word 2016 tips, along with our Outlook 2016 tips and Excel 2016 tips
1. Random text
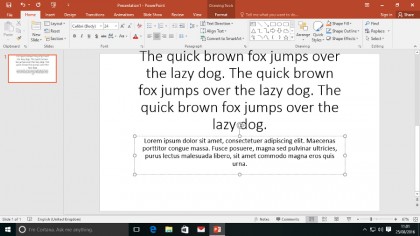
Design and content don't necessarily have to go hand-in-hand. It's not inconceivable to want to create eye-catching slides before you know exactly what's going on them, and PowerPoint has a tool built in to help you create placeholder text.
Just click inside a text box, type =rand(), then hit [Enter] to generate a passage of text, or use =lorem() to bring up some standard 'lorem ipsum' filler. You can also input a number within the brackets to determine just how many paragraphs you feel you'll be working with. To take it further, input two numbers: =lorem(2,3) will generate two paragraphs of three sentences each.
2. Draw equations
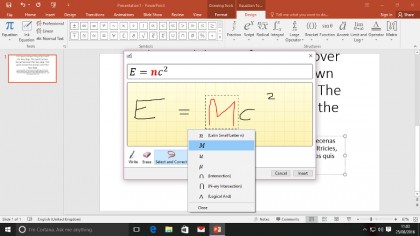
Presentations with a mathematical bent will benefit from clear, well-designed equations. We all know how difficult these can be to lay out – and nobody truly wants to resort to using LaTeX if they don't have to. PowerPoint 2016 includes a new tool that makes this easy: the Ink function.
Head to the Insert tab and click Equation to bring up a new ribbon panel. Click the Ink Equation button and draw your equation on the yellow grid. If you're clear enough with your scrawling PowerPoint will convert it into the appropriate symbols automatically. If not, use the Select and Correct tool to draw around the symbol that's being poorly interpreted and select the correct one. Tap insert when you're done.
3. Selection skills
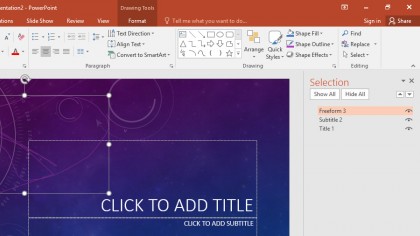
While many will argue that the most effective PowerPoint presentations are those with few elements beyond the facts, we know that some slides have a tendency towards the complex. As soon as you've started layering elements and sticking text on top of images, it can be an absolute pain to make design tweaks.
Sign up to the TechRadar Pro newsletter to get all the top news, opinion, features and guidance your business needs to succeed!
Effective PowerPoint users tend to work with the selection pane open to counter this problem. Go to Home > Select > Selection Pane to open it. Here you can hide elements (click the eyeball icon), rename them (click twice), and quickly rearrange their ordering on the page using the arrow icons.
4. Use the grids
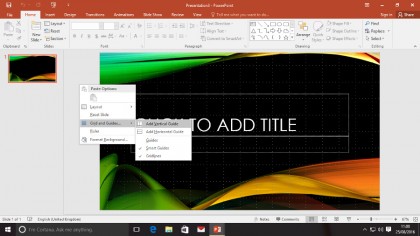
Yes, there's a good possibility you haven't missed this aspect of PowerPoint, but don't underestimate just how important it is to use the program's layout tools (right click the pasteboard around your slide, select Grid and Guides) to lock down your designs.
We recommend switching on grid snapping and viewing the grid, at least while you're sketching things out, or hovering over the Grid and Guides button to create vertical and horizontal guides. Objects you move or resize will tend towards locking on to these subtle markers, allowing you to stay on track without being tied to a formal structure.
5. Print hand-outs
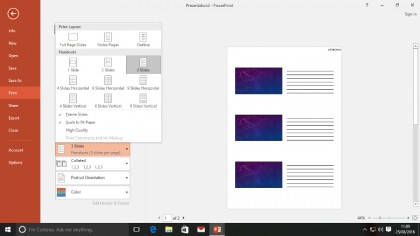
Printing a slide deck one-to-a-page is wasteful and a little pointless, particularly if your slides are well designed – they should work as an accompaniment to whatever you're talking about, not a verbatim copy. But slide hand-outs can be useful if you use them in the right way.
We recommend the '3 slides' configuration – you'll find it in the Print dialog under the File menu. This adds a set of lines next to your slides, providing a handy reference point and a space for your audience to make notes. Or, if you'd like to share the slides with a transcript of your speech or write your own bespoke notes to present from, add them for each slide using the Notes icon in the status bar and print using the appropriate template.
6. High-resolution slides
You can avoid the pain of font unavailability – and make the most of any custom fonts you may have installed – by rendering your presentation into flat images (File > Save As, select PNG as the file type) then reinserting them into a black slide deck before heading out to deliver it. You could also export your deck in PDF format (File > Export) for moments where you may not have PowerPoint installed on the machine you're expected to present from.
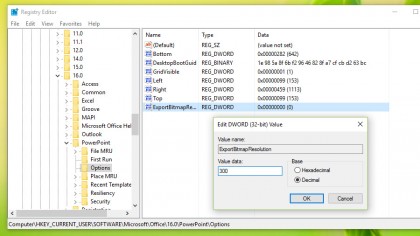
But here's the issue: PowerPoint, by default, saves in a woefully low resolution. Your slides tend to look terrible when rendered. To tweak this requires a little registry editing magic: open Registry Editor by hitting [Windows]+[R] and typing regedit, then head to HKEY_CURRENT_USER/SOFTWARE/Microsoft/Office/16.0/PowerPoint/Options – you may need to change '16.0' to a lesser number if you're using an earlier Office release.
Right click in the right-hand pane and add a new DWORD. Name it ExportBitmapResolution (all one word), right click the new entry, and click Modify. Change its Base to decimal, and pop 300 in the box. Now every image you export will be a crisp 300dpi, more than enough to satisfy any projector screen.
7. Share screens
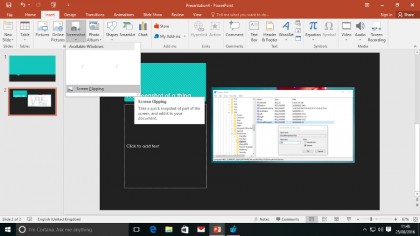
PowerPoint includes two powerful ways to project your message if you're working with software. First up you can use its screenshot tool to quickly capture screen regions or whole windows and pull them straight into your slides. Go to Insert > Screenshot and either select the window you want to insert (resize your chosen window as appropriate before selecting it here) or use the screen clipping tool to import a specific region. PowerPoint will automatically duck out of the way if you use the latter option.
PowerPoint's screen recording tool, found on the right-hand side of the Insert ribbon, is very handy, allowing you to demonstrate software functions in the form of a live video, although this will naturally increase your deck's file size significantly. Handily you can use this feature to create videos for use outside of PowerPoint – just right click the element once you've finished recording and select Save Media As to drop an MP4 file wherever you need it.
8. Duplication
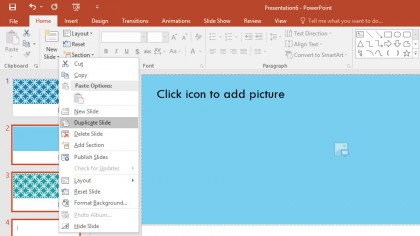
Copying and pasting the contents of one slide into another might seem like a good idea if you're going to replicate the same structure. But there's a much quicker way to do it: select the slides you want to replicate in the left-hand navigation pane, right click on one of your selected slides, and select Duplicate Slide.
You can also reuse elements within a slide quickly by holding [Ctrl] and dragging them; you'll pick up a copy, and drop it wherever you release the left mouse button. If you enter the slide sorter (View > Slide Sorter) you can use this technique to quickly duplicate entire slides, too.
9. Paint it on
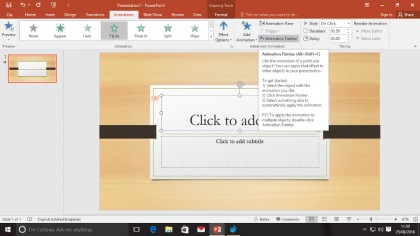
Setting up animate objects isn't particularly difficult, but making multiple unique objects use the same animation properties can be something of a pain. Unless, that is, you use the Animation Painter, which quickly copies styles.
Set up your animation as usual, then find Animation Painter in the Advanced Animation portion of the Animation ribbon panel. Make sure the object whose properties you wish to duplicate is selected, click the button, then click the object to which you'd like to apply the animation.
Need to animate more than one additional object? Double-click the Animation Painter button and your paintbrush will stay active until you click it again.
10. Embed web video
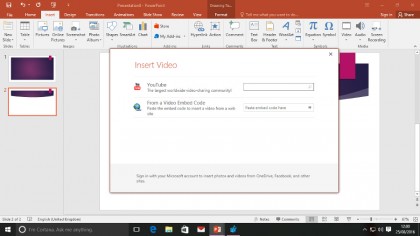
If you're sure that your presentation venue is going to have a stable internet connection, you can spice up your slides with video from sites like YouTube or Vimeo. Open up a web browser and head to the video you'd like to include. Find its embed code – this differs from site to site, but shouldn't be too hard to find – select it all and copy it to your clipboard.
Now head back to PowerPoint, draw a box where you'd like the video to be, go to Insert > Video > Online Video, and paste your embed code in the appropriate box. You can resize the box as appropriate, and even apply animations and other effects to spice things up.