Introduction
We dare say you're a dab hand with Microsoft Word. You can write a letter. You can perform admin tasks. Maybe you're even capable of pulling off a flawless mail merge. But many of us don't go beyond Microsoft Word's most basic features.
With that in mind we're here to show you ten ways to get more out of Word, from interface streamlining to work practices which will make your documents look better and come to life faster.
Note that we're running Office 2016 on Windows 10 here, but you'll be able to pull off the majority of these tricks on any version of Microsoft Word post-2010, and they're even applicable if you happen to be running Microsoft Word on a Mac.
- Also check out our top Excel 2016 tips, along with our PowerPoint 2016 tips and Outlook 2016 tips
1. Configure the ribbon
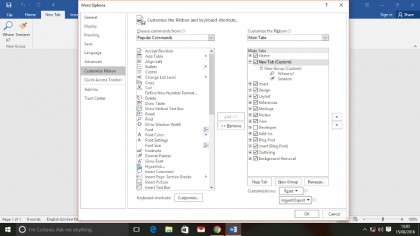
Why not begin by making that Ribbon interface – controversial as it is, even after all this time – work for you? Go to File > Options, then head to Customise Ribbon. Click New Tab, right click your tab and select Rename to label it, then drag it to set where you'd like it to appear on your toolbar.
You can now drag your most frequently used controls over from the left hand column to the new custom ribbon tab, using the New Group control (renaming as appropriate) to break them up into neat sections. You can even rename the tools themselves, or give them new icons, by using the right click menu.
2. Style tips
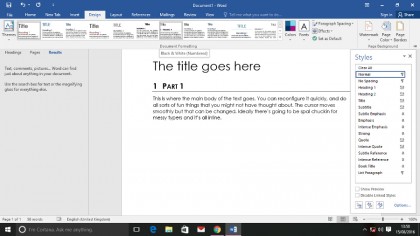
If you're creating a large document, it's imperative to make it consistent – your readers will notice if it's all over the place. Rather than manually formatting your document's fonts and weights, select the text and use the Styles panel in the Home tab to apply different styles (normal text, headings, quotes and the like).
By painting your text in this manner, you can easily apply one of Word's built-in document formats (available from the Design tab) to completely transform your document in a click, or reconfigure individual styles (right click them in the Styles panel) to change them document-wide. This will also enable you to use Word's built-in table of contents tools without any further tinkering.
3. Make a note
Highlighting is more than just a way to add a pretty colour to your documents. First enter highlighting mode by selecting the appropriate tool in the Font panel of the Home tab, then drag your mouse over the text you want to highlight. You can also select the text first, then hit [Ctrl]+[Alt]+[H] to highlight it.
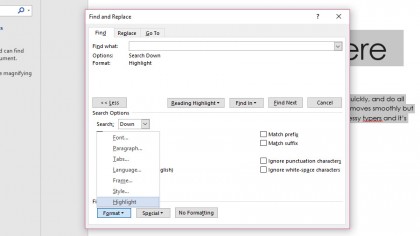
When you come to proof your document, bring up the find tool – [Ctrl]+[F] – then switch to the Advanced Find dialog by clicking the drop-down arrow on the search box and selecting the appropriate option.
Click More>>>, click the Format button at the bottom of the window, then select Highlight. You can now hit [Enter] in the 'Find what' box to skip through each highlighted area in your document. Or why not try the opposite? Click Format > Highlight again, and you'll search for non-highlighted text, allowing you to mark off sections of your document when they're done.
Select your entire document with [Ctrl]+[A] when you're done, and set the highlighting to 'No colour' to remove it completely.
4. New shortcuts
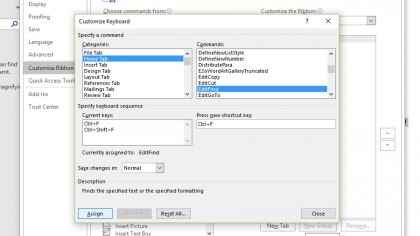
In the previous tip we were forced to go the long way around to get to the advanced search dialog, because the [Ctrl]+[F] shortcut is instead assigned to the much less useful Navigation panel. This injustice is easily corrected if we generate our own shortcut.
Head back to the ribbon designer that we used in step one (File > Options > Customise Ribbon) and click the Customise button on the bottom-left corner of the window. Find 'Home Tab' in the left column, then 'EditFind' in the right column. You'll see there's nothing listed in the current keys box; just click beneath 'Press new shortcut key' and hit your custom combination (you can even use [Ctrl]+[F] to replace the original shortcut) then click Assign to set it.
5. Quick access
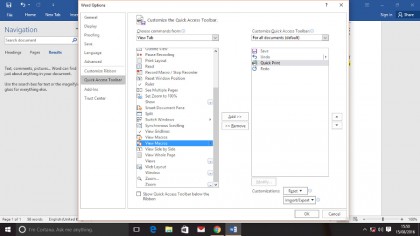
Find the features you need even faster than you could with the ribbon by attaching them to the quick access bar, that area to the top-left of the screen above the ribbon tabs. By default this includes shortcuts for save, undo, and redo – all very handy, but what if you're performing some other function with greater regularity?
Click the drop-down arrow on the toolbar's right side, select More Commands, and click the Add>> button to move selected items from the left pane to the right pane. You can also check the box at the bottom of this window to put the quick access bar below the ribbon, but that's potentially a bit of a waste of screen real-estate.
6. Citation needed
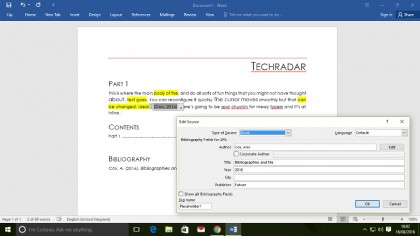
Many documents require a proper bibliography, and Word includes tools which make creating one easy. Head to the references tab to find them, and use the Insert Citation button to place a reference at your current cursor location. When adding citations as you go, you (thankfully) don't need to fill them in entirely – you can pop in a bit of placeholder text to remind you of the exact data you need to input, and come back to it later to fill in the blanks.
Once you've inserted a citation placeholder, hover your mouse over it and click the drop-down arrow on the right-hand side. Choose Edit Source, and fill in the appropriate data for your citation – it defaults to 'Book', but there are numerous other sources to choose from. You can now insert a bibliography at the end of your document, also from the References tab – make sure you update this before publishing, as it doesn't automatically reflect changes made to citations.
7. Smart lookup
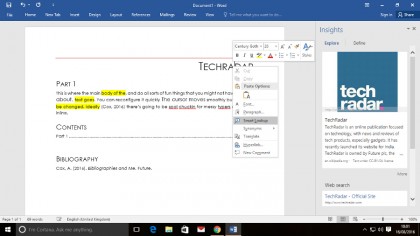
Perhaps a tool most suited to documents you're reading rather than writing, Smart Lookup (select a bit of text, right click it and select, you guessed it, Smart Lookup) can help you find out more information about the text in your documents by doing a neat Bing search in a column on the side. Click Define at the top of that column and you'll get a definition of the word from the Oxford Dictionary.
As long as you're connected to the internet, you can also use the right click menu to grab quick synonyms for words, and delve further into the synonym menu to look them up more deeply in a thesaurus sidebar.
8. See more options
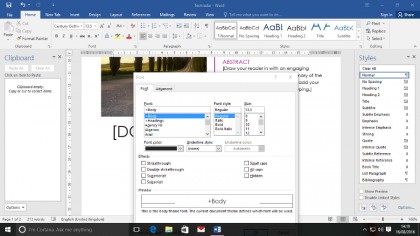
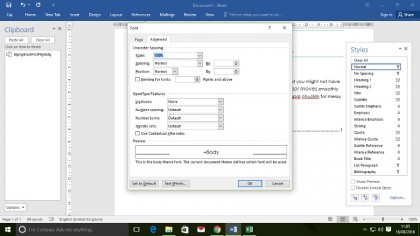
The more you explore the ribbon, the less restrictive it feels. You may have noticed certain ribbon groups with a small icon on their bottom-right corner – click this to expand that group's options into Word's full selection. This will either take the form of a pop-up window, a sidebar, or a hovering panel depending on the particular group of options you've expanded.
Usefully the latter two are interchangeable and optional – click and drag the top of a sidebar to turn it into a panel, or drag a hovering panel to the edge of the Word window to dock it as a sidebar. Sidebars can be placed side-by-side, providing you have enough screen real-estate.
9. Many clips
Word's clipboard has much more than the basic Windows one-item memory. You can store up to 24 items on it at a time – just hit [Ctrl]+[C] twice to bring it up and see what's currently being remembered.
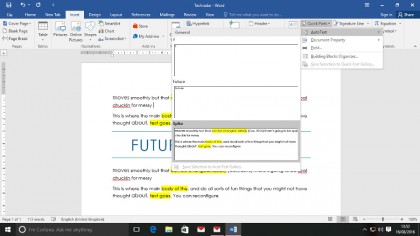
But did you know that's not Word's only clipboard? You can also make use of an almost-hidden tool called the spike to gather together chunks of text into an ordered line. Select the text you wish to cut and hit [Ctrl]+[F3] to add it to the spike. Repeat the process as many times as you wish to grow the spike. When you're ready to retrieve your text, either hit [Ctrl]+[Shift]+[F3] or type 'spike' (without the quotes) and hit [Enter].
Text on the spike even stays there between sessions – you can view it by choosing Quick Parts > AutoText in the Insert tab.
10. Building blocks
When you're constructing a document, it may be tempting to form all of its components by hand using Word's design tools; a text box here, a fancy footer there. That's certainly possible, but it takes time and effort that might be better spent writing.
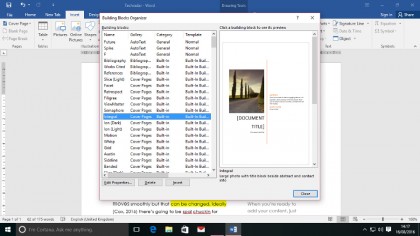
Try, instead, Word's huge collection of page building blocks (Insert > Quick Parts > Building Blocks Organiser). They're quick, good looking objects that you can insert in an instant to add flair to your documents. If they don't quite fit your style, you can tweak the design and use Insert > Quick Parts > Save Selection to keep them on file for the next time you need them.
Sign up for breaking news, reviews, opinion, top tech deals, and more.
You are now subscribed
Your newsletter sign-up was successful