Guide to iWeb: tips and tricks you need to know
Design an entire website in a matter of minutes
Create a professional-looking website using iWeb's templates
Even though it might seem complicated and daunting, creating your first website in iWeb couldn't be easier. When you launch iWeb for the first time it automatically presents you with a series of templates that you can choose from.
Each template has a different style – modern or old fashioned, dayglo colours or formal and restrained – that you can choose from to give your website a distinctive look and feel. Each template also includes a number of different pages that are designed for presenting various types of information.
There's an About Me page that enables you to quickly and easily present personal information about yourself, such as your age, job and hobbies. There are also pages for laying out photos and creating online slideshows, and you can share your blogs and podcasts or even play video clips from your home movies.
Each template comes with a number of placeholders, in the form of ready-made images and text that are used to define the page layout. So all you have to do to add your own content is type in your own text and simply drag and drop photos and videos onto the page using your mouse.
Another couple of clicks with the mouse will enable you to move things around and create a more individual layout, and then you can carry on creating as many additional pages as you want to – even adding extra websites too, if you wish.
As you go along, iWeb will automatically keep your website nicely organised, linking pages together for you and creating a nav bar that means you can move from page to page – a tedious task that can take ages in other web design programs.
Sign up for breaking news, reviews, opinion, top tech deals, and more.
As you become more and more confident with iWeb you can leave the templates alone and start to create your own individual designs from scratch. And if you want to push it further, you can extend iWeb's capabilities, using features such as 'snippets' of HTML code that you find on other sites on the internet.
Admittedly, iWeb does have a few limitations – fingers crossed for rollover buttons in iLife '11 – but it's undoubtedly the easiest and most straightforward web design program we've ever seen. And it's definitely the ideal starting place for anyone who wants to design a website for their family, school or a local club.
How to design web pages with iWeb
1. Page maker
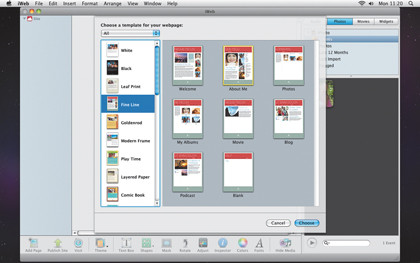
iWeb will present you with a selection of templates you can use to get started with your site. Each template consists of different pages – there's a blank page, a welcome page, and pages that are designed for laying out photo galleries, video clips, podcasts and blogs.
2. All about me
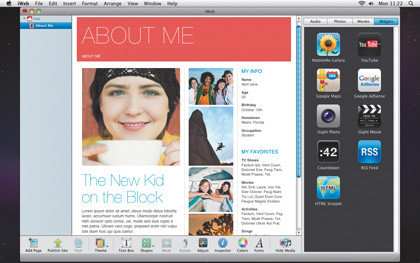
We'll start with this About Me page. As you can see, the template page has placeholder pictures and text in position for creating a basic page layout. All we have to do is insert our own pictures and text into the layout. Let's use the Media Browser to look at our iPhoto library.
3. Browsing around
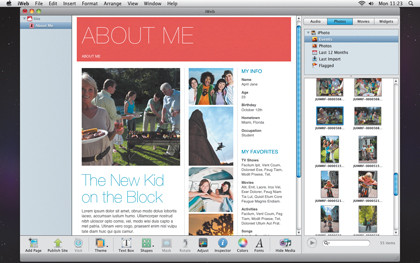
The Media Browser (at the right of the screen) shows widgets you can add to your pages, but if you click the Photos tab at the top of the panel you can see the contents of your iPhoto library. Use the mouse to drag and drop a photo from the browser onto the page.
4. Drag and drop
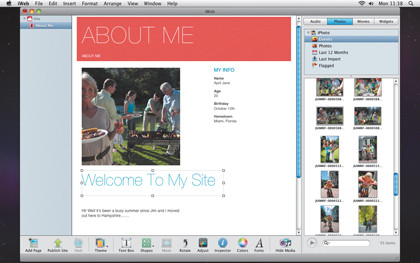
It's easy to modify templates and give them more individuality. We'll make space by getting rid of the extra placeholder photos – click on a photo and hit ∫ to delete it. Then we'll use the mouse to click on the text box to edit the headline and stretch it across the page.
5. Picture perfect
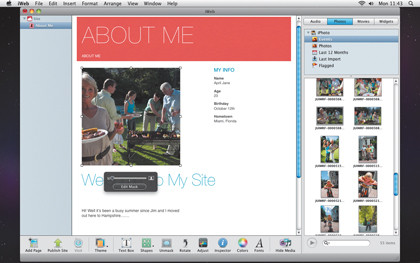
We need to adjust the main photo to make Jane the centre of attention. Clicking on photos activates the editing toolbar. This allows you to resize the photo and move it around. However, there's also a mask on the photo that acts like a frame hiding parts of the image.
6. Behind the mask
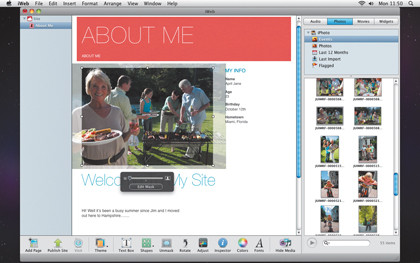
Click on the Edit Mask button to display the mask. Part of Jane's head was cut off by the mask, so we'll click on the photo and drag Jane back into the picture, and then zoom in a bit, as well. You can modify the shape of the mask by clicking and dragging the square handles.
7. Online albums
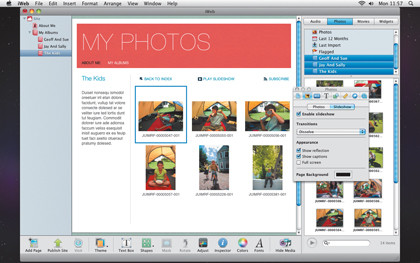
Let's create some additional pages now. You can drag and drop individual photos onto a page, but iWeb also includes an Albums template that allows you to drag albums from iPhoto and organise them into a gallery. There's even an option for an online slideshow.
8. Quick blogs
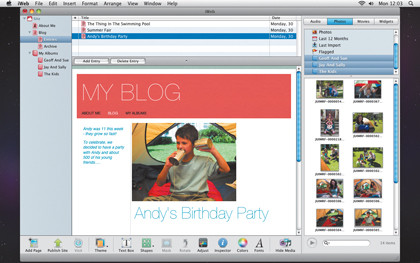
The blogging template is just as simple. It lets you add entries whenever you want while archiving older entries for you. Notice how iWeb organises these pages in the left panel, and how the nav bar is updated with links that let you move from page to page.
Cliff Joseph is a former Editor of MacUser magazine, and a freelance technology writer with 30 year’s experience in the industry (and old enough to remember when Apple was close to going bust…).
His first job involved using Macs for magazine sub-editing and typesetting, which led to the realisation that these computer-thingies might actually turn out to be useful after all. After a few years specialising in the Mac side of the market, he went freelance and embraced the wide world of digital technology, including Windows PCs, digital audio and hi-fi, and networking. Somewhere along the line he also developed a bit of a gaming habit and has stubbornly waved the flag for Mac gaming for far too many years.