TechRadar Verdict
A solid video editing app for beginners, with enough features to grow with you once you feel you’ve mastered the basics.
Pros
- +
Good-looking interface
- +
Industry-standard shortcuts
- +
Easy to use
Cons
- -
Window-Only
- -
Terrible import interface
- -
Reversed track order
Why you can trust TechRadar
Update: This review is for an older version. For the latest release, see our Magix Movie Studio 2022 review.
------
How does Magix Movie compare to the best video editing software out there? We put this post-production tool to the test.
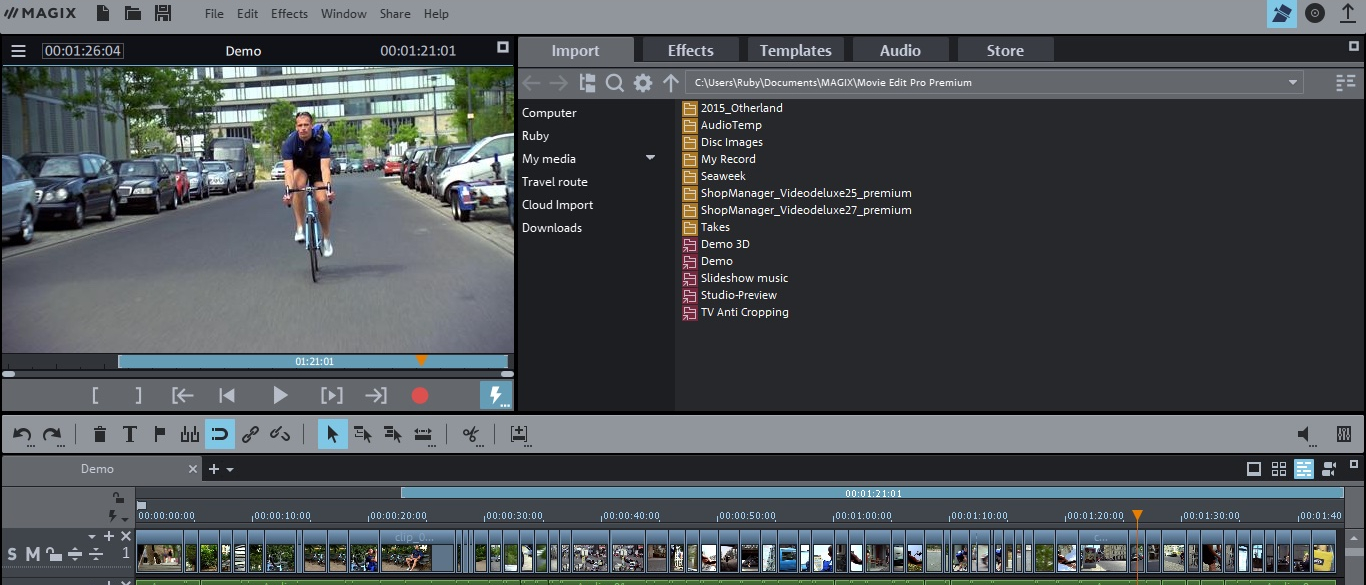
Based on its current purchase price of just under $70 (£60) Magix’s Windows-only Movie Edit Pro is a video editing software solution aimed at the lower end of the market. The software comes in two additional flavours, Plus ($100/£90) and Premium ($130/£110), which offer some more advanced features.
- Want to try Movie Edit Pro Premium? Check out the website here
We found Movie Edit Pro Premium to be remarkably full-featured, with a sleek interface which can grow with you as you improve your editing skills, but it’s not without its frustrations.
- Also check out our round up of the best free video editing software and the best video editing software for beginners.
Importing media
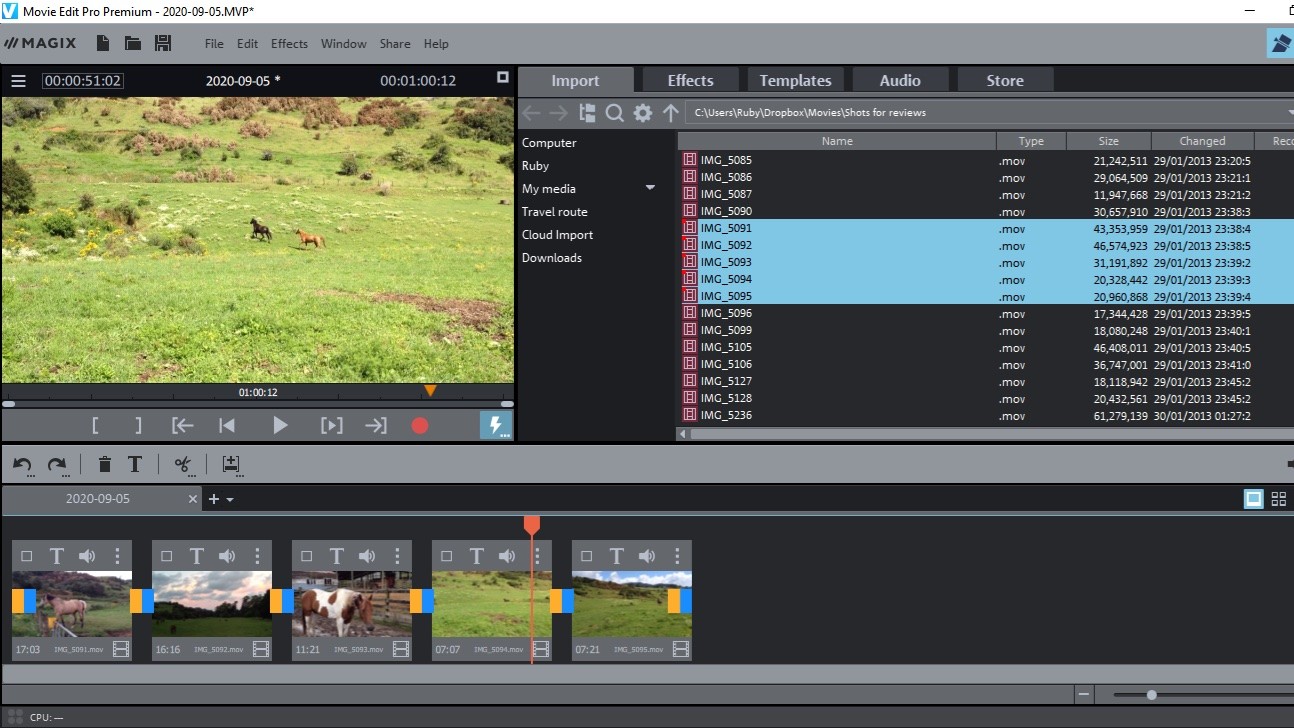
Adding clips is a perfect example of this: most other competing programmes have the ability to organise your clips prior to using them in a project. This allows you to import footage into your project, organise them in bins (aka folders), label them, or do whatever you need to do to have all the clips at your fingertips when building a project. Movie Edit Pro Premium doesn’t work like that. Instead, if you choose a clip, it’s immediately added to your timeline. Choose multiple clips and they’re all added in chronological order.
Worse still, any clip is presented in list view with no thumbnail. You can preview clips one at a time prior to importing them (either from a camcorder or from a drive), but that interface is far from seamless and really slows you down if you’re looking for a specific moment.
Sign up to the TechRadar Pro newsletter to get all the top news, opinion, features and guidance your business needs to succeed!
Editing
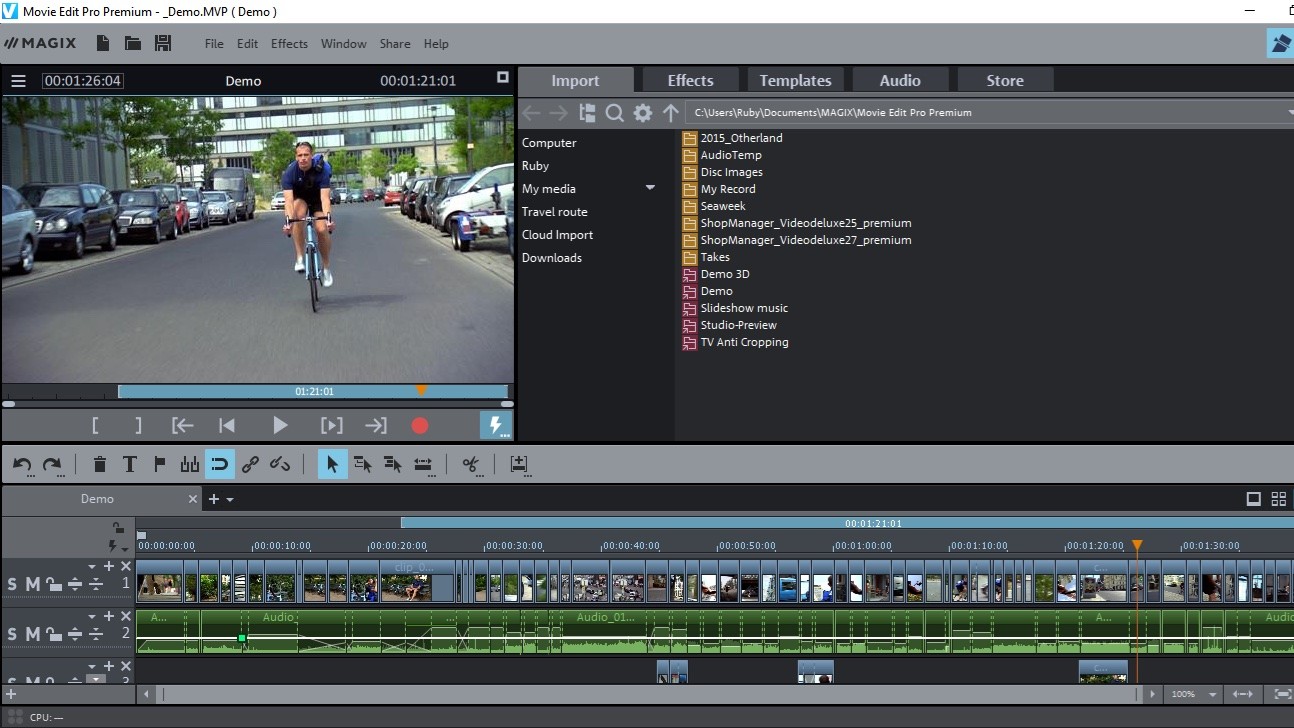
Once your clips are in your project, they appear by default as big square thumbnails. This is Movie Edit Pro Premium’s basic interface, designed to keep the editing nice and simple. Top right of the Timeline section are other options represented by a series of icons. The third one from the left offers you a more traditional view, with clips represented by rectangles whose lengths depend on their duration. This migration in complexity is welcome, especially if you’re initially unfamiliar with the editing process.
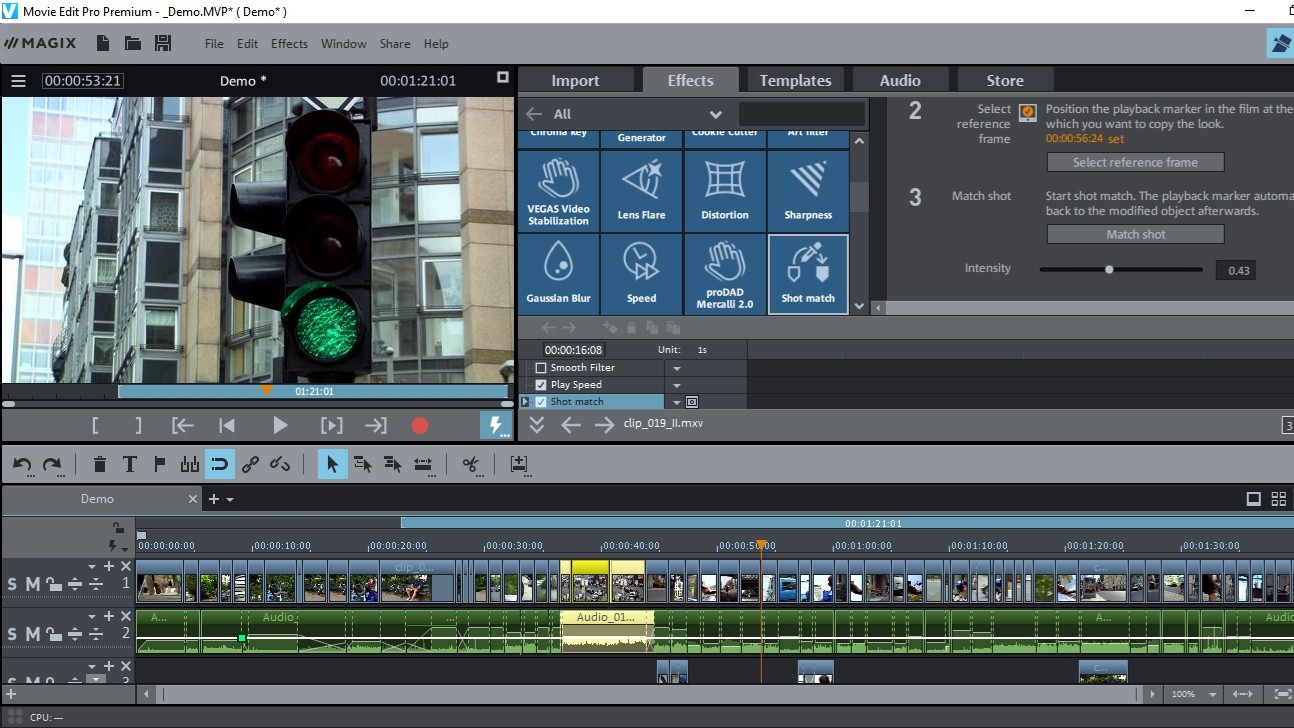
As far as editing is concerned, if you’re at all used to making videos in other apps, you’ll feel right at home here. Everything pretty much works as expected. It’s easy to trim clips and move them around, you can navigate via the keyboard and even the traditional JKL keys which are often used to rewind, pause and forward through the timeline, are implemented here. You also have a series of tools available to you via a row of icons top left of the Timeline section.
The one thing that is frustrating to a veteran editor though, and which could confuse you should you wish to eventually migrate to another package, is the fact the tracks are placed in reverse order. In more professional applications, tracks work like layers, and anything on top of one obscures what’s beneath it. Not so here: if you want to place one clip over another, you have to place it underneath it. It’s a different way of thinking which is counter intuitive if you’re used to the more traditional way of working, or just used to the way things word in the real world.
Transitions and titles
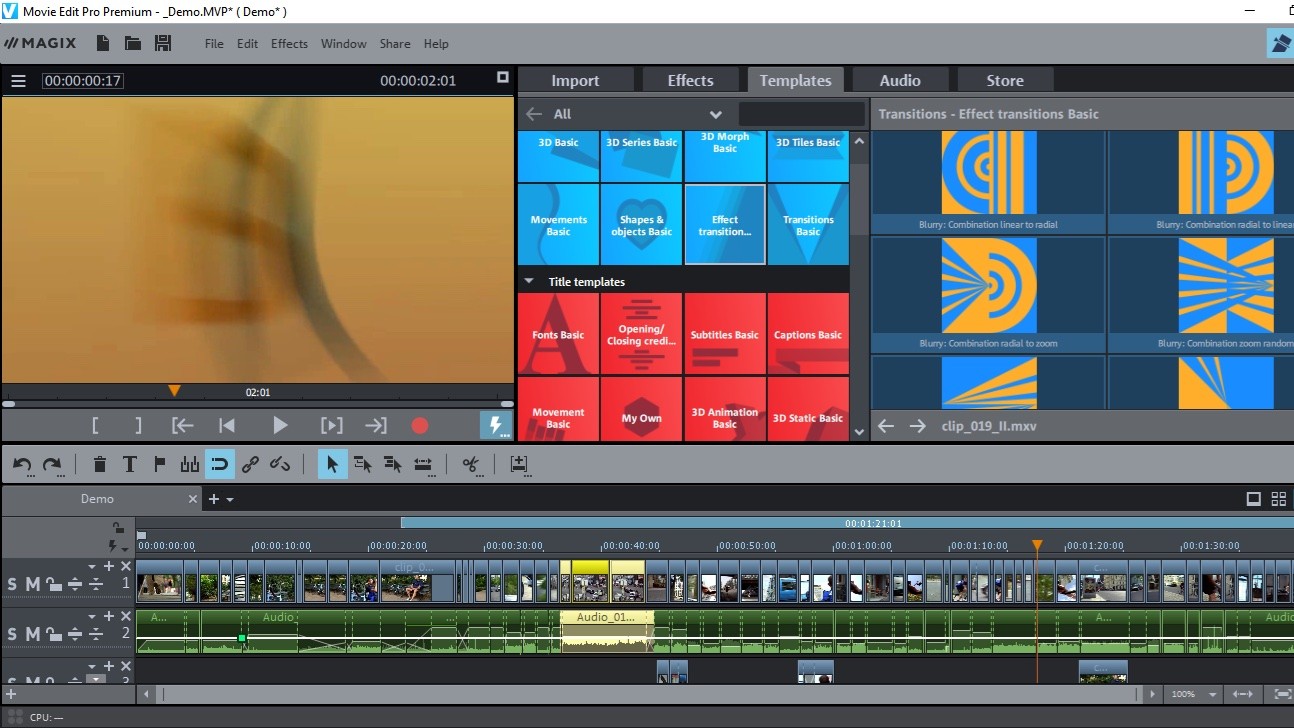
Top right of the interface is known as the Media Pool. This is where you import your footage as described above, but also where all the app’s effects, transitions and titles reside. You can preview them all easily prior to adding them to your project, which is a definite plus and can save you a lot of time.
There’s a good selection of titles, most of which are fully editable (the 3D effects ones aren’t, aside from imputing new text). You can also move them around the screen to place them in a location that better suits your project. There aren’t many transitions, but those that are present look very nice, and some are even quite original.
Looks and color correction
You can apply specific Looks to your clips, or your entire project, which is a quick and easy way to grade your footage. Of course you also have access to regular colour correction tools and other effects such as blur, distortion, speed, chroma key, and many others.
If you’d rather your video editing software do most of the work for you, choose a Movie Template. Do this and the interface changes with the Timeline getting filed with specific placeholders. You need to replace them with your own clips and if possible match the type of shot requested (long shot, medium shot, etc).
You also have a handful of Image Objects. Think of them as clip arts, with some being animated, which you can add over your clips. There’s also some royalty free songs in the Audio section.
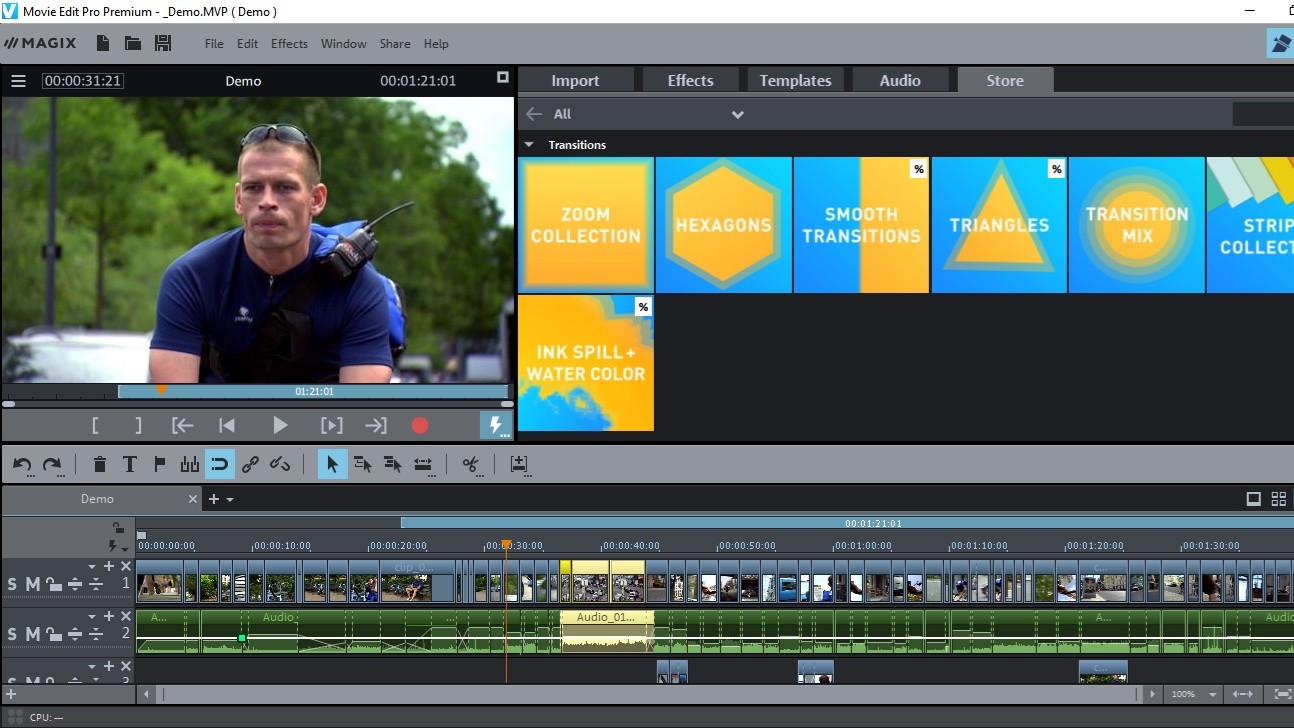
If you like these Templates and Objects, or you’re looking for additional transitions, effects, and audio tracks, you’ll be pleased to know that you can purchase additional one via the app’s built-in Store.
New features
Since we last looked at this software, a few notable additions have been introduced.
A big one is support for 8K Ultra HD video. Now we didn’t have any 8K video to test this out with, so we’ll have to take Magix’s word on that, but it’s good that they’ve introduced this early.
There’s a few new templates that support videos shot on your phone in portrait orientation (as opposed to landscape), but the most interesting new features are only available to the Plus and Premium customers.
These include improved colour correction, multicam editing and layer masks. These are advanced tools which can help more experienced users get more out of their investment.
And speaking of investment, Premium owners also get access to NewBlue Filters 5 Ultimate at no extra charge, a package of effects to add that extra touch of professionalism to your end product.
Exporting
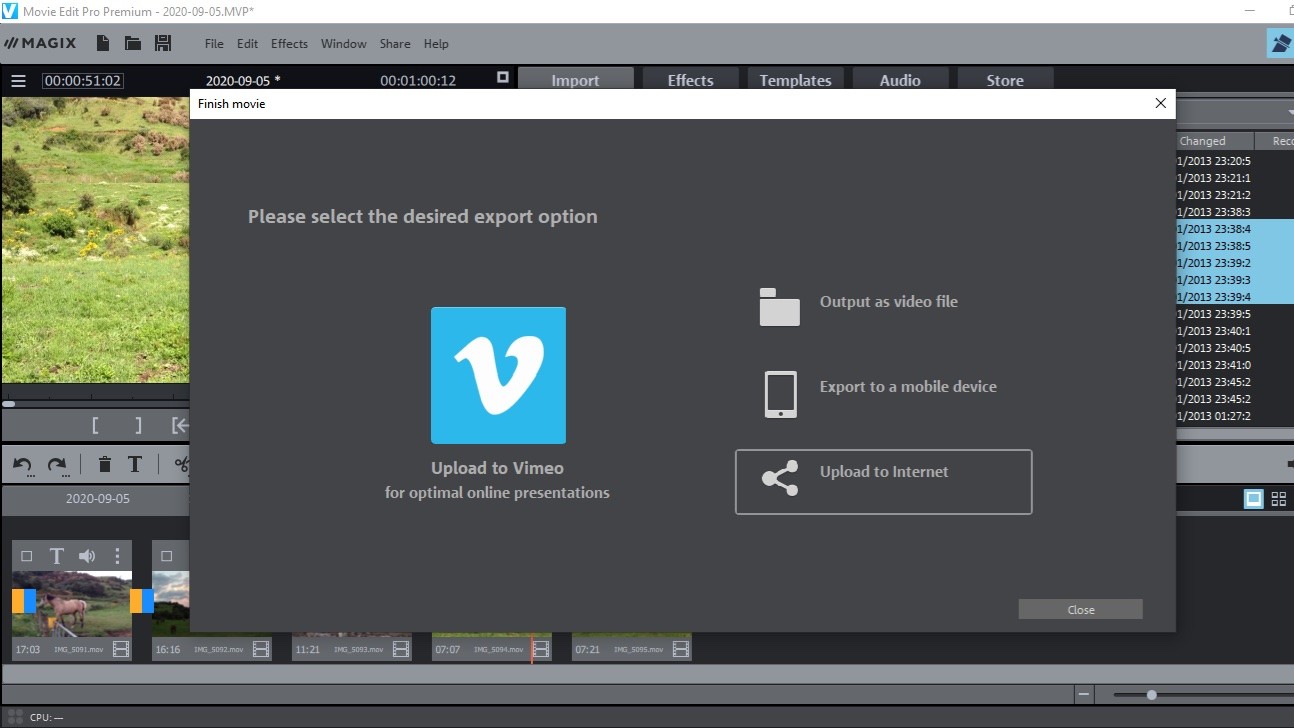
Once you’re ready to share your movie, the Export facility lets you save a rendered copy to your hard drive, create a version compatible for a mobile device, or upload it to the web. The app’s social media site of choice, and the one very prominently displayed, is Vimeo, but you can also upload to YouTube (via the Upload to Internet button) if you prefer. Should you still use DVDs, Movie Edit Pro Premium lets you burn your movie to disc and even allows you to create basic navigation menus.
Final verdict
Movie Edit Pro Premium has a few flaws and annoyances but it covers much more than the basics and even includes automated features which could be a boon for novice users.
Overall, this is an app that can grow with you as you perfect your craft, and is a great step up from any free alternatives, for a reasonable price.
We also tested the best video editing apps for phones and tablets.
Steve has been writing about technology since 2003. Starting with Digital Creative Arts, he's since added his tech expertise at titles such as iCreate, MacFormat, MacWorld, MacLife, and TechRadar. His focus is on the creative arts, like website builders, image manipulation, and filmmaking software, but he hasn’t shied away from more business-oriented software either. He uses many of the apps he writes about in his personal and professional life. Steve loves how computers have enabled everyone to delve into creative possibilities, and is always delighted to share his knowledge, expertise, and experience with readers.


