5 ways Autodesk Flow Studio improves on traditional VFX workflows
Could Autodesk’s Flow Studio revolutionise your VFX workflow?
In March 2023, Wonder Dynamics introduced the world to Wonder Studio, an AI tool for film and TV. It was designed to help filmmakers create what would otherwise be complex CGI and VFX on a very tight budget. So impressive was the technology, Autodesk bought the company in May 2024.
In the Summer of 2025, Autodesk launched freemium access to the renamed Flow Studio, meaning some parts can be used for free - which, let me say right here, is incredible. Of course, you can’t expect amazing things with a free account, but Autodesk do offer you 300 credits each month (one second of live action capture costs around 20 credits) to check it out.
You’re also given 1GB of online storage (because everything’s done online). The free tier only allows you to track a single actor per shot, irrespective of how many there are in the frame, and as you probably expect, your output is watermarked. Perhaps the worst aspect of the free tier is that your maximum export resolution is locked at 720p.
But that’s because this is simply designed to wet your appetite, and entice you to subscribe to the service. You’ve got ‘Lite’, ‘Standard’, ‘Pro’ and ‘Enterprise’ tiers, each offering higher-end goodies to sweeten the deal. For instance, ‘Lite' bumps the export resolution to 1080p, and ditches the watermark, ‘Standard’, increases the resolution to a maximum of 4k, and introduces more advanced tools, while ‘Pro’ offers you 12,000 credits each month, and even allows you to export the character(s) with a transparent background. This is just a sample: each tier offers much more than that, but hopefully, you get the idea.
You can try out Autodesk Flow Studio by clicking here.
No Expertise Required
OK, cards on the table here: although I’ve got decades of experience in filmmaking, I’m not a pro-VFX guy. But in a way, that’s part of the beauty of Flow Studio: at its simplest, anyone can use it, even those with absolutely zero experience in the matter.
Now, creating VFX characters can be a complex, time consuming process. One way to circumvent most of the animation complexity, and to end up with more life-life movement, is to film an actor performing the action you’re after. For this to work best, you’d ideally need a motion capture suit. Having a green screen studio would come in handy too.
Better still, you need specialised hardware to record the camera’s motion so should you need to recreate a digital environment, you’ll be sure to reproduce the exact same movement, seamlessly blending fiction with reality. You then get a computer to analyse said motion, and apply it to your digital character and background. All of this requires specialised hardware and software that doesn’t come cheap.
Amazingly, Flow Studio does away with all of that: shoot something with any camera, even with your phone, and it should be good enough for Flow Studio to do something impressive with it. I say ‘should be’, because you’ve got to be sensible: blurry shots, bad contrast, or shots where it’s hard to easily distinguish between the subject and their background, will unsurprisingly yield poor results. But the point is, as long as you can see the subject clearly, you should be ok.
Log In
So now you’ve got your footage, what next? You login to Flow Studio - yes: everything is done online, via your web browser. This has the advantage of you being able to access your account from any computer, and not have to invest in the latest and greatest (and most expensive) machine: Autodesk’s servers will take care of the grunt work for you.
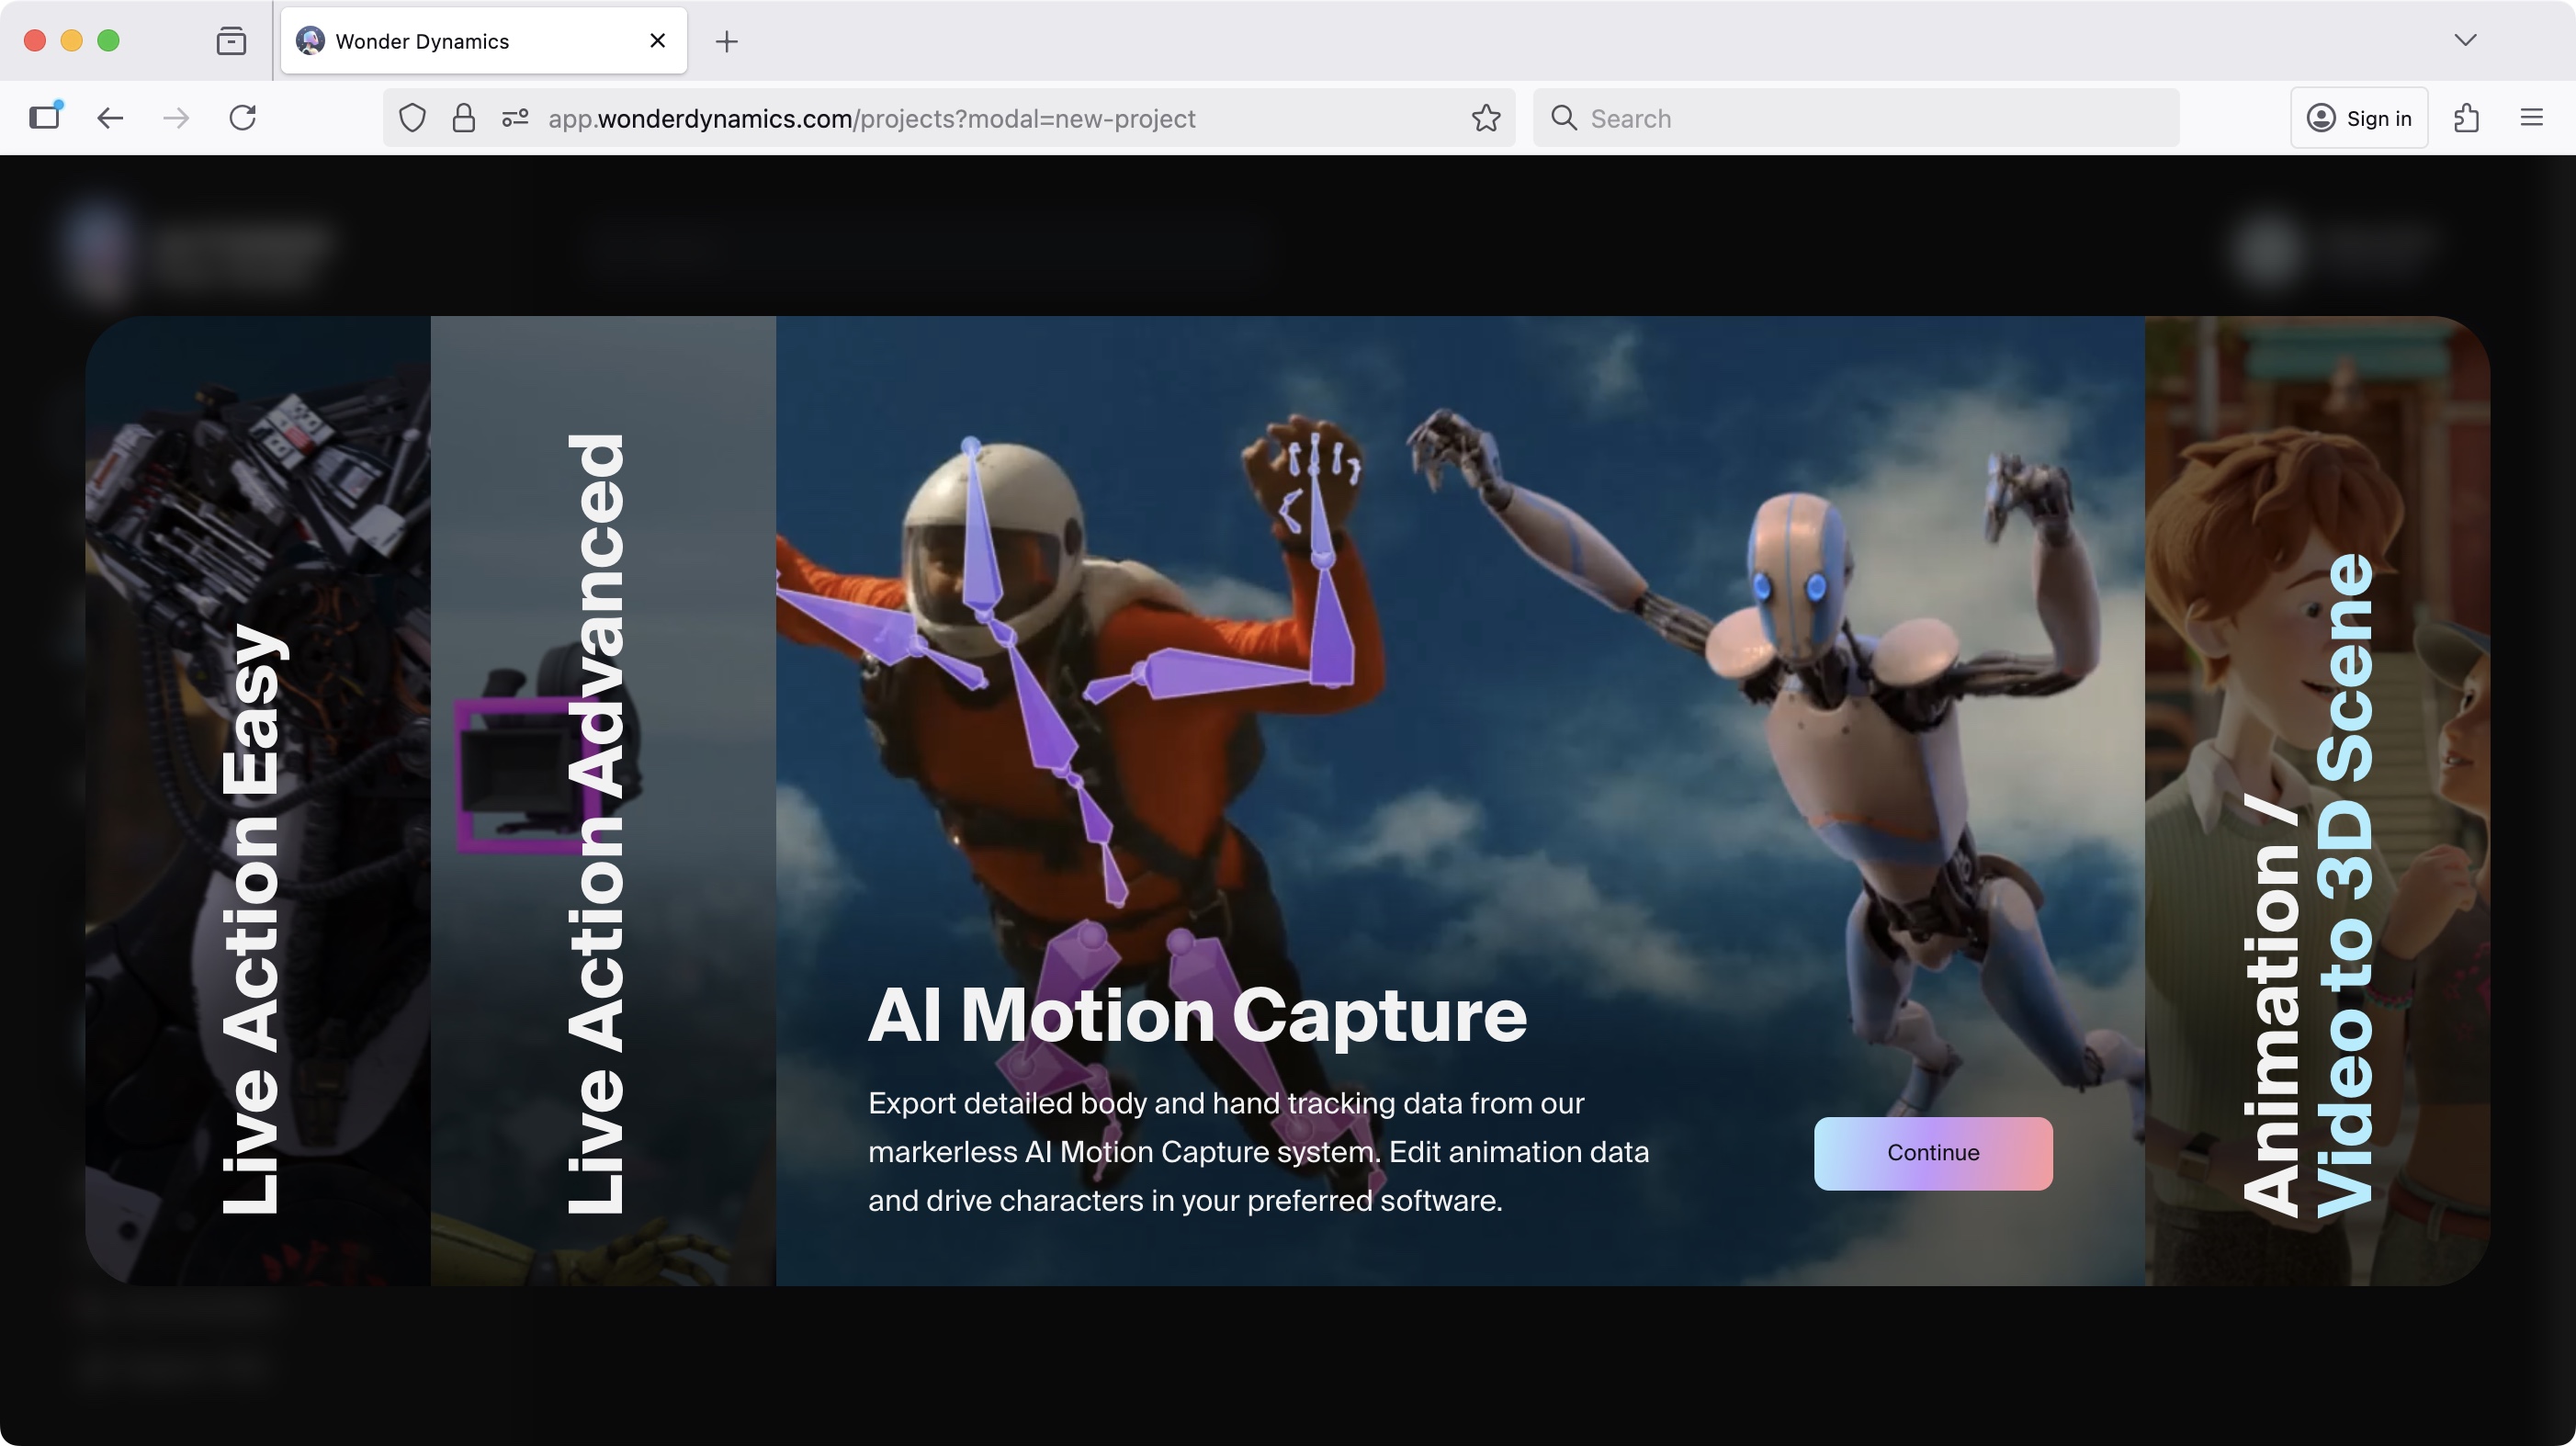
When you create a project, you’re offered four options, two of which you can explore for free. These are ‘Live Action Easy’, where Flow Studio analyses the actor in the scene and replaces them with a CGI character of your choosing, with minimal input from you, and ‘AI Motion Capture’, where your actor’s motion is analysed and converted into data you can upload into a dedicated VFX app so you can manipulate it further.
The other two are called ‘Live Action Advanced’, which grants you changeable parameters to help you fine tune the automatic analysis, and ‘Animation/Video to 3D Scene’, which allows you to not only replace the actors, but the entire background with a completely CGI-generated one as well.
If you’re thinking of trying it for free while reading this piece, we’ll explore the ‘Live Action Easy’ mode together. Having logged in to Flow Studio, the webpage will grace you with a list of templates and characters you can use. That’s right: although it’s entirely possible for you to upload your own characters into the service, if that’s beyond your skill level, worry not, as there are 11 you can play with for free.
Let it do all the work
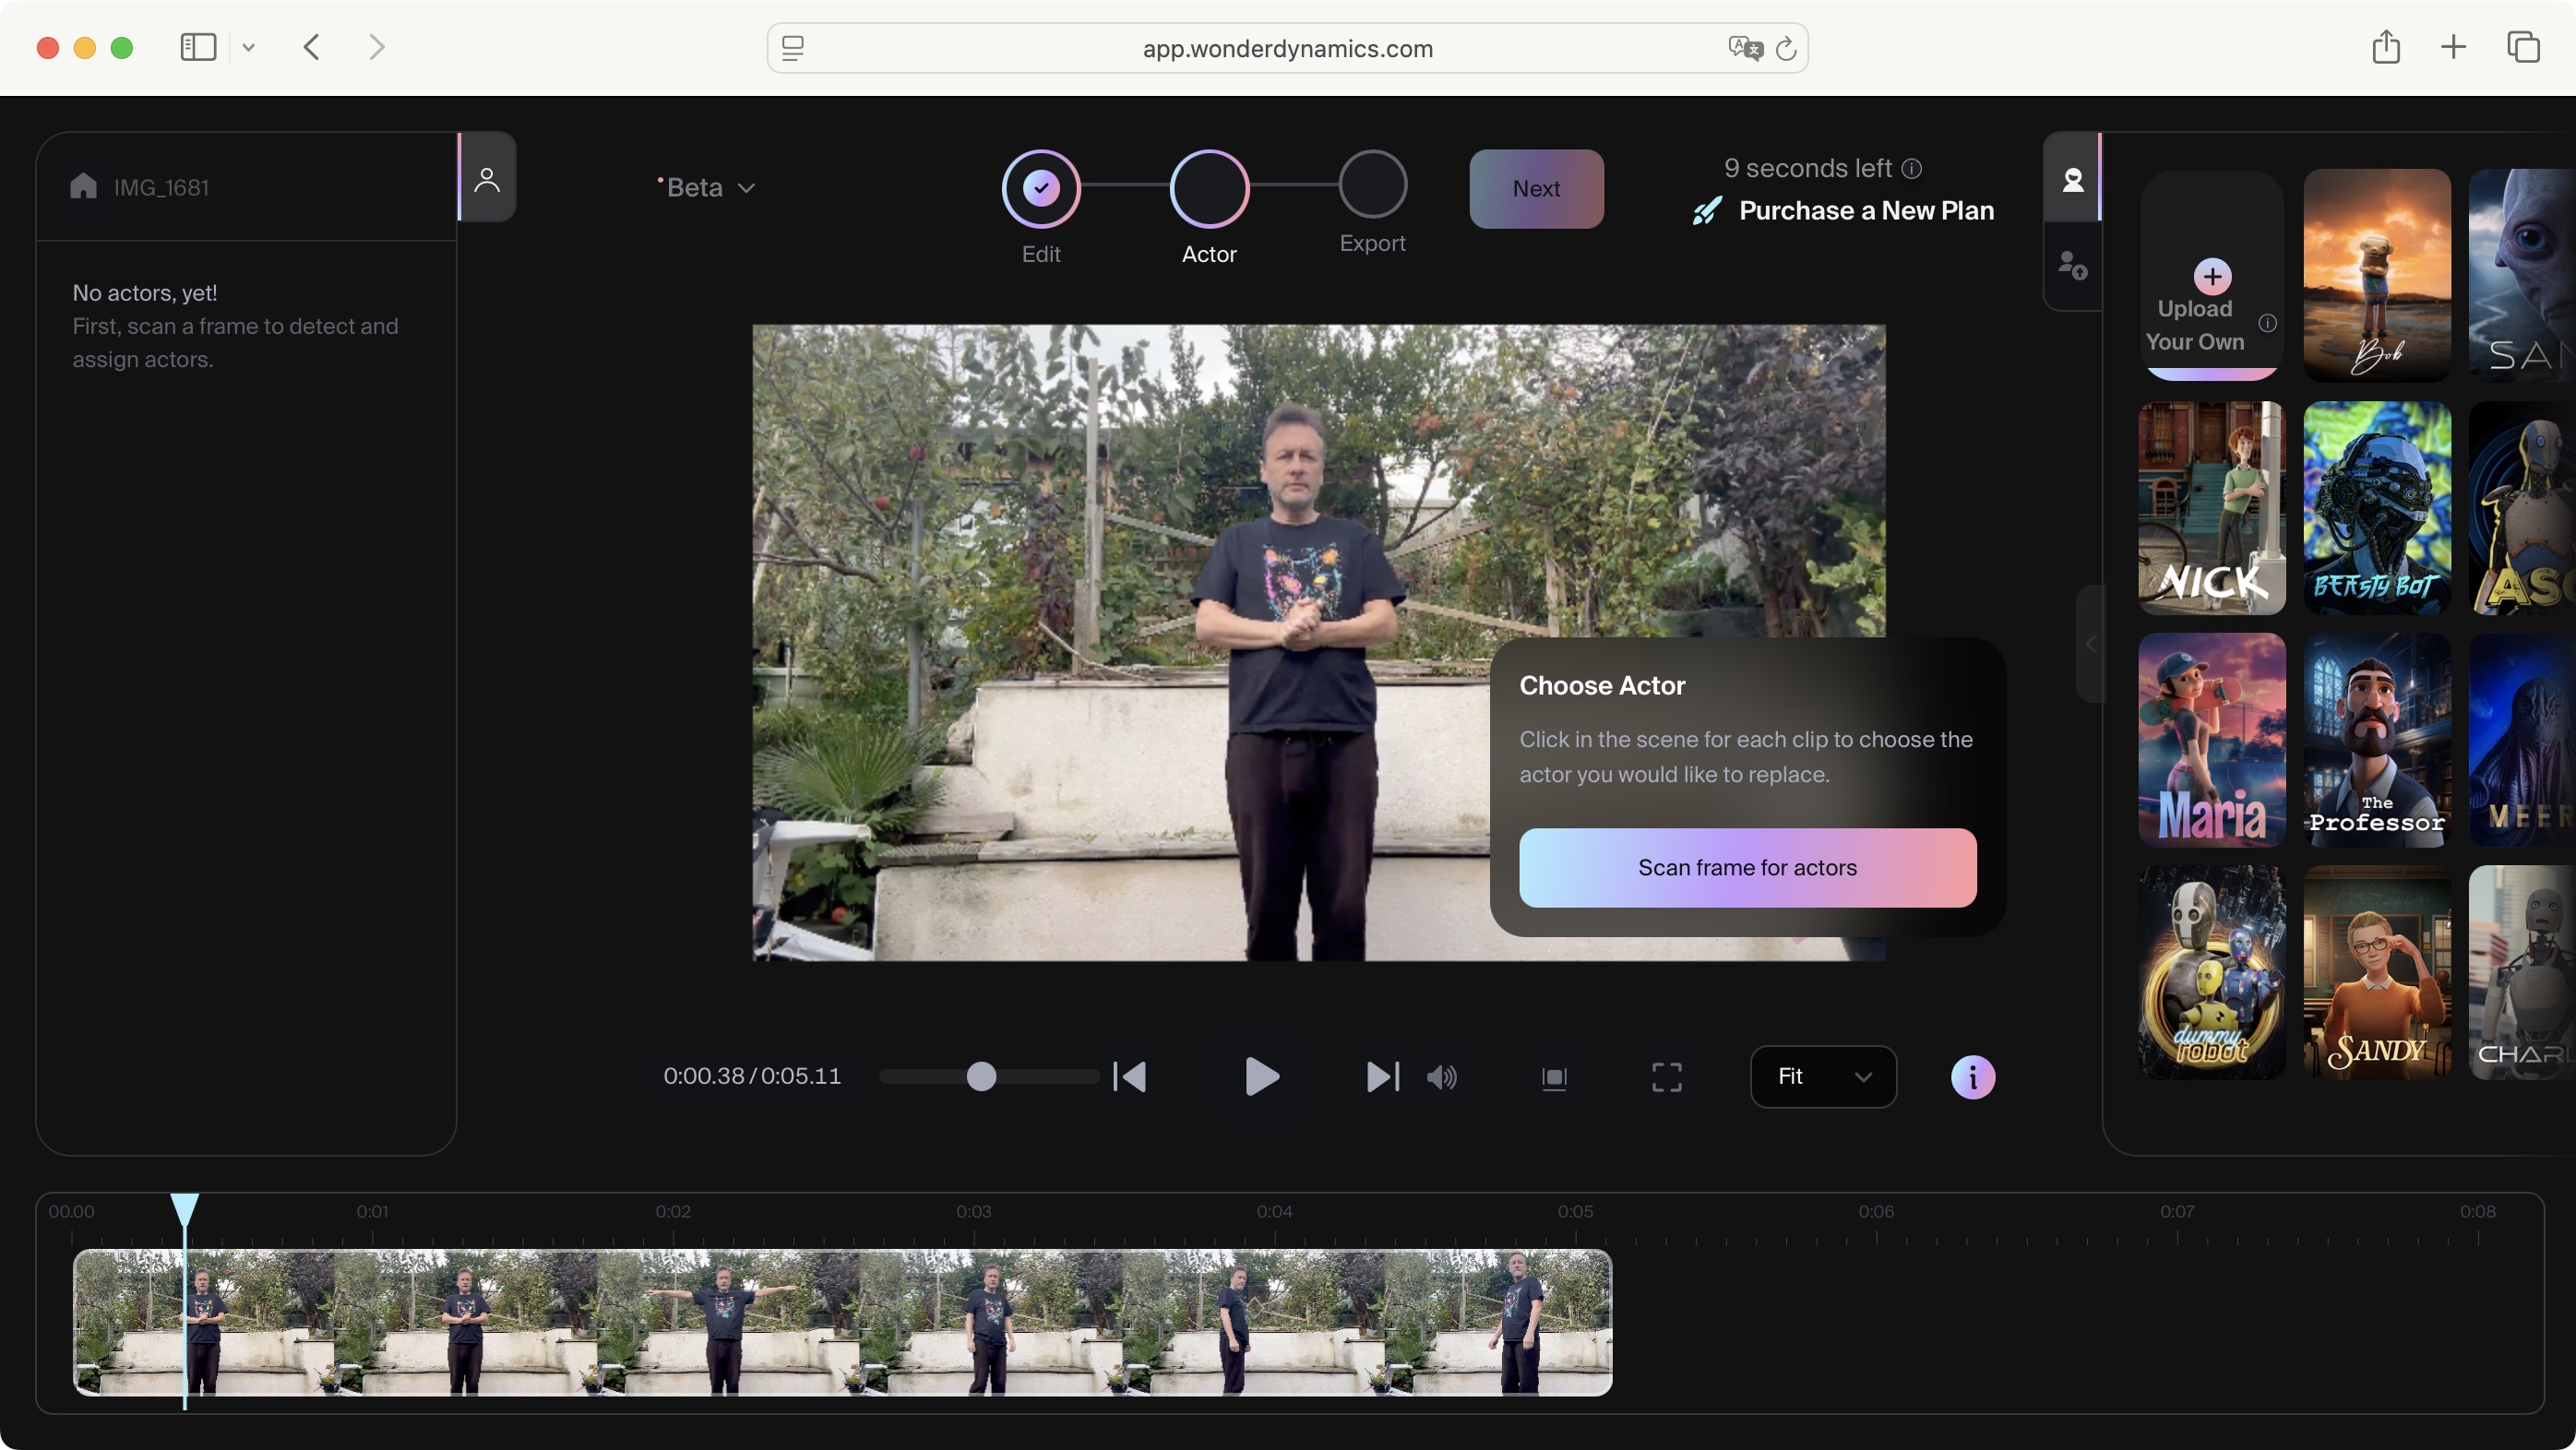
Let’s start by dragging the video clips you’d like to use into the interface’s sidebar on the left. You can drag as many as you need, although do keep an eye out for how many seconds you have left in your monthly allotment. This can be seen top right of the interface. It isn’t affected by how many clips you add in that sidebar, but if even one of those is longer than what you’re allowed to work with, it’s clear that won’t work. The free tier lets Flow Studio convert up to 15 seconds of footage. This isn’t much, so use it wisely. Perhaps trim the clips you’d like to work with prior to importing them into Flow Studio.
Drag the clip from the sidebar onto the centre of the interface, then click on ‘Next’, followed by ‘Scan frame for actors’. Flow Studio will be able to detect all the characters in the frame, but the number you can alter will depend on your tier: as I mentioned above, the free one lets you convert a single person. For ‘Lite', that’s two, ‘Standard' is three, ‘Pro’ is four, and ‘Enterprise’, seven (as always, the more you pay, the more you get).
But don’t let that dissuade you from trying the service out: even altering a single actor is impressive in itself. After a few seconds, Flow Studio puts a thin frame over the actor(s) it found. All you have to do now is select a CGI character from the right, be they robots, cartoon humans, or aliens, and drag it onto your chosen victim - I mean the actor to be replaced. Clicking on Next once more takes you to the export menu.
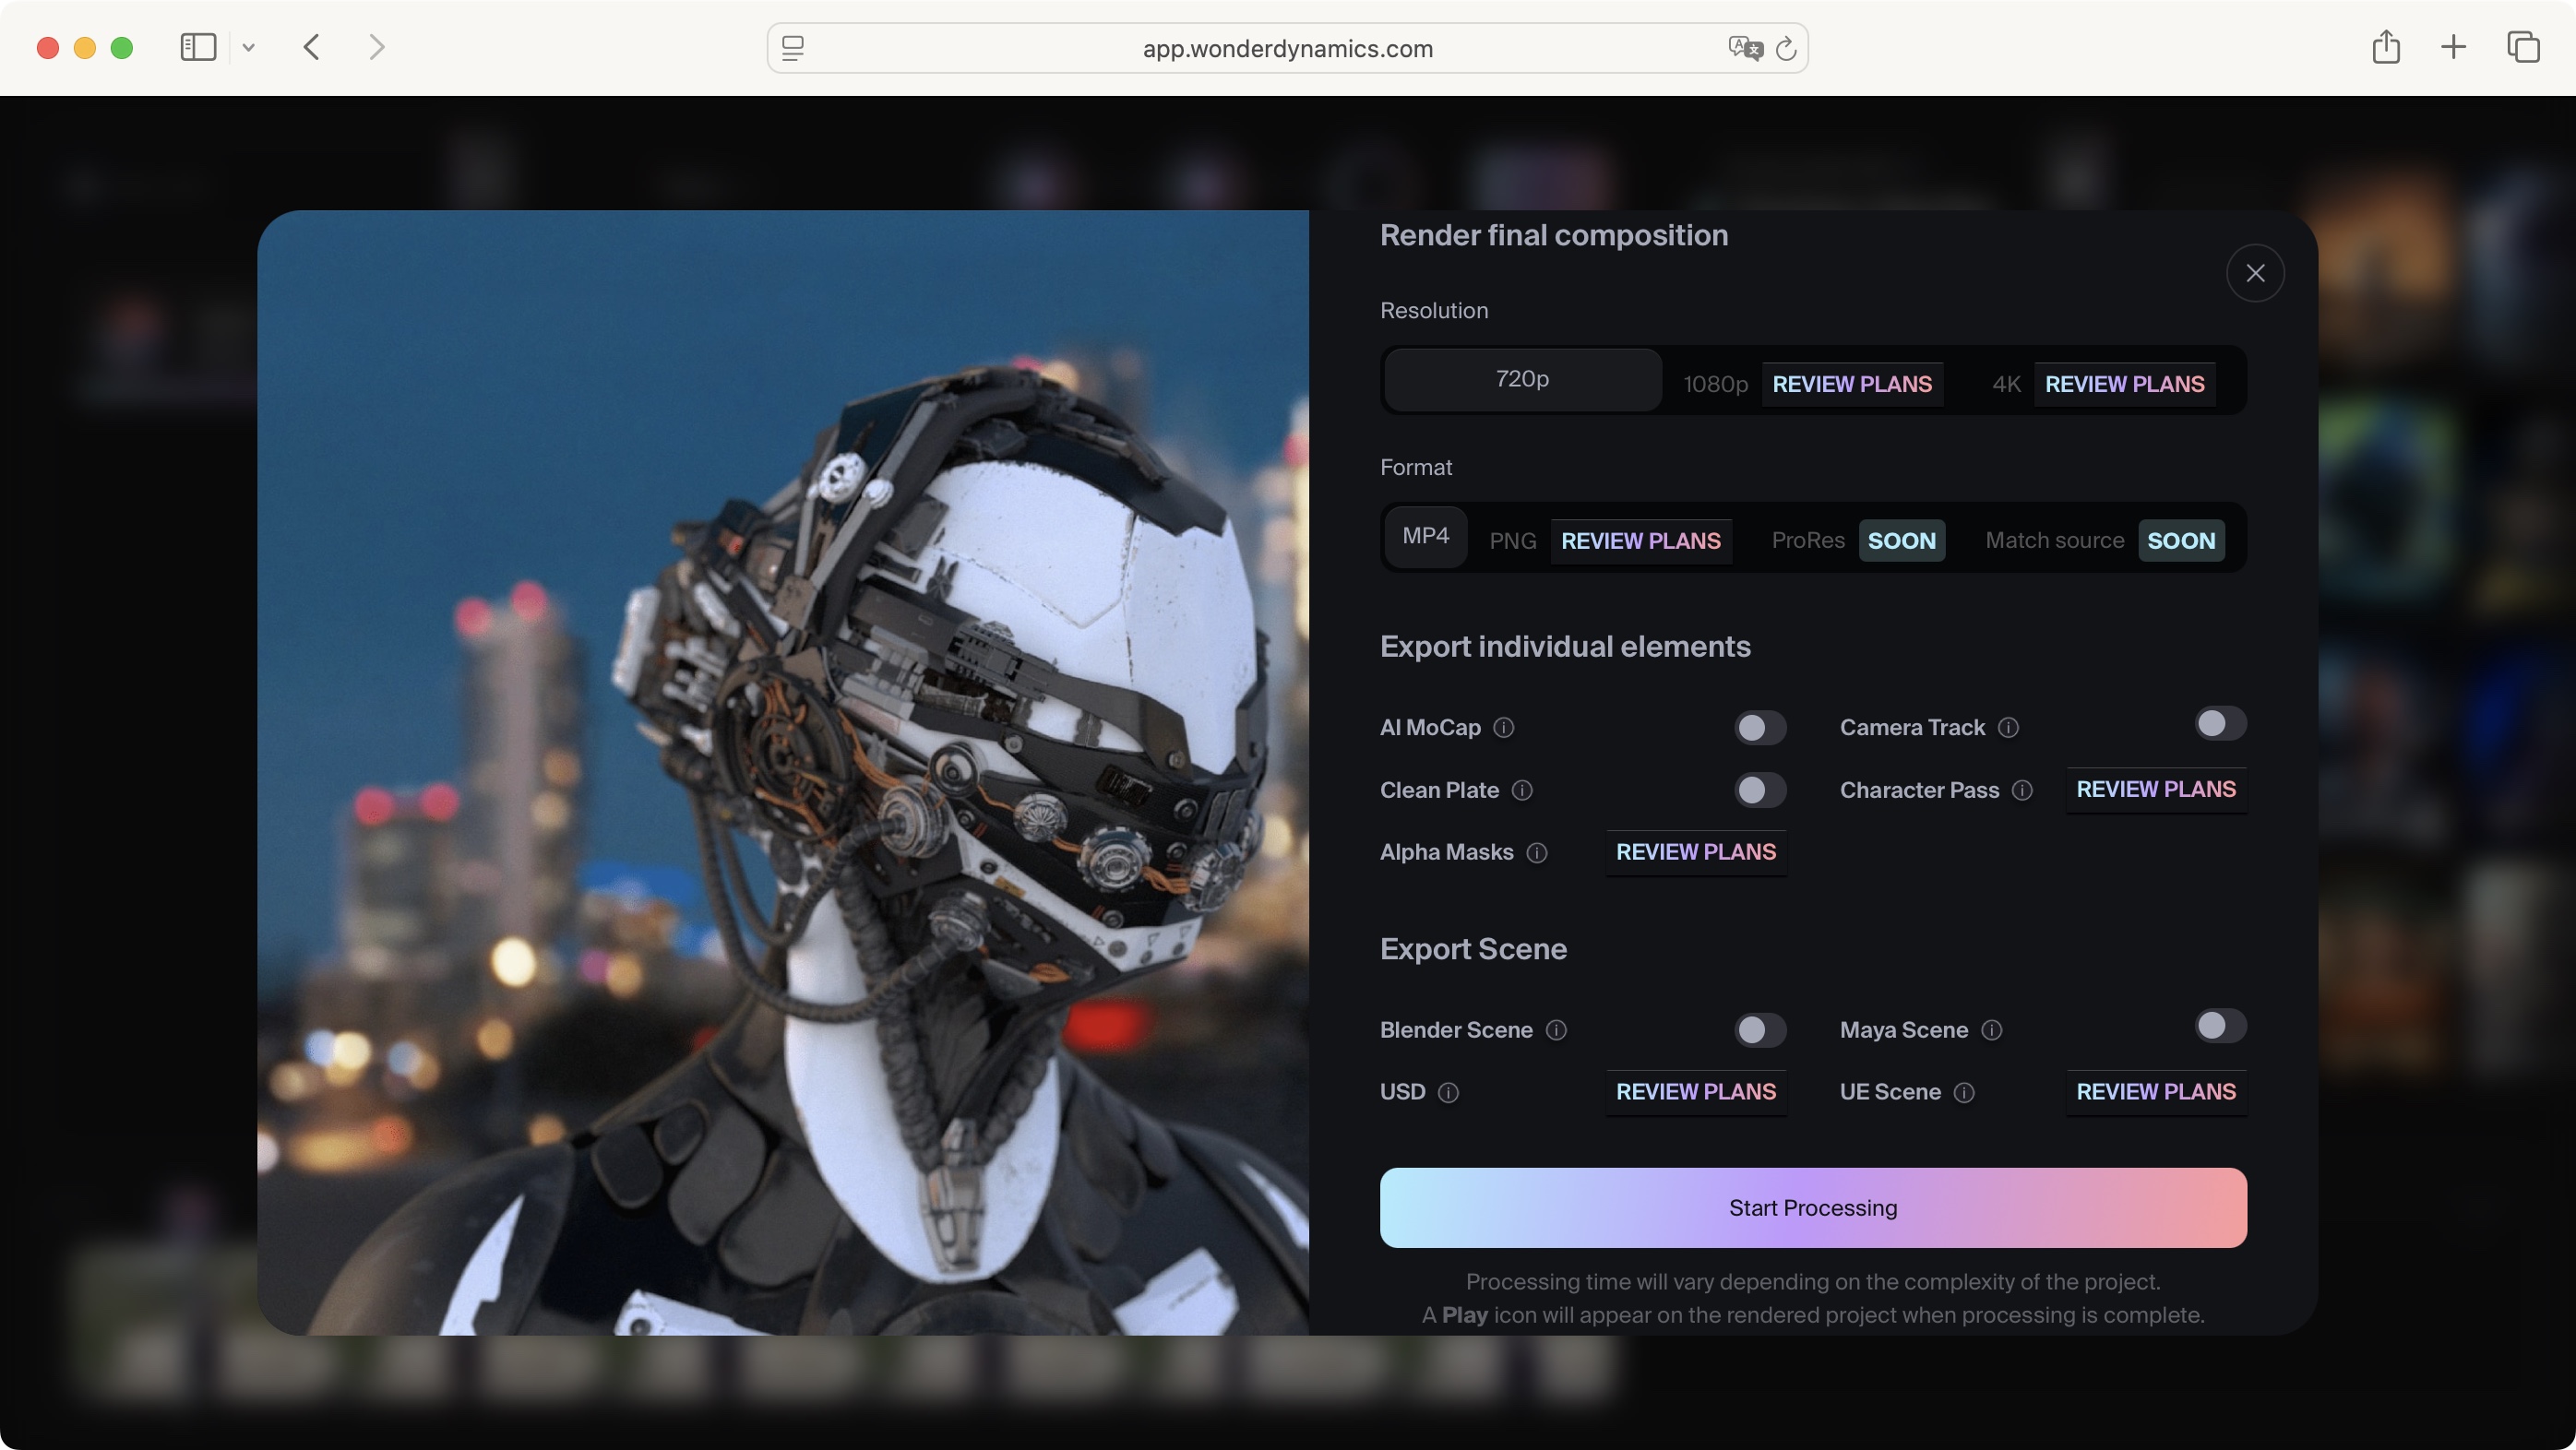
That’s right: you can’t actually preview the effect before submitting the work - you’re putting a lot of faith into Flow Studio to get the work done, but trust me: it’s worth it. Your export options depend on your chosen plan, and also on the clip’s resolution.
I found a few options to be very interesting, such as the ability to export an FBX file with detailed body and hand tracking data. You also have the ‘Clean Plate’ option, which recreates your shot with the actor(s) removed, and ‘Camera Track’, which uses special algorithms to track the camera movement so you can recreate its motion digitally.
All of this gives you the data you need to import the files into a dedicated VFX app such as Blender or Maya, with most of the grunt work already done for you.
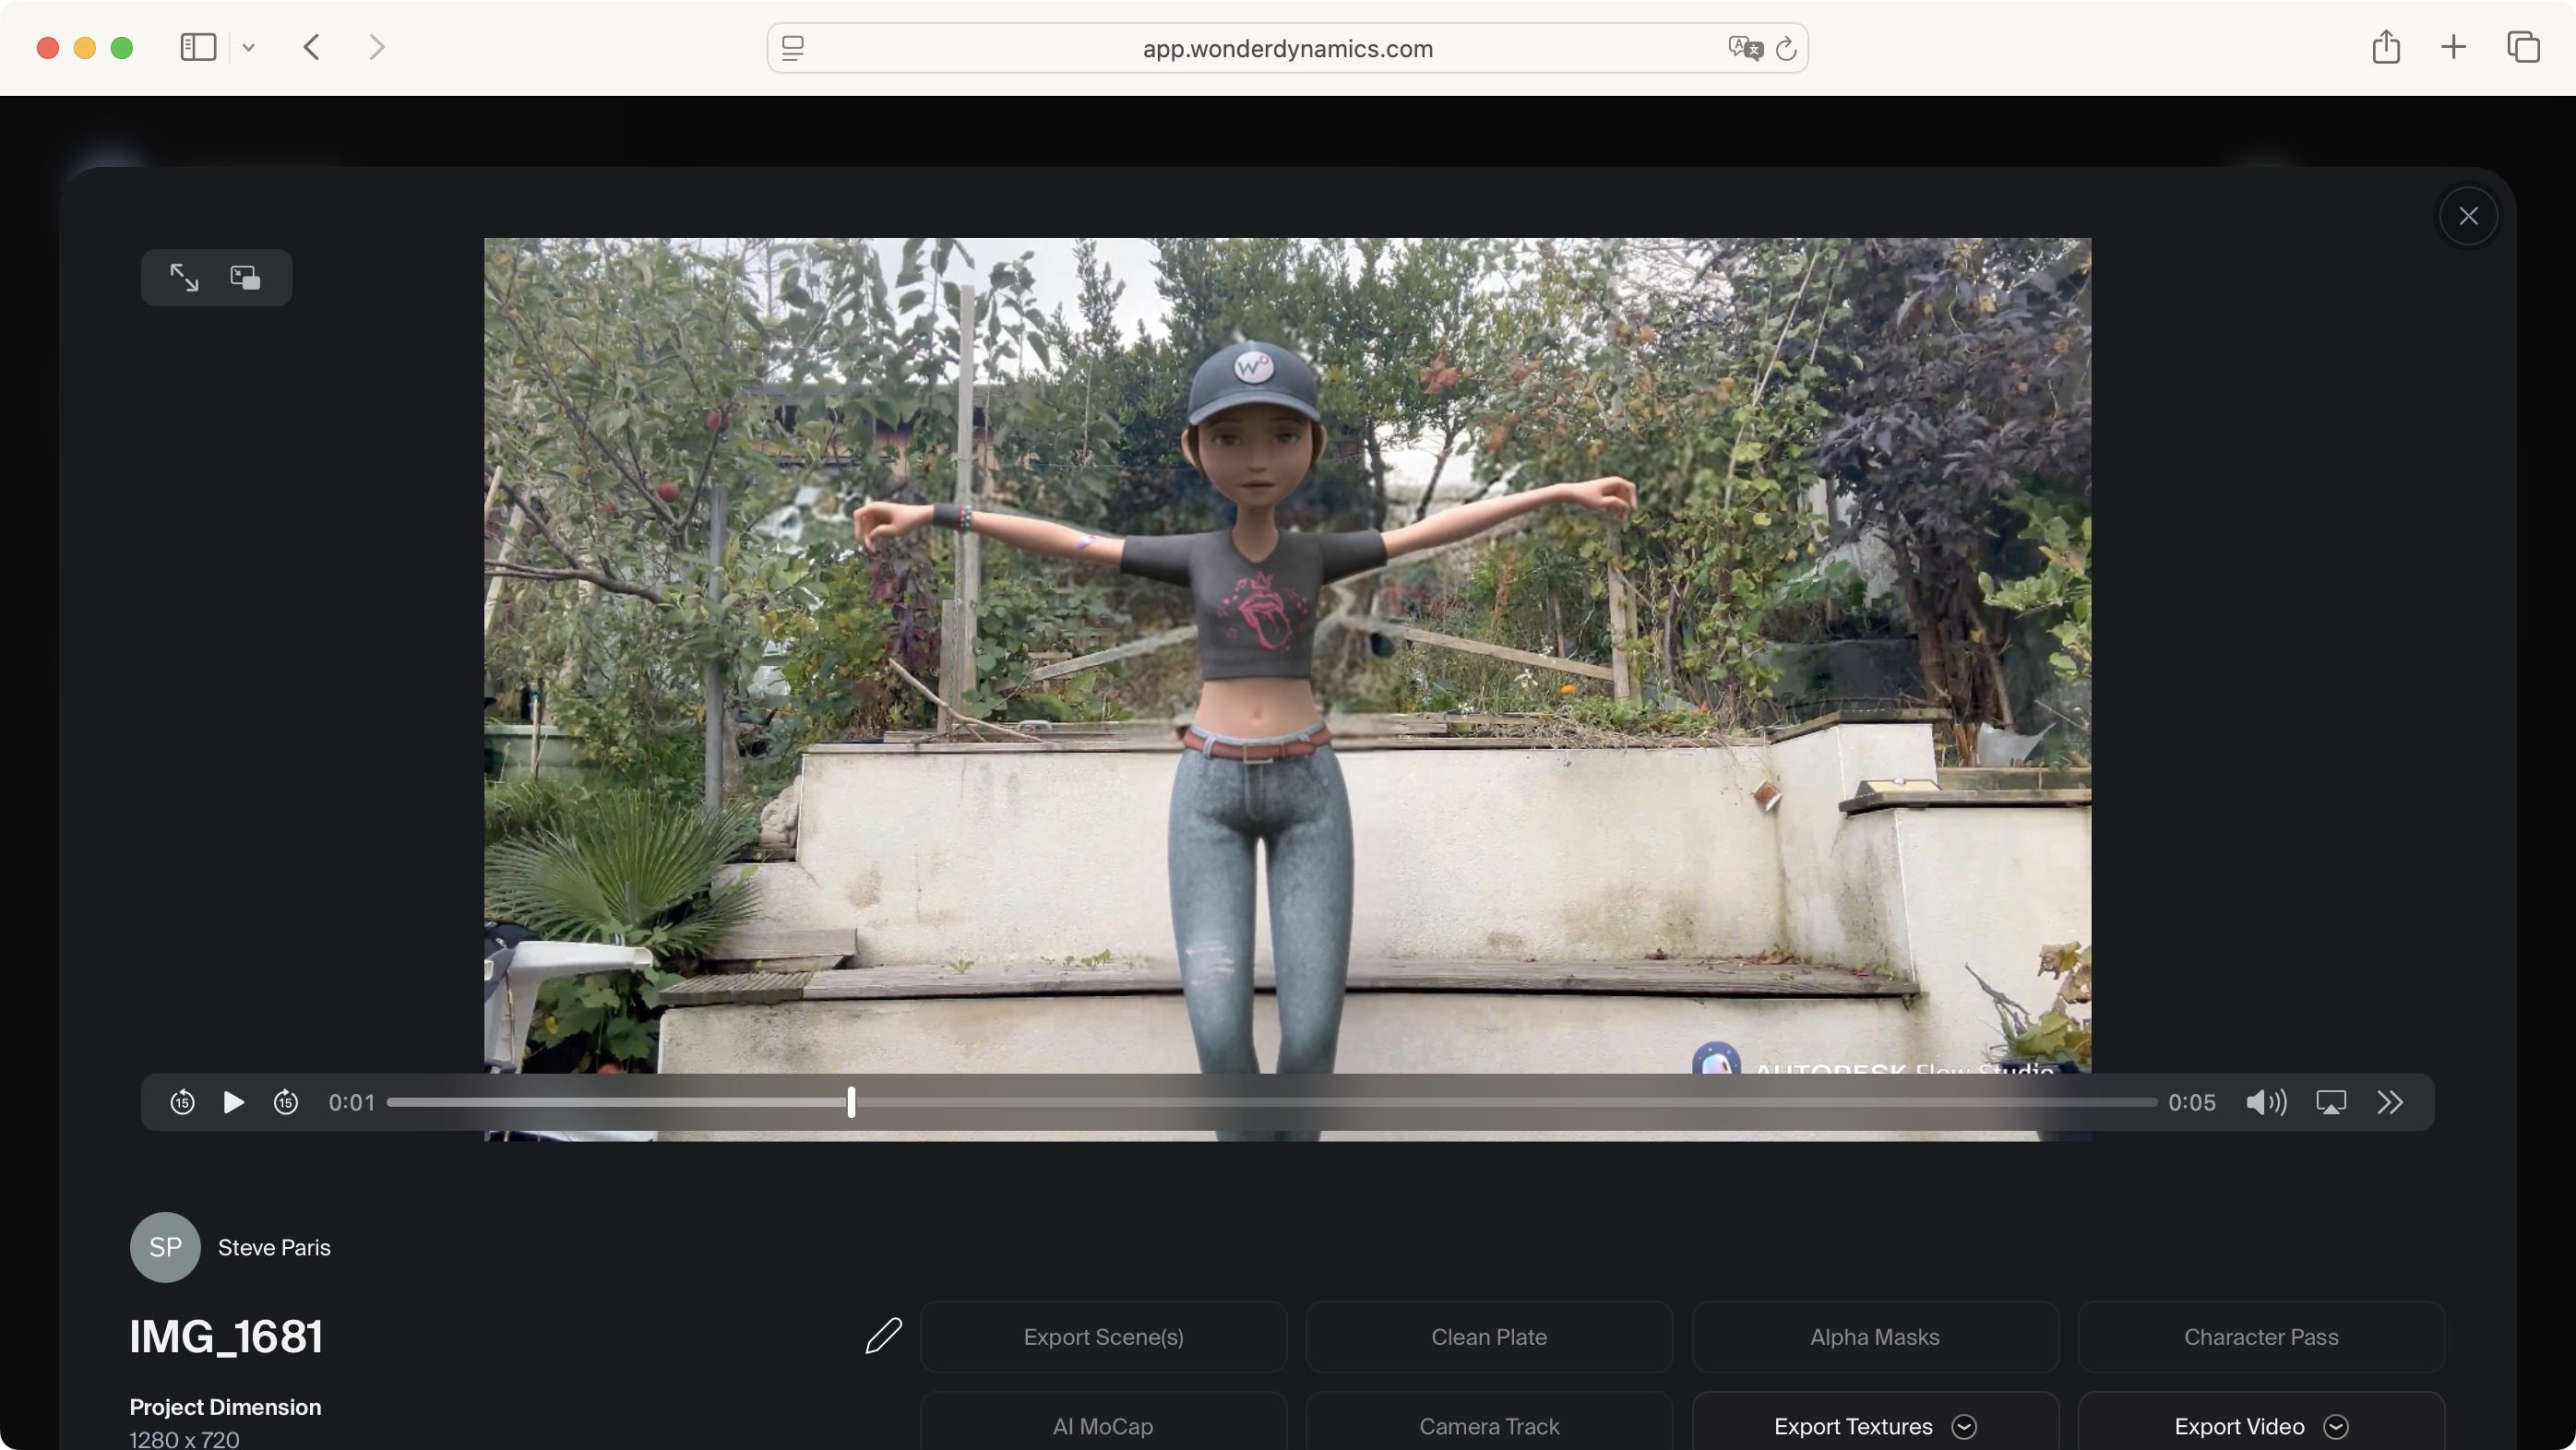
The process will take a few minutes (Flow Studio always seems to state it’ll take 40 minutes, but I always got my results much quicker than that), after which you can play back your altered footage.
The Results
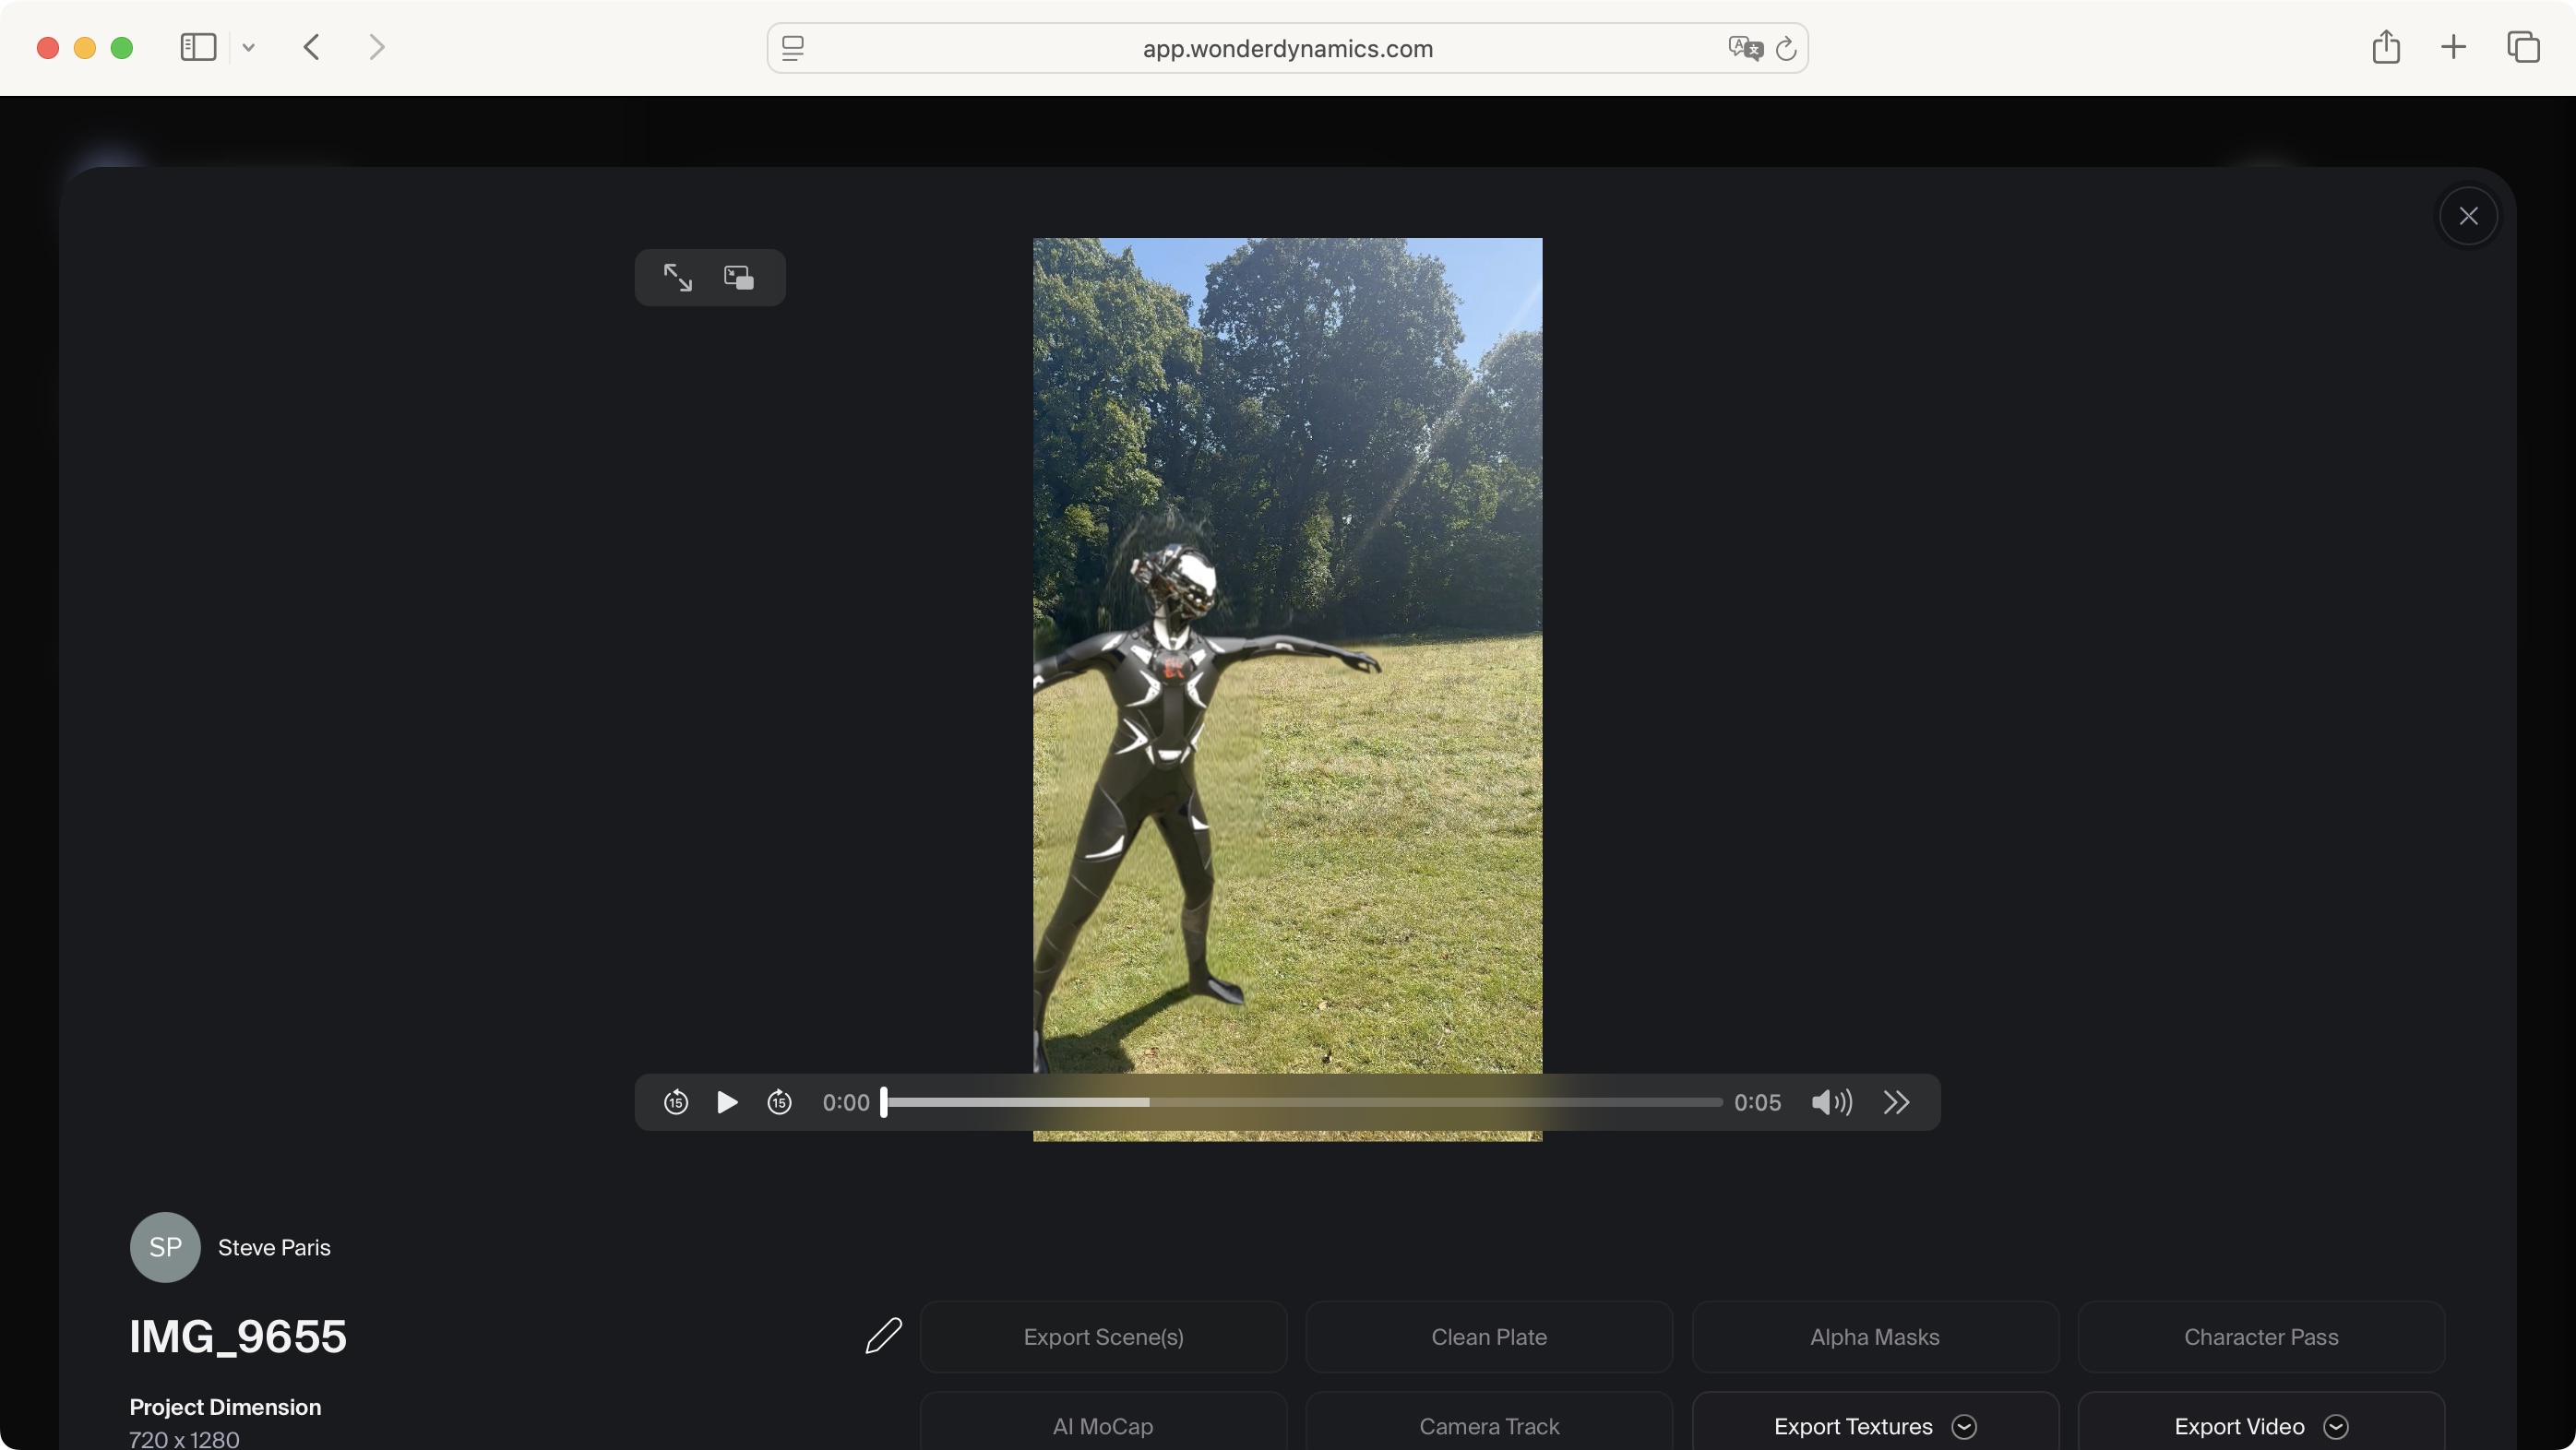
I must confess, I was incredibly impressed. Even on ‘Easy’ mode (the one anyone can try for free), the results were truly fantastic - not perfect, mind, but we’ll get to that a little later.
For instance, I had one shot where a character throws a ball using a sling. Only half of the character was in the frame (it wasn’t a particularly good shot, but that was the point of the exercise). The CGI character matched the movement perfectly, but what was more impressive for me was how the background was digitally recreated where the original actor once stood - they were wearing a long coat, the replacement robot didn’t for instance, and you couldn’t tell - so the clean plate was truly excellent.
Blending the CGI character with the ambient light and shadows was also seamless, and not only that, but the camera panned to the right as the ball flew away, and Flow Studio applied motion blur to the robot as the camera moved out of frame. And all with me doing nothing, so imagine what you could do with the ‘Advanced’ version of this tool.
And best of all, there was no preparation. It was just a shot I happen to have in my camera roll. Flow Studio got to work without a fuss and did an excellent job to boot.
Honestly, I was more amazed by the clean plate. Replacing a character with another, without using a green screen is a nightmare, as if you haven’t got a shot of the background without any characters in it, how can you fill in the hole left by removing the actor? Usually, with a lot of VFX work to meticulously recreate the missing background. It seems Flow Studio does that without breaking a sweat.
I tried it with multiple backgrounds, including complex ones with various shrubs, greeneries, and structures… Flow Studio recreated it all automatically.
After such an impressive feat, it felt like recreating the movement of the actor and replacing them with a CGI variant was child’s play in comparison, but still that worked flawlessly too - for the most part. There are some very powerful and clever algorithms doing all the hard work in the background, and, it’s important to stress again, without me having to do anything.
But, as always, your mileage may vary, which is where the ‘Advanced’ side could come in handy. For instance, one clip I used, even though it was a still shot of two people chatting - with only minor movements on the part of the actors - led to a problem with the first few frames of the clip: the actor wasn’t replaced, then the CGI character was overlayed, and only after 30 frames or so did the desired effect come into play.
Another issue occurred in another shot, when the actor put their hands on their thighs, but Flow Studio decided one of those arms should be behind them instead, while their hand was still seen in front… a weird glitch, which again, should be easily fixed in Advanced mode or in a dedicated app. It’s not perfect, but it’s pretty close.
Saving You Time
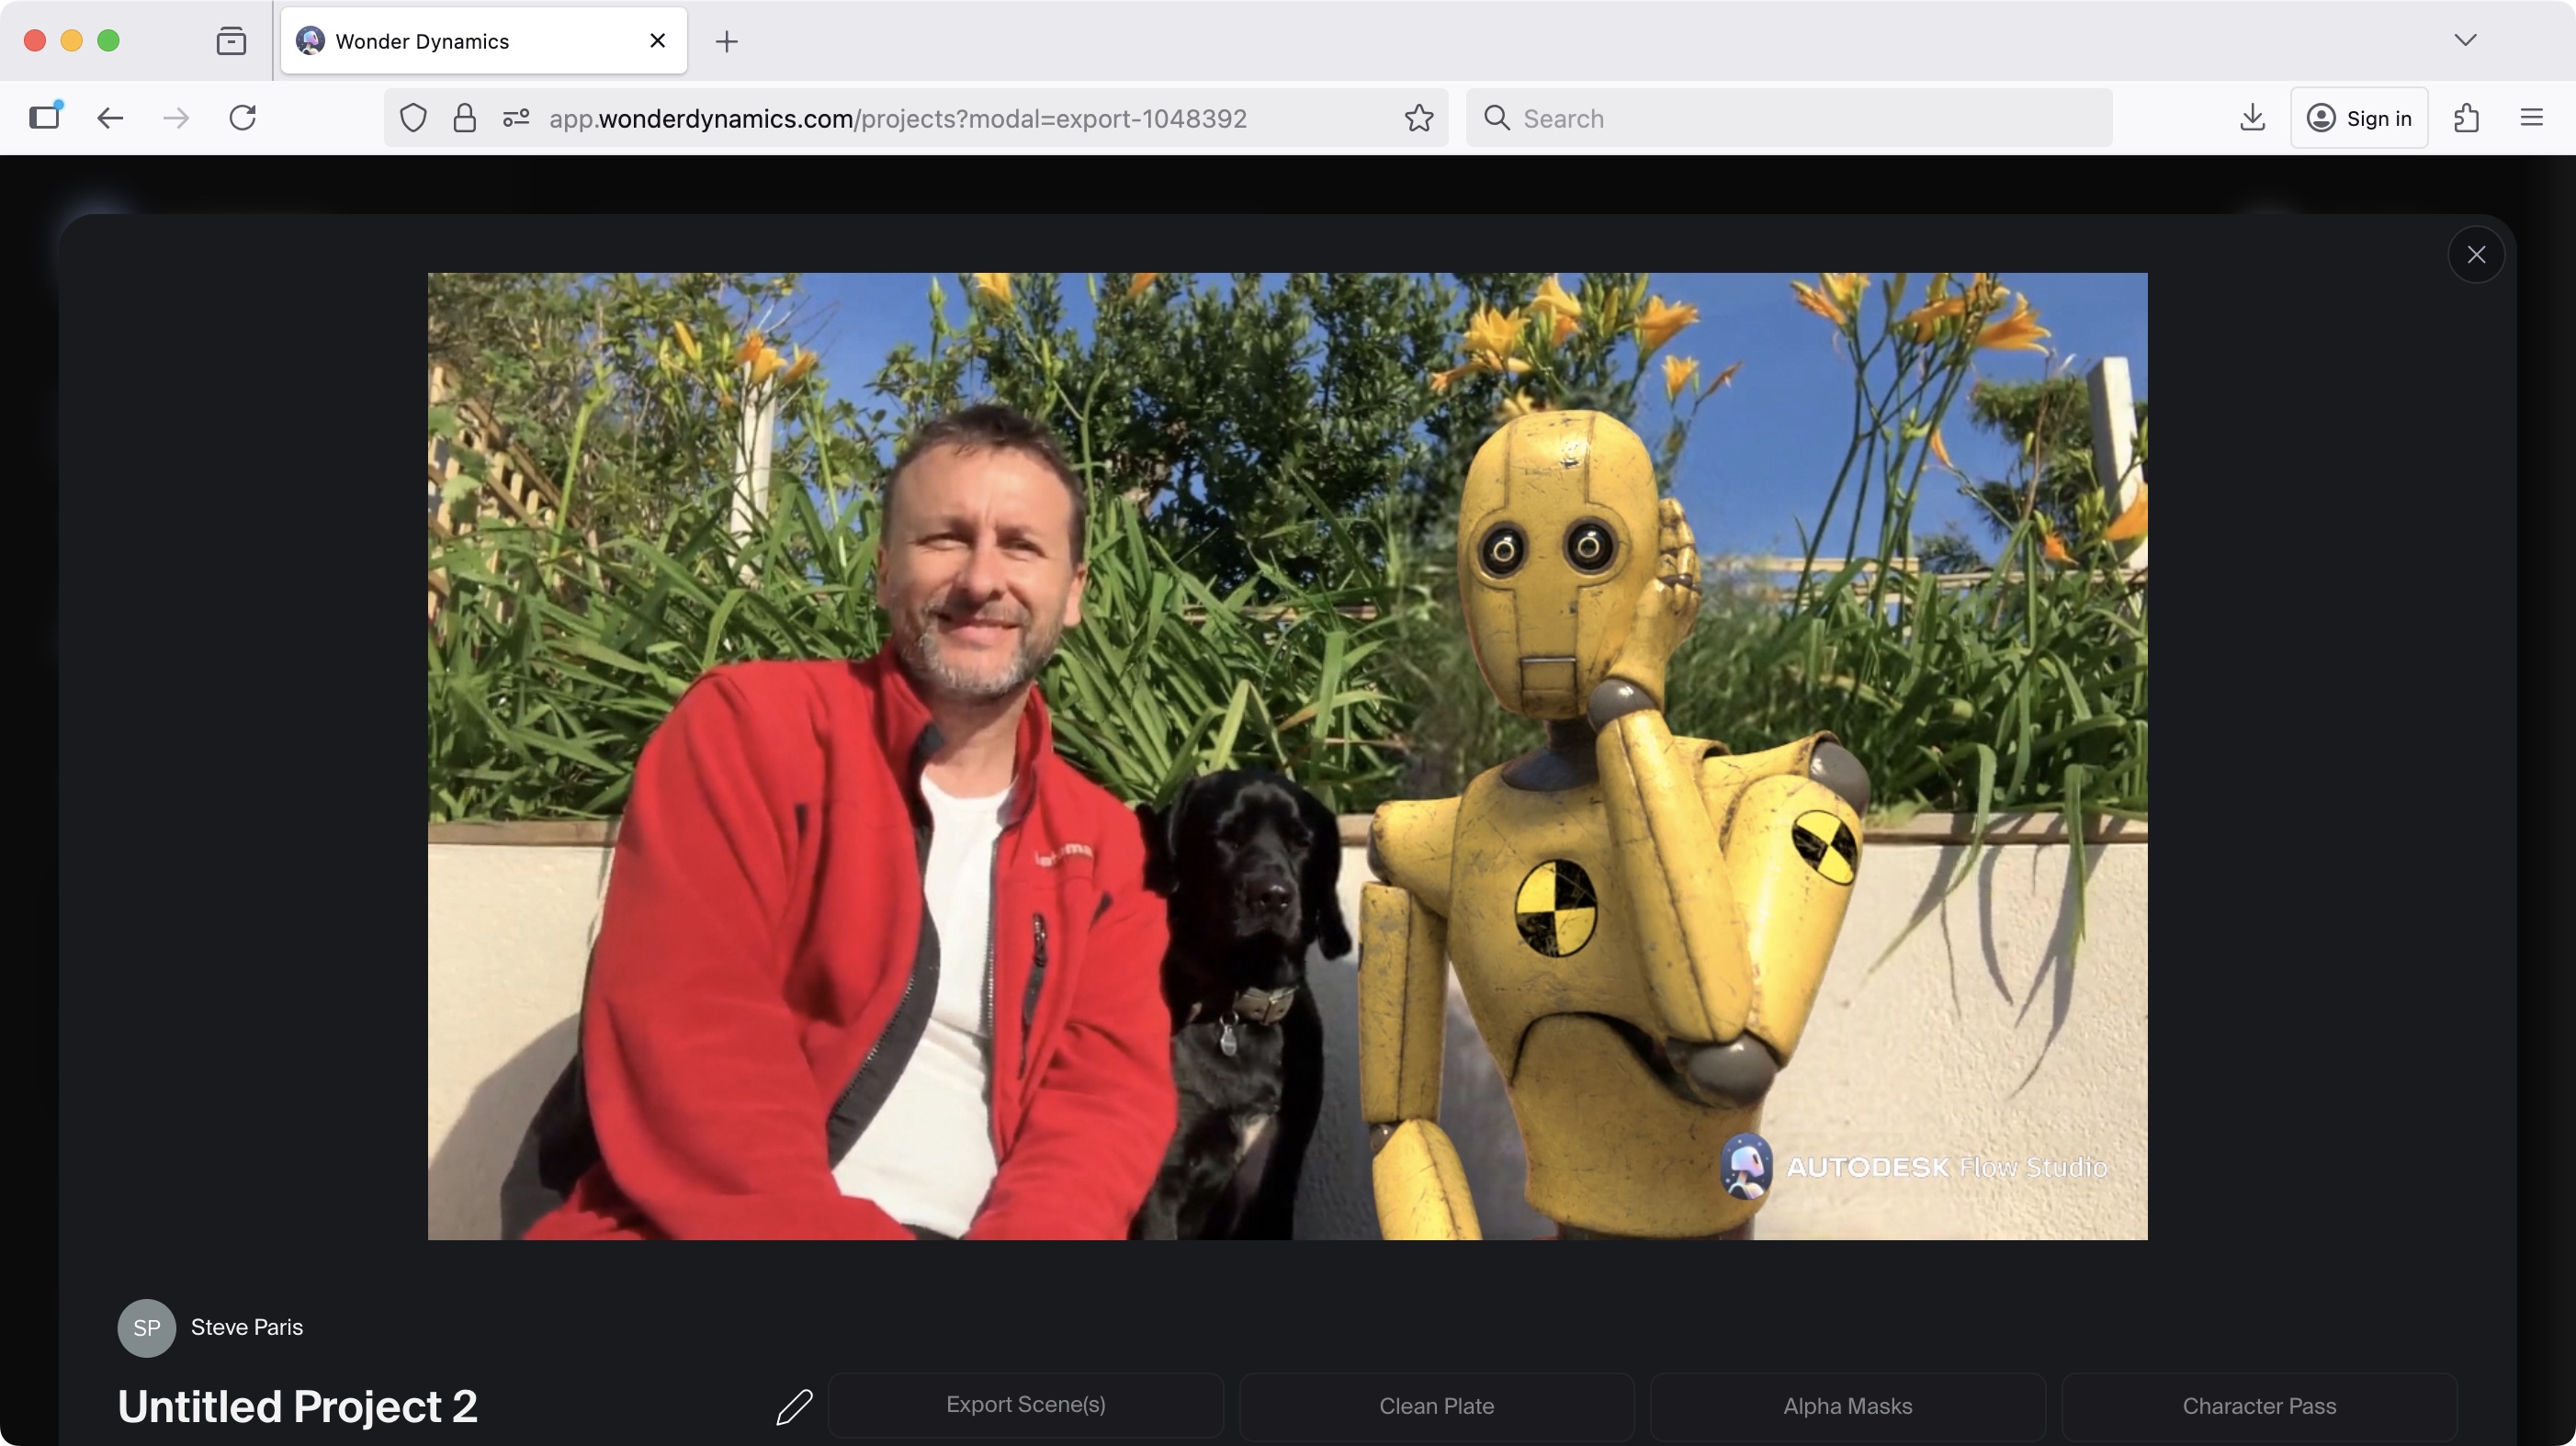
Traditional VFX work is expensive and time consuming, but Flow Studio aims to slash both of those, and as far as I could tell, did a truly excellent job, even with minimal input from myself. So here are the five ways I see Flow Studio helping with the workflow:
You don’t need to invest in the latest and greatest hardware (which, let’s face it, costs a pretty penny), and instead rely on Autodesk’s own powerful servers to take care of all the complex computation for you.
It handled the animation and the lighting on its own, so the CGI character is seamlessly blended into the scene.
Flow Studio created a truly excellent clean plate, which you can export as is.
It can turn animation and movement into a data file which you can import into Maya or Blender to refine it further.
It can track your camera movement, to help you create a CGI scene which will blend perfectly with the recorded movement.
Pros should immediately see the potential of how Flow Studio can be integrated into their workflow, while amateurs can also also enjoy a few seconds of fun with results which are, although not always perfect, nevertheless pretty darn extraordinary.
Sign up to the TechRadar Pro newsletter to get all the top news, opinion, features and guidance your business needs to succeed!
Steve has been writing about technology since 2003. Starting with Digital Creative Arts, he's since added his tech expertise at titles such as iCreate, MacFormat, MacWorld, MacLife, and TechRadar. His focus is on the creative arts, like website builders, image manipulation, and filmmaking software, but he hasn’t shied away from more business-oriented software either. He uses many of the apps he writes about in his personal and professional life. Steve loves how computers have enabled everyone to delve into creative possibilities, and is always delighted to share his knowledge, expertise, and experience with readers.

