How to upgrade the SSD in your business Ultrabook
Bonus: you'll also gain a high capacity external USB drive
Sign up for breaking news, reviews, opinion, top tech deals, and more.
You are now subscribed
Your newsletter sign-up was successful
1. The cloning method
Cloning a drive saves time in that it creates a twin of whatever is on your existing system. Once the drive is cloned, you can pop the new drive into your system and be up and running with all your apps, programs and files in place – there is no need to reinstall programs, and this saves time as you don't need to enter in serial numbers.
Before you clone your drive, be sure that your new drive is at least as large as the drive you're looking to replace.
For example, my Dell Latitude 12 7000 (E7250) comes with a 256GB mSATA format solid state drive. For the cloning to work, I'd need another mSATA SSD with at least a 256GB capacity. For this scenario, I purchased a new Samsung SSD 850 EVO drive in a 1TB capacity.
In addition to the new drive, you'll need free software and some cheap hardware. There are a number of options available for drive cloning software, and you'll need either a hard drive docking station or a cheap enclosure for your drive.
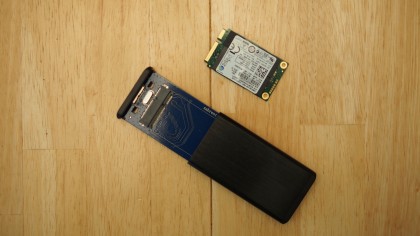
I recommend that you use a drive enclosure, but the process works the same if you're using a drive dock. With the drive enclosure, at the end of the cloning process, if your old drive is good (meaning you're upgrading to a larger capacity SSD and not replacing a faulty drive), you can use it as an external drive and connect the drive in the enclosure over USB to store or backup data.
For my process, I chose an inexpensive mSATA (there are also SATA and M.2 enclosures) for under $20. The enclosure connects my new Samsung 1TB SSD to my Latitude via a USB 3.0 cable, so the process didn't take too long.

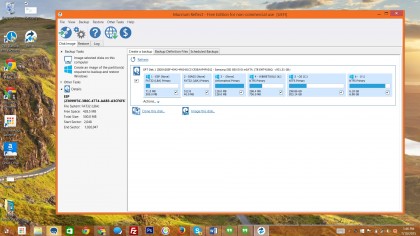
If you're cloning a Windows 8 or later system, you'll need cloning software that supports GTP. For this process, I chose to use the free Macrium Reflect cloning software, but there are other free and paid cloning software available on the market.
Sign up to the TechRadar Pro newsletter to get all the top news, opinion, features and guidance your business needs to succeed!

When I first load Macrium Reflect, the software asks if I want to create a recovery media in case something goes wrong. Even though this is an optional step, it's advisable that you complete this process just in case.
The cloning process is fairly intuitive using the Macrium Reflect software. You'll want to select the cloning option in the Reflect software, and you'll want to be sure to clone over all the drive partitions on your existing drive. Once the cloning is finished, you can swap the new drive into your laptop, and you should be ready to boot up.
Removing and replacing your drive
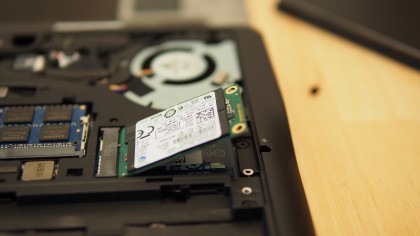
Depending on your drive and your manufacturer, your internal SSD may be affixed to your system with screws. Even though the SSD board on my Latitude has two screw openings, Dell only screwed the SSD onto the motherboard using one of the screw openings.
You'll want to remove the screws that attach the SSD to your notebook's motherboard. The SSD will then pop up slightly, and you'll need to gently pull the card out from the connector so that you don't damage the system.

Once the card is out, you can attach your new drive by sliding it gently, but firmly into the connector. You'll want to push the drive down so it lies flat with the motherboard, and then replace all the screws to secure the drive.