A Google Photos alternative: Store your photos online with Piwigo
Set up a private photo storage solution with this open-source software
The digital photos we have of our friends, family, and past experiences are priceless, and it would be crushing to lose them all in a hard drive failure or other unforeseen circumstances. So, cloud-hosted photo storage services like Google Photos have become extremely popular, but they can also be expensive when you have many photos to store.
An alternative is to store your photos on your web hosting using open-source photo management software Piwigo. In this guide, we’ll show you how to set Piwigo up on the popular web host Hostinger.
Step 1: Start the Hostinger Auto Installer for Piwigo
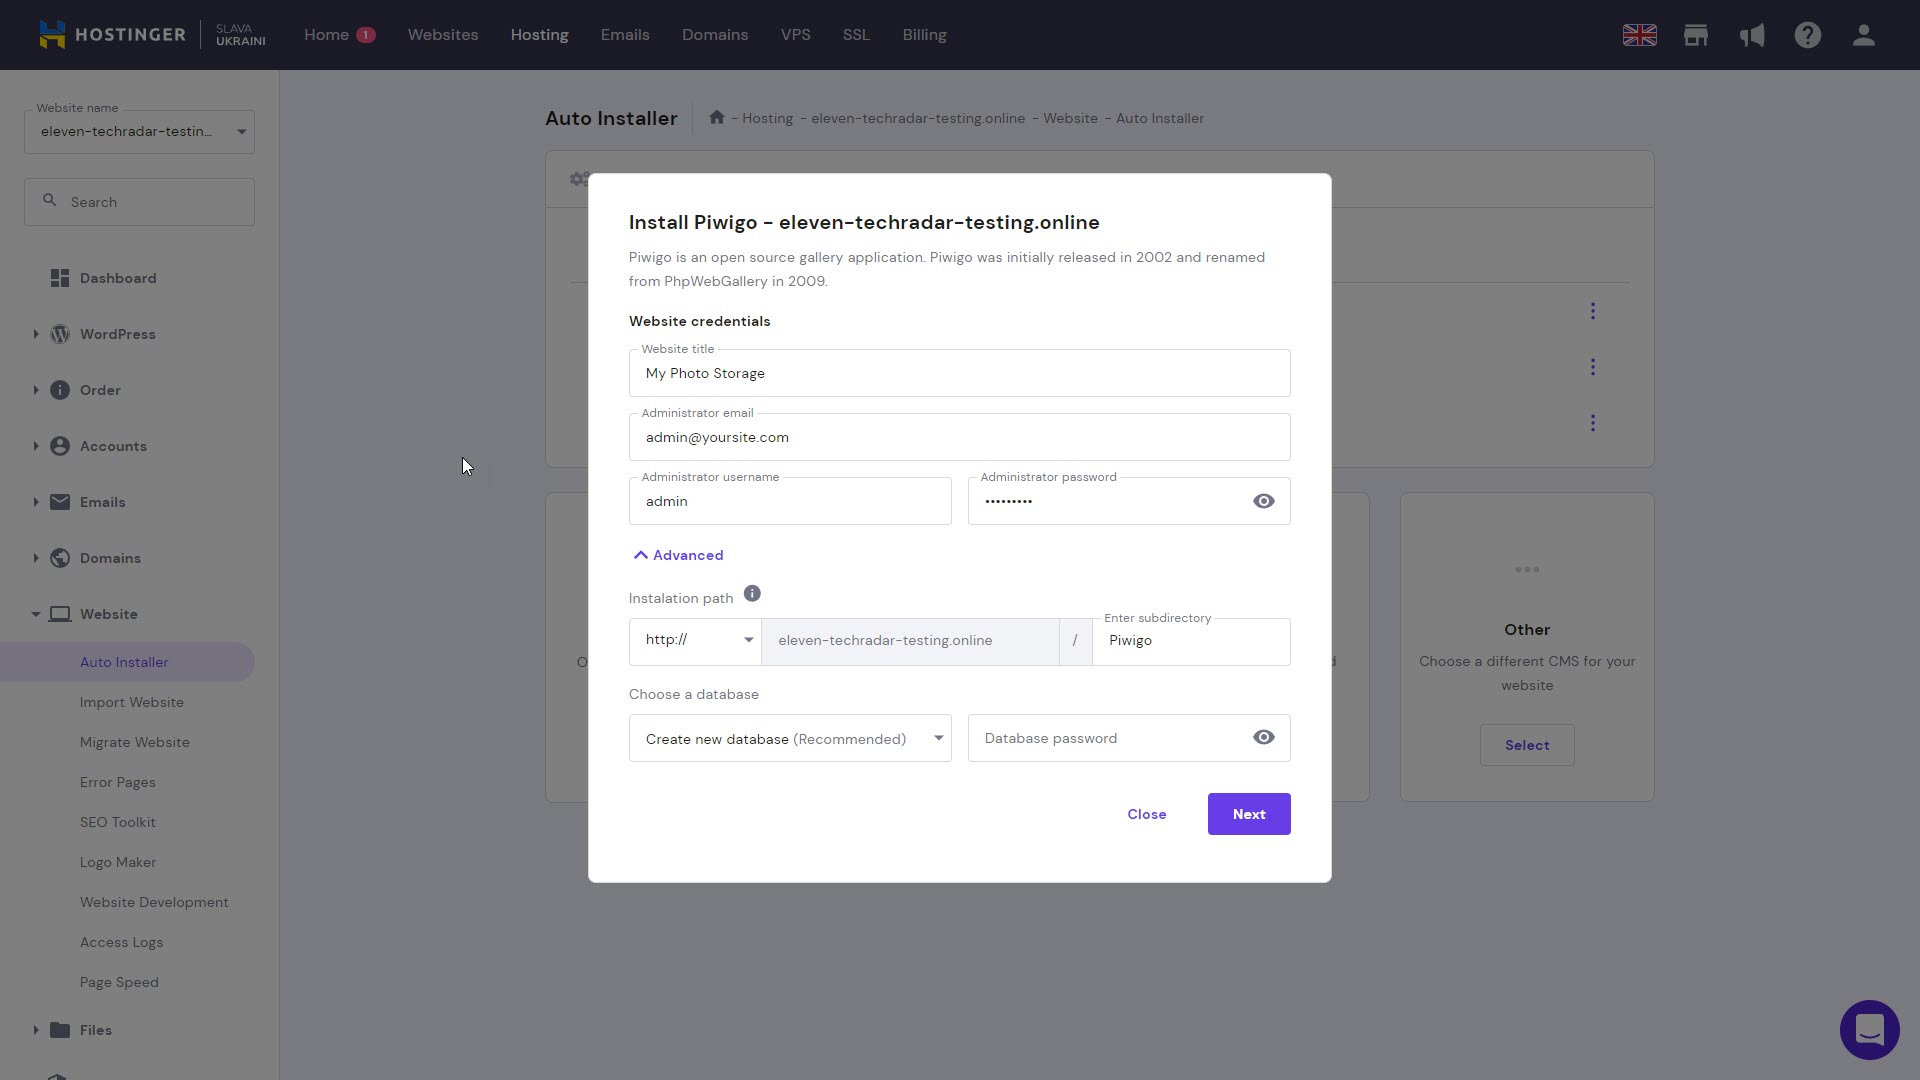
Hostinger has an Auto Installer for Piwigo, making installation of the software particularly easy. From the menu on the left in your Hostinger administration panel, choose Website, then Auto Installer. Select Other, then Piwigo from the dropdown box. Click Select, and the wizard will begin.
On the first page, set the name of your Piwigo site and enter your email address, plus a username and password for logging in.
By clicking on Advanced, you can decide to install Piwigo into a subdirectory instead of your website root. You can also select whether to create a new MySQL database for Piwigo, or use an existing one.
Step 2: Choose Piwigo version and update schedule
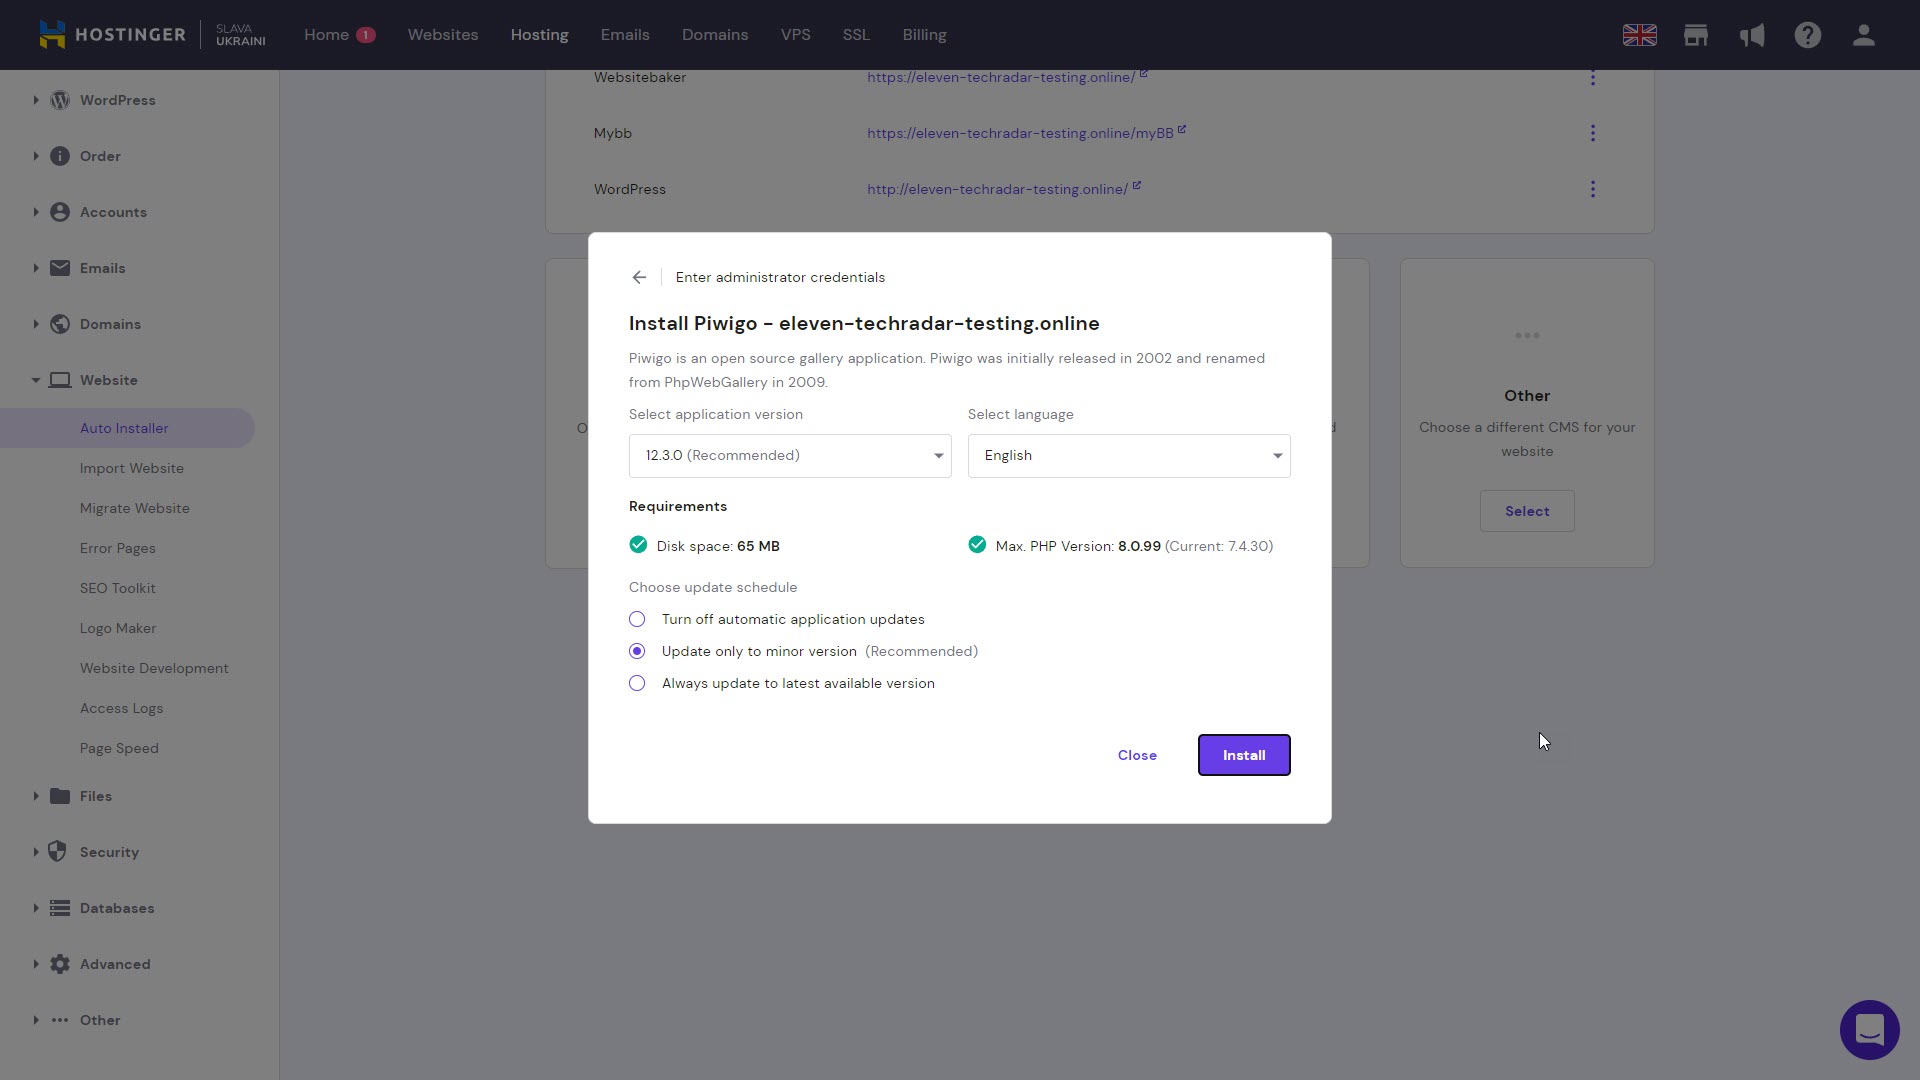
Click Next to get to the final step of the installation wizard. Here, you can decide to install an older version of Piwigo and turn off automatic software updates. We recommend leaving these settings as their default. Click Install to complete the wizard.
Step 3: Log in to your new Piwigo site
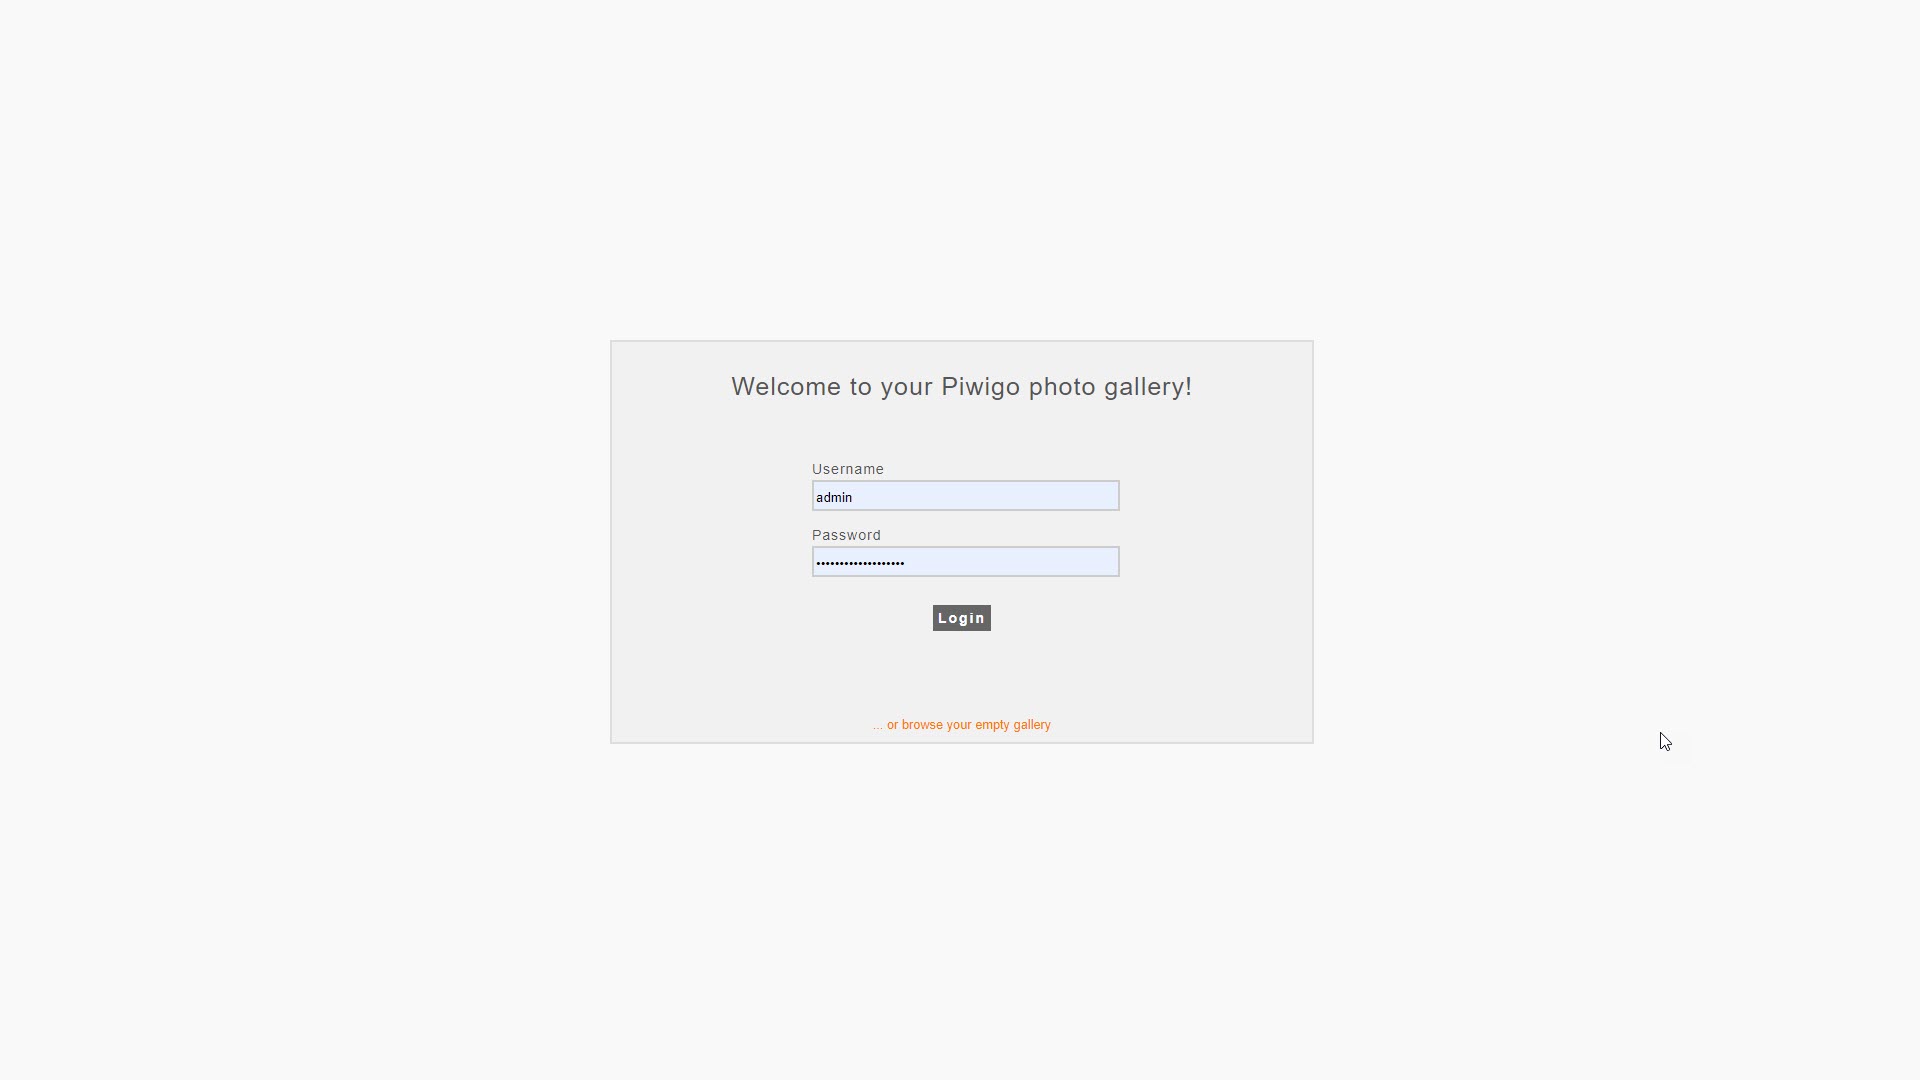
Piwigo is now installed. You’ll find the correct URL under Installed Applications on the Hostinger Auto Installer page. Go to this URL, enter the admin username and password you created earlier, and click Login.
Sign up to the TechRadar Pro newsletter to get all the top news, opinion, features and guidance your business needs to succeed!
Step 4: Create a photo album
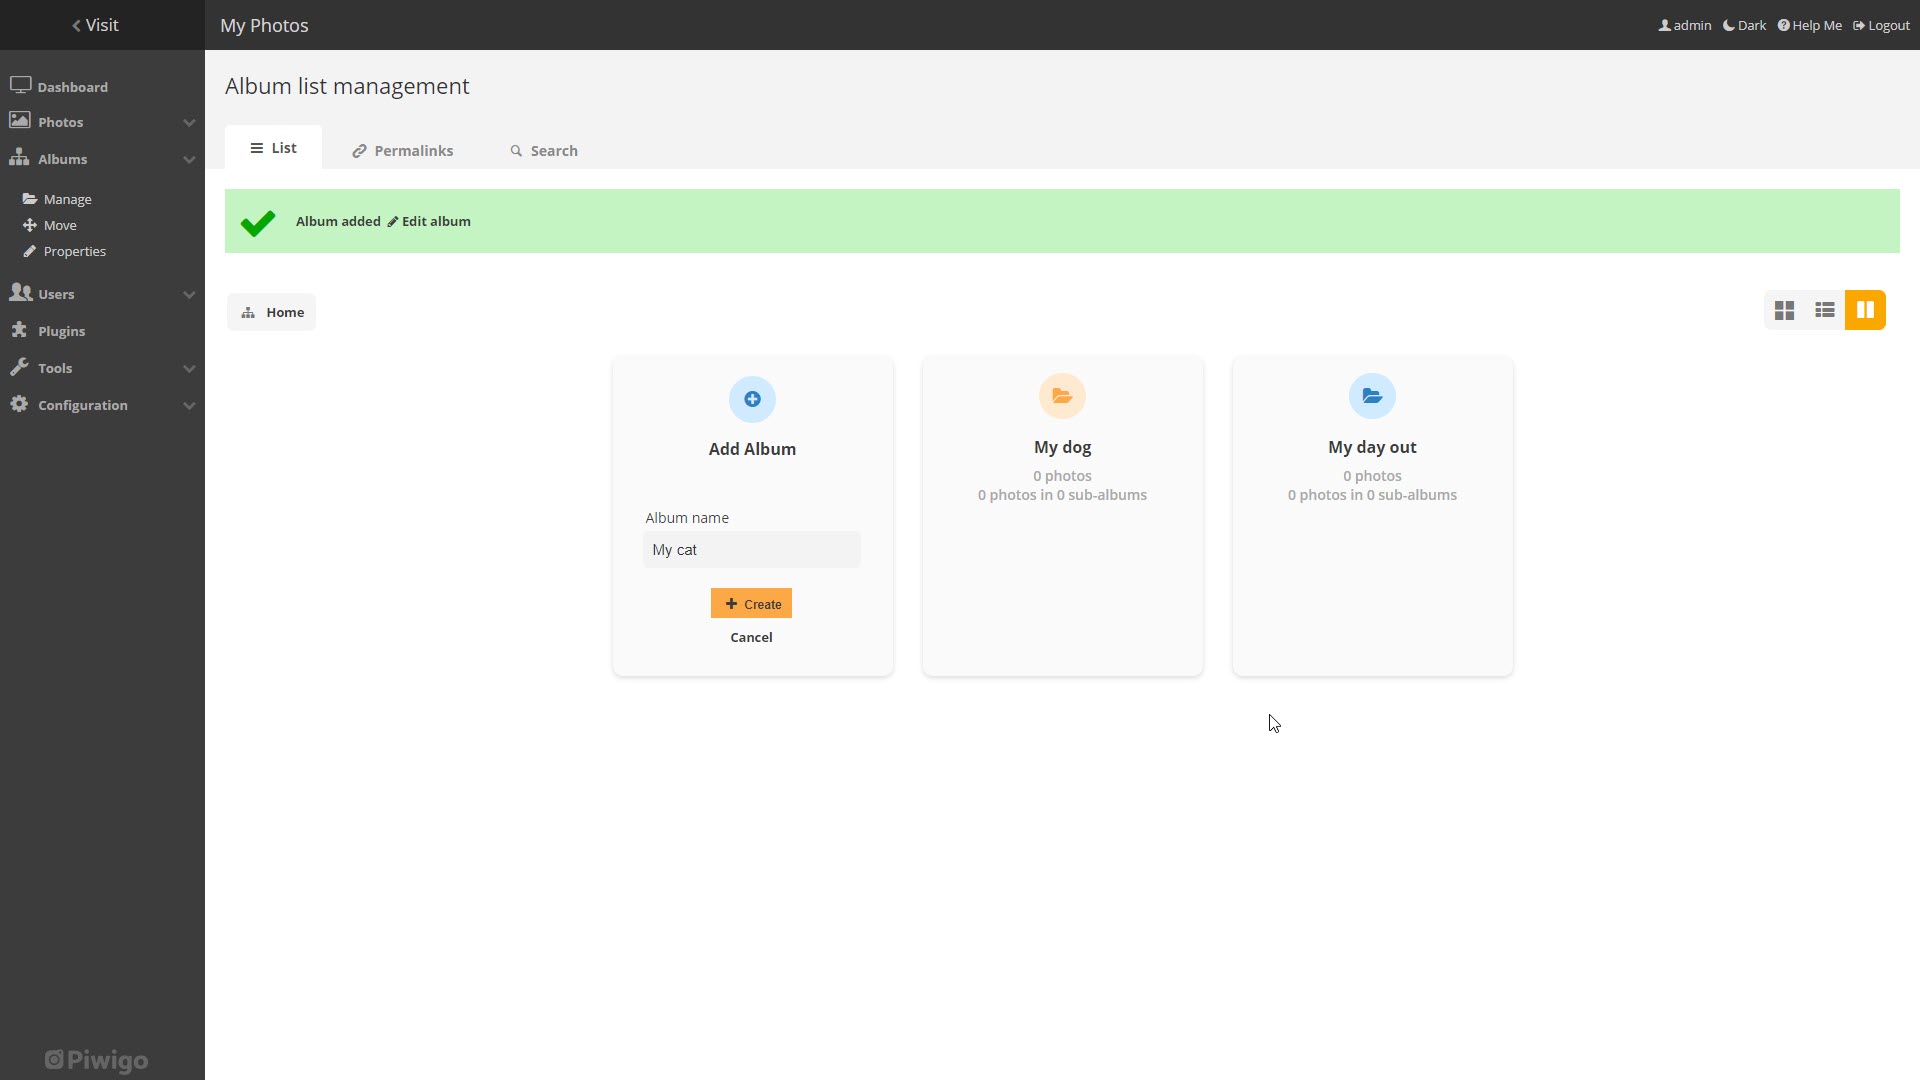
Get started by creating your first photo album. Click Create a first album. On the next page, give your album a name, and click Create.
Optionally, you can now hover over your created album and click Edit to set some more advanced options. You can set an album description, pick the default photo sort order, and set the photo album to private or public.
Step 5: Add photos to your album
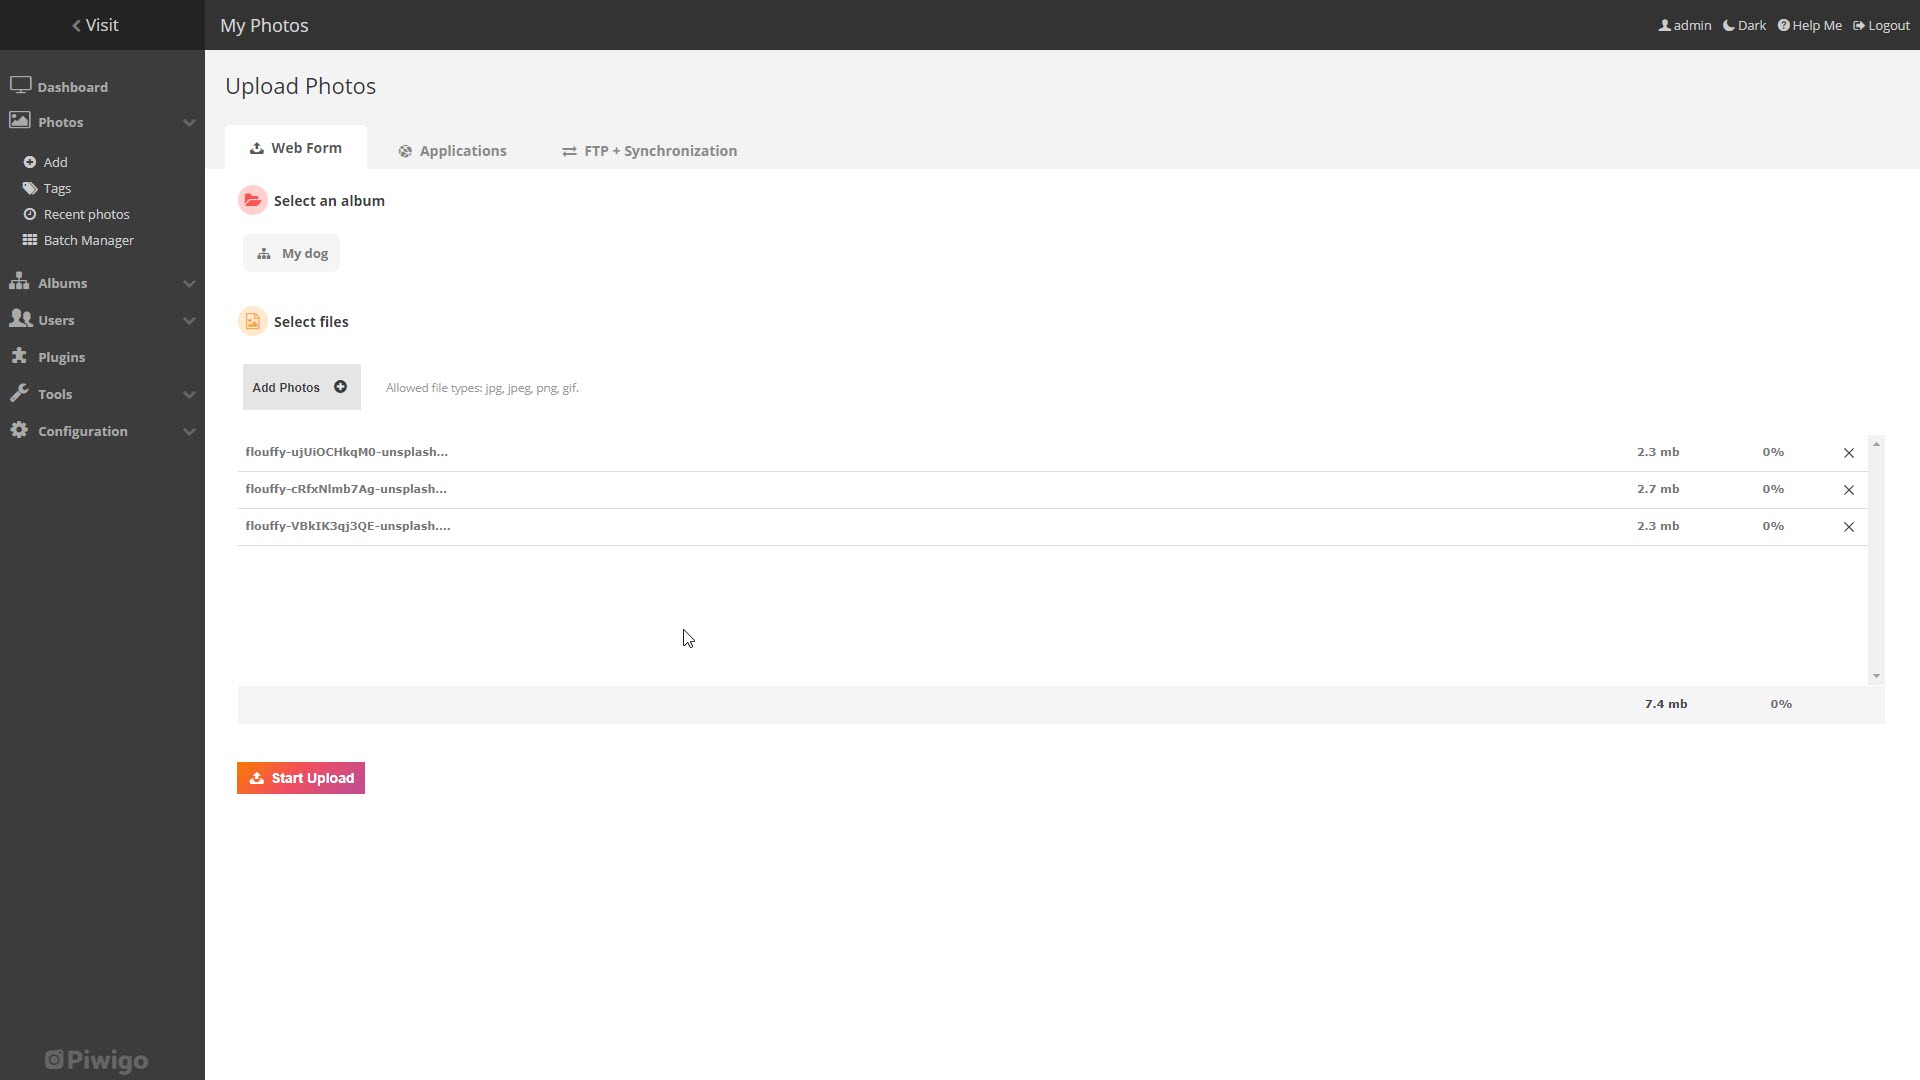
Click on an album and select Add Photos. Select all the photos you want to upload from your computer, then click Open. Your selections will be added to a list on the screen. Finally, choose Start Upload to add the photos to your album.
There are several other ways to add photos to your albums in Piwigo. For instance, under the Applications tab, you can find links to software you can use to upload photos. Notably, you can use the Piwigo for Android and Piwigo for iOS apps to automatically upload photos from your mobile devices.
Step 5: Set a theme for Piwigo
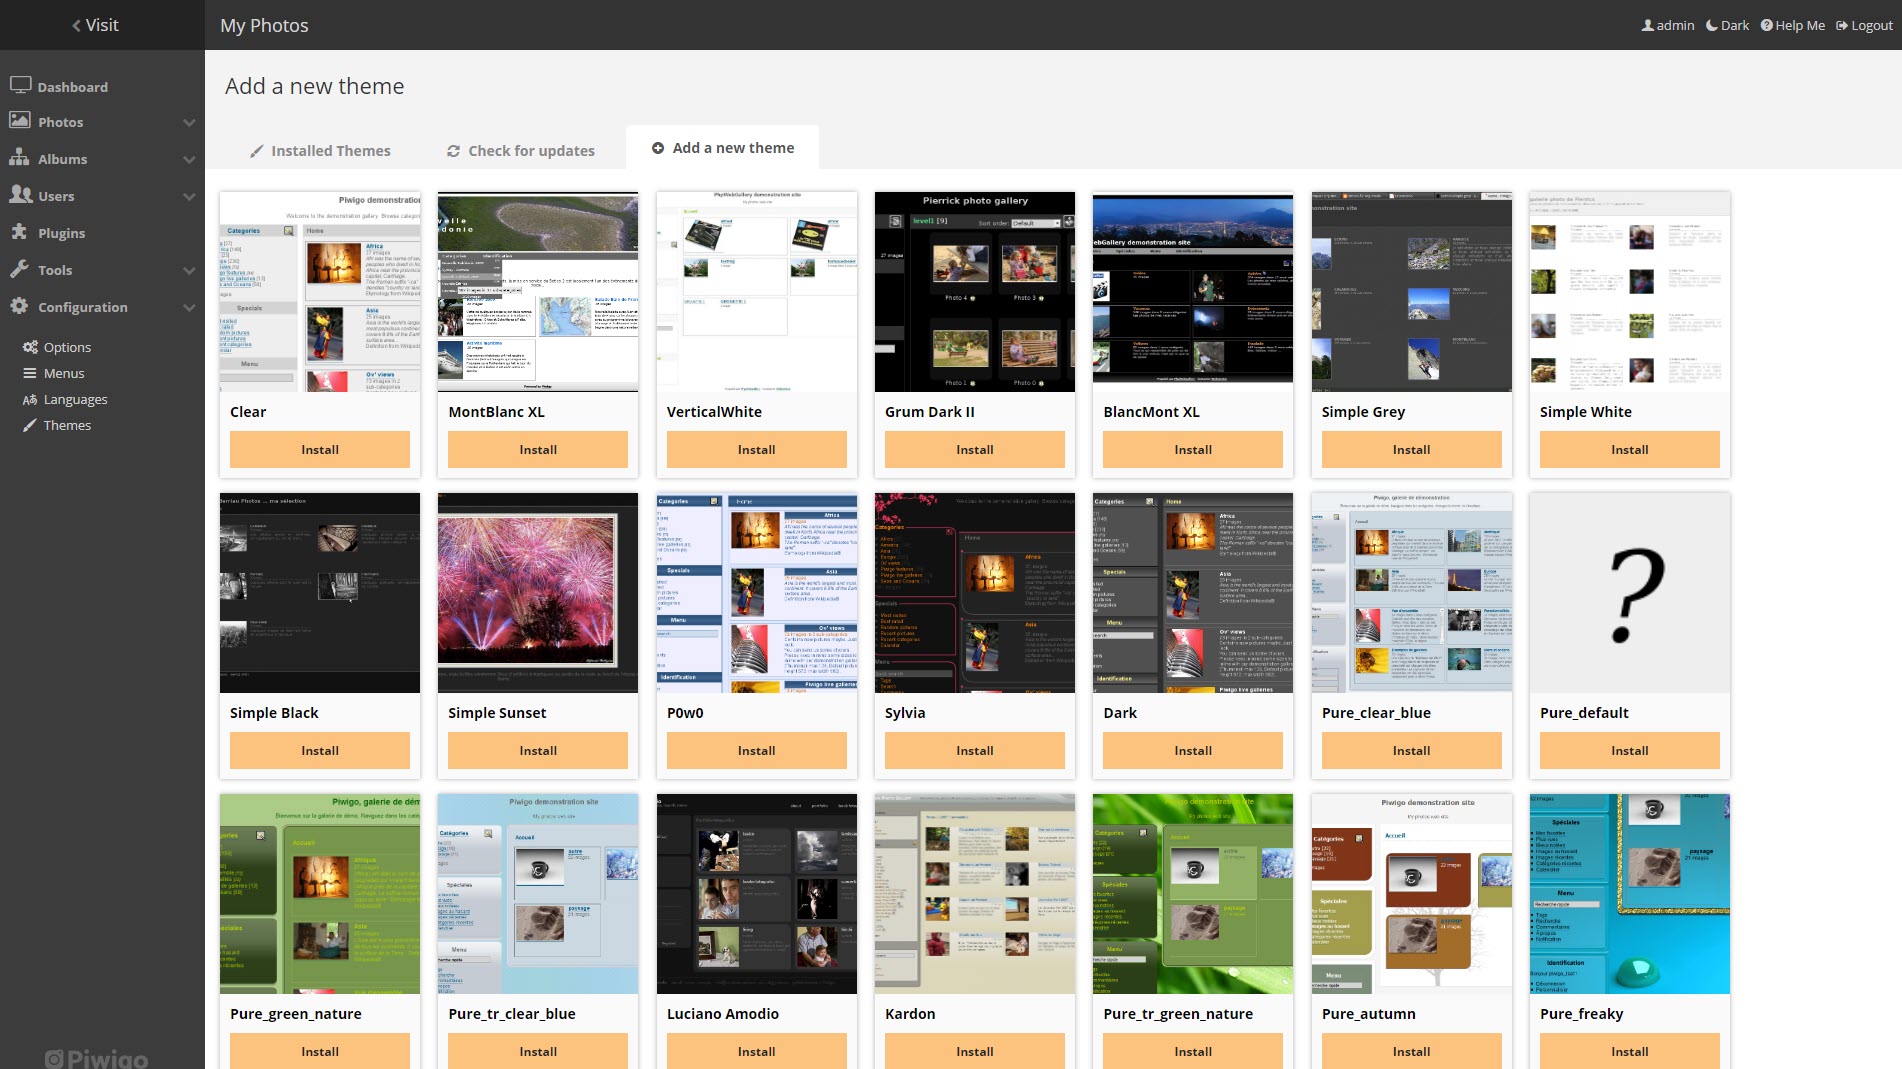
It’s easy to change the look and feel of your photo galleries using the theme system in Piwigo. Choose Themes from the Configuration menu and select Add a new theme. Here, you’ll find around 35 themes from which to choose.
Select Install on the theme you like, and it will be installed. To use the new theme, click on Installed Themes and choose both Activate and Set as default on the theme you want to use.
Step 6: Set general options for your photo galleries
One of the benefits of running your own photo management software is you can choose exactly how it operates. Piwigo has a wealth of options in its Configuration menu. Here, you can set up a page header, and allow users to register to view, vote, and comment on your photos.
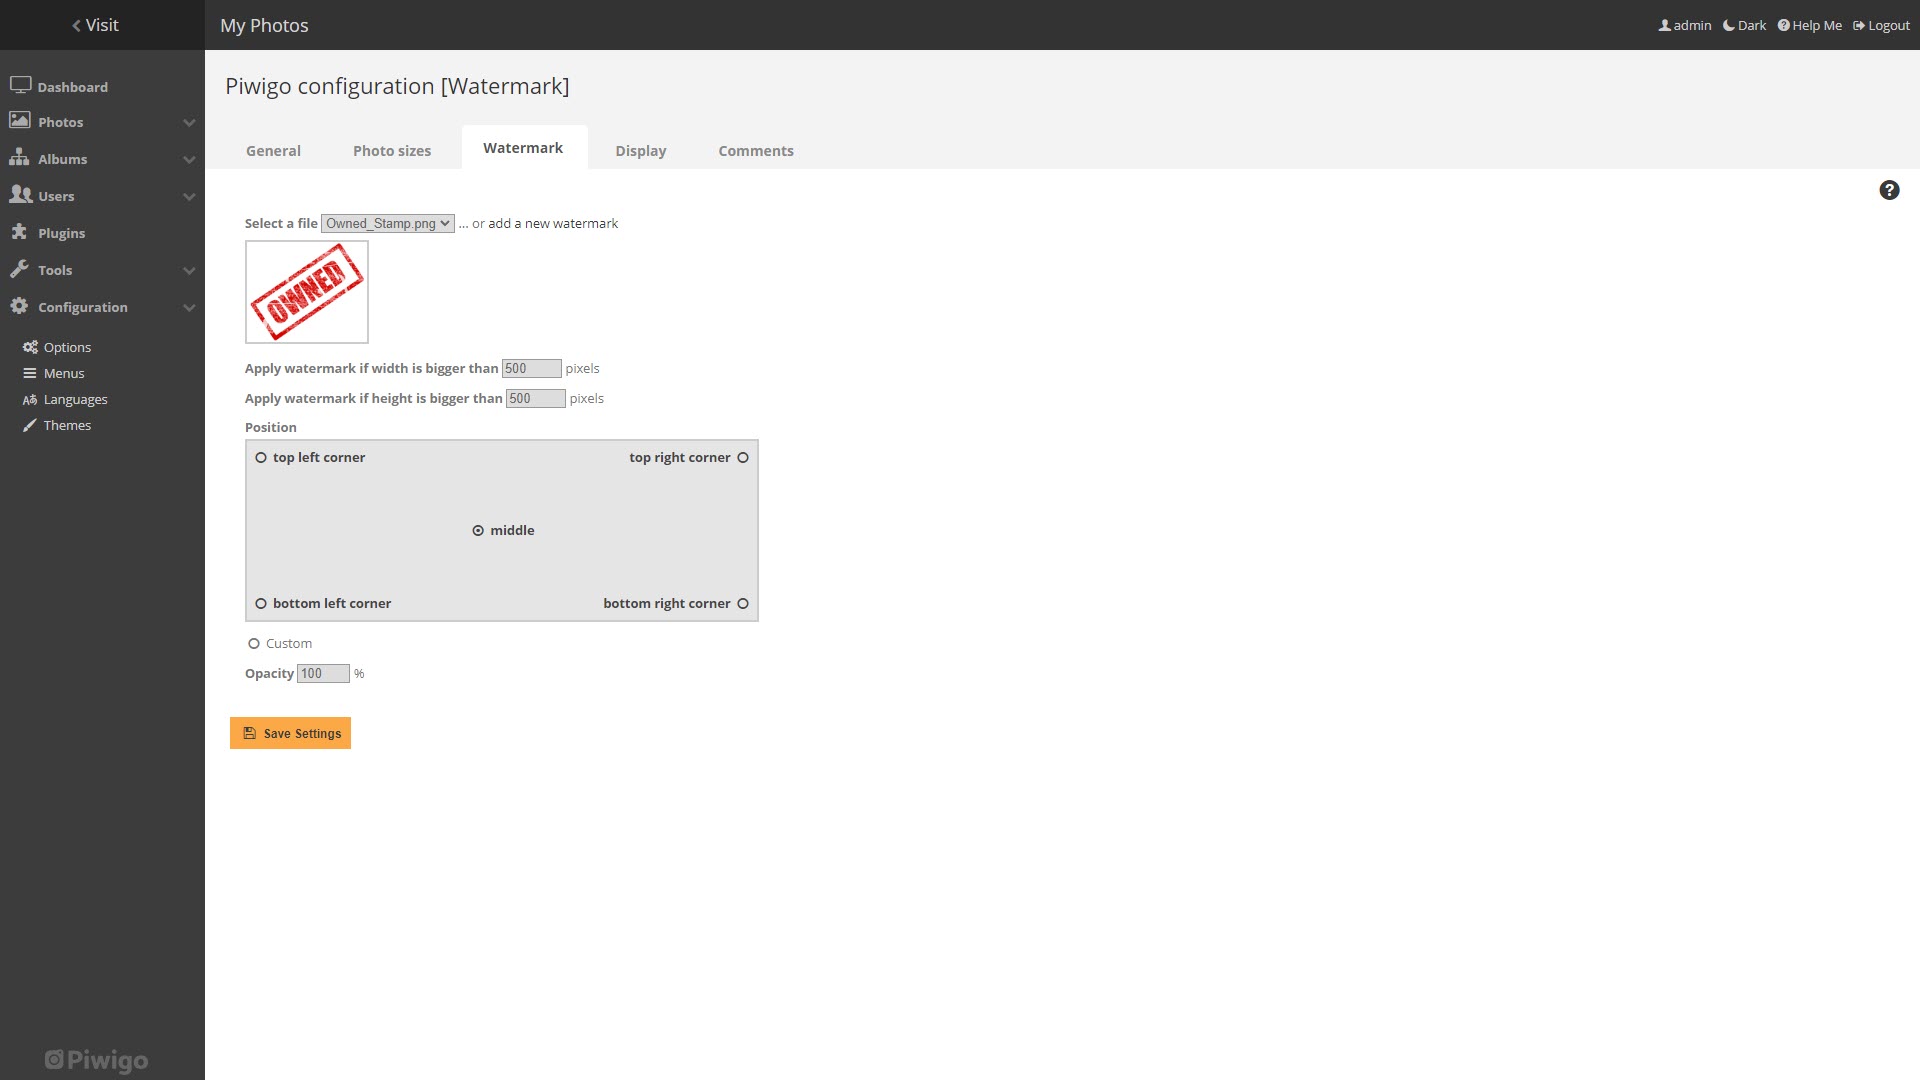
You can set your photos to be automatically available in multiple sizes, and add a watermark to all images. Every option, such as slideshows, calendars, image downloads, and menus, can be tweaked to your liking.
If that’s not enough, there are over 100 plugins you can install on your Piwigo site, available directly in the Piwigo administration interface. These plugins can add extra functionality to your image galleries, from video players to ecommerce shopping carts, so you can sell your photos to visitors.
Summary
Piwigo is an open-source photo management option that provides an interesting alternative to mainstream cloud photo storage. In this guide, we’ve shown you how to set it up on Hostinger.
It will also work on most free website hosting, but you won’t be able to store many photos there because of tight storage space limitations. Any of the top website hosts we’ve chosen are better candidates than free hosting for creating your own mini-Google Photos with Piwigo.
Read more in this series:
- How to start a blog with Joomla
- Build your own CRM using SugarCRM
- How to host your files online using Nextcloud Hub
- How to start your own help desk with Hesk
- How to build an HR System using OrangeHRM
- How to generate your own invoices using Invoice Ninja
- How to install live chat software with Sales Syntax
- Run your own ecommerce platform with PrestaShop
- How to create your own website with Soholaunch
- How to launch your own website with WebsiteBaker
- How to learn search engine optimization with SEO Panel
- How to kickstart your own Ancestry.com alternative with webtrees
- How to install a free ERP software called Dolibarr
- Demand gen vs lead gen: What's the difference?
- Host your own private forum with MyBB
- Build your own calendar application with WebCalendar
- Set up your own groupware service with Tiki Wiki CMS
- How to build your own email marketing service with phpList
- How to start with project management using The Bug Genie
- Make your own poll platform with LimeSurvey
- Roll out your own Wikipedia clone with MediaWiki
- How to host your own learning management software with Moodle LMS
- Set up an accounting system with FrontAccounting
- Produce your own bills with BoxBilling
Richard brings over 20 years of website development, SEO, and marketing to the table. A graduate in Computer Science, Richard has lectured in Java programming and has built software for companies including Samsung and ASDA. Now, he writes for TechRadar, Tom's Guide, PC Gamer, and Creative Bloq.
