How to start with project management using The Bug Genie
Easy project management for software applications

The Bug Genie is an open-source project management tool first released in 2003. Mostly aimed at software developers working in a team, The Bug Genie supports issue tracking, source code management, and custom workflows with visualization. It can be used with common version control systems like SVN and Git.
Despite the development of The Bug Genie stopping in 2019, a rebranded version—Pachno—has been in development since 2021.
However, because updates haven’t been made to The Bug Genie for a few years, you must take a few extra steps to get the software working on modern web hosting with the latest versions of PHP.
This guide will show you how to do this on Hostinger, a low-cost, high-performance web hosting provider. We’ve partnered with Hostinger to offer an outstanding free hosting deal for our readers, so you can try out The Bug Genie at no cost.
Step 1: Enable APCu PHP extension
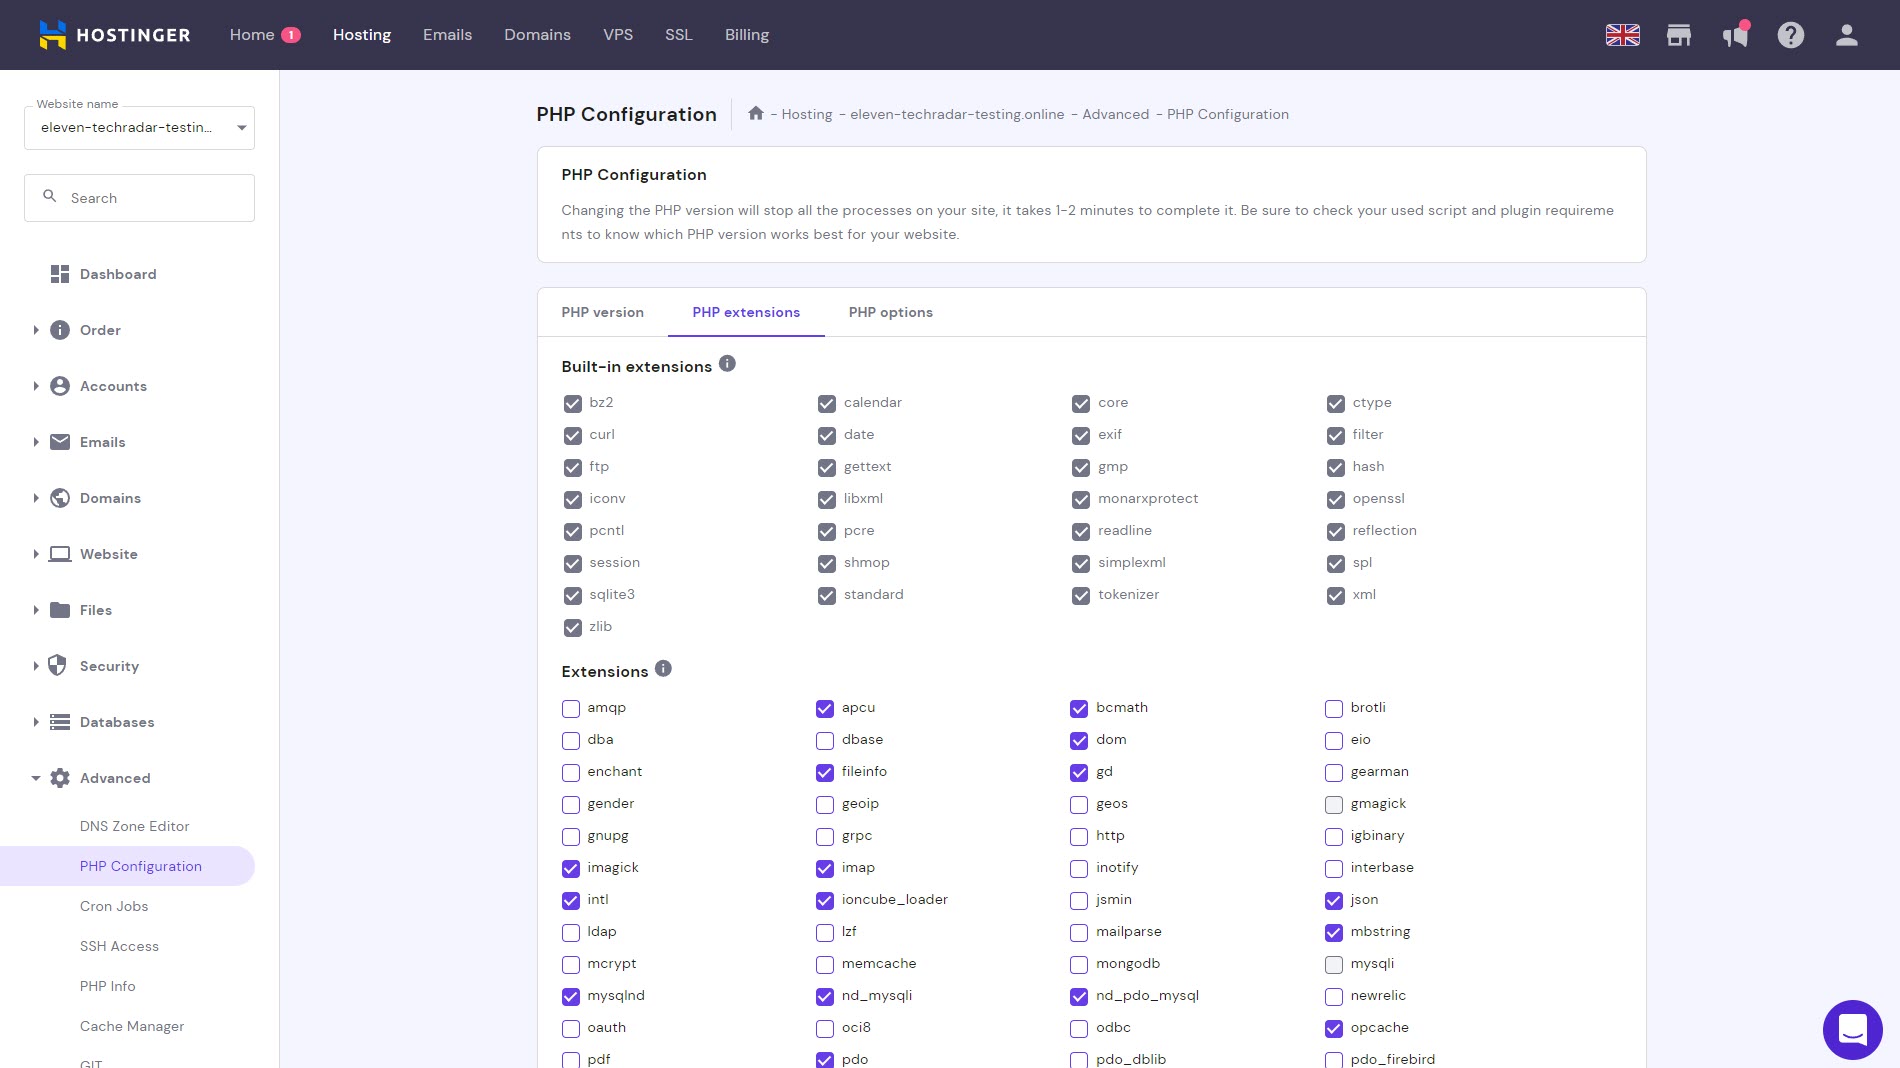
The Bug Genie requires the PHP extension APCu to be installed and enabled on web hosting. Many web hosts, including Hostinger, have APCu disabled by default.
Thankfully, on Hostinger, it’s quite easy to enable APCu. In your Hostinger website administration panel, navigate to Advanced. Choose PHP Configuration. Select PHP extensions, and check the apcu box. Click save.
APCu is now enabled on your hosting and you can move on to the next step.
Sign up to the TechRadar Pro newsletter to get all the top news, opinion, features and guidance your business needs to succeed!
Step 2: Downgrade PHP version (if required)
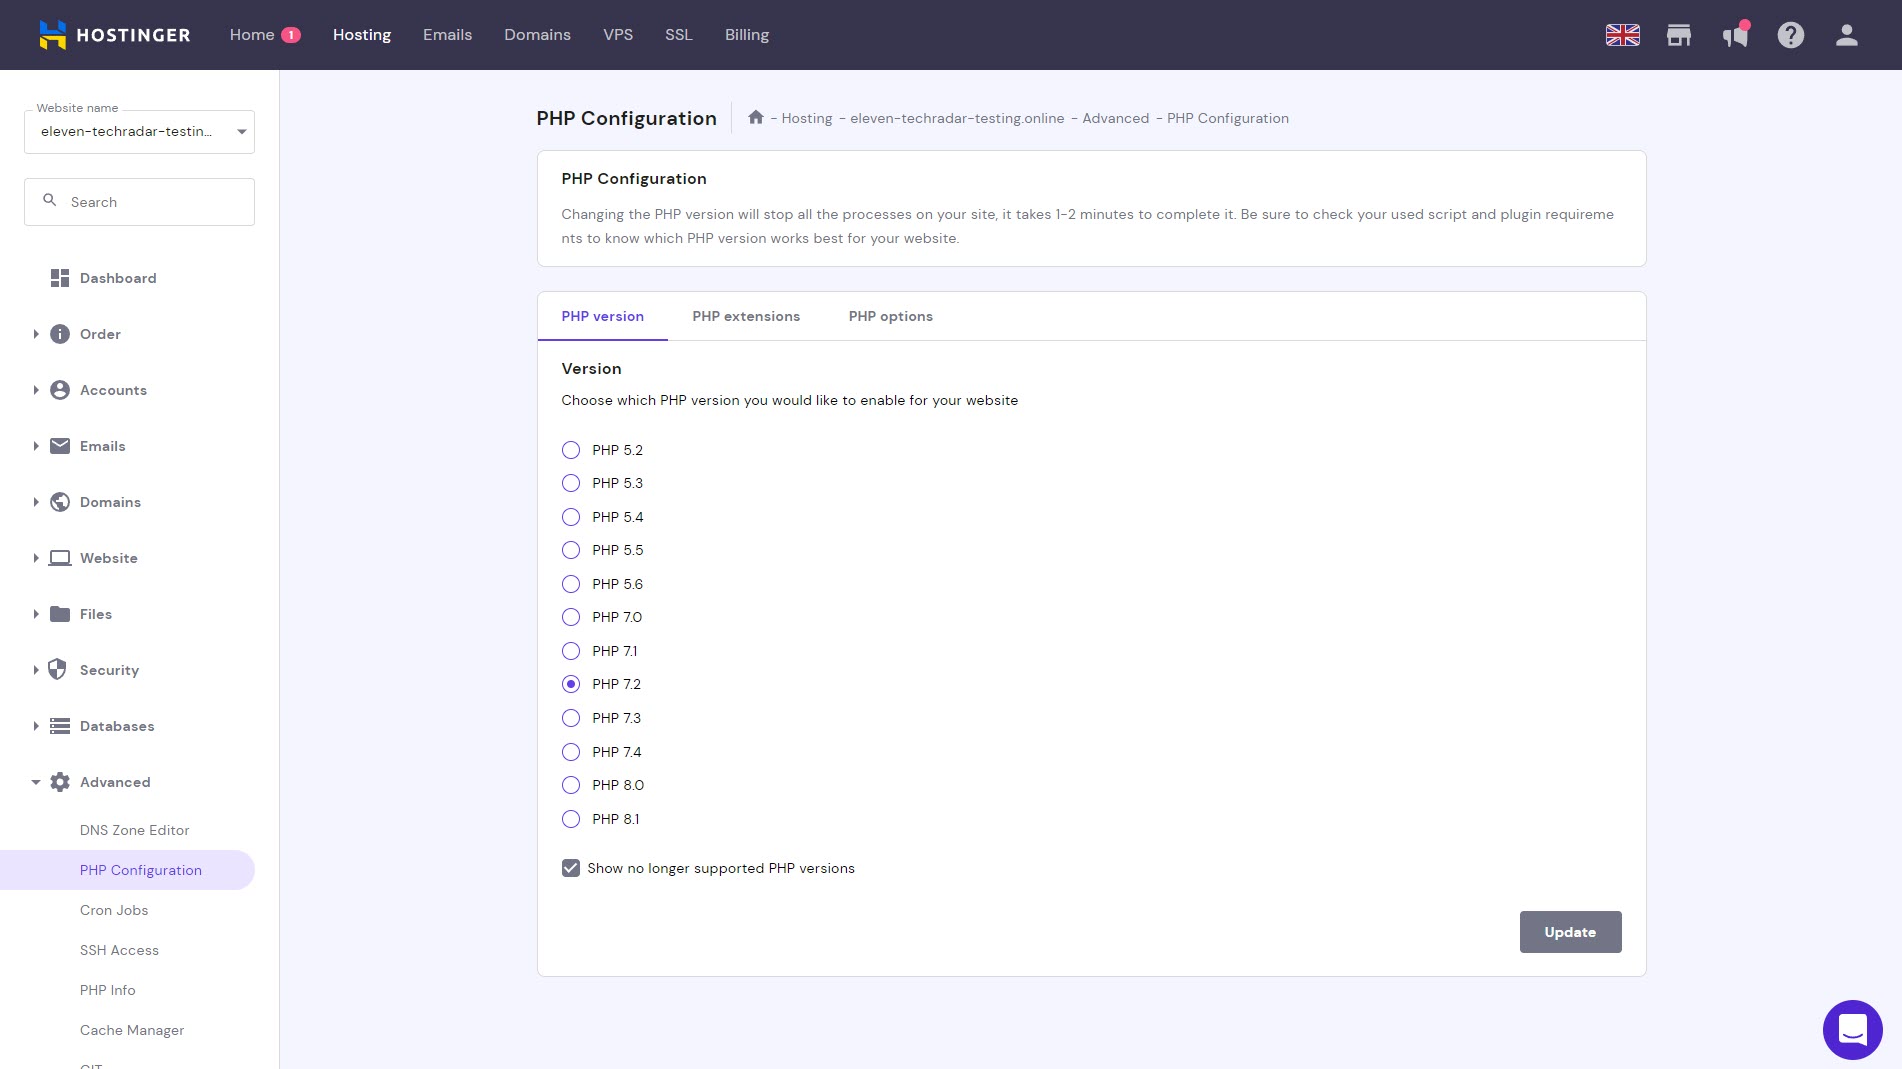
The Bug Genie won’t work if you’re running a version of PHP that’s newer than 7.3.99. Most web hosting providers, including Hostinger, run a newer version of PHP, typically 7.4, 8.0, or 8.1, so you’ll need to downgrade PHP to use The Bug Genie.
Navigate to Advanced and choose PHP Configuration. Select the PHP version you want from the radio box and press Update. We suggest version 7.2.
Downgrading your PHP version will also affect other PHP applications you’ve installed on your server. In some cases, this could cause them to stop working, so be sure to check the PHP version requirements of other applications you’ve previously installed.
Step 3: Install The Bug Genie using the Auto Installer
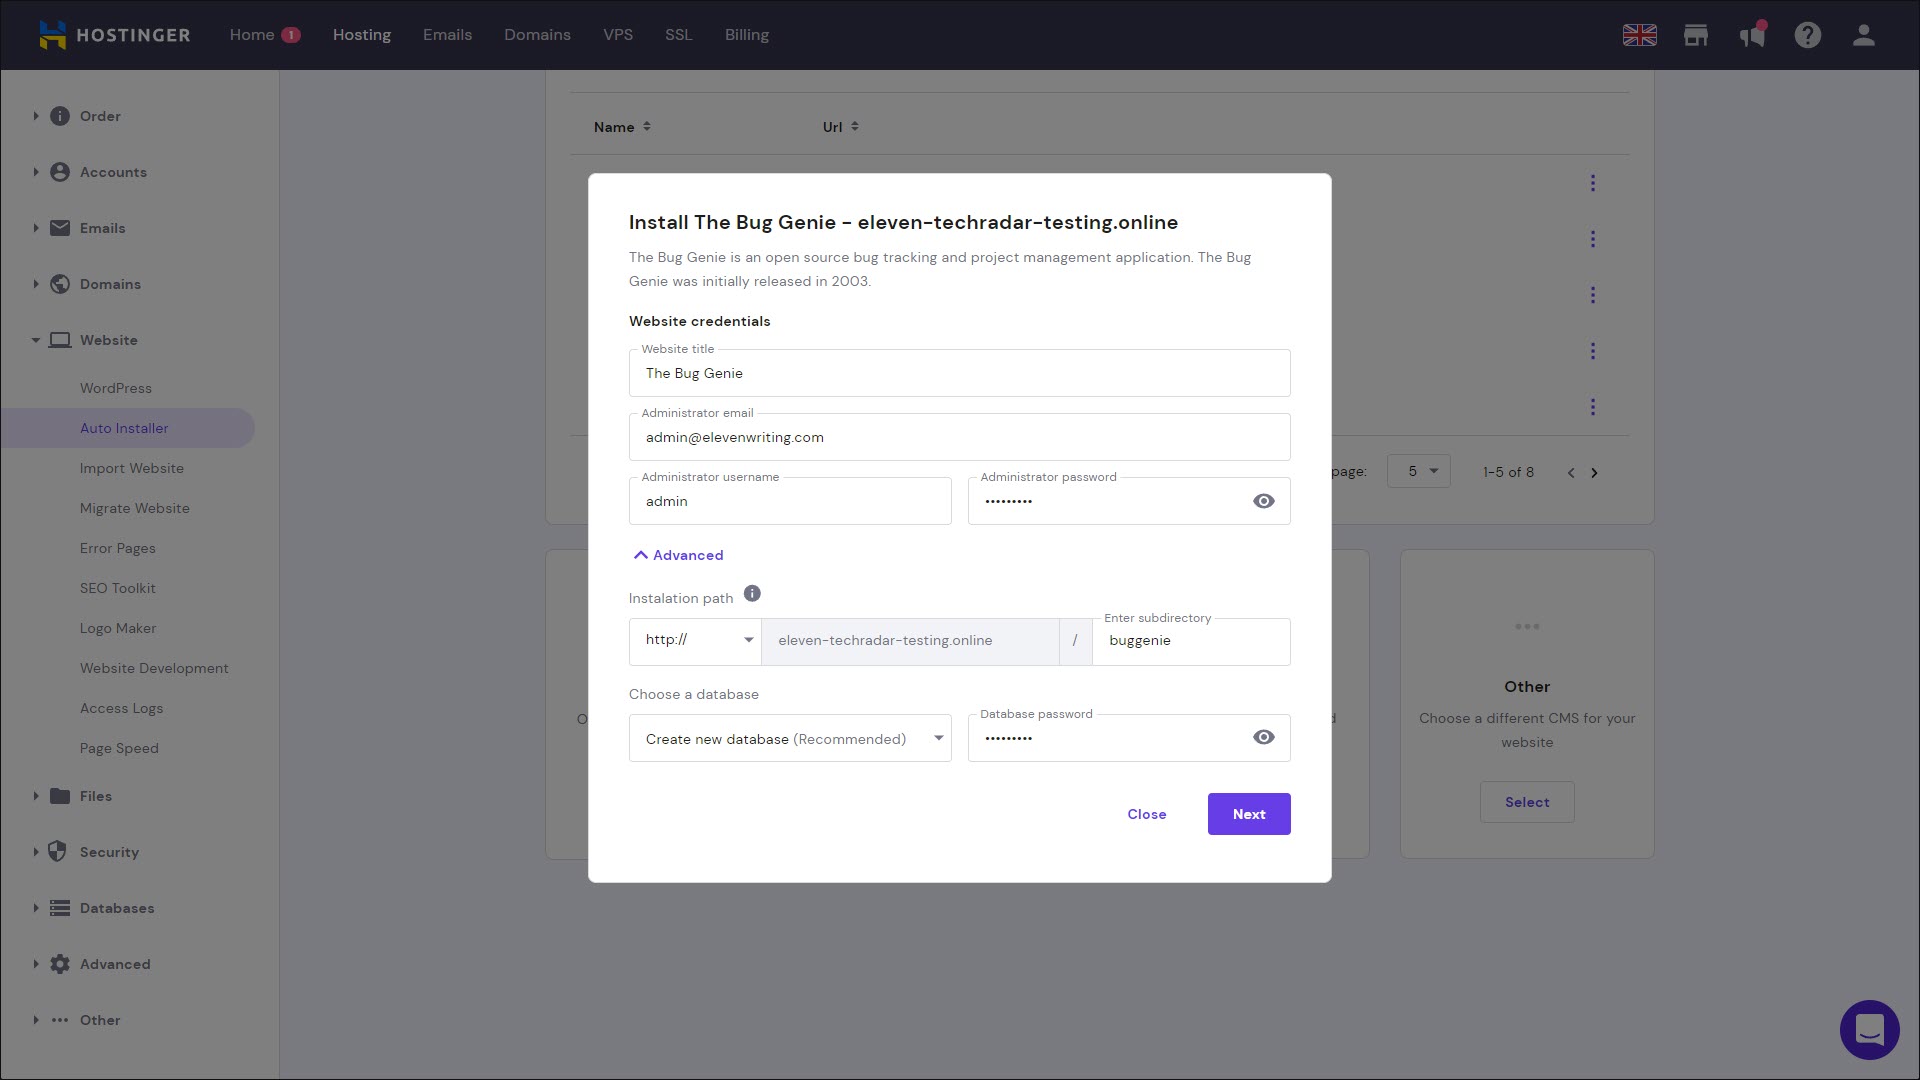
Navigate to Auto Installer in the Website menu. Click Other, and select The Bug Genie from the drop-down menu.
On the first page of the wizard, you’re tasked with creating an administrator username and password. In the advanced settings, you can choose to install The Bug Genie in a subdirectory. You can also opt to create a new database for The Bug Genie or use a MySQL database you’ve already created.
On the second and final page of the Auto Installer, choose the version of The Bug Genie you want to install and how often you want it to automatically update.
Step 4: Log in to The Bug Genie as an administrator
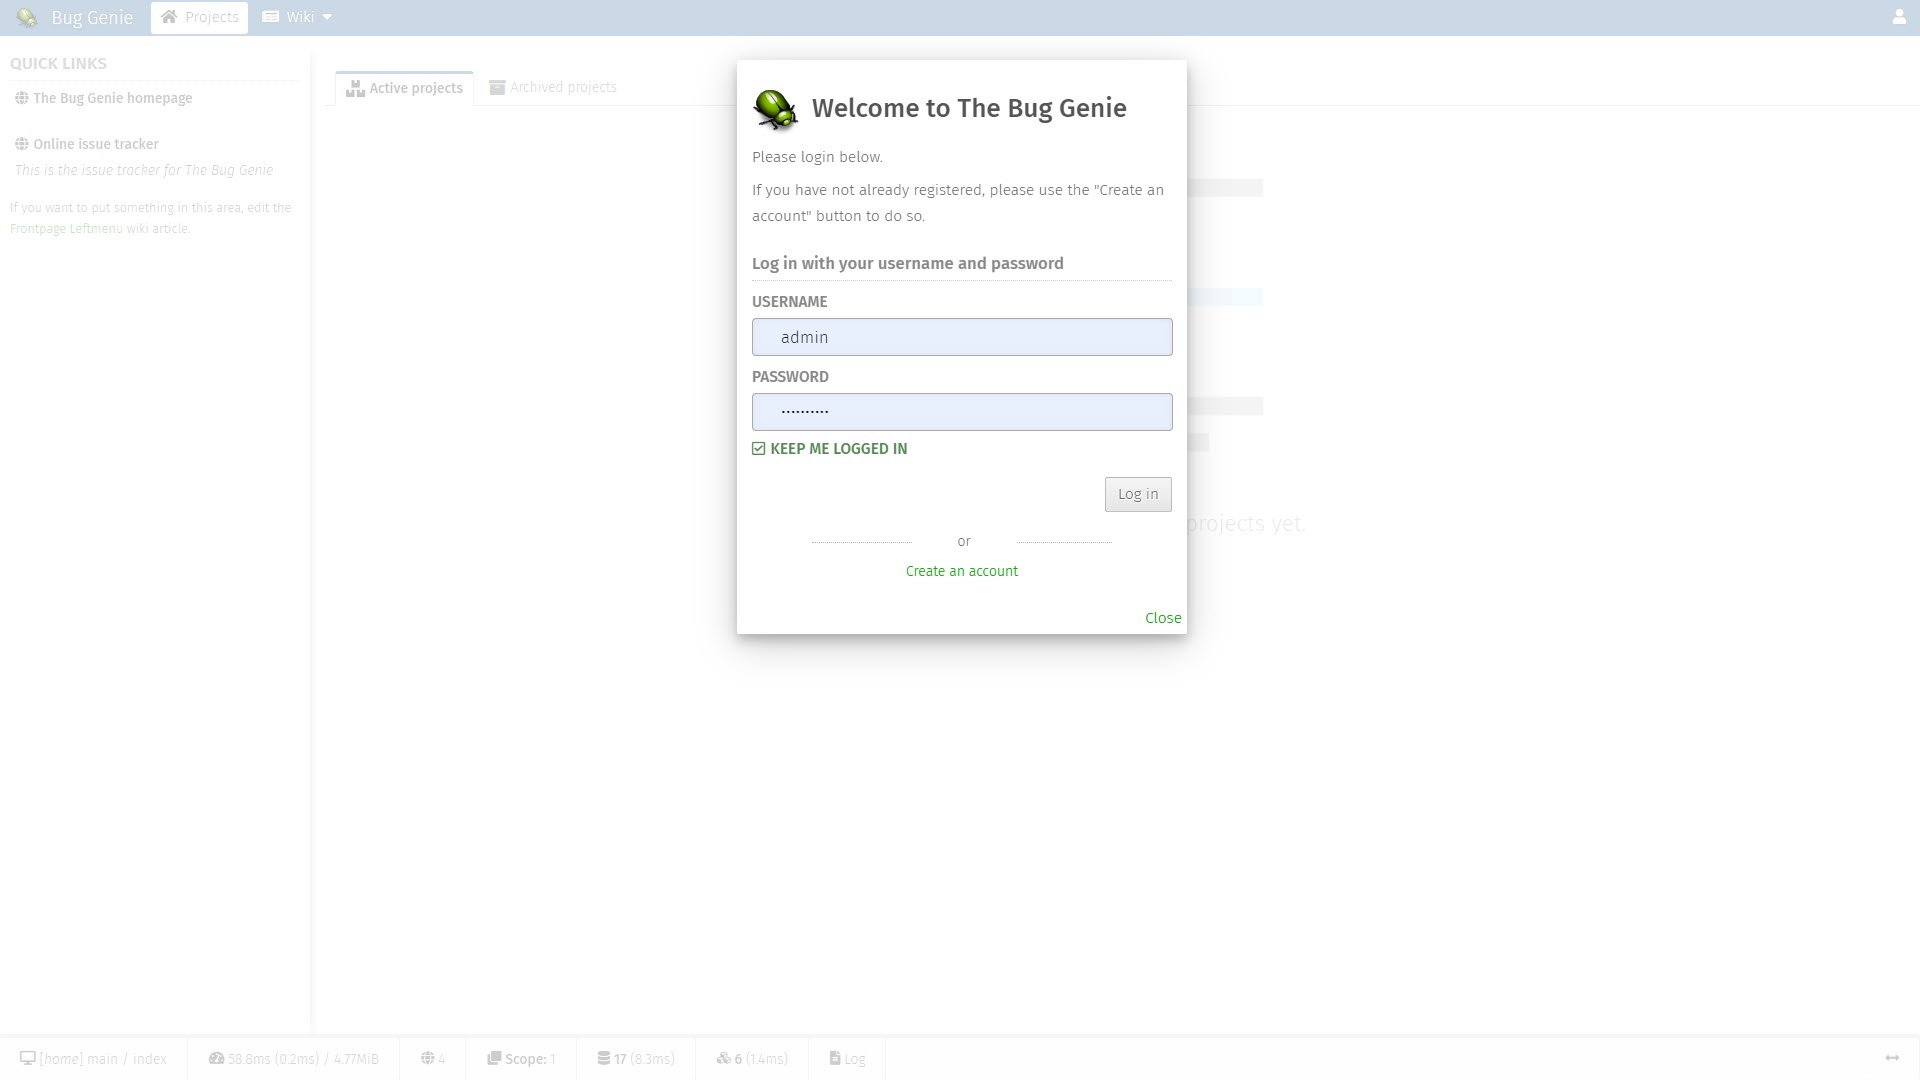
On the Auto Installer page in the Hostinger administration panel, right-click on The Bug Genie and choose Manage. This will bring you to The Bug Genie. Click on the user icon at the top-right of the interface. Enter the administrator username and password you created earlier to log in.
Step 5: Create a new project
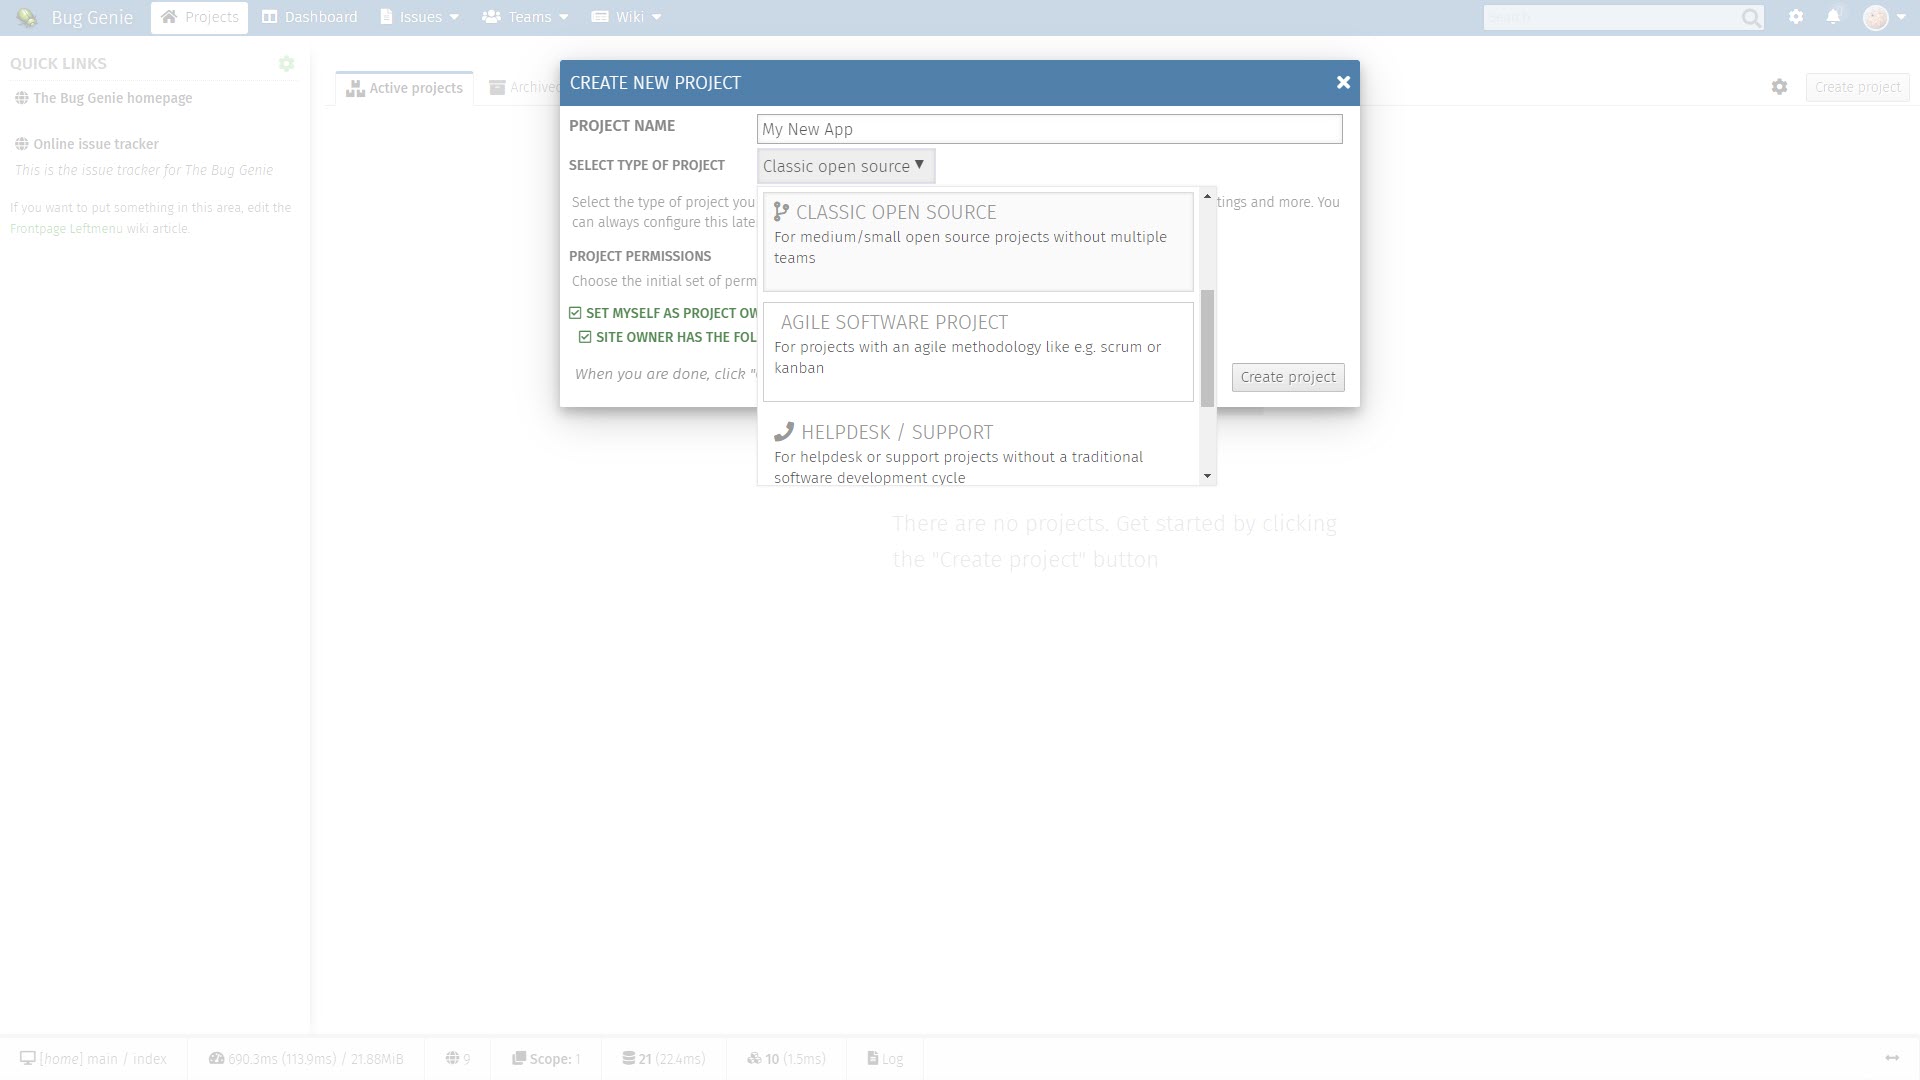
Click Create Project and give your new project a name. Select your project type from the list of templates. These are: classic software project, distributed teams project, classic open source, agile software project, helpdesk, and personal to-do list.
Set yourself as the project manager and click Create Project.
Step 6: Build out your project
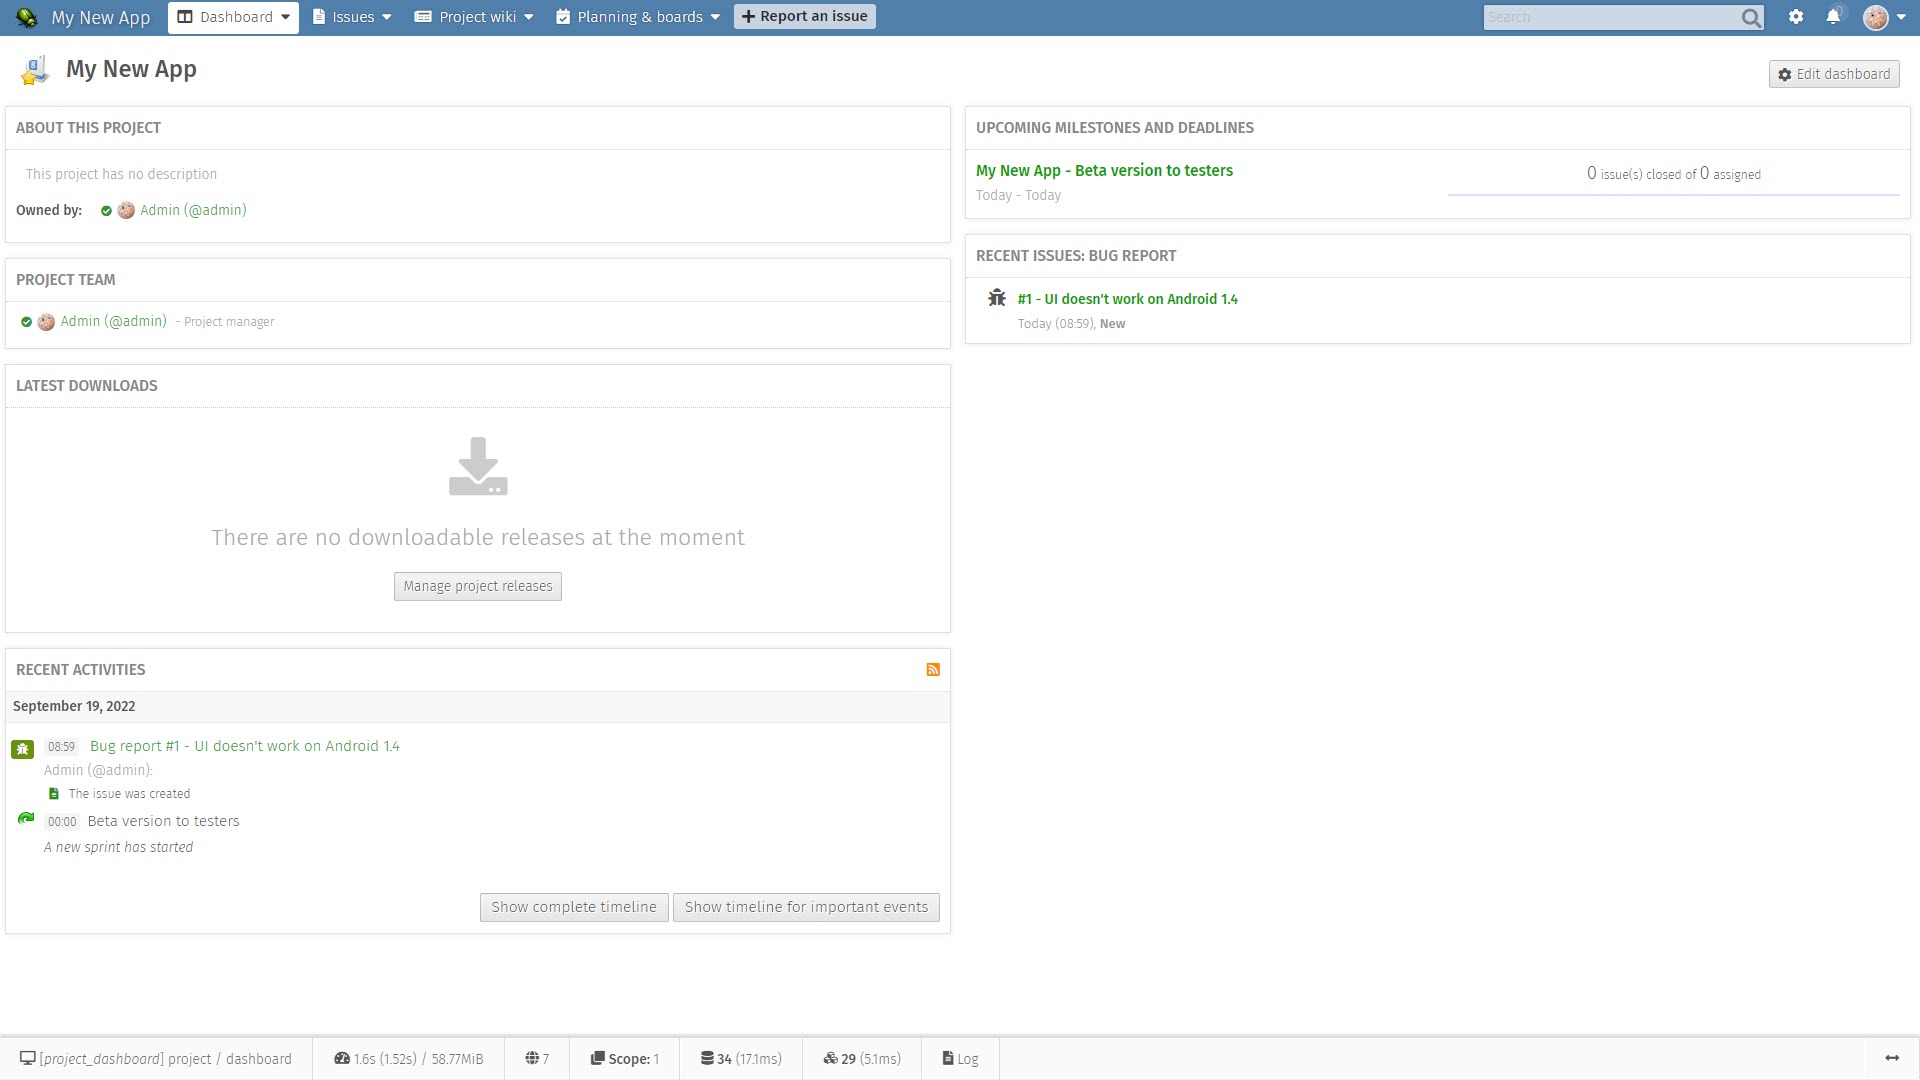
From the dashboard, you can create and expand your project and its goals. Add people to the project team and assign them different roles. You can also create a roadmap for the project, adding milestones and assigning them to members of your team. Every project has a wiki to which you can add articles, documentation, and files.
As your project progresses, you can add issues that need to be fixed and a wish list of features for the project. Workflows can be used to define the lifecycle of issues. This enables every issue to be viewed by the right people and addressed as quickly and efficiently as possible.
Summary
In this guide, we’ve shown you how to install The Bug Genie, a popular project management tool. It requires a few extra steps to get set up compared to most applications, but thanks to the Auto Installer on Hostinger, it’s still relatively easy to get The Bug Genie up and running.
The Bug Genie is just one of many online collaboration tools we’ve covered. We discuss alternative options in our rundown of the best project management software, and we’ve also listed the best free and paid productivity tools you can use today.
Read more in this series:
- How to start a blog with Joomla
- Build your own CRM using SugarCRM
- How to host your files online using Nextcloud Hub
- How to start your own help desk with Hesk
- How to build an HR System using OrangeHRM
- How to generate your own invoices using Invoice Ninja
- How to install live chat software with Sales Syntax
- Run your own ecommerce platform with PrestaShop
- How to create your own website with Soholaunch
- How to launch your own website with WebsiteBaker
- How to learn search engine optimization with SEO Panel
- How to kickstart your own Ancestry.com alternative with webtrees
- How to install a free ERP software called Dolibarr
- Demand gen vs lead gen: What's the difference?
- Host your own private forum with MyBB
- Build your own calendar application with WebCalendar
- Set up your own groupware service with Tiki Wiki CMS
- How to build your own email marketing service with phpList
- A Google Photos alternative: Store your photos online with Piwigo
- Make your own poll platform with LimeSurvey
- Roll out your own Wikipedia clone with MediaWiki
- How to host your own learning management software with Moodle LMS
- Set up an accounting system with FrontAccounting
- Produce your own bills with BoxBilling
Richard brings over 20 years of website development, SEO, and marketing to the table. A graduate in Computer Science, Richard has lectured in Java programming and has built software for companies including Samsung and ASDA. Now, he writes for TechRadar, Tom's Guide, PC Gamer, and Creative Bloq.
