Set up your own groupware service with Tiki Wiki CMS
How to install the versatile content management system Tiki Wiki

Tiki Wiki CMS is a powerful open-source content management system that can be used to create websites, intranet, and web applications. It’s known as Tiki for short.
Tiki functions particularly well as a web-based collaboration tool, and its modular nature allows you to create all manner of websites. For instance, you can add articles, forums, image galleries, quizzes, chats, webmail, and FAQs to your Tiki site.
As Tiki is open source, you can install and use it on your own web hosting at no cost. To better facilitate this, TechRadar has teamed up with Hostinger to offer a free shared hosting deal.
Step 1: Install Tiki with Auto Installer
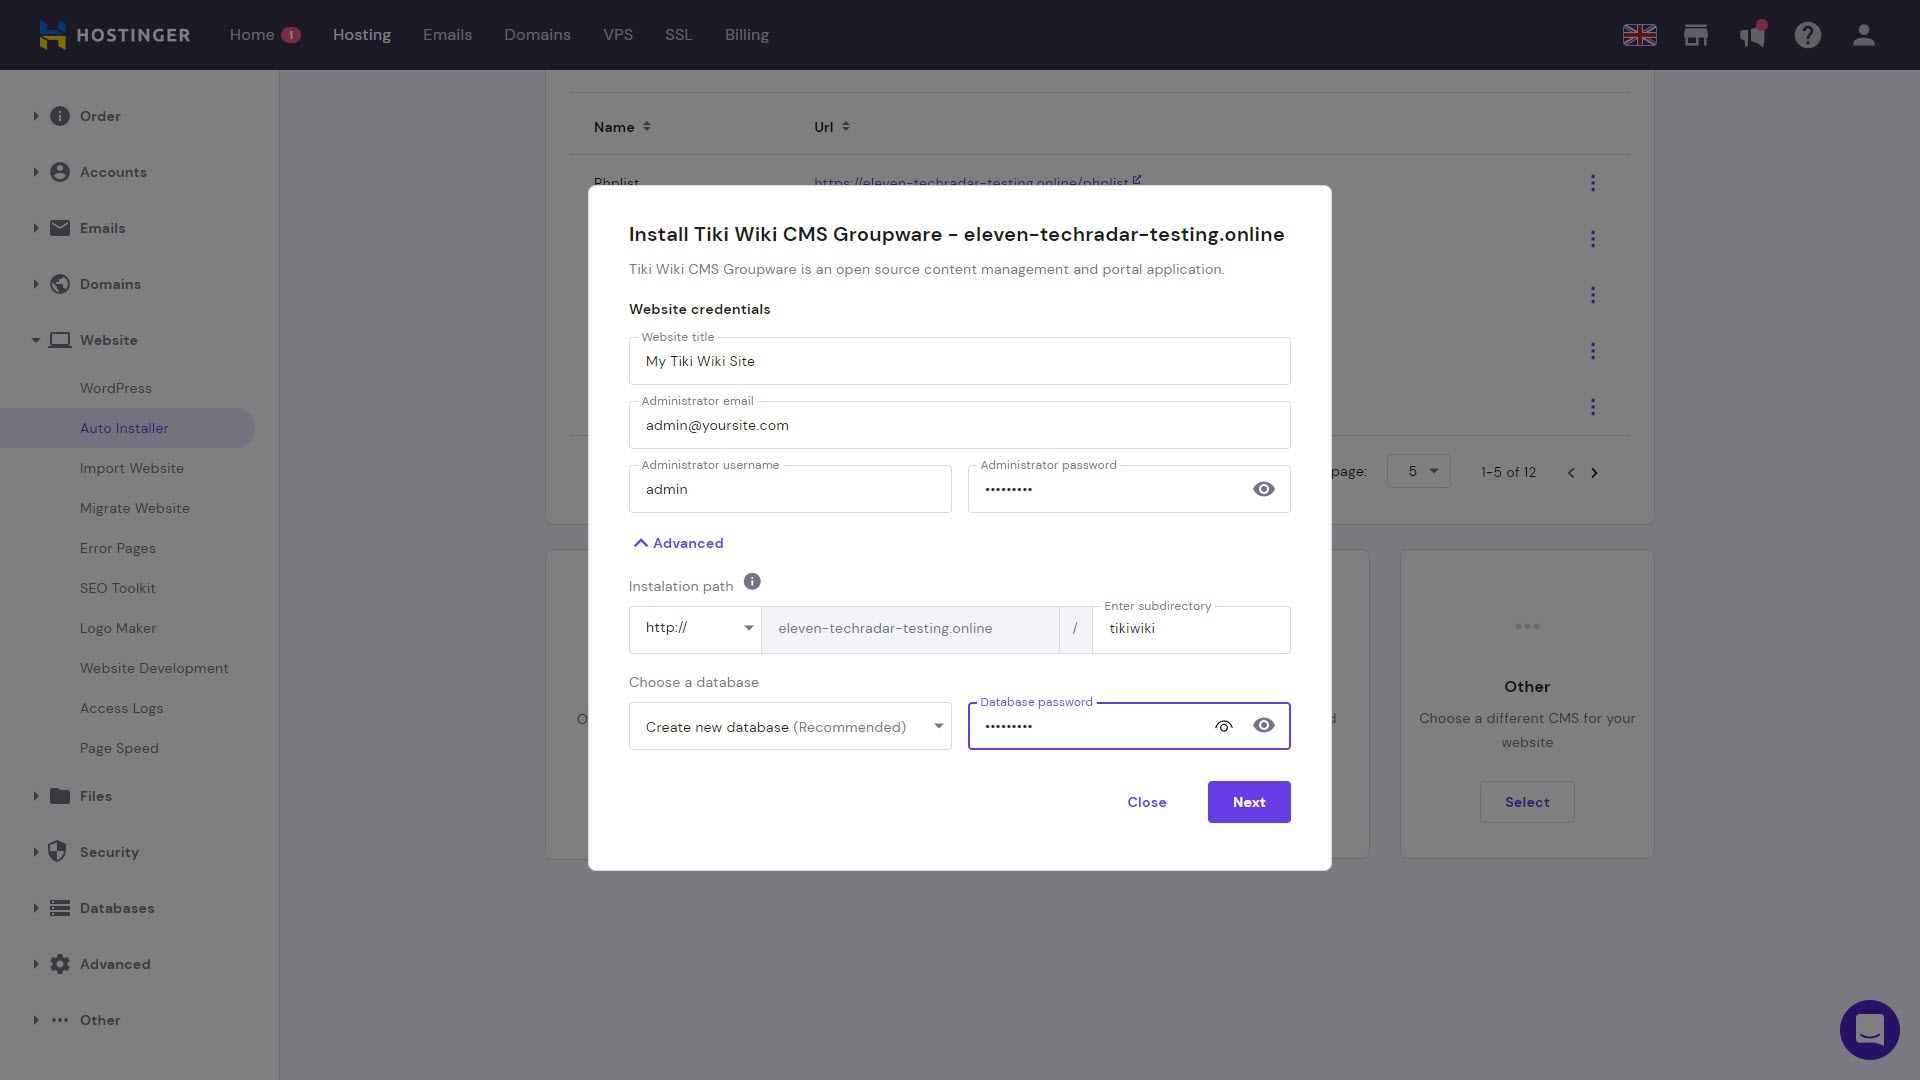
The quickest way to start using Tiki is to install it using Hostinger’s Auto Installer. In the Hostinger web administration panel menu, browse to Auto Installer and choose Other. Select Tiki Wiki CMS Groupware from the list.
On the first page of the wizard, you’ll be asked to enter a name for your website and to set administration login details. You can specify the site to be installed in a subdirectory and choose which MySQL database to use.
The second page of the wizard asks which version of Tiki you want to install and whether you want the software to update automatically. Click Install when you’re finished choosing your preferred settings.
Step 2: Log in to your Tiki site
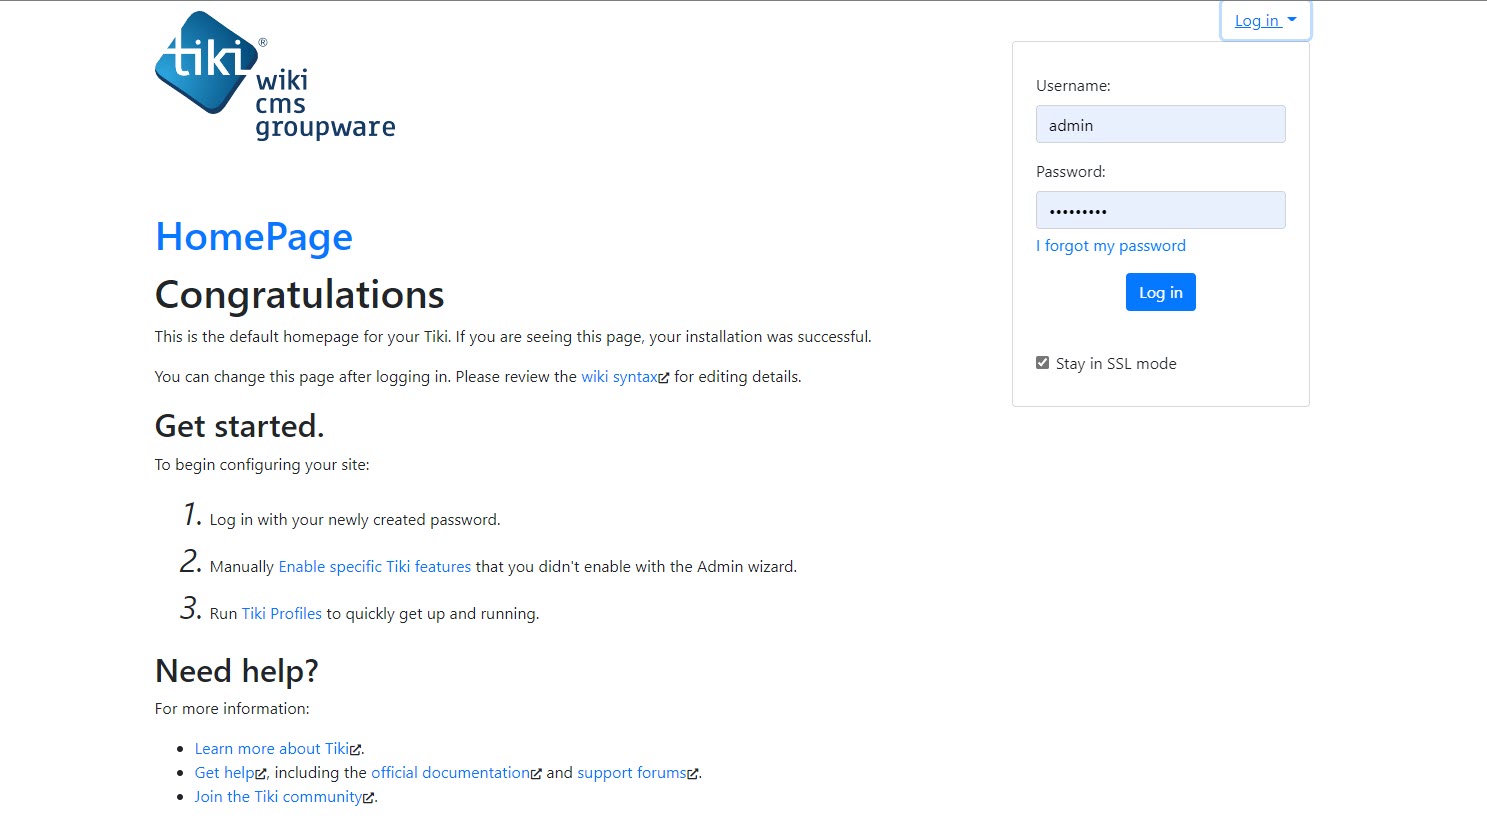
On the Auto Installer page, right-click on Tiki and choose Manage. You’ll be taken to the home page for your Tiki installation. You can edit this page later. For now, click on Log in and enter the administrator user credentials you created in step 1.
Sign up to the TechRadar Pro newsletter to get all the top news, opinion, features and guidance your business needs to succeed!
Step 3: Run the Configuration Profiles Wizard
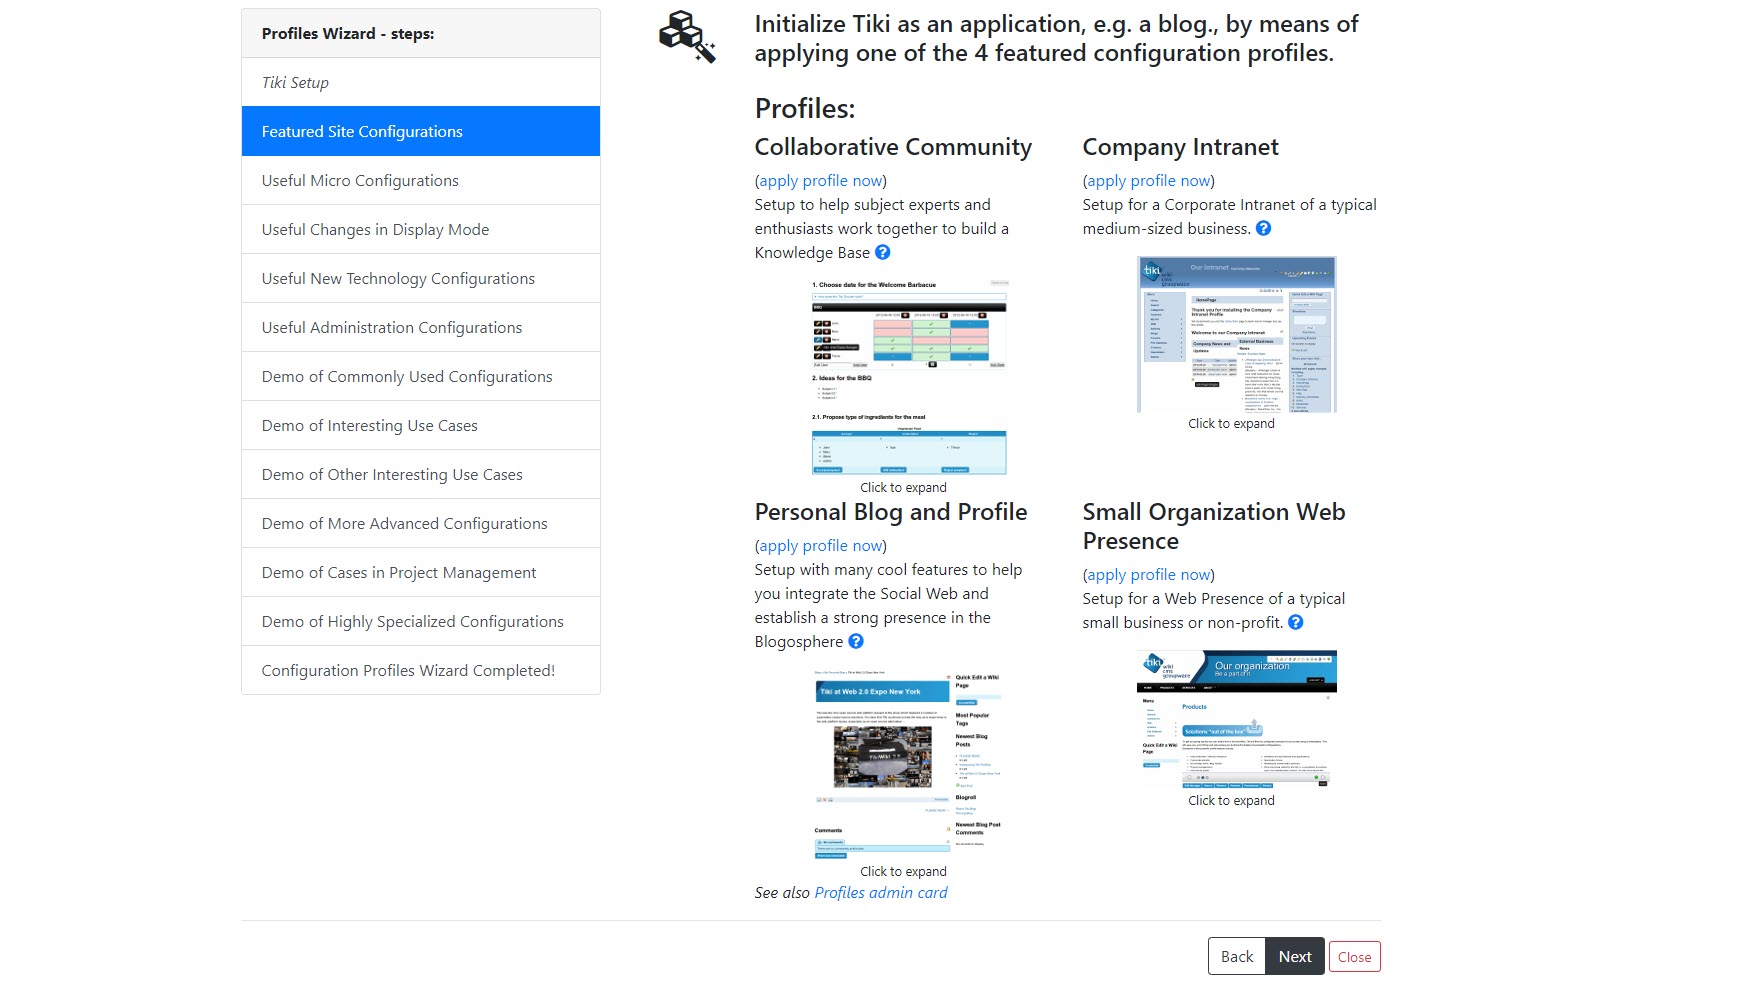
You are now offered several options for setting up your Tiki site further. Click Start the Wizardry to begin the Configuration Profiles Wizard.
This wizard presents several commonly used template sites to choose from. For instance, you can choose to apply the Company Intranet profile to set your Tiki site to include sections for company news, file repository, and wiki. Or, you could choose Personal Blog and Profile so your site will include a blog, image gallery, RSS integration, and a video log.
Besides these large template profiles, you can also choose to apply smaller profiles that only change certain elements of your Tiki site. You can apply multiple profiles at the same time to customize your site further.
Step 4: Run the Configuration Wizard
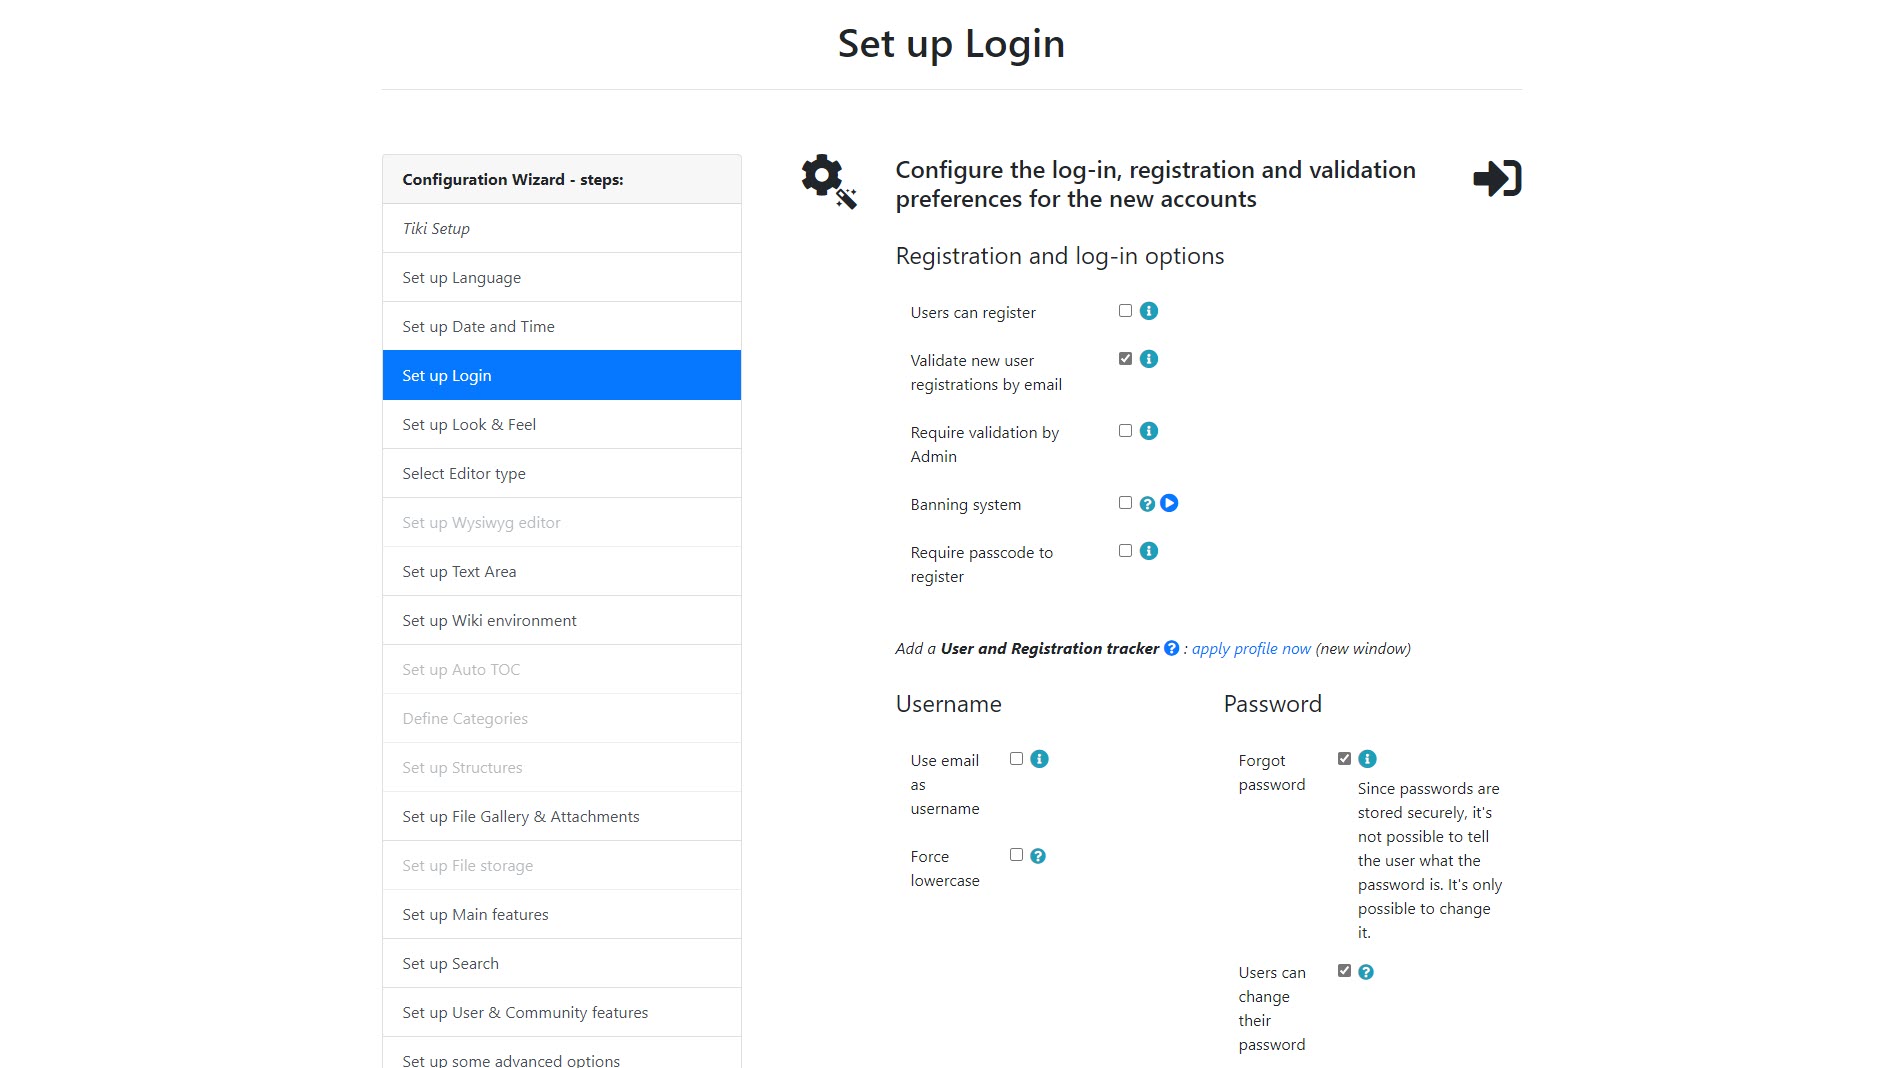
After applying your preferred profile(s), log out and log back into your Tiki site. Select Start Configuration Wizard. This wizard includes all the most common preferences you’ll typically want to change on your Tiki site to make it your own.
The wizard has 18 pages in total, but the pages available to you depend on the features you currently have enabled. For example, if you applied the Small Business Presence profile in step three, File Storage settings will not be covered in the Configuration Wizard because you’re not using that feature.
Run through each page, choosing the right option for your project, and click Save and Continue until you’ve completed the Configuration Wizard.
Step 5: Use the admin menu and control panels
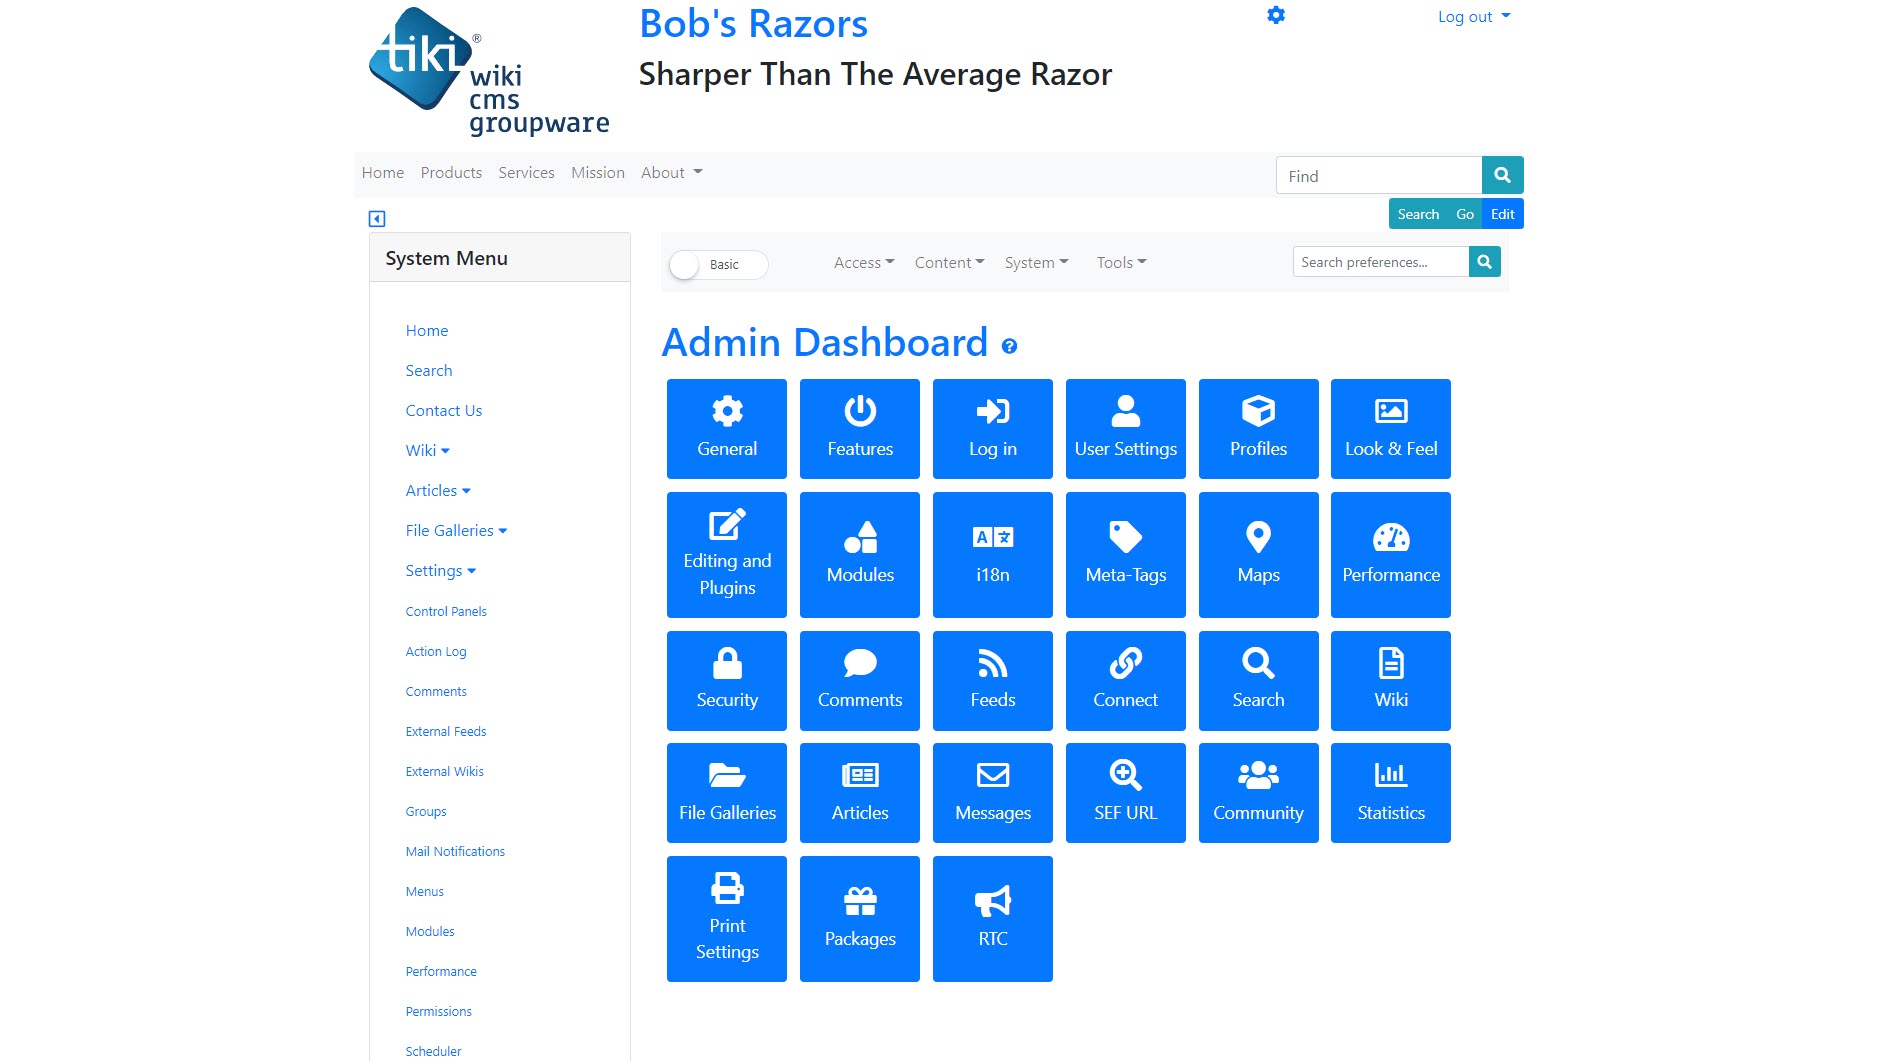
Further configuration can be performed in the admin menu. Click on the blue cog at the top of the page and click on Features. Here, you can choose a list of features to enable or disable.
By clicking on Control Panels in the System Menu, you can alter the settings of each of the features you enabled.
Step 6: Edit your website
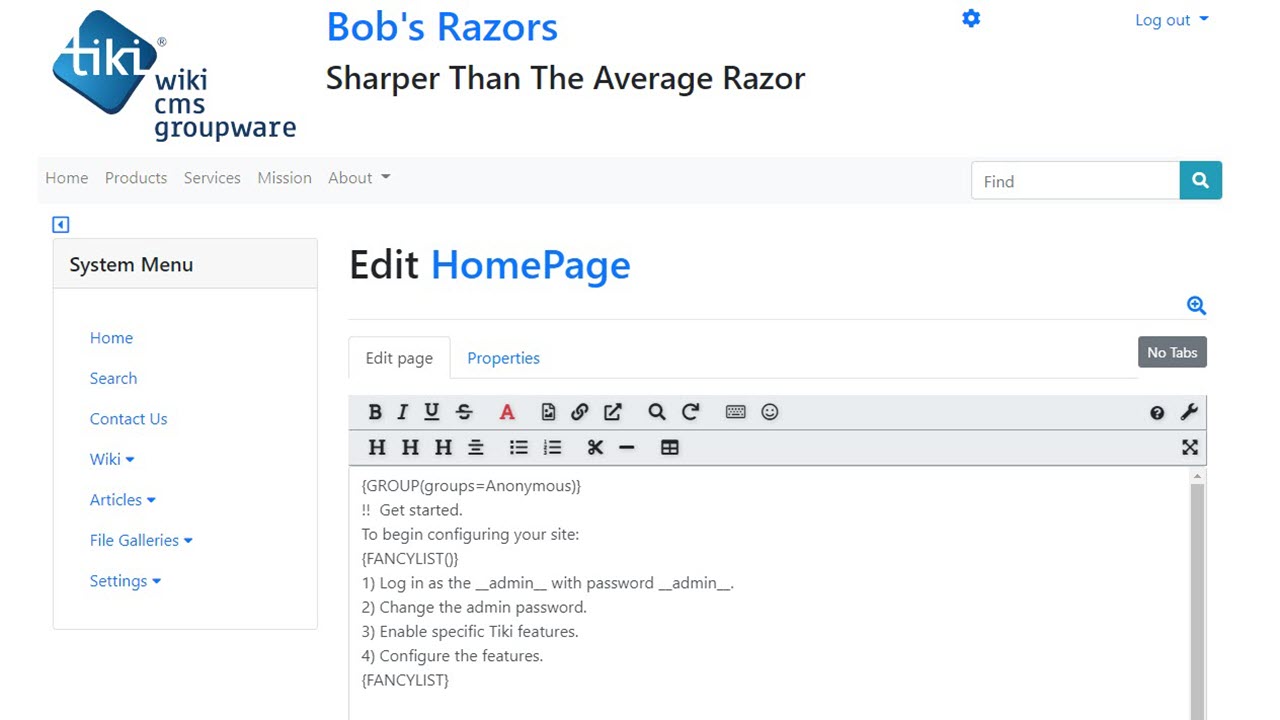
Browse to any page on your Tiki site and you can click on the Edit button to alter the page’s content.
Tiki uses wiki syntax for formatting. For example, surrounding text in two underscores (e.g., __text__) means the text will be displayed in bold to website visitors. Tiki includes an editor that makes wiki syntax easier to generate as well as a pop-up help tool to remind you of all the available wiki code syntax.
Summary
In this guide, we’ve covered how to install Tiki Wiki CMS, a powerful web-based content management system with strong team collaboration features. Tiki requires more initial configuration than the average website application because it offers so much versatility. Ultimately, the ability to fine-tune your website so much leads to a site that better serves your specific purposes.
Versatility is Tiki’s greatest asset. Not only is it a great online collaboration tool, it is also a powerful content management system. Tiki can be used as a document management tool, to build a corporate website, or for personal blogging. By giving Tiki the time it deserves to understand its varied and complex systems, it can be used as the foundation for a huge range of internet and intranet applications.
Read more in this series:
- How to start a blog with Joomla
- Build your own CRM using SugarCRM
- How to host your files online using Nextcloud Hub
- How to start your own help desk with Hesk
- How to build an HR System using OrangeHRM
- How to generate your own invoices using Invoice Ninja
- How to install live chat software with Sales Syntax
- Run your own ecommerce platform with PrestaShop
- How to create your own website with Soholaunch
- How to launch your own website with WebsiteBaker
- How to learn search engine optimization with SEO Panel
- How to kickstart your own Ancestry.com alternative with webtrees
- How to install a free ERP software called Dolibarr
- Demand gen vs lead gen: What's the difference?
- Host your own private forum with MyBB
- Build your own calendar application with WebCalendar
- How to build your own email marketing service with phpList
- A Google Photos alternative: Store your photos online with Piwigo
- How to start with project management using The Bug Genie
- Make your own poll platform with LimeSurvey
- Roll out your own Wikipedia clone with MediaWiki
- How to host your own learning management software with Moodle LMS
- Set up an accounting system with FrontAccounting
- Produce your own bills with BoxBilling
Richard brings over 20 years of website development, SEO, and marketing to the table. A graduate in Computer Science, Richard has lectured in Java programming and has built software for companies including Samsung and ASDA. Now, he writes for TechRadar, Tom's Guide, PC Gamer, and Creative Bloq.
