How to install a VPN on your router
We show you how to work some VPN magic with an Asus router
One way of setting up a VPN is to install the client software on a single PC. This is the most common method, particularly for novice users, as it has the major advantage that it’s a nice and simple way to set everything up.
However, more advanced users might want to install a VPN not on a single computer, but rather on their router. Remember that the router oversees the entire network, so having the VPN installed at this level means that all data is encrypted as it leaves the LAN. This way, every device on the network is using the VPN by default, and you don’t have to worry about hardware not being supported by the VPN provider.
Configuring the VPN in this manner is described as using a VPN router. However, you’ll still have to do some tinkering each time you wish to change VPN server locations.
If you’d like a more an even more user-friendly approach to the VPN router, check out the ExpressVPN app for routers, a custom VPN router firmware. We reviewed the Linksys version two years ago, but it’s now also available on select Asus and Netgear models.
While some folks may be willing to pay the price for the convenience of a VPN router, this is hardly necessary, as some standard routers can be configured to work with a VPN by the end user.
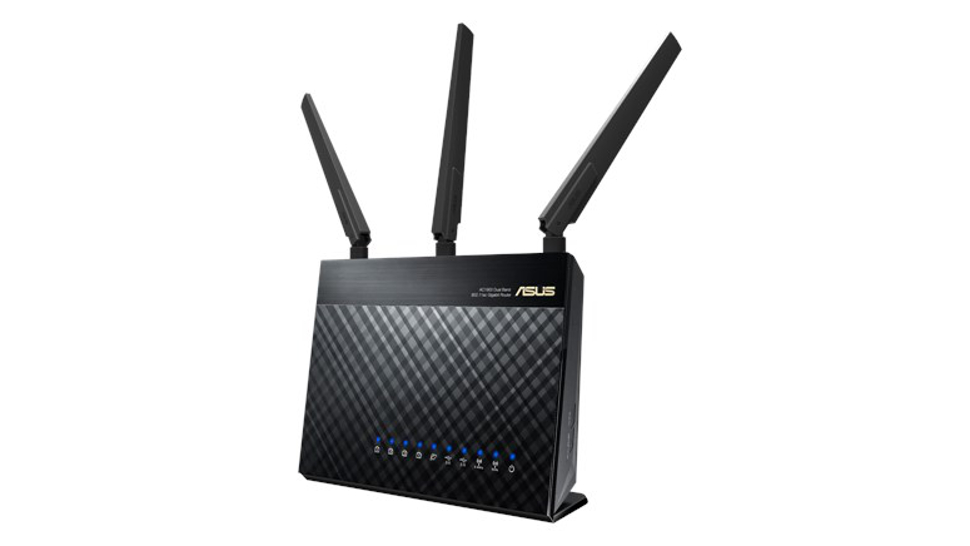
The routers that work well for a VPN router include those that support DD-WRT, a Linux open source firmware. Another option is Asus routers which support VPN router settings with the manufacturer firmware – and that’s what we’re going to look at in this article. For this step-by-step tutorial, we will be using the Asus RT-AC1900P router with stock firmware.
- We’ll also show you how to build a dedicated VPN router using DD-WRT
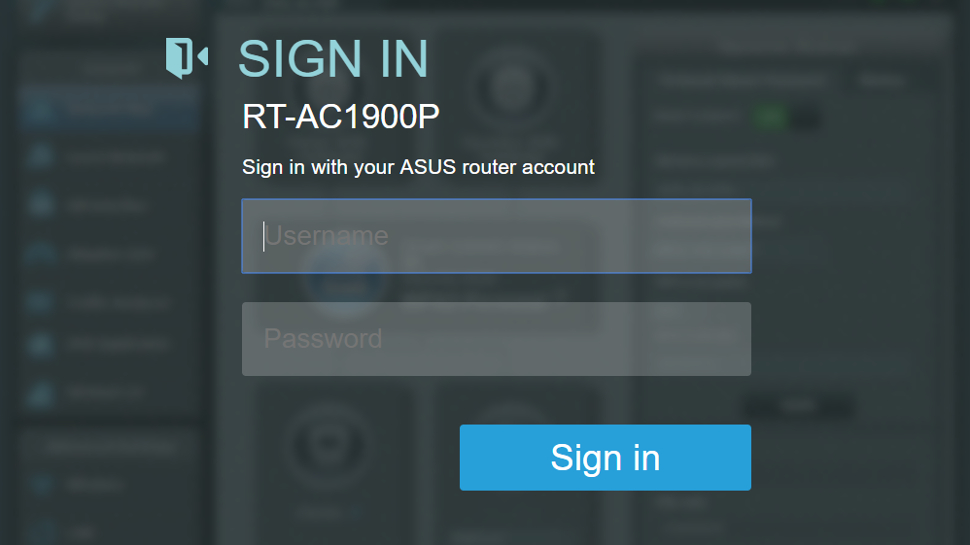
The first step in this process is to access the router’s login page. For our Asus RT-AC1900P router (and with most routers), this can be done by entering 192.168.1.1 into the browser’s URL bar, and then signing in with the username and password. (If you’ve forgotten the login details then do a factory reset and use the default credentials as specified in the user manual).
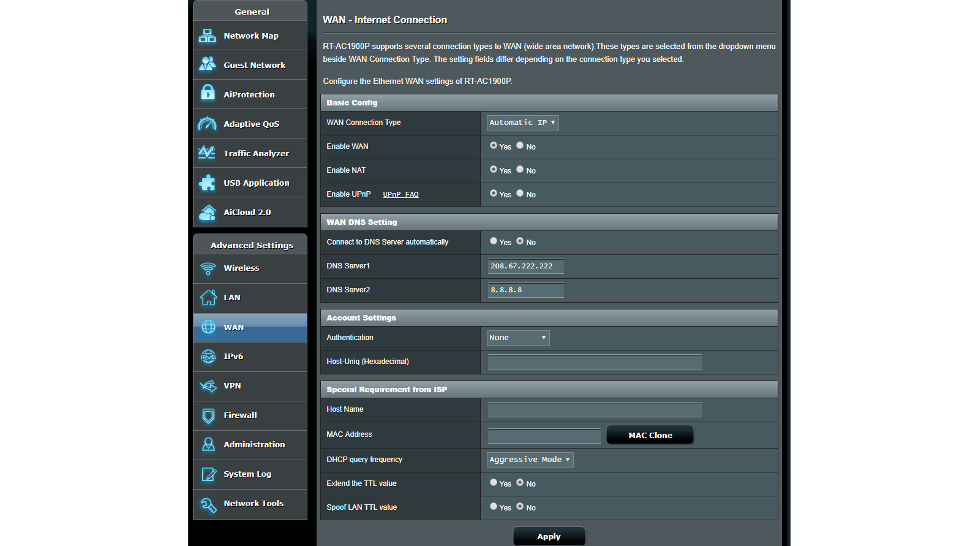
Once we are signed in, we now have a menu of choices in the left-hand column. While it is tempting to head right over to ‘VPN’, the next step is to go to ‘WAN’. Here we need to adjust the background settings as per the above screenshot. Use the following settings:
- WAN Connection Type: Automatic IP
- Enable WAN: Yes
- Enable NAT: Yes
- Enable UPnP: Yes
- Connect to DNS Server Automatically: No
- DNS Server 1: 208.67.222.222
- DNS Server 2: 8.8.8.8
- DHCP Query Frequency: Aggressive Mode
Remember to hit ‘Apply’ to lock in these settings before moving on.
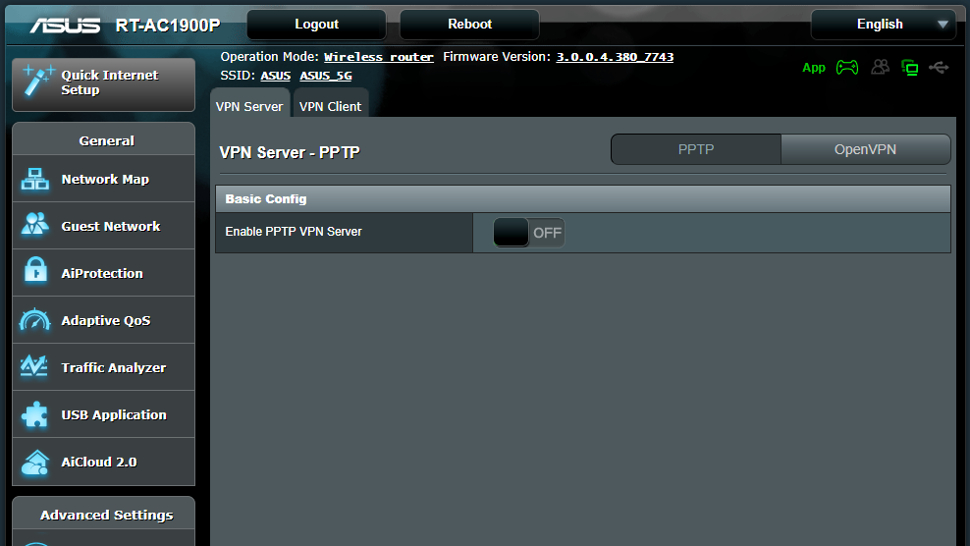
Okay, now we hit the menu for ‘VPN’. Note that when we do that, there are two options for VPN settings: ‘VPN Server’ and ‘VPN Client’, and we need to select ‘VPN Client’.
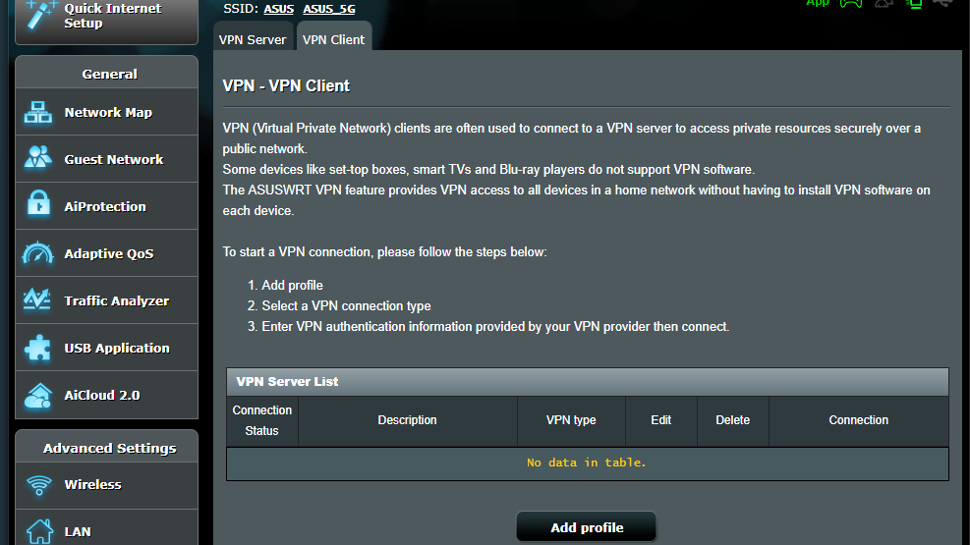
With the VPN Client selected, we have an empty VPN Server list. Select the option to ‘Add Profile’.
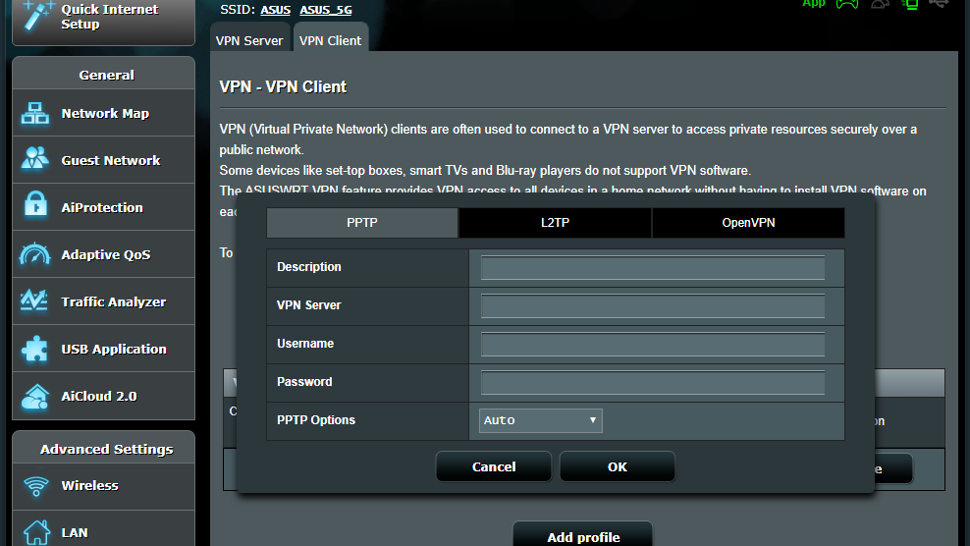
We now see a window to add the credentials for a VPN server. Note that across the top we have three options for different types of VPN security. OpenVPN is considered the most secure, but it can be slower due to the higher level of security – it is also a good choice when trying to get past a firewall restriction. PPTP has the lowest level of security, but is generally faster with less encryption overhead. Finally, L2TP is a good compromise between the other two encryption protocols, offering an excellent balance of speed and security. Select the encryption protocol you wish to use before inputting the credentials.
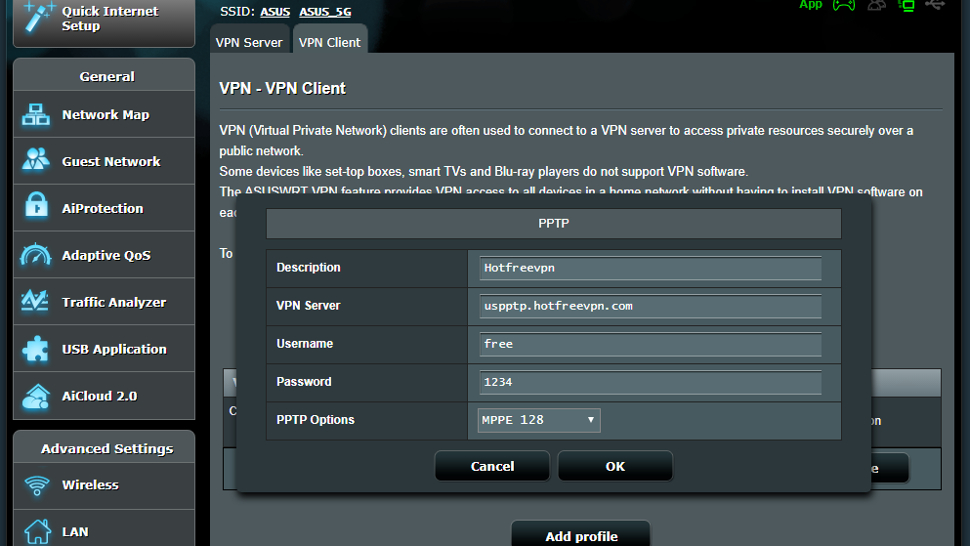
Here is an example of how to set things up using PPTP. First off, you must enter a description, but this can be anything to indicate to the user what this service is. Then it requires the URL of the VPN Server, along with a username and password, which are all provided by the VPN Server. In addition, the ‘PPTP Options’ needs to be set to MPPE 128, which indicates the Microsoft Point-to-Point Encryption with a 128-bit key. When the credentials are entered, be sure to save them by hitting OK.

Above we have an example of the setup for an OpenVPN server. Here we also enter an initial description, along with a username and password. In addition, there’s a small OVPN file that is provided by the VPN Server, which gets imported into the setup credentials. After this is entered, hit the OK button.
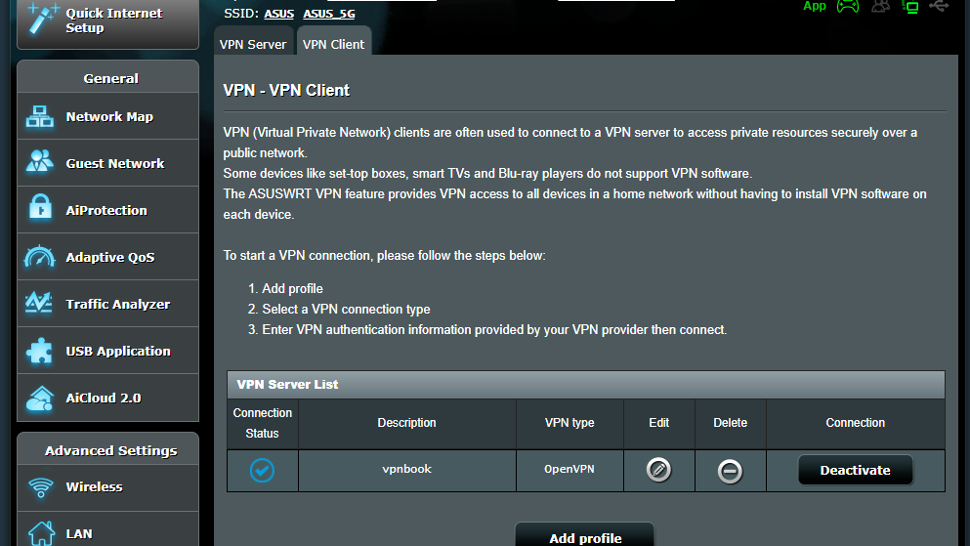
With the credentials entered, next press ‘Activate’ under the ‘Connection’ of the service to start. You can have multiple credentials saved for each VPN Server, but only one active at a time. The router will then access the internet, create the VPN tunnel, and when this is done, Connection Status will display a blue checkmark, verifying that the connection is active.
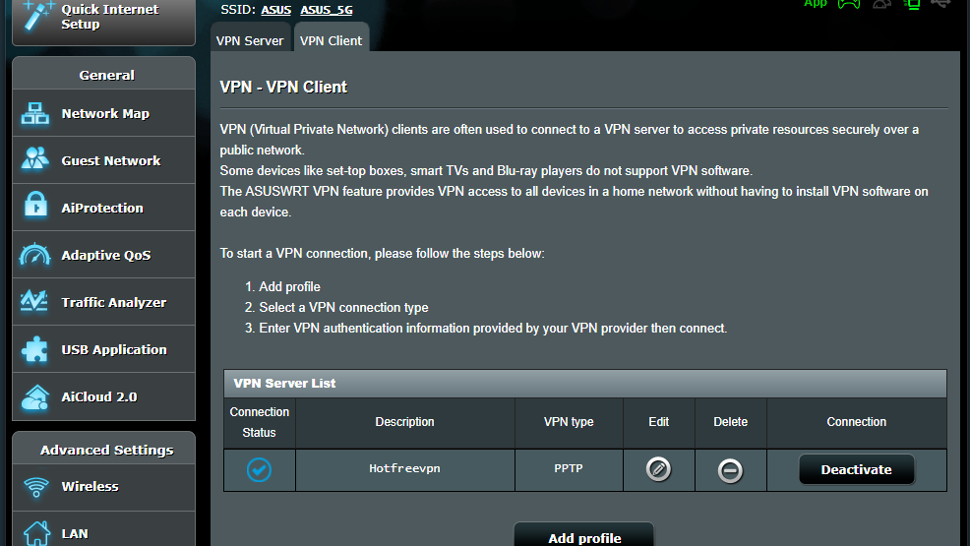
This step is the same for either an OpenVPN server or a PPTP server.
With the VPN tunnel established, it’s good practice to check that it is working. Perform an IP leak test to verify that the location has been changed, i.e. it should display the virtual location, not your actual location. You can perform this test at ipleak.net. And that’s it – you’re all set to surf more securely and privately across all devices connected to your router.
- Check out the best VPN
Sign up to the TechRadar Pro newsletter to get all the top news, opinion, features and guidance your business needs to succeed!
Jonas P. DeMuro is a freelance reviewer covering wireless networking hardware.