Breathe new life into your Windows XP PC
Give your XP PC a refresh
Sign up for breaking news, reviews, opinion, top tech deals, and more.
You are now subscribed
Your newsletter sign-up was successful
Keep your precious data safe by getting to grips with Windows XP's built-in backup and recovery features and other useful third-party apps.
36. Save your data with System Restore
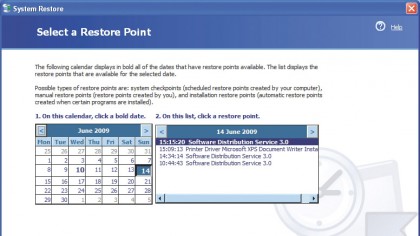
System Restore keeps a note of everything you change on your Windows XP computer, enabling you to reverse them with a couple of clicks if necessary.
System Restore is switched on by default when you install Windows XP, although it's always worth double-checking by selecting 'Start > Programs > Accessories > System Tools > System Restore'. Windows XP creates restore points automatically, once a week or just before you install new software, but you're not bound to this schedule - you can create your own restore points whenever you like.
Note that the Recommended Restore Point is simply the last one, but you don't need to remember what it did, since all the important changes are listed for you.
To see more restore points, simply click 'Choose a different Restore Point' followed by 'Next'. This lists the ones that Windows has saved, and by clicking 'Scan for affected programs' you get additional detail without having to actually run the process.
37. Keep your files safe using MS Backup
Sign up to the TechRadar Pro newsletter to get all the top news, opinion, features and guidance your business needs to succeed!
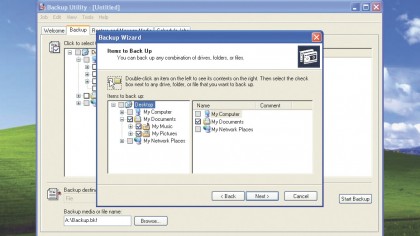
Microsoft has included MS Backup with both the Professional and Home versions of Windows XP. However, Home users will need to install it from the original Windows XP CD - you'll find the NTBACKUP.MSI file in the \VALUEADD\MSFT\NTBACKUP folder on the CD.
Once installed, run it from the 'Start > Programs > Accessories > System Tools' menu. MS Backup is a basic old-school backup tool, which provides you with a tree list of all the files on your PC for you to select which ones you want backed up.
It starts in Wizard mode - using this you can pretty much take care of all your backup needs. You can choose to save your files to a network drive, but in most cases you'll be burning to a DVD.
The default is to enable Windows to choose which files to back up - which includes the desktop, libraries and standard Windows folders, such as Documents. This will cover 99% of the files you want, but you can add more or be more selective if you need to be.
38. Recover system passwords
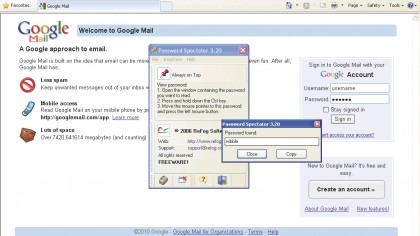
If you use online resources that require you to log in, you probably told Internet Explorer to remember your password so that in future you won't need to enter one. But what's under those asterisks? To see, download the Password Spectator Lite software. Launch the program, and ensure you press 'Stay On Top', because this will make things easier.
Fire up your web browser and pay a visit to the website that requires you to log on. Enter your user name and hit [Tab] to force Internet Explorer to automatically enter your password for you. Highlight the text masked with asterisks and hold down [Ctrl]. Move the mouse away from the password and click with the left mouse button. Your password will now be revealed.
Password Spectator can also recover passwords from other applications. This works in the same way as well, just find your hidden password and press the [Ctrl] key.
Turn off Internet Explorer's password-remembering option by clicking 'Tools > Internet Options > Content'. Click 'AutoComplete' and clear the two boxes relating to passwords.
39. Create remote backups of your data
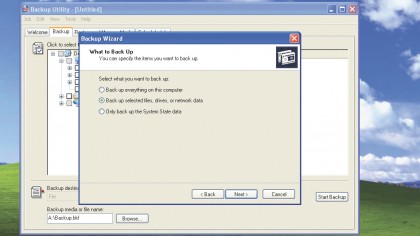
Back up your data to DVD with Windows XP Backup and Restore or even send it to a compressed file that you can copy to a network or share on another computer.
If you use Windows XP Professional Edition then the Backup Utility will already be installed on your system. However, for Home Edition users, it may not be. You can find out by placing the installation disc in your drive and browsing to VALUEADD\MSFT\NTBACKUP. Once you've located that directory, double-click ntbackup.msi and begin the installation.
Click 'Start > All Programs > Accessories > System Tools and Backup'. Leave the check box, 'Always start in wizard mode', as this will guide you through the process. Click 'Advanced Mode'.
Select the 'Advanced Mode Wizards for backup or restore'. Here we'll run the backup manually to step through the process. Click 'Backup'. Go through the file system, checking the files and folders you intend to back up. Change the backup media or file name to the appropriate target device. Click 'Start Backup'.
Leave the 'Append' radio button selected and alter the backup description to your choice. The text string shows what to write on the media if you intend to label it. Click 'Advanced'.
Check 'Verify Data After Backup'. This will take longer to finish but it ensures data integrity. Leave the other check boxes clear. Backup Type is where you pick the backup method. Click 'Start Backup'. You'll see the Backup Progress box, showing the job label, the job status, and an estimated completion time. When finished, click 'Report' and scan it for errors.
40. Securely erase data from your hard drive
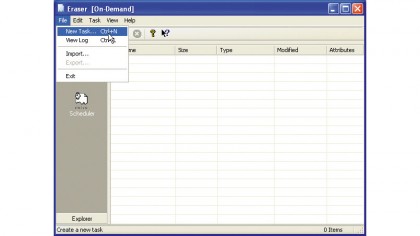
To speed file deletion up, Windows XP merely marks the beginning of a file when you delete it, which enables other files to reside in the space taken by that old file. Until the file is overwritten, however, it's retrievable. You can bypass this problem with a free third-party app called Eraser.
Once installed, you can securely delete any file by right-clicking the file in question and choosing 'Erase'. Click 'OK' to use the default options or 'Options' to choose a different method.
If the files have already been deleted, launch Eraser and click 'On Demand', select 'File > New Task' to set up the task to wipe a drive's free space. Select the drive you wish to scrub from the drop-down menu, tick 'Keep task on the list' and click 'OK'. Right-click the task and choose 'Run'. Read the warning, click 'Yes' and prepare to wait.
Current page: Windows XP back up and recovery tools
Prev Page Remote access features in Windows XP Next Page Windows XP time-saving tips and tweaksChris Thornett is the Technology Content Manager at onebite, editor, writer and freelance tech journalist covering Linux and open source. Former editor of Linux User and Developer magazine.
