How to run a full Bitcoin node
Take full control of your BTC and help the network with Bitcoin Core

Most Bitcoin wallet software connects to other servers to verify Bitcoins (BTC) you’ve sent and received. This means that transactions can be linked to your own IP address. Lightweight wallets can also be tricked into accepting payments which aren’t valid as they rely on a third-party server for information.
The official Bitcoin Core client is a ‘full’ node in that it downloads the entire Bitcoin blockchain and processes all new transactions on the network. This means if you’re downloading data about all payments received then it’s much harder to link them to your identity.
Running a full node is also more secure as it doesn’t need to check with a third-party that all the rules of Bitcoin are being followed – for instance, if someone tries to spend the same BTC twice.
In this guide, you’ll learn how to set up your own full node with the official Bitcoin Core client. In order to get started, you’ll need enough space to store the blockchain (currently around 155GB), as well as 2GB of RAM.
Full nodes also upload and download large amounts of data so you’ll need a reliable and low cost internet connection. (See here for more information).
As you’ll see, there are ways to reduce both internet traffic and storage space used.
The safest way to run a full node is on a dedicated computer, as there’s less risk you’ll accidentally download malware.
Sign up to the TechRadar Pro newsletter to get all the top news, opinion, features and guidance your business needs to succeed!
- We show you how to mine Bitcoins
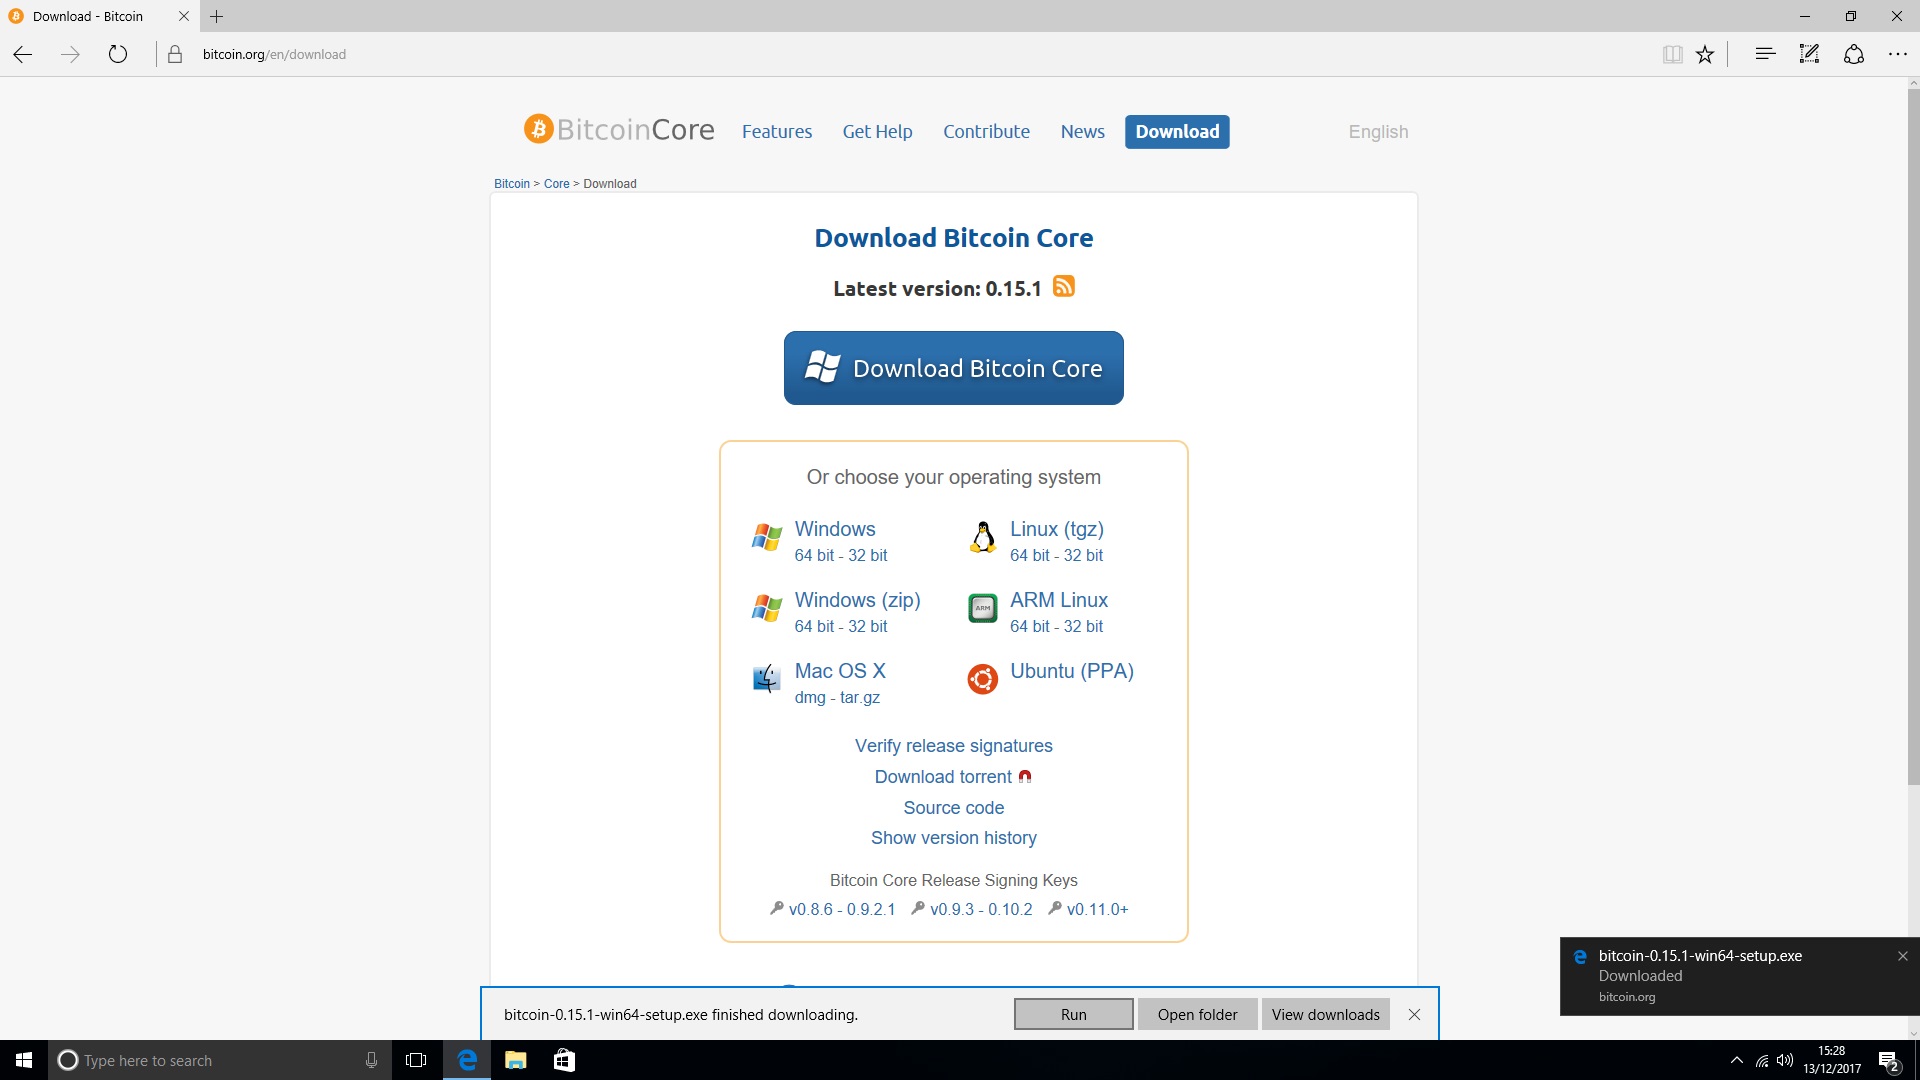
1. Download Bitcoin Core
Open your web browser and navigate to https://bitcoin.org/en/download. Click ‘Download Bitcoin Core’. This should automatically download the correct version of the software for your operating system.
If you’re using Windows 10 with Microsoft Edge, you can choose to automatically launch the installer by clicking ‘Run’. Otherwise open it from your Downloads folder.
Once the installer starts, click ‘Next’ to continue. Finally, click ‘Finish’ to complete installation.
You can now start Bitcoin Core itself. If you’re using Windows, you can do this from the Start menu.
2. Sync blockchain data
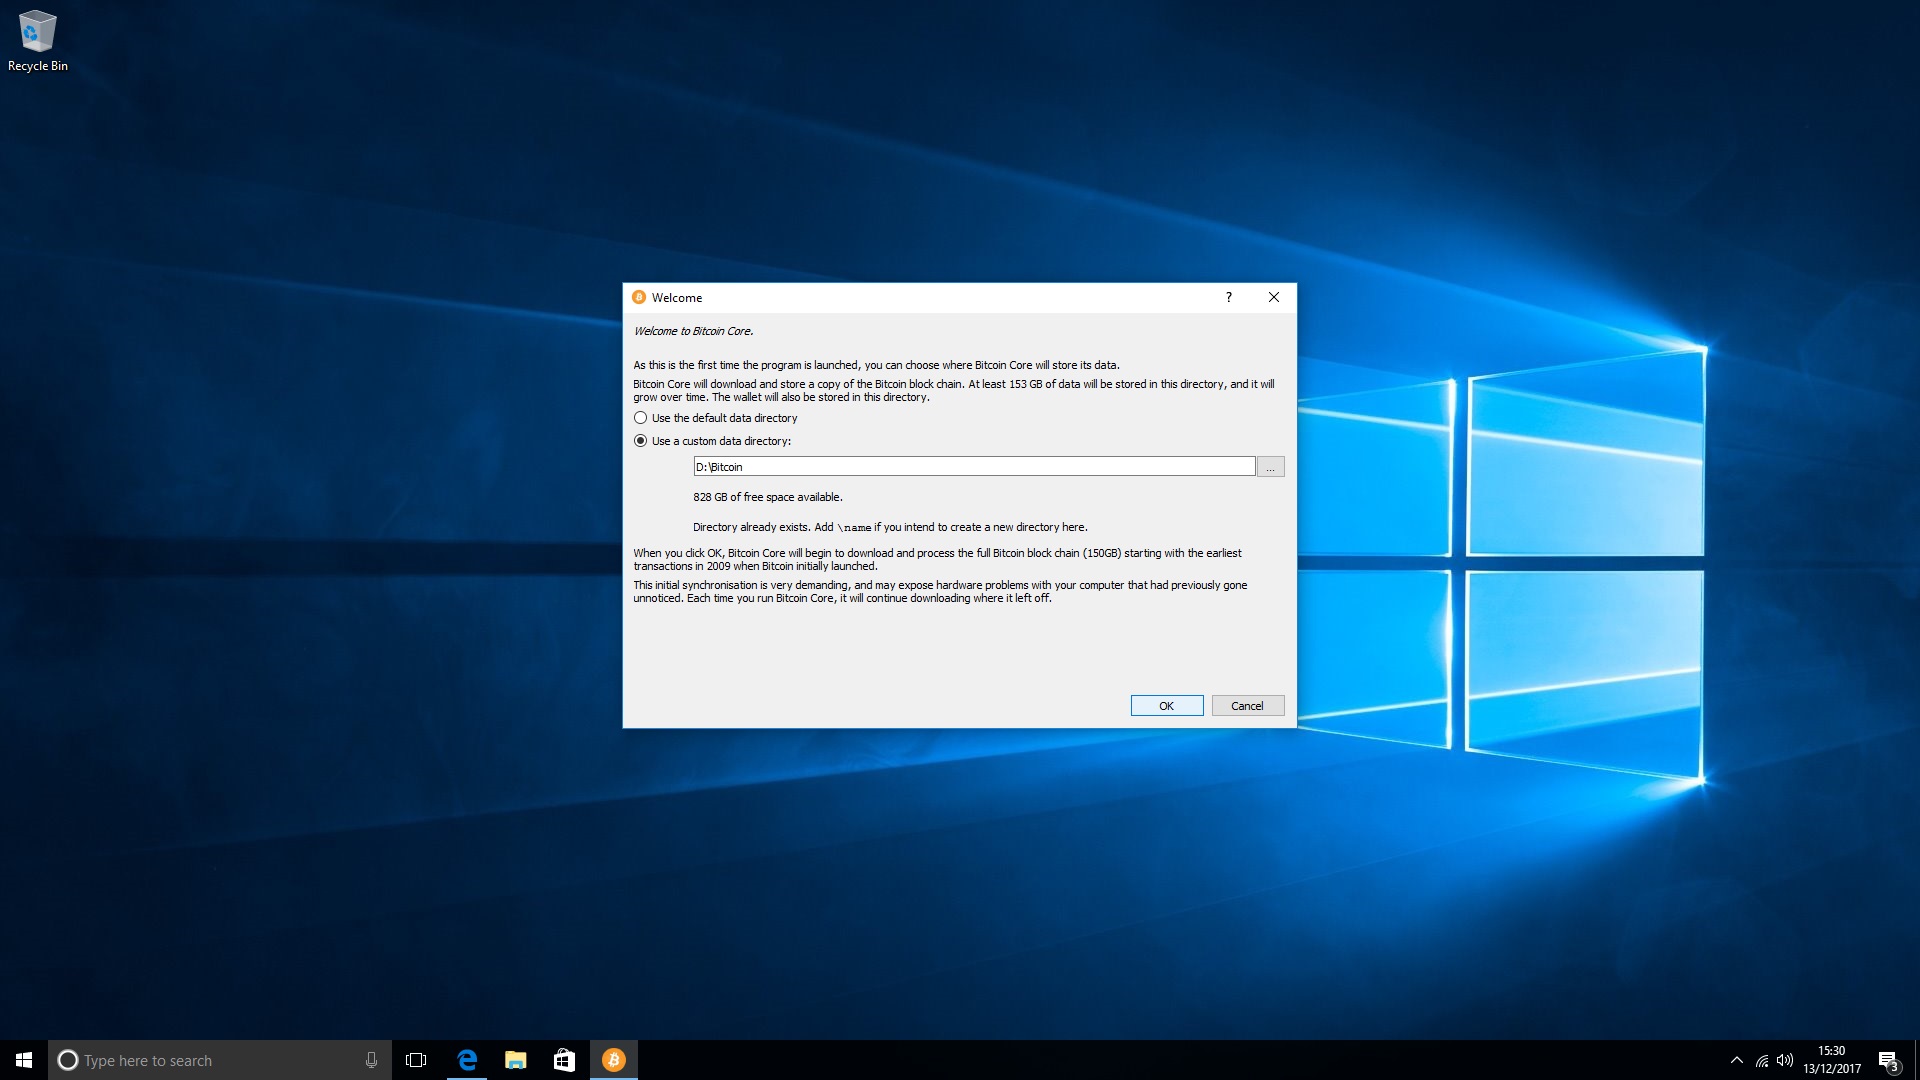
Once Bitcoin Core launches, the welcome screen will ask you to choose a location for your data directory. This is where you’ll store your Bitcoin wallet as well as your copy of the Bitcoin blockchain which currently is around 155GB.
Leave ‘Use the default data directory’ checked to use your hard drive to store the data. If there isn’t enough space, or you prefer not to store the entire blockchain on your hard drive, click ‘Use a custom data directory’. From here you can specify a folder elsewhere such as on an external hard drive.
Click ‘OK’ to start the sync process. Note that this can take anywhere from a few hours to several days.
3. Encrypt your wallet
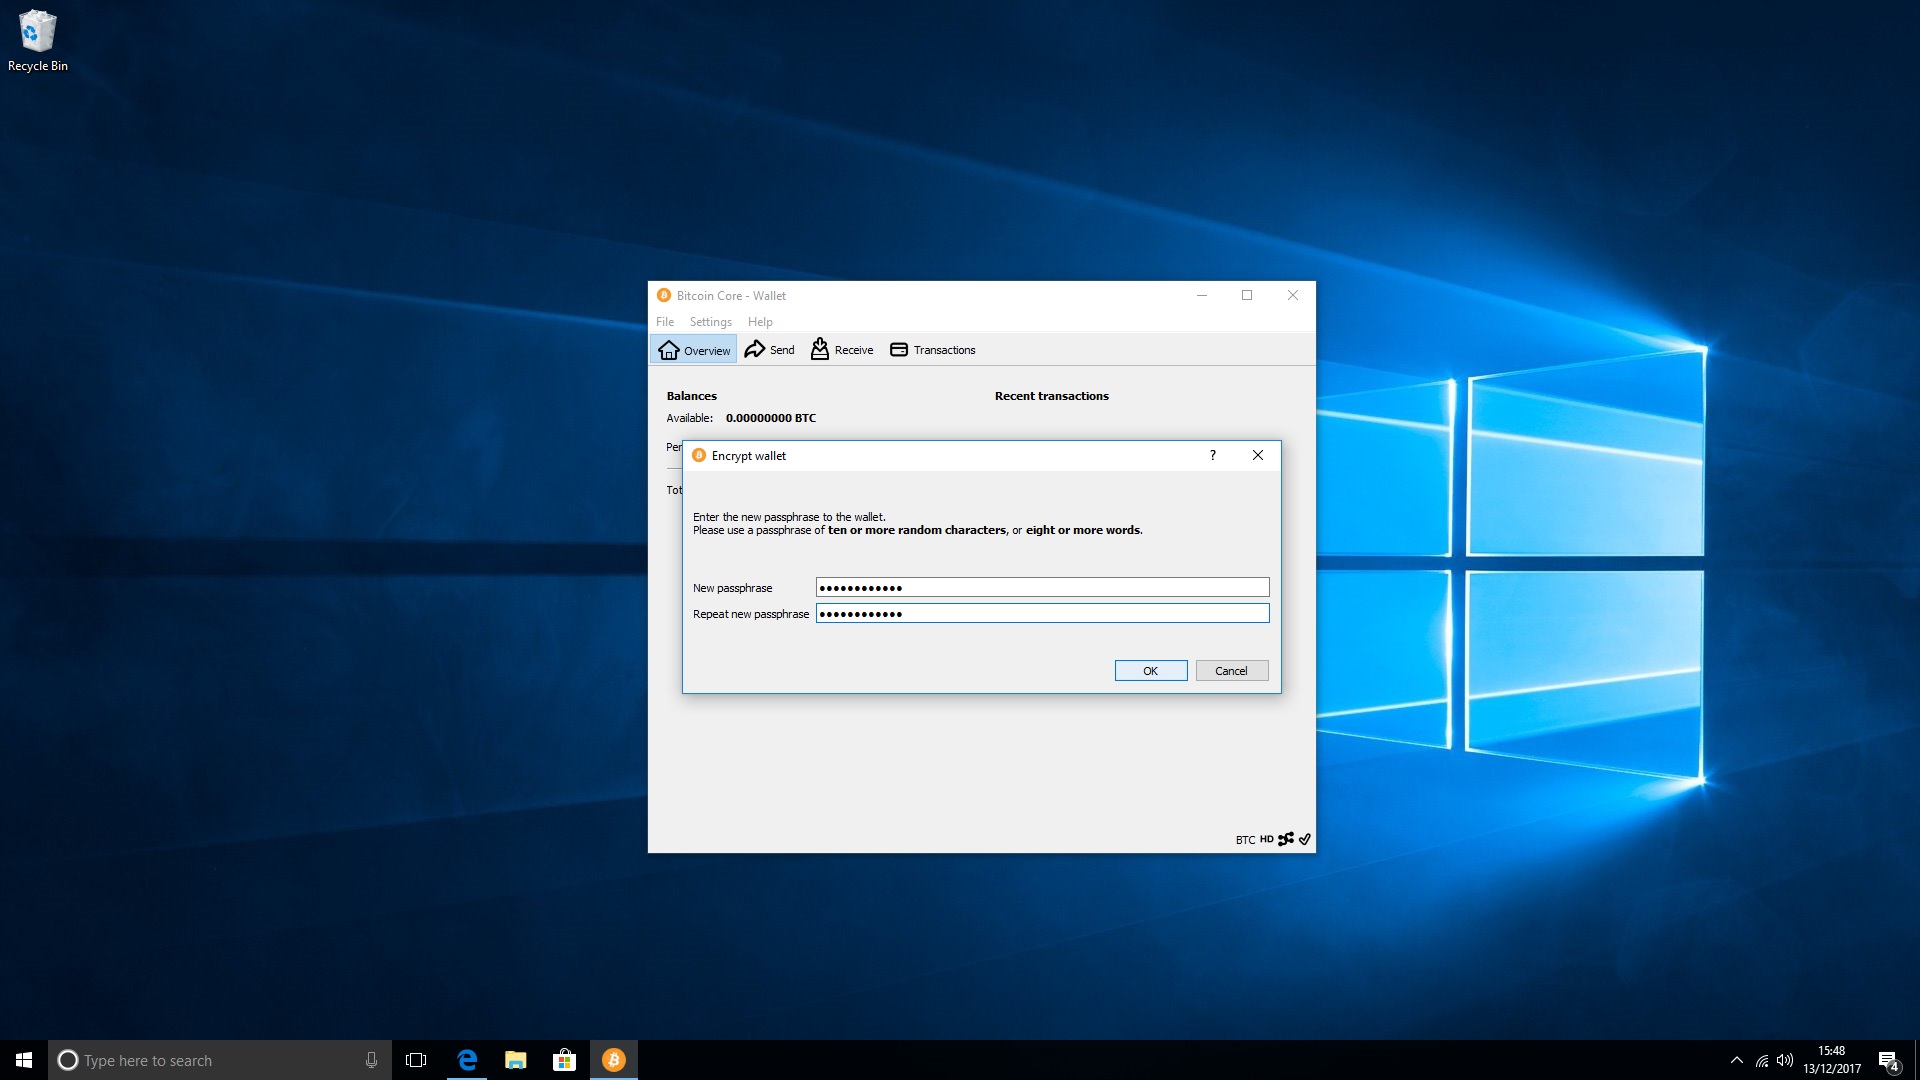
By default anyone with a copy of the data directory you created earlier can access the ‘wallet.dat’ file and control your Bitcoins. You can make life much harder for thieves and hackers by encrypting it. This also gives you something to do while Bitcoin Core is still downloading the Blockchain.
Click ‘Hide’ for now and then click on the ‘Settings’ menu then ‘Encrypt’ wallet. Read the warning message carefully and choose your password. If you have any dice to hand, consider using Diceware to generate the password.
Once you’ve entered the password, click ‘OK’. Follow the advice in the new warning message and make a careful note of your password on a piece of paper, then put it in a safe place.
4. Backup your wallet
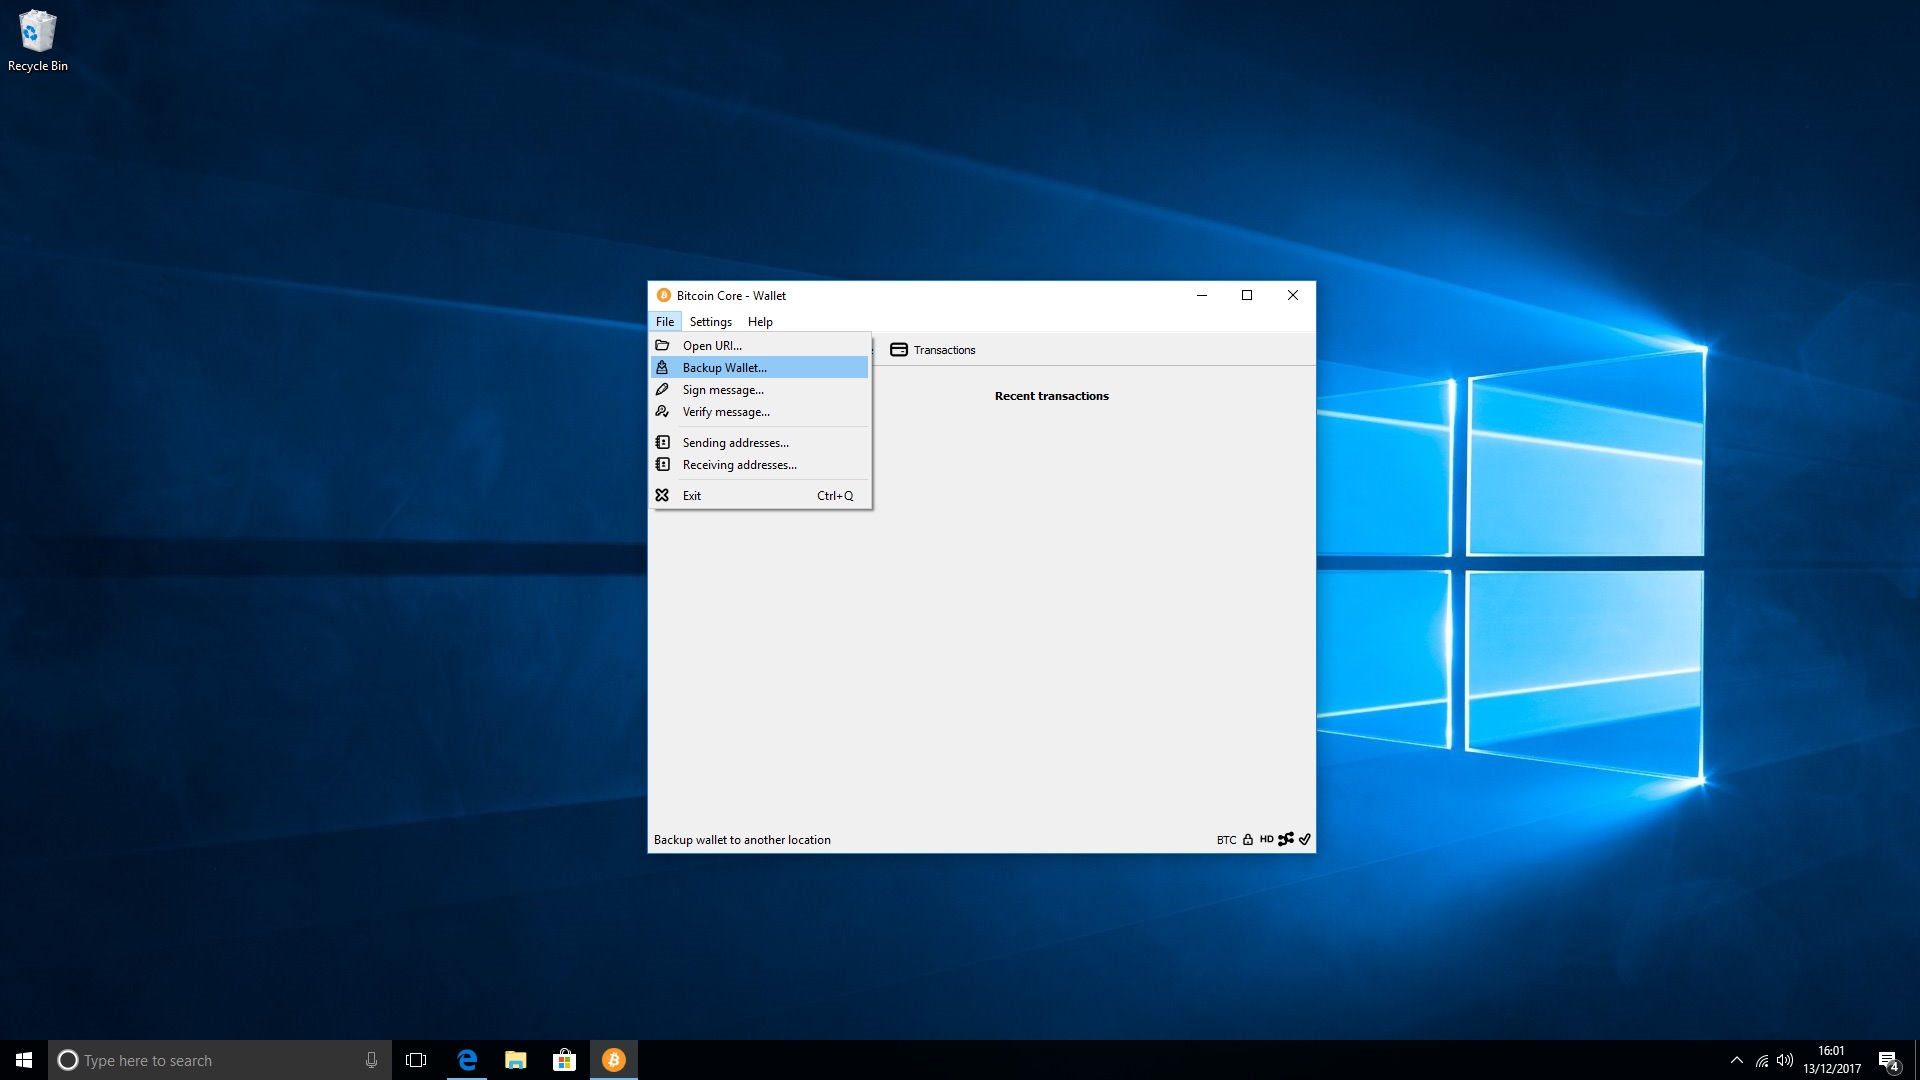
As it stands, if your ‘wallet.dat’ file itself becomes corrupted or is accidentally deleted, you would almost certainly lose access to your Bitcoins.
Click on ‘File ... Backup wallet’ to export a copy of your wallet file. If you already have a drive you use for backups, place it there. Although your wallet file is now encrypted, try to avoid uploading it to a cloud service such as Dropbox, as hackers may still try to crack your password. This also makes it easier for others to know you own BTC.
If you don’t have a dedicated backup drive, copy your wallet.dat file onto a USB stick. Remember that anyone who has access to this file and knows your password can control your BTC, so keep it in a safe place.
5. Download Tor
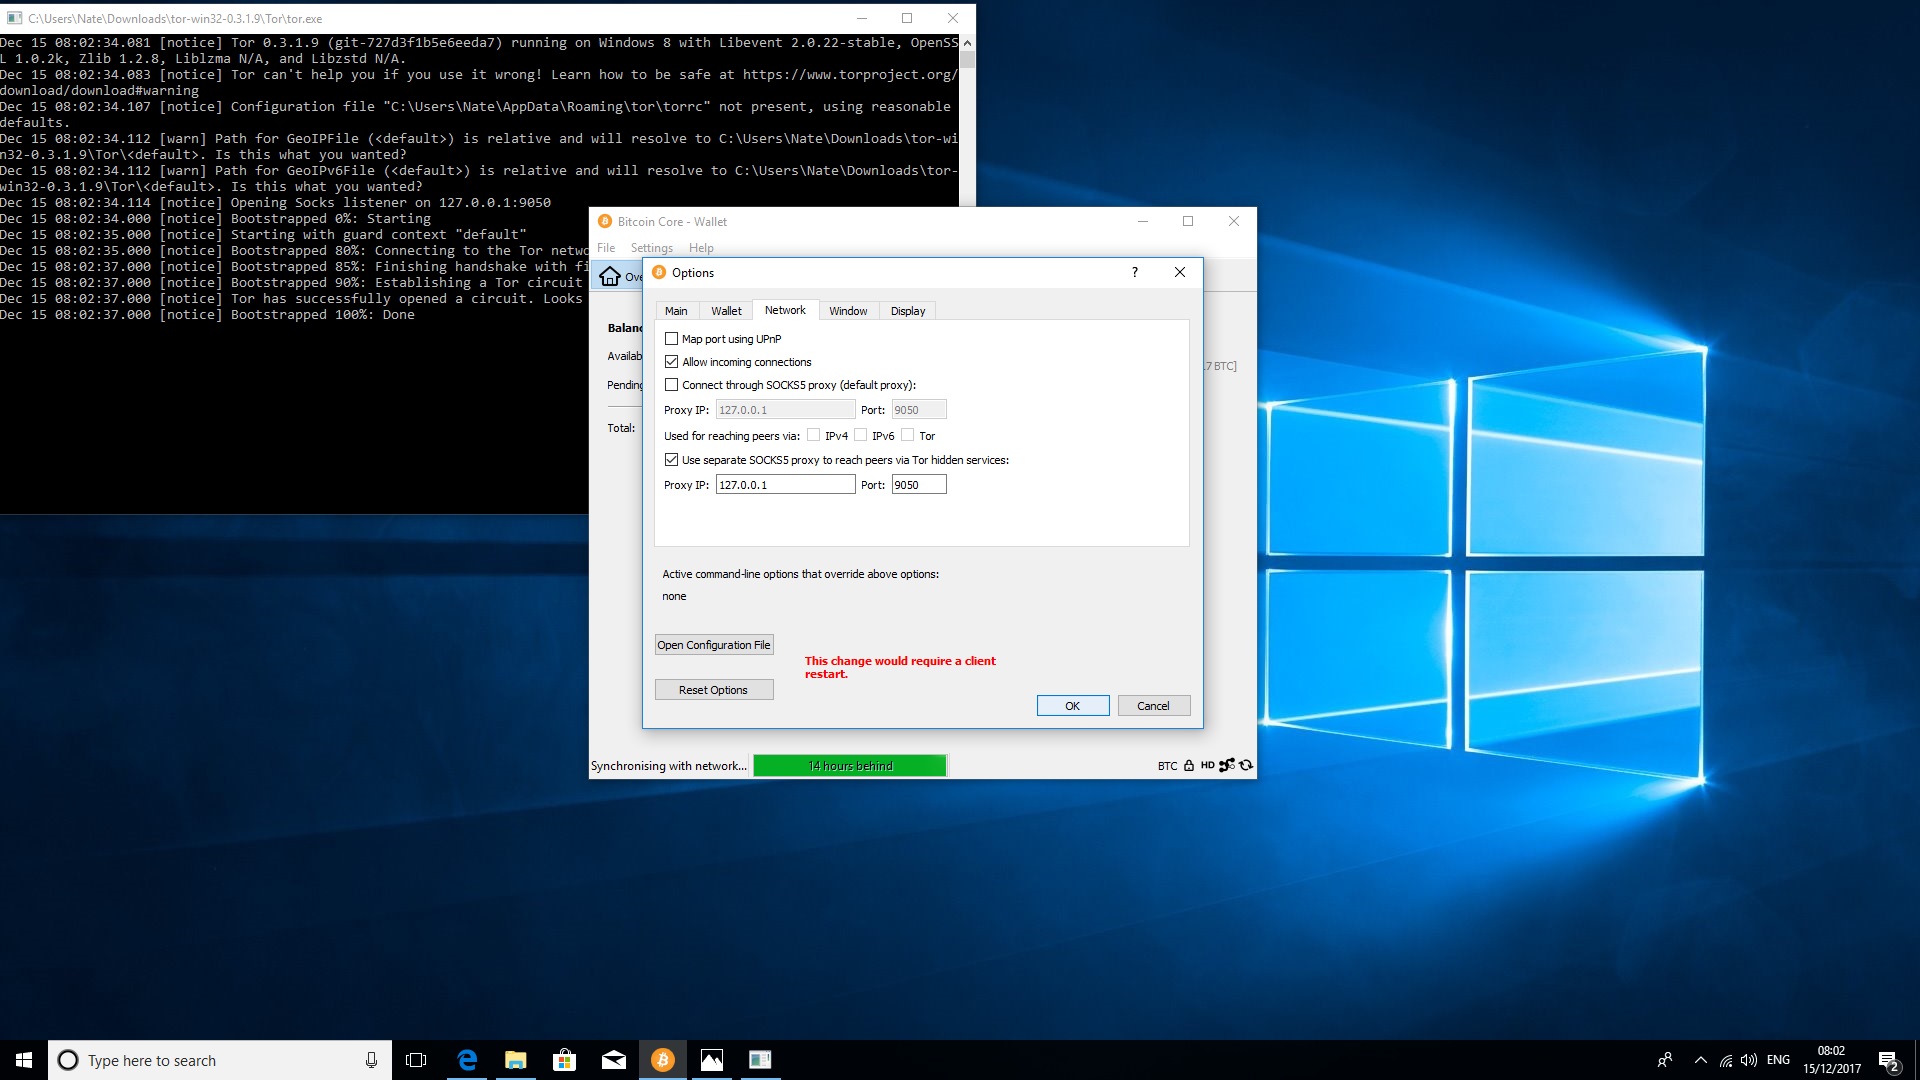
By default, anyone with access to your network can see when data is uploaded, making it easy to tell when you’re making BTC payments. You can make this much harder to trace by routing Bitcoin Core network traffic through Tor using ‘Onion Routing’.
To get started, head over here. Click on ‘Windows’ to download the ‘Expert Bundle’.
Right click the file and ‘Extract all’. Open the new directory, then the one named ‘Tor’. Double click on Tor.exe. If Windows Defender shows an alert, click ‘More Info’ then ‘Run anyway’.
Return to Bitcoin Core. Click ‘Settings’ then ‘Options’. Choose the ‘Network’ tab and tick the checkbox marked ‘Use separate SOCKS5 Proxy to reach peers via Tor hidden services’. Click ‘OK’, then ‘File’ > ‘Exit’.
From now on Bitcoin Core will connect to peers via Tor. This makes it much harder to trace payments, but will also massively slow down the time it takes to sync with the network.
6. Choose your peers
Bitcoin Core has several ‘DNS seeds’ hardcoded into it which link to IP addresses of other nodes. By default, as soon as you launch the client, it will use the DNS seeds to start connecting with eight other peers to download and verify transaction data.
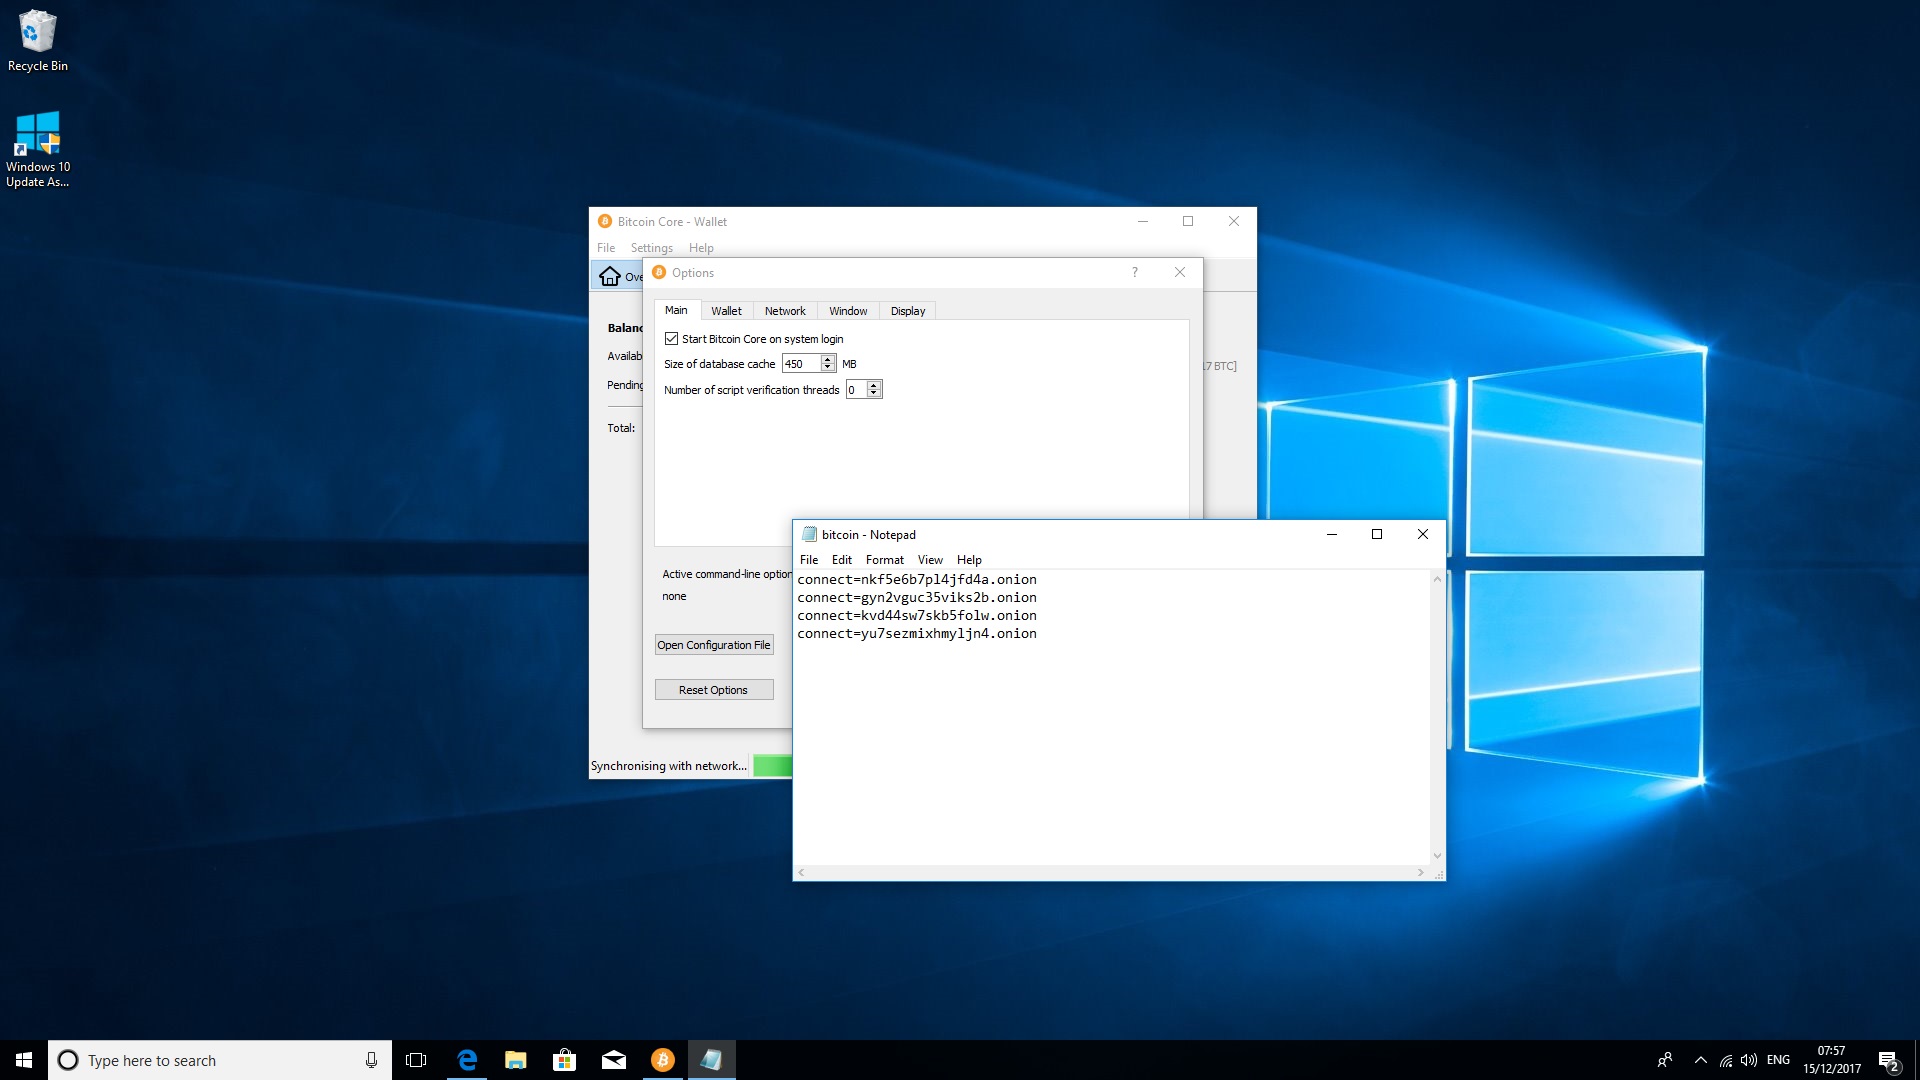
If you prefer, you can choose specific peers. This means Bitcoin Core doesn’t have to query other servers, making your wallet more private. To get started visit the Bitcoin Wiki to obtain a list of reliable nodes.
Next, launch Bitcoin Core and click ‘Settings’, then ‘Options’. In the Options menu choose ‘Open Configuration File’. Read the warning message and click ‘OK’.
Paste each of your chosen nodes in to the empty document on a new line using ‘connect=’ so, for example, you’d use the format: ‘connect=173.242.112.53’. Save and exit. Bitcoin Core will try to connect only to these nodes next time it starts.
If you set up connections via Tor in the previous step, consider using the ‘Tor Nodes’ listed on the Bitcoin Wiki e.g. ‘connect=gyn2vguc35viks2b.onion’. This means Bitcoin Core connects only to other peers in the dark net, making it much more difficult to trace transactions you send and receive. Bear in mind this will slow your download/upload speed.
7. Enable pruning
In the simplest terms, ‘pruning’ is the process of removing old blocks of transaction data that have already been processed. In other words, it means you’re only storing blocks of data relating to new transactions.
You can enable pruning to save space in your Bitcoin data folder (typically this reduces the space used from around 155GB to 6GB).
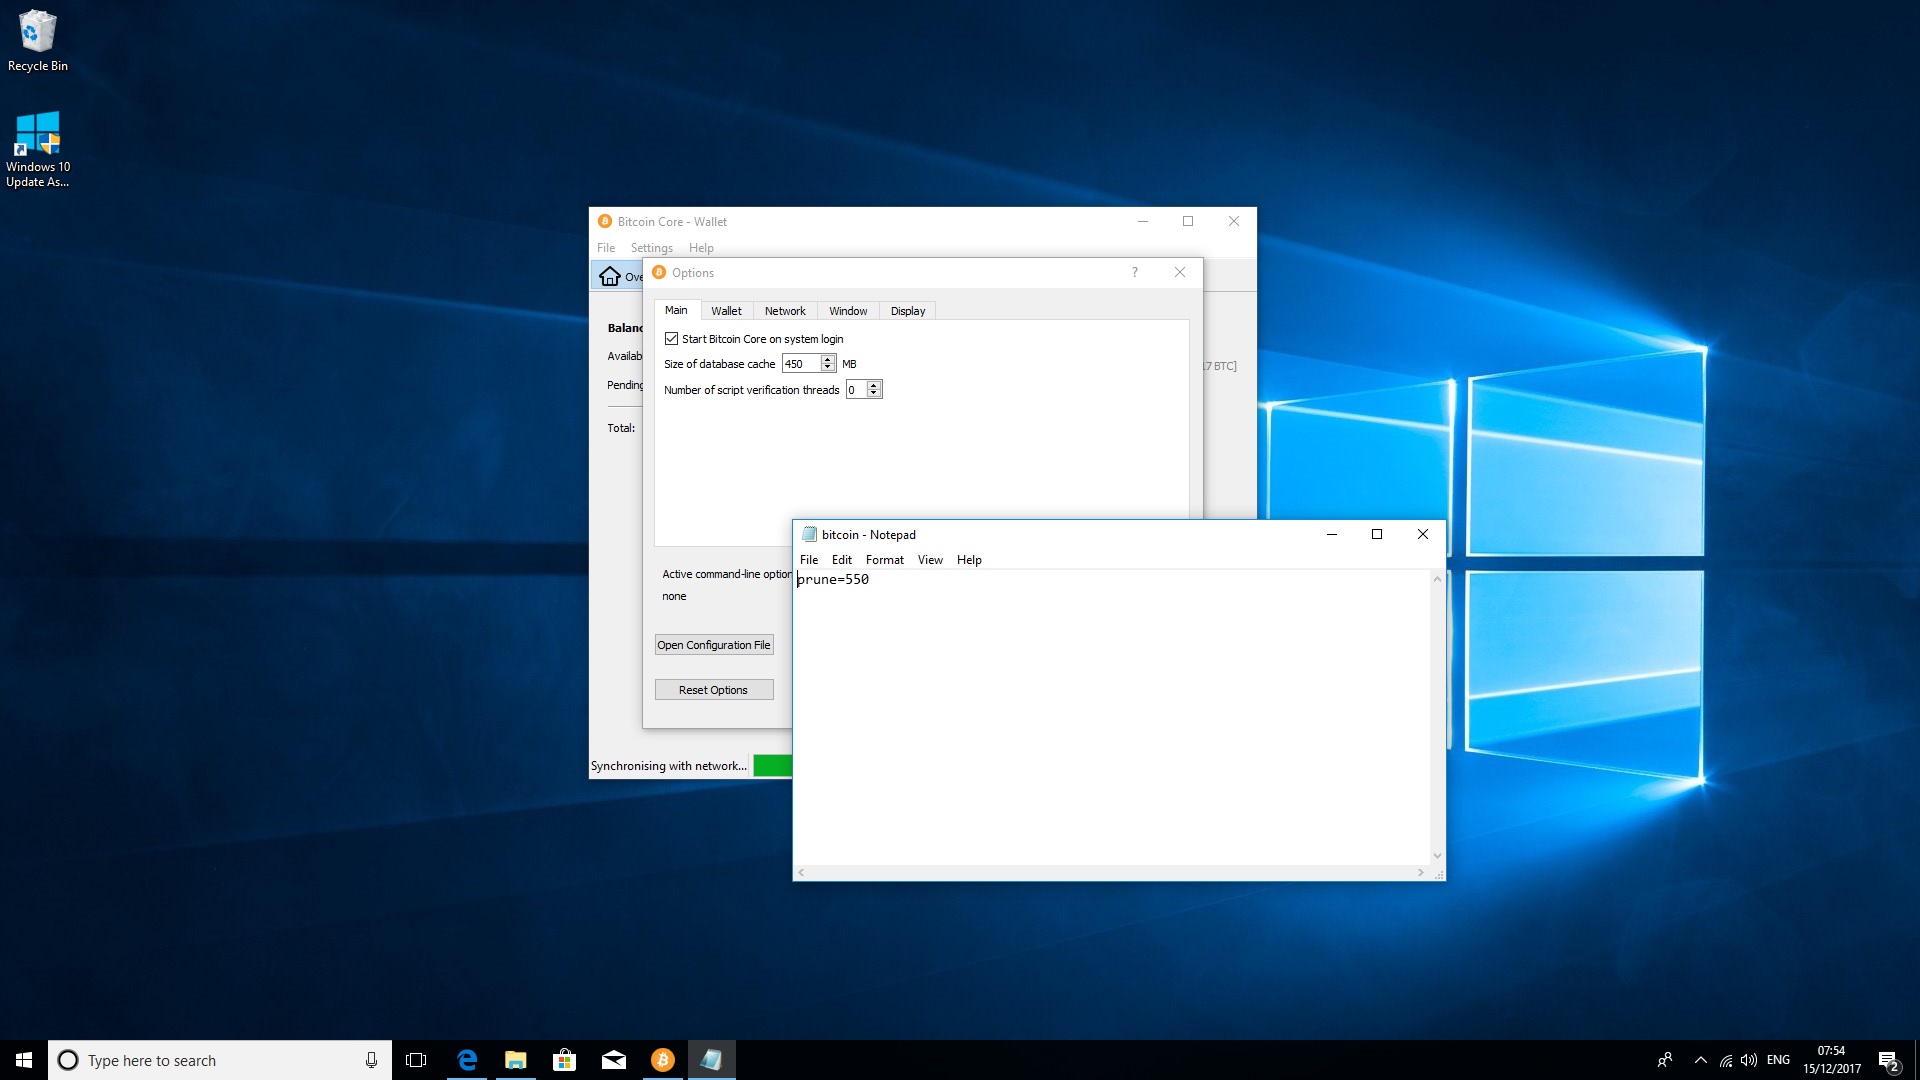
If you can spare the space and bandwidth, try not to use pruning as it helps newcomers to Bitcoin Core download the entire Blockchain (as you did earlier). If you don’t have the resources, however, open the Configuration file in the same way as outlined in the previous step and add ‘prune=550’ on a new line. Bitcoin Core will now remove older transaction data automatically.
8. Enable incoming connections
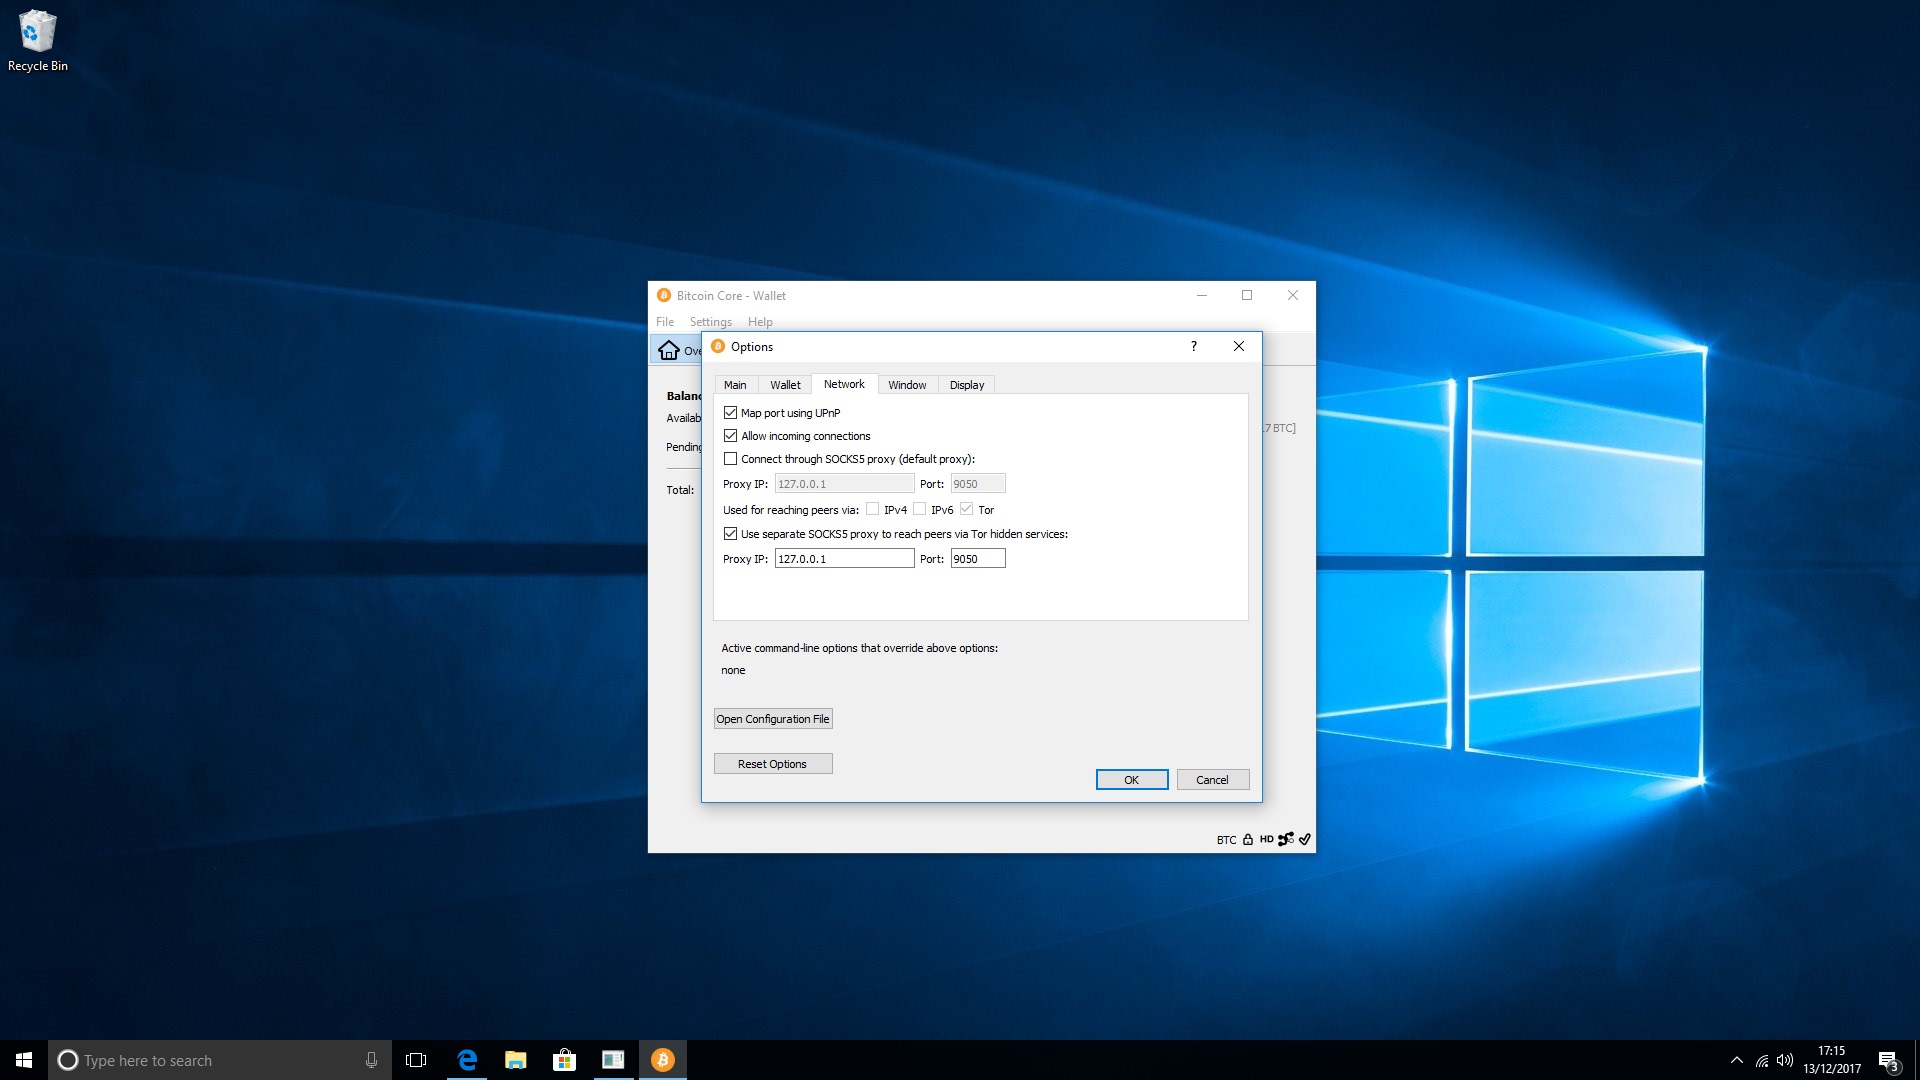
As you’ve learned, when you start Bitcoin Core it automatically connects to other nodes to download the latest blocks and transactions. If you want to return the favor and help keep the network honest, you need to configure your router to allow inbound connections on Bitcoin Core’s port (8333).
The easiest way to do this is from within Bitcoin Core. Choose ‘Settings’, then ‘Options’ and click the ‘Network’ tab. Otherwise you’ll need to manage this yourself via port forwarding. See the Bitcoin website for help with the latter.
If you’re connecting via Tor, Bitcoin Core can automatically create a hidden service so that other peers can connect to you via the dark net. This makes it harder to tell you’re running a Bitcoin node. Follow the Bitcoin instructions for Tor to do this.
9. Fund your wallet
Once Bitcoin Core has fully synced with the network and you’ve configured your connection, your wallet is now ready to receive funds.
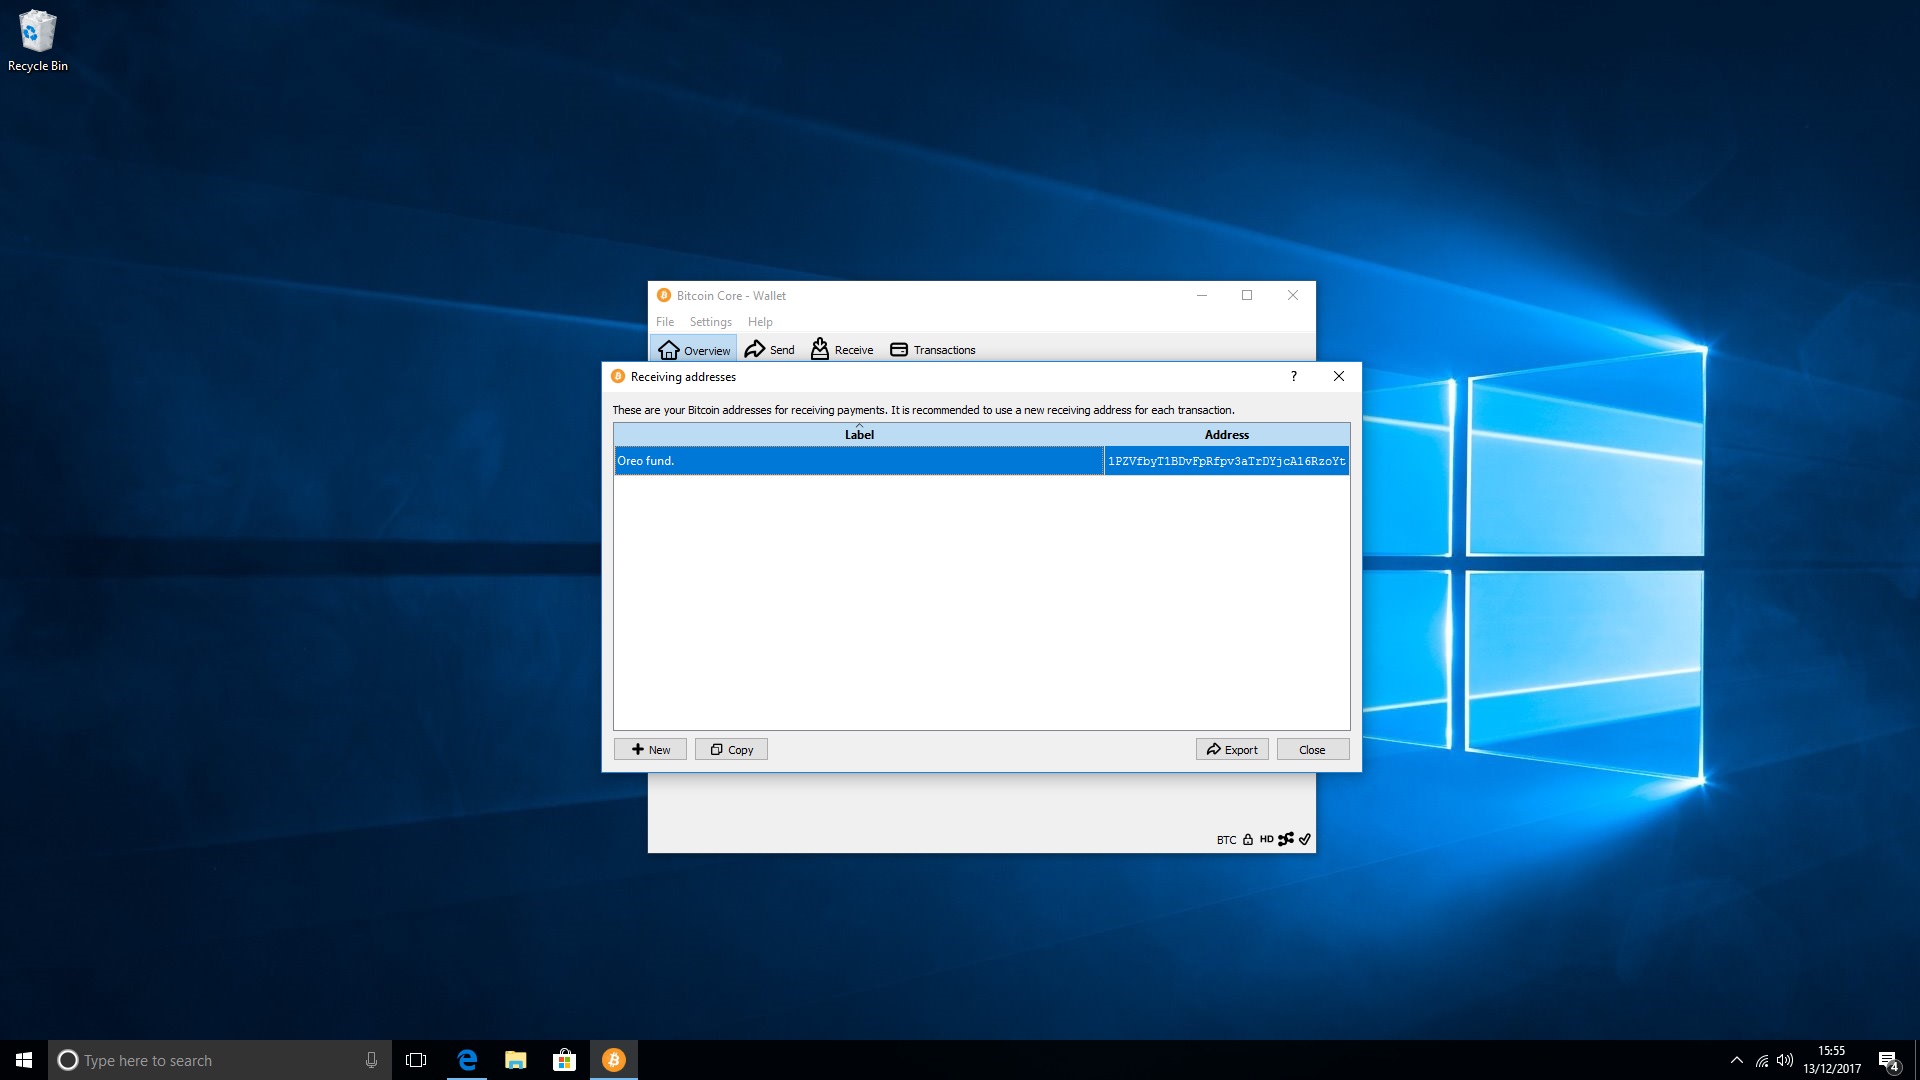
In Bitcoin Core, click the ‘File’ menu then ‘Receiving Addresses’ to list your payment address. For security reasons you should use a new one each time you receive a payment. For now, copy the one you have and use it to send any existing BTC to your new wallet.
If you don’t have any Bitcoin yet see our guide on buying BTC via Bitstamp.
Double click on the label to set a 'Name'. You can also click 'New' to generate new addresses.
Return to the ‘Overview’ tab to check your funds are on the way.
10. Spend your Bitcoin
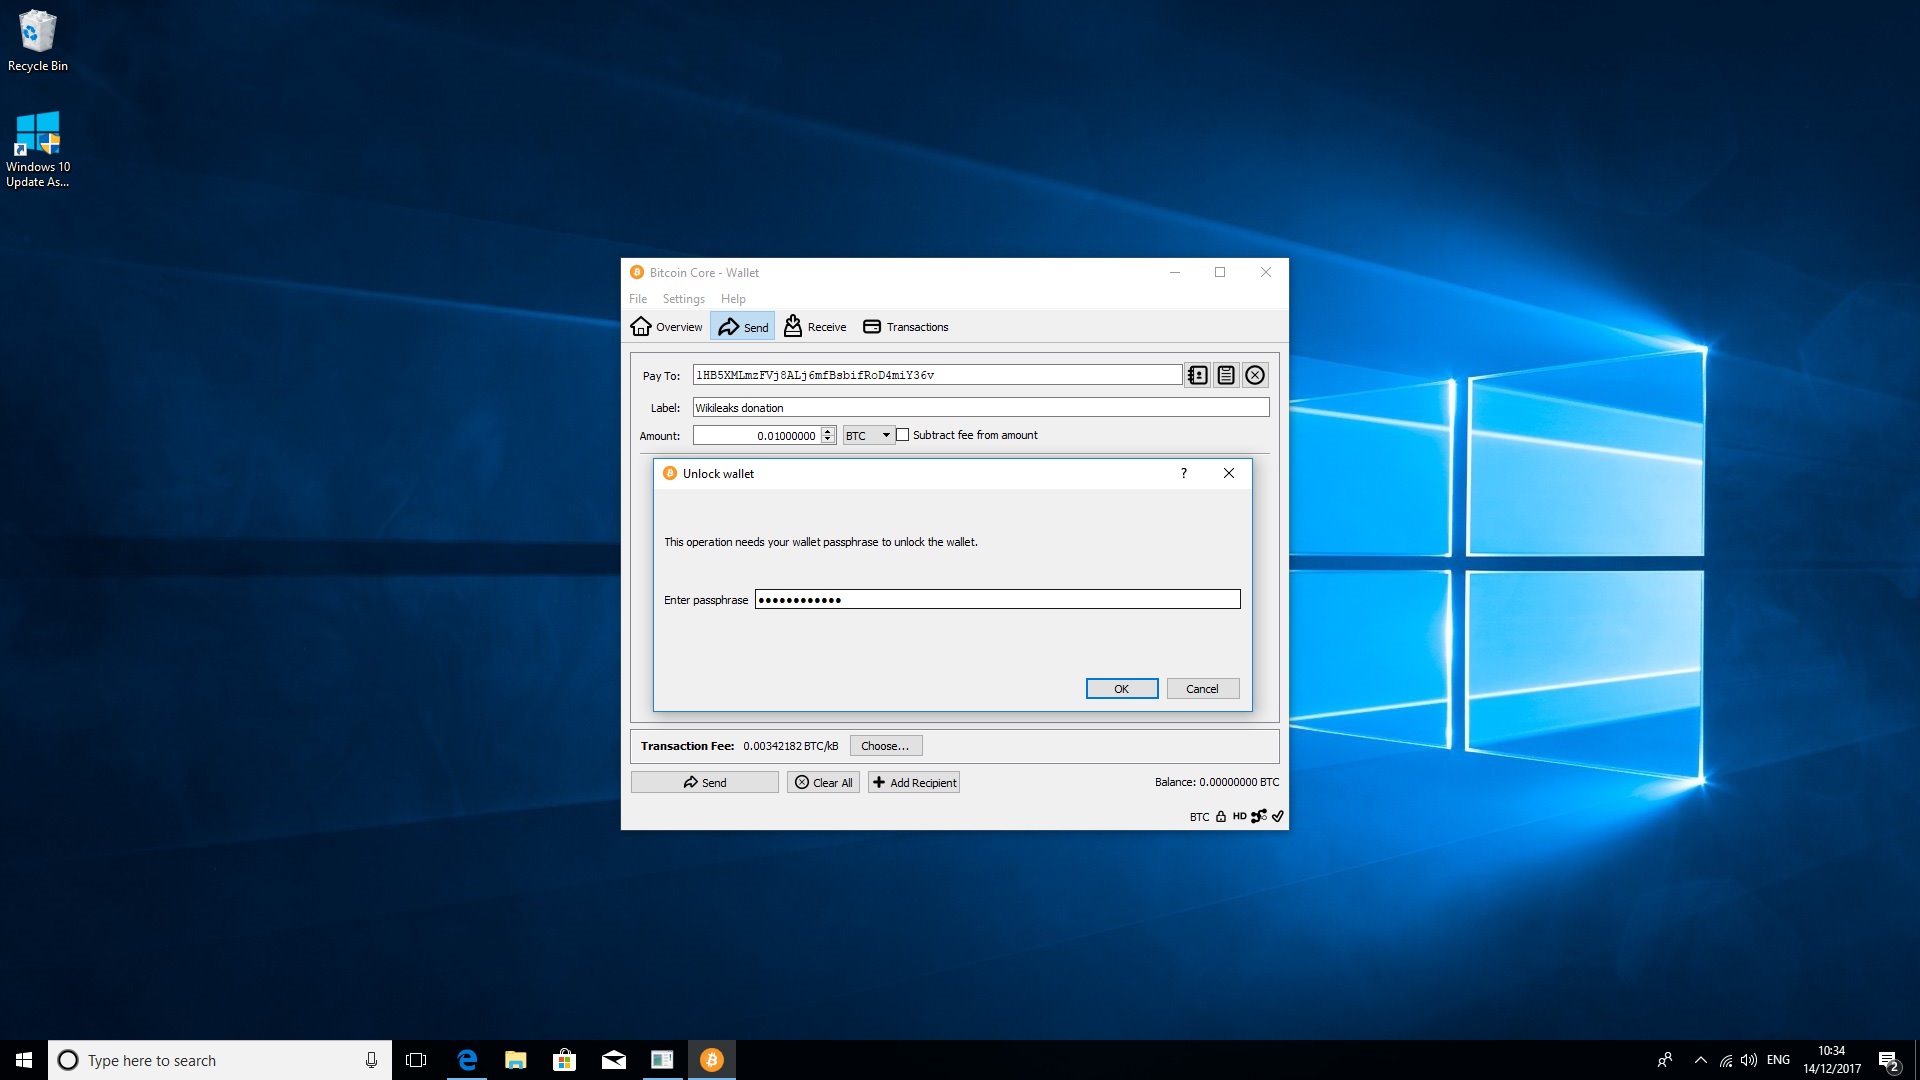
Click on the 'Send' tab to spend your BTC. The options here are very self-explanatory.
Enter your recipient's payment address in the 'Send To' field. Optionally set a label, and the amount you want to send. You can also use the dropdown menu to switch between BTC and other denominations such as mBTC (millibitcoins).
Click 'Choose' next to the transaction fee to set the amount you're willing to pay to have the transaction validated. Generally speaking, the more you're willing to pay, the faster your payment will be confirmed. Select this from the dropdown menu marked 'Confirmation Time Target'. You can pay just the minimum required fee if you wish, but be warned – if the network is very congested the transaction may never confirm.
Nate Drake is a tech journalist specializing in cybersecurity and retro tech. He broke out from his cubicle at Apple 6 years ago and now spends his days sipping Earl Grey tea & writing elegant copy.