
A long time ago, in the final decade of the 20th century, networks became popular and replaced ancient notions of centralised computing platforms.
Early file servers could be fridge-sized appliances with proprietary operating systems and communication protocols, like Novell Netware.
Eventually, IT Managers realised that they didn’t need massively parallel computers the size of a VW van to deliver decent file serving performance. Tailored operating systems built on Linux were ideal for these new smaller devices, and the modern NAS was born.
Article continues belowFirst, they invaded the business space and since they’ve become a common home platform for keeping media and personal documents in a personalised cloud-space.
Today we’ll be walking you through all the stages of configuring a NAS from assembly to deployment, and we’ll also talk about the choices that need to be made along the way.
Preparation
As with most IT projects, giving some thought to the objectives before starting is a good idea. Assuming that the NAS was picked and purchased, unless it was a gift, hopefully, some planning has already occurred.
Before configuration, it needs to be decided where the hardware will be located, giving some consideration to fan noise and ventilation. This location is the best place to set it up since moving a large NAS box once it is full of drives will be harder than locating an empty enclosure.
The NAS home needs to have power, network cabling and be easily accessible in the event of an issue. A hard-working NAS can generate heat, so overly confined spaces aren’t ideal.
Once you’ve found the perfect place, bring the NAS, drives, accessories and any tools that you might need (screwdriver, etc.) there, and if you have access to a laptop system, that would also be useful.

How to set up a Network Attached Storage device
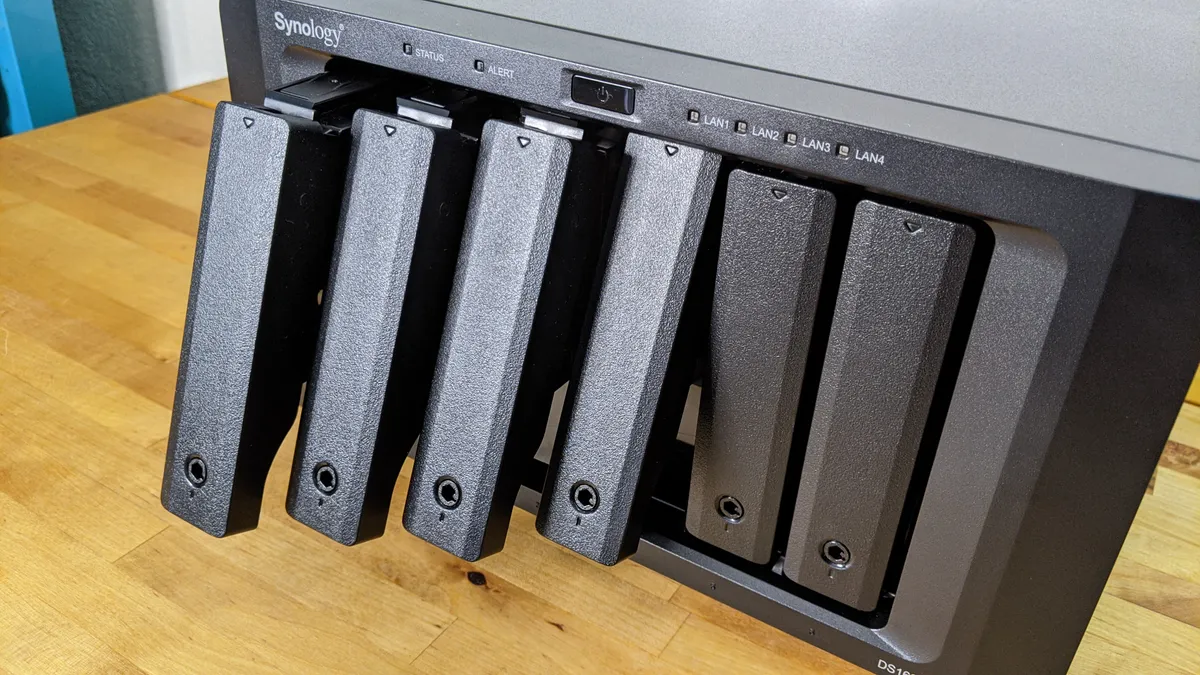
With everything that we need to hand, we can progress to configure the NAS. In our example, we’ve chosen to use the latest Synology DS1621xs, but the steps we’ve outlined are the same or similar for most NAS brands even if the interface may look different.


1. The physical install
Depending on how many bays the NAS has, and the number of drives you’ve got, putting them in the system is usually a relatively short exercise.
Some NAS have tool-less trays, others require screws to hold the drives in place, but once the drives are mounted, they can usually be pushed into place easily.
If they don’t go in smoothly, make sure that you don’t have them the wrong way up, and never force a drive into a slot for that reason.
This is also the time to install any extra memory, NVMe cache modules or PCIe card, should the NAS have any of those, since the system should be complete before we fire it up.
That last statement also refers to drives. Install all of them, not just one or two, to speed up the install, as you will only make things more complicated and time-consuming later.
With all the hardware in place, connect power, the LAN cable and power the machine up.
Typically, the system will go through a self-checking process at this point that can take a few minutes, depending on the number of drives, and eventually, the activity LEDs should reveal that the system is ready to accept a connection.

2. Find that NAS
When you connect a NAS to a network, it will be allocated a network IP number, and we need to know that number so it can be accessed remotely. Some NAS have displays that reveal the IP, but with our Synology hardware, they provide an application Synology Assistant called that sniffs out their hardware on a network and then links to the web interface of the NAS through a browser.
In this software, an existing older Synology NAS is seen, but we can identify that it is ‘Ready’ where the new hardware has a status of ‘Not installed’.
From the assistant, we can launch a browser that takes us a web-based installation wizard that will help us configure the NAS.

3. Safe install
We won’t go through every page on the Synology web assistant, but the first few want you to confirm that you are happy with all the drives being erased.
If you have data on them that is needed, then you should stop right NOW! Because NAS installs don’t generally retain the contents of previous use, and the drives will be wiped prior to being organised.
There are a few exceptions to this, like if you are moving from one Synology NAS to another, but as a strict rule, make sure that any data is secured elsewhere, on external drives, another NAS or the Cloud before erasing the drives in any new installation.

4. Make a cup of tea
Once you’ve agreed to erase the drives, then the NAS operating system will do precisely that, and it will do it thoroughly. Depending on the number of drives and their size, this can take a while, so its best to enjoy a beverage while it is happening.


5. Create an Administrator
All NAS boxes need an administrator, and the account must have a valid password.
In the Synology process, this is also where you define the network name of the NAS box. Pick a name that you can quickly identify, and maybe make a label to stick to the box with that name on it, so others know what it is when they see it physically.
Make the password for the admin account one that can’t be guessed, don’t call the account ‘Admin’ or ‘Administrator’ and don’t forget either of those two pieces of information.
On some NAS systems, like our example brand, you can also set two-factor authentication later, and we highly recommend you do that if it is an option.


6. Browse the web interface
With the NAS box having a name, an administrator and all the drives erased, we’re a good way through our configuration. The NAS should eventually bring you to the web interface of the system that has windows and menus and all the other things we expect from a computer.
It is worth have a click around and seeing how it all works and what options are available to explore.


7. Create storage pools
To share drives, all the physical hard drives in the NAS must be organised, and there are many different ways this can be done.
Synology systems define two distinct levels that separate the physical drive from the volumes and folders that are shared. The top-level is the storage pool, and all drives need to be added to the ‘Storage pool’ and then once part of that they can be used to create a shareable volume.
As part of defining the storage pool, you also get to decide what RAID model is used, and they’re numbered, with the most common ones being 0,1,5 and 10.
We’re not going to explain RAID packs here, but some are better tailored to the resilience of the system and others to enhanced performance and some both. Exactly what you choose will determine how much space is made available for creating volumes.


8. Create Volumes
It is possible to slice up the storage pool and create multiple volumes from it.
But as a rule, this would be a bad plan unless you intend to create an especially secure volume or tightly manage usage on the part of the total capacity.
If you allocate the whole storage pool to one volume, you can still make multiple shares from that one volume and have different security on each, so making multiple volumes isn’t often needed and could cause issues if you need to resize them later.
Once the volume(s) is defined, the system will do an integrity check of the drive array, and this can take a very long time.
While the system can be used while the check is performed, it reduces performance, and use will slow the verification process down, making it take even longer.
Give yourself at least a couple of days for verification to complete, and even longer if the system has many drives or external expansion attached.


9. Add users and shares
Once a volume exists, folders can be created and then shared across the network to those using a PC or Mac, or even across the internet to remote users.
But for these users to access the NAS, they will need an account and password defining. If an existing network exists that uses the Active Directory system, then this can be usually be linked to the NAS, allowing these account details to be synchronised.
Alternatively, users can be manually added.
It's best to add the shares and groups first, and then the users, as what groups they belong to and the permissions for the shares are set when users are defined.
On the Synology DSM operating system, all users have a personal folder structure called ‘home’ that can’t be viewed by anyone else except for the administrator.


10. Add applications
Most NAS solutions allow the installation of applications, expanding the capabilities of the box to perform other functions or to enhance those it already offers.
These take up memory and processing power, so don’t install dozens that you don’t intend to use. Pick the ones that you need and add those, and consider more later.
The ones you should always consider are an antivirus module and a backup application, as these should always be priorities for keeping the contents safe and secure.
Final thoughts
We’ve not talked here about user and group management, live syncing user data to the NAS and making multiple NAS work together, as this is a big subject.
But getting a NAS from the delivered hardware to an operational facility doesn’t take long, and the installation wizards that the makers create guide you through it.
If you understand how much capacity you will have once the drives are in a RAID pack compared with their raw capacity, and that the box will not be ready for users for at least a day or two, it should be a relatively pain-free exercise.
- Also see: How to setup your own NAS server.
